Manipulations with the socket box
The internal socket has a design that ensures its minimal elevation above the wall surface. This becomes possible only when using a socket box, which is part of the structure. It is a plastic cylindrical bowl. To bury it in the wall, you will need to make a recess slightly larger than the socket itself. This recess in the wall is filled with alabaster. Then, while the plasticity of alabaster is high, the socket box is pressed into this recess. The alabaster squeezed out along its edges is immediately removed. If this is not done, it will quickly harden and there will be more worries.
Before installing it, wires are threaded through the socket box, which are part of the wiring in this wall and are intended to be connected to the socket. Therefore, before starting installation work It is necessary to reliably turn off the voltage on these wires. It is best to ensure that no one else accidentally applies voltage to these wires without warning. To do this on electrical panel the safety plug is unscrewed, turning off this place in the room. If instead it is installed on the shield circuit breaker, it is disconnected and sealed over the rocker with adhesive tape, which can then be easily removed. After this, you can begin to carry out work.
Installing sockets step by step
- We start with compliance with safety measures. We check the presence of voltage on the wires passed through the socket box. To do this, we use an indicator screwdriver or a tester in the 220 V AC voltage measurement mode.
- The socket is simply disassembled into the terminal part, which is placed in the socket box and the front part. As a rule, the entire structure is held on by one screw. This screw is located in the center of the socket on its front side.
If you unscrew it, the structure will disintegrate into its component parts. In some models, for ease of assembly, latches are made to duplicate the screw. In this case, the structure is disassembled with a careful movement of a screwdriver, which loosens the latch.
- Then the terminal part (terminal block) is connected to the wires. Before connecting the wires, they must already be in the socket box, which is located in the wall in dried (and therefore hard) alabaster. The ends of the wires, which can be two (phase and neutral) or three (phase, neutral and ground), are stripped of insulation by about one centimeter. You need to deal with the wires even before installing the socket box and know exactly which one is which. Depending on the model, the terminals are either clamped with screws or clamped with self-clamping contacts.
- The connected wires, together with the terminal part, must be easily and completely immersed in the socket box. If the wires prevent this due to their excessive length, they must be shortened.
- We immerse the terminal part in the socket box and hold it in correct position rotate the spacer screws one by one. At the same time, the legs of the spacer mechanism diverge to the sides and rest against the walls of the socket box. Tighten the spacer screws one by one with a little force, without releasing the terminal part. To check the strength of fixation of the spacer mechanism, you need to slightly rock the terminal block from side to side. If it is firmly secured, it can no longer be held. If there is no spacer mechanism in the socket, which must be dealt with before installing the socket box, fastening instead is carried out through holes in the metal part of the terminal block with self-tapping screws. To secure them firmly in the wall when installing the socket box, dowels are placed in the appropriate places in the alabaster.
- If the spacer mechanism is misaligned, you need to align the socket by loosening and re-tightening the corresponding screws.
- We complete the installation by fastening the cover and frame with a screw. If everything is done correctly, the lid will press tightly against the wall.
We check the outlet by applying voltage to it and connecting to it, for example, a table lamp or any other lighting equipment. In the future, we use this socket only in combination with plugs of the appropriate standard.
podvi.ru
The height of sockets and switches from the floor according to European standards: the correct distance
The location of power supply points, the installation height of sockets and switches is a serious issue that requires planning, drawing up diagrams, and calculating their number for each room.
If you approach the installation with advance planning, you won’t have to unwind the extension cord, trip over the carrier, and plug everything in there, thereby overloading the outlet or even the network.
Planning and installation of switches and sockets
It is estimated that each person uses approximately six different electrical appliances per day. And the number is constantly growing. New devices and gadgets are appearing, without which it is difficult to imagine life.
Appliances fill our homes, but the number of outlets remains unchanged. Cases when a person runs around the house or office in a panic, looking for a free connector to charge a smartphone, are happening more and more often. What's the end result? You have to turn off the printer or something else. It is not difficult to avoid such situations; you just need to know how to correctly position the connectors. Then using them will become as comfortable as possible.
Image gallery
Convenient location of electrical fittings
Horizontally oriented electrical installation block
The need to be removed from possible water ingress
Location limits relative to the gas pipeline
Socket block with switch near the desk
Pull cord switches
Floor switch front door to the apartment
Tabletop portable switch
To avoid cosmetic repairs When installing/moving switches and sockets, it is imperative to allocate time for planning. For example, when ordering a project from an interior designer, the application must indicate the exact number of network connectors and switches, as well as their location.
Because the interior designer may not know that you prefer to work on your laptop on the couch. Project approval is the point at which all wishes are accepted and changes are made to the project.
Draw up a diagram and preliminary design before starting work on wall grooves, electrical wiring and installation of switches and sockets (+)
When planning the interior yourself, it is important to understand the purpose of the room and its design. The location of the furniture is also taken into account, since the socket behind the wardrobe is a useless thing. What if you like to rearrange all the furniture in the room every six months?
It turns out that the calculation of the number of switches and sockets is carried out only after the design has been developed.

Laws and technical standards
Building regulations that strictly regulate the number and location of network connectors and switches in the house are not prescribed at the legislative level. But there is a document called “Code of Rules for Design and Construction” or SP 31-110-2003, which contains recommendations on where to locate switches and electrical connectors.
The first are located on the side of the door handle at a height of up to 1000 mm, and the second - in convenient location, but at the same height. You should be guided only by common sense and your own choice.
Rules for placing switches
The switch for the main lighting is usually placed near the doorway at a height of 750–900 mm. Height calculations should be based on the average height of all adults in the family. As a result, everyone should comfortably press the switch button without raising their hands up.
The level of 800 mm will be comparatively exemplary for everyone. The switch must be positioned so that when closed door, it was on the side of the handle, and not vice versa. Then, when opened, the door will not block it. Also, do not block access to the switch with various furniture and cabinets.

The European standard for installing sockets and switches has become entrenched in society as a convenient and safe way arrangement of appliances for the whole family. You can easily reach the point with your hand and carry out repairs or replacements without excessive muscle tension
Power points for lighting fixtures in the bathroom, powder room and pantry should be installed in the hallway. For living rooms, kitchens, as well as the corridor itself, the correct location would be inside the premises themselves.
Electrical installation devices for adjusting auxiliary or decorative lighting are mounted in a convenient location, but taking into account the design.
The outdated “Soviet” method of arranging electrical points has the following strengths:
- more people in the CIS countries consider this option more convenient, therefore, when there is demand, you can find an excellent offer;
- the switch is located almost at eye level;
- you can install furniture under it, and it will not block the switch;
- the safest option for children;
- The location of the socket will allow you to comfortably connect an electrical appliance, without preliminary “bows”.
But if the device connected to such an outlet always stands in one place, this method looks less attractive. Because the wires, and the socket itself, will be in a visible place.
At the same time, the “European standard” is:
- high ergonomics, pleasant and easy use;
- adjusting lighting devices “blindly”, as well as with a lowered hand;
- maximum “secrecy” from public view.
But this option requires additional protection from children, and you must always bend down to connect devices. Installing additional furniture will in any case block the device built into the wall.
The pros and cons of European standards in the area of location of switches and sockets are indicated in the gallery:
Image gallery
Height of switches according to European standards
Height of all types of household sockets
Disadvantages of location according to European standards
Tips for choosing the optimal location for your electrical installation
Features of installation of switches and sockets
The reason for long discussions is the height of the sockets from the floor. Since the exact definition is not written down anywhere, you can use concepts such as “European standard” or “Soviet standard”. When a “European-quality renovation” is planned in an apartment, most likely the sockets will be placed at a level of 300 mm from the floor, but the switches will be already at 900 mm.
According to the “Soviet standard”, the switch would be installed at shoulder level - this is approximately 1600 mm, and the socket would also be much higher - at 900 mm from the floor.
Each method has its pros and cons. Let's look at them briefly.

The Soviet standard for installing switches and sockets still occupies a leading position in society, since these layouts are still in demand in the market
#1. Features of placement in the corridor
For a hallway, 1–2 sockets are enough. It is better to place them in a corner near the baseboard at about 15-20 cm from the floor. This will allow you to connect various household appliances, for example, a vacuum cleaner, an electric shoe dryer or a phone charger.

Lighting and electricity points in the corridor are located so that it is convenient to use when leaving/entering the house, connecting infrequently used devices
In addition, other devices will fit perfectly into the corridor. Among them:
- apartment distribution board with circuit breakers;
- voltage stabilizer;
- electric meter, although apartments have a separate place on staircase, it can also be installed in the corridor;
- switches for kitchen, bath and restroom;
- junction box for TV cable, Ethernet or landline phone;
In most cases, this is quite enough, but sometimes they also provide for the installation of a heated floor sensor in the corridor.
#2. Location of electrical points in the bathroom
Of course, the quantity will depend on the area and number of devices, but in 95% of cases, 1–2 sockets will be enough. It is advisable to place the first one close to the mirror at a level of 1000 mm from the floor. It will connect a hair dryer and an electric razor. The second, for example, is connected to a washing machine or heater. In this case, at least 600 mm from the floor for the machine, and 1500 mm for the boiler.

There are no rules against installing outlets in the bathroom, despite the fact that the area is considered an electrocution risk.
It goes without saying that mounting both sockets next to a water tap is strictly contraindicated, so there should be a distance from the bathtub and sink of more than 600 mm, and preferably 1000 mm. It is imperative to worry about protection from moisture and install a waterproof IP 44 socket.
We must not forget that products may be subject to even greater danger. Since the bathroom is at risk of flooding, fixing products below 150 mm from the floor is completely unsafe. If water gets into the socket, the threat to life is simply colossal.

The optimal height for installing sockets in the bathroom is selected based on ease of use and minimizing contact with water (+)
The reasons for this can be various situations, from a leaking faucet or pipe to a breakdown household appliances or forgetfulness of the owners.
#3. Specifics of installation in the living room
A home theater or simple TV box will require a minimum of two outlets. The first is for the TV receiver itself, and the second is for the satellite receiver. The height level should be determined based on the location of the TV itself. It can stand on a cabinet, be mounted into a wall or fit into a special cell furniture wall. The power cord must not dangle or be under tension. It should be completely hidden behind the screen.

Living room in small apartment can be visually divided into two separate zones: the space at the desk and the part for relaxing on the sofa in front of the TV
On each wall, you should additionally place 2 sockets at a level of 150–300 mm from the floor. They can be connected floor lamp, fan, chargers for gadgets, game console, vacuum cleaner.
You should worry about the possibility of conveniently connecting the air conditioner.
If there is a personal computer in the living room, at least six sockets must be provided to connect power to the screen, system unit, desk lamp, scanner, speakers for sound playback and Wi-FI router.

#4. Rules for location in the kitchen
Every year we develop more and more smart technology to ensure human comfort and time. Naturally, the amount of equipment in the kitchen is simply overwhelming in some places. It is imperative to provide for the connection of an exhaust hood, possibly a washing and dishwasher, electric stoves.
But the main thing is a refrigerator, a microwave oven or a slow cooker, sometimes both. Mixer, juicer, food processor, toaster, blender, coffee maker and TV - this list is probably endless.

Installation of electrical sockets in kitchen furniture is in a convenient way create a visual appearance of the absence of these devices and increase comfort (+)
An outlet is usually installed behind the refrigerator at a level of 600–800 mm. For the hood, it is advisable to increase the height three times - 1800–2000 mm from the floor.
When connecting a washing machine or electric stove, the connector must be mounted 200–300 mm from the floor. Additionally, a hole is cut for it on back wall kitchen furniture, if available.

For powerful consumers, a separate outlet is installed in the kitchen, independent of the general power line
Having estimated the place of the future work surface, it is necessary to provide connectors there too. It is advisable to place at least three sockets 100–200 mm above the tabletop to connect small equipment.
A TV in the kitchen is most often mounted on wall brackets; accordingly, the height of the socket for this household appliance can be from 1800 to 2000 mm from the floor.
The subtleties of installing sockets and switches in the kitchen are demonstrated in the video:
#5. The nuances of placement in the bedroom
Four products are sufficient in this room, with two sockets on each side of the bed. They will be intended for a bedside floor lamp, electronic clock or additional devices, such as an air conditioner, fan or vacuum cleaner. Near the chest of drawers with a mirror, it is also advisable to install one socket at a level of 600–700 mm from the floor to connect a hair dryer or hair straightener.
If there will be a TV or PC in the room, you should also think about where to hide the wires and how to place the connectors electrical network.
#6. Competent planning of power points in the nursery
A children's room is usually a combination of a bedroom and play space. This room also cannot do without electrical outlets. It is advisable to have at least 2-3 of them. You can put a lamp near the crib, and the rest for additional purposes.

Modern technologies make it possible to emphasize the visual component, while not forgetting about the safety of children, eliminating the chance of fingers getting inside
Many experts warn that plug connectors should be mounted as high as possible away from small children. They were right about this a few years ago.
Modern developments have made it possible to equip products with additional protective covers that prevent the child from coming into contact with the electrical network. These valves often require considerable effort to gain access to the fork holes. Spontaneous children's curiosity will be stopped.
#7. Subtleties of installation in the office
This room is not much different from the living room in terms of the location of the connectors. A minimum of 5-6 devices will be required to connect the PC - system unit, screen, audio speakers, scanner and desk lamp. Near the shelves for books you need to provide a place for reading.
Installation of a lamp and a comfortable chair should be included in the project plan, and this is another auxiliary connector. The other two devices are placed on an unoccupied wall. Each connector is mounted at a height of 150–300 mm from the floor.
There are two options for connecting the air conditioner. Directly through the machine or through an outlet. In the first option there will be no hanging cords, but you must definitely choose a high-quality machine, on which the functioning of the device will depend. In the second case, the socket should be placed at a level of 300 mm from the ceiling.
Location of lighting points
Lighting control points in the house are divided into three main groups:
- Classic switches are included here - these are devices different types, often with one or two keys. But thanks three-button switches, three different groups of lighting installations can be used simultaneously.
- This group includes switches, which, when activated, control several lighting sources at once from different places.
- IN this group There are devices in which lighting control mechanisms are already built into the lighting tools. These include a table lamp and a floor lamp/
Almost all rooms in the apartment are equipped with one or two-gang switches, which is considered justified and, most importantly, comfortable.

For example, for a bathroom, an additional light source can be a lamp above the mirror. But regulation for such a device is carried out using a built-in switch
The bedroom has its own unique system switches. It allows you to adjust the light source simultaneously from different places. Let's look at convenience using an example.

Each sleeping place must be equipped with a lamp in the form of a night light on a table, bedside table, wall sconce or floor lamp
Every time you need to turn the light on or off, you have to get out of bed, since the switches are located quite far from the bed. The solution is obvious. Three switches are installed in the room at once. One is at the exit from the room, and the other two are on both sides of the bed. As a result, it has become very easy to regulate the lighting in the bedroom, and access to switches will be at hand.
Where and how to locate switches and sockets must be determined only on the basis of safety and, of course, comfort. Today there are no prescribed standards that would indicate the location of electrical connectors and switches. Especially their quantity in a separate room.
Planning is the stage of calculating the number of mechanisms that a person will use on an ongoing basis, regardless of the premises. Plus 1-2 more sockets on top for additional devices. The most stringent requirements are imposed only on craftsmen who install electrical appliances in the apartment. Such people should be specialists with good experience.
But if you decided to carry out all the work yourself, then you need to familiarize yourself with all types of electrical equipment. Since the product range is very wide, this means that equipment can be found for every need. This can be an audio socket that allows you to connect acoustics, a stereo system or a connector for a landline telephone, as well as for an Ethernet cable.
The installation height determines comfortable conditions for living in a house, its safety, improvement and beauty.
Conclusions and useful video on the topic
Where to harmoniously arrange switches and sockets:
Suitable height for mounting sockets and switches:
Before you get started, remember that electricity is not a toy. It requires an ideal approach to business. It is advisable to entrust the installation of sockets and equipment in the kitchen, bathroom and hallway to a professional electrician who has specialized permits for electrical installation work.
sovet-ingenera.com
Methods for installing sockets and switches on the surface of building structures
High reliability of fastening of electrical switching devices, ensuring their safe operation during the entire time of use of electricity, is one of the main requirements that apply to residential electrical wiring in any room.
A home craftsman engaged in repair and construction work in the electrical circuit of rooms must:
- professionally install sockets and switches;
- correctly lay and connect wires to them;
- comply with technological developments that take into account the physical processes occurring during electric current increased power.
Only in this case will sockets and switches not fall out of their mounting sockets over time, spark, get hot, create a fire hazard, or serve as a prerequisite for electrical injuries.
Modern home wiring is done in only two ways:
- by overhead method directly on the surface of the building's building structures - open;
- inside the walls with switching devices leading out - closed.
For each of these methods, industry produces all the necessary equipment:
- wires and cables of various sections with layers of insulation designed for use in home wiring;
- switching devices of electrical points (connection nodes):
- sockets;
- switches;
- socket boxes;
- connection and distribution boxes.
For long term safe operation electrical wiring elements, the home craftsman can only provide:
- reliable, tight contacts at the places where the wires are connected, creating minimal voltage losses across transient resistances;
- high insulation of current-carrying conductors, eliminating the occurrence of leakage currents;
- safety, taking into account:
- ease of control;
- restriction of access of unauthorized persons;
- fire protection.
Let's look at these points using examples of work on electrical wiring laid in different ways.
How to install sockets and switches in closed wiring
Building structures made of reinforced concrete, brick, stone slabs
With the factory manufacturing method panel buildings Technological voids are immediately created inside building structures - channels for laying electrical cables and wires. After assembling the building frame, places for electrical communications have already been prepared inside the walls.
All that remains is to lay the cables in them, and at the ends to mount the connection points of the electrical points.
Design features of installation boxes
These fasteners are designed to securely hold sockets and switches within building components.

All installation boxes are installed after laying the cable, laid in mortar, fixed with it in the prepared recesses of the wall, and strictly oriented horizontally.
The material for installation boxes used to be metal tin.

In it, the socket body was fixed with spacer tabs by creating a spreading force with screws on special thrust tabs. If during installation the electrician made a slight mistake in tightening the fastening, then over time the fastening would become loose and the socket would fall out of the installation box.
During operation, such things should not be allowed, and electricians were periodically required to carry out external inspections, check the condition of electrical points, and promptly eliminate noticed faults. When this process was not carried out, very dangerous conditions were created.
One of the reasons for the occurrence of such malfunctions lies in the rather high sliding of the metal of the sliding legs along the tin of the installation box.
Modern housings for flush-mounted socket boxes are made of durable plastic materials based on non-flammable types of polypropylene foam with high mechanical and dielectric properties.
The metal of the sliding legs cuts into this material when the fastening screws are clamped, and the socket is firmly held during the entire period of operation.
For this reason, when reconstructing the electrical network, it makes sense to abandon metal installation boxes and switch to new, polypropylene foam ones.
Fastening the housing in the installation box with sliding legs is not the only way. On the surface of modern boxes, reinforced areas are created for fixing sockets and switches with self-tapping screws, which hold the mechanism being fixed through special mounting holes.
Replacing single sockets with blocks
When renovating an apartment, you should take into account the increased number of electrical appliances in home use and install not just one outlet, but a whole block of them. For this purpose, installation boxes are created on the principle of serial connection to each other. They can be assembled into a strip of any length depending on the number of switching devices used.
Reasonable technical solution It is possible to use an installation point to locate in this place a set of switches used to illuminate various places in the room.
The use of ready-made internal channels in the wall saves the home craftsman from creating new lines associated with dirty work. construction work for gating, drilling, plastering, surface leveling.
Pavel Sidorik offers an interesting technology for installing socket boxes in closed wiring in his video. It clearly complements the material of the article. I recommend watching it.
Building structures with ceramic tiles
When the owner of a room has a design idea for installing a closed socket or switch on the surface of a wall covered with tiles made of ceramic materials, a certain part of even experienced electricians refuse and do not undertake to implement such ideas because of the fragile material that can crack in the most unexpected places with little violation of its processing technology.
However, it is technically possible to implement it. We present to your attention a description of one of the options for such work with an illustration of the stages of implementation with photographs. They clearly show the technology used by the home craftsman.
In our opinion, it can be taken as a basis, but it can clearly be improved. We invite you to comment on this material after reading it. We are interested in several opinions of different experts on this issue.
Please note that the owner indicated the place where there used to be an outlet and a cable was connected to it inside the wall before the tiles were glued. You just needed to connect to it, and there was no need to wire it.
Sequence of construction operations for installing an outlet
The technology for installing a socket inside a wall with glued tiles is shown in a sequential series of photographs.

To drill ceramics, you should use sharp drills or cutters specially designed for this purpose with Pobedit tips, or better yet, diamond-coated ones. Naturally, a tool of the latter class is more expensive than a regular one and purchasing it for a single job is unprofitable.
It is recommended for a home craftsman in one room to mark the locations for installation boxes with a pencil, and then carefully chamfer the decorative covering using a cutter for an electric drill and drill out the internal area around the perimeter of the contour.
The drill should be positioned close to the hole you just created each time, but the edges should not intersect. Otherwise, creating neat notches will be problematic. The depth of the holes should correspond to the thickness of the tiles.
When all the holes around the perimeter of the contour have been completed, it will be the turn of a hammer and a sharp chisel. You can also use a chisel or chisel. Using the precision strike method small force chop off all the partitions between the holes.

You must work carefully: the cutting edge of the impact tool should not extend beyond the outer limits of the holes.
After removing the partitions, the area of the tiles located on the inside is removed. Please note that all its mechanical connections with outside were torn apart.
After roughly removing the remaining ceramics, they begin to sequentially level the sharp edges by grinding with an abrasive wheel using a hand drill.
Then you need to:
- Using a small diameter concrete drill, drill out the concrete slab under the tile to the depth of the installation box. When working, you should step back from the edge of the tile and avoid contact of the working tool with fragile ceramics;
- widen thin holes with a thicker drill, but you can’t drill concrete with it right away: increased loads will be transferred to the tile material;
- remove excess concrete between holes with a hammer drill or hand tool.
The last step can be performed impact drill. But in this case it will stretch out over time and create unnecessary difficulties.

When the internal cavity of the wall is prepared in volume and allows the installation of the mounting box, create a highway for supplying the cable to the outlet and lead it from the inside of the wall.
You can pull it out with a homemade hook from any piece of wire, which is pushed into the hole and pulled out after grabbing the cable.
The end of the wire is taken in the hand and carefully pulled out, inserted into the installation plastic box.
The remaining ends of the connecting wires are inserted into the same block. The cavity made in the wall is filled with the prepared building mixture and a common installation box is pressed into it, controlling its position on the wall. After this, excess lumps of solution squeezed out through the holes are removed with a slightly damp cloth.

Using a building level, the position of the installation block is controlled and adjusted.
Features of connecting wires
The ends coming out of the installation box are mounted to the terminals in the usual way - using screw clamps.
Sometimes, to connect an outlet in this way, a non-standard situation is created when it is impossible to completely lay the cable from the apartment distribution box to the new switching device and you have to extend a piece of the old one that has already been laid.
Before starting work, you must check that there is no voltage on it with a pointer or another method. Only after his absence can you work.

The cable extension location will most often have to be hidden directly in the wall, which is not entirely correct from the point of view of installation technology and safety rules. But you have to put up with this. But you will have to worry about the reliability and quality of the connection.
Heat-shrinkable tubing provides good insulation of electrical circuits from building structures. It is put on the free conductors from one side of the cable to electrical connection.
The ends of the wires of the joined cables can be made of different metals: aluminum and copper. Their contact is created through steel tubular adapters with screws, which are immediately clamped securely. Then the heat shrink tube is moved to this place and heated industrial hair dryer or even the flame of a lighter.
Under the influence of temperature, the tube material tightly fits the junction of the wires in the terminal and reliably insulates it.
Final stages of installation
It is better to divide them into execution:
- electrical checks of the assembled circuit;
- final closing and securing of decorative covers.
Electrical checks of completed work
This is a mandatory item that must be performed by checking the electrical installation before applying operating voltage. The circuit must be completely assembled, and the protective covers need not be closed. This will save you from unnecessary operations when eliminating identified errors: breaks, short circuits, insulation violations.
After the call electrical diagram voltage is applied to it, the presence of phase and zero potentials is monitored. However, poor contact can only be detected under load created by a powerful consumer, for example, a drill.
If it works normally not at idle, but under load, when a thick hole is drilled in the metal, then the job is done correctly. In this case, there should be no heating of the socket contacts.
Installing and closing the decorative cover, securing it with screws.
These operations are performed at the very end, as final ones.

Building structures with plasterboard partitions
Walls made of plasterboard, fiberboard or chipboard are small in thickness, but have strength that allows you to mount overhead ones on the surface or embed sockets and switches built inside. For these purposes, the industry produces special plastic socket boxes.
They have movable plates located with back side housings. Through holes in the drywall, screws are screwed into the plates, moving these fasteners to the wall surface. Due to this, a reliable fastening of the socket box to the building structure is created.

For internal installation of an outlet or switch, you need to cut a hole in the drywall for the installation box. Plaster and cardboard are easily processed with an ordinary sharp knife. A single hole can be carefully cut without much effort.
If you need to install a lot of installation boxes, then purchase a special crown with circular saws for processing drywall. It is attached to the drill chuck and allows you to quickly create neat holes with smooth edges.
Installing the trimmer into the cut hole and tightening the mounting screws does not cause any particular difficulties and is shown in the video by Evgeny Romanov.
How to install sockets and switches in open wiring
The method of overhead fastening of switching devices requires additional compliance with protective measures. All electrical wiring elements are accessible for direct contact with a person and must be equipped with a high-strength insulation layer.
At the same time, it is necessary to exclude the possibility of a fire in the event that a short circuit is created anywhere in the circuit. For this purpose, the wires are separated from the wooden walls at a distance, and special socket boxes are mounted under the installation boxes on metal spacers.
The housings of the socket boxes can be made of wood, beautifully decorated, but they must be impregnated with a fire-fighting solution that prevents combustion.
The socket box is attached to the building structure with ordinary flat-head screws. A hole is first drilled in the wood to prevent cracks from forming in it.
Remove the cover from the socket and secure the housing to the socket box using self-tapping screws and connect the wires.
To safely insert the cable into the cover according to its size, it is necessary to remove part of the pre-press - the thin part of the wall. Then the wire sheath will not be pinched by the cover when tightening the fastening screw.
Old craftsmen remember that earlier socket covers were more fragile and could crack if handled carelessly. Now the jumper can be cut off with a regular knife.
As you can see, installing sockets and switches on building structures It is quite possible for a home craftsman to do this. Just don’t forget about electrical and fire safety rules.
Dmitry Avdeev reminds us of this in his video dedicated to the method of laying open wiring in a retro style.
Ask questions about the topic of the article in the comments.
Useful products
housediz.ru
review of standards + step-by-step instructions for beginners
Correct placement of sockets is very important to increase reliability, increase comfort and correct distribution of electricity in the room. Therefore, most people, when replacing wiring, ask a reasonable question: “at what height from the floor should the outlet be made?” Today we will try to comprehensively answer this question, providing all the necessary and useful information for you that may be useful when installing sockets in a residential area.

Naturally, young people strive for a more modern “European standard” in order to keep up with the latest fashion trends. The old guard prefers the “Soviet standard”, when the socket is placed at a height of about 1 meter, at waist level. It’s worth mentioning right away that there is no “European standard”. There is only a small list of restrictions that exist solely to ensure fire safety.

Brief contents of the article:
In the USSR, sockets were placed at a height of about 90 cm above the floor, which corresponded to the then standard. This method can compete with the so-called “European standard”, since it has many advantages:
- Small children cannot access the outlet because it is located at a fairly high height;
- This location is very convenient when there is a need for an outlet for an air conditioner or any other devices that do not require constant connection to the network;
- An adult does not need to bend over to plug an electrical appliance into an outlet.

Height of sockets according to “European standard”
This method is gaining increasing popularity in the post-Soviet space. The sockets are placed at a height of 30 cm from the floor, which also has some positive aspects:
- Due to the rather low location of the socket, the wires do not interfere with free movement around the room;
- The appearance of the room is not spoiled by wires from electrical appliances “hanging” everywhere.
Rules for the construction of electrical installations (PUE)
The PUE regulates the placement of sockets as follows:
- You can install sockets in the bathroom of an apartment or hotel room, but only together with a residual current device (RCD) or an isolation transformer;
- The socket should not be placed closer than 0.6 m to the shower door;
- Each group of sockets located in the apartment must have an RCD;
- It is prohibited to install electrical equipment closer than 0.5 m to the gas installation;
- It is prohibited to place in baths and saunas.
SP and GOST requirements
Correct placement of the outlet follows from following these rules:
- One socket is installed for every 4 m of the perimeter of the living room;
- The owner of a private or one-room house himself determines how many sockets need to be installed;
- One socket is placed for every 10 sq. m of corridor area (it is better to install switches at both ends of the corridor).

There are no clear rules at what height sockets should be installed in the kitchen. But there is a certain standard that was formed on the basis of standardized sizes of kitchen furniture. According to this standard, sockets are placed on three levels.

First level. Standard height placement in the kitchen - 10-15 cm from the floor. Great for various electrical appliances, such as dishwasher, refrigerator, electric stove, etc.

Second level. Next are sockets for portable electrical appliances: kettle, microwave oven, blender, etc. They require a height of 110 to 130 cm.

Third level. It is characterized by placement of sockets at a height of 200-250 cm. A stool may be required for easy access to them.

The bathroom is a place with almost permanently high humidity. Therefore, for maximum safety, it is necessary to install the electrical outlet together with a splash-proof cover. The minimum height for the socket is 15 cm to prevent water from getting inside. All safety precautions and common sense must be followed during installation.

For ease of use of various devices, you can use the following socket height parameters:
- For hair dryers, razors and other small electrical appliances, it is recommended to install the socket at a height of 1.1 m;
- Washing machine – 1 m;
- Water heater – 1.8 m.

In the bedroom, sockets are installed on both sides near the double bed to connect electrical appliances to the network without getting up. It is also recommended to place switches nearby.

At a height of 30 cm, a socket for a vacuum cleaner is installed, the cord from which should be able to stretch freely in any direction. Near the table there are sockets for a computer or other equipment.
In other rooms
Here everything depends on the owner’s imagination. The number of sockets is calculated so that it is enough for all the equipment that will be in a given room. But it is better to use several levels: first and second, in order to ensure convenient use of all electrical appliances.

Electrical sockets are installed at a height of 0.15-0.2 m above the table surface and 0.3 m above the floor. Other accommodation options depend on your convenience.

Own standard
If you have an idea about how to install an outlet in an unusual way, it is better to first look at a photo of such an outlet location on the Internet. This will save you from possible problems.

You can install sockets in your home at your own discretion, but following the rules described above. Therefore, it is not necessary to adopt any of the standards. You can place sockets based on your own ease of use.

It is necessary to choose a placement that will allow you to use various electrical appliances without any problems. For example, the most convenient placement of bedside sockets is 70 cm. At this height it is quite comfortable to use a gadget that is connected to the network.

It is better to place sockets for the TV closer to the floor, behind the TV itself, so that the wires do not interfere with movement. A convenient location is necessary in order to avoid the use of extension cords.

Conclusion
The key importance in choosing the location of outlets is safety and comfort. By following these two factors, you can simplify your life as much as possible. This should not be neglected. Good luck.
Photo of the optimal placement of sockets in height


electricmaster.ru
in drywall and concrete wall

Installing sockets yourself is one of the most common household chores. It would seem nothing complicated. But let us remember Murphy's laws, which were not derived by a teapot. One of them says: “If the device still doesn’t want to work, then finally take it and read the instructions!”
In order for an electrical outlet, this generally simple device, not to become a source of concern, or even danger, especially in modern highly loaded residential networks, you need to know quite a lot about it and how to install it. The rules for installing sockets are also relevant from the point of view of electromagnetic compatibility: if they are installed correctly and the wiring is properly carried out, the need for expensive interference filters and additional protective devices, as a rule, does not arise.
Important: socket – electrical switchgear and, as such, requires compliance with all safety measures in accordance with safety regulations during operation. In particular, the presence at the place of work of an assistant (according to PTB - “observing work”) trained to provide first aid in case of electric shock.
Important to important
When installing electrical fittings yourself, you must follow the following rules:
- Electrical installation work should be carried out in a de-energized apartment.
That is, first you need to perform all the auxiliary operations: knock out the grooves, drill holes and holes, lay the cable without connecting, and connect the wires last.
- First of all, check each next connected wire with a phase indicator.
One of general provisions PTB states: “When working on electrical installations, it should be remembered that voltage on de-energized live parts may suddenly appear at any moment.”
- Install the socket or switch without allowing exposed conductors to come into contact with the body.
The basic working methods that allow you to install household electrical fittings “without touching the copper” are described below.
- In case of electric shock, remember that the main thing in this case is the speed of reaction of the observer.
Exposure to an electric current of 10 mA for 0.2 s (the reaction speed of a dexterous, quick-witted person without special training) causes involuntary unflattering statements. The same, within 1 s – chills, trembling, painful sensations, which during the day may intensify to a degree requiring hospitalization. The same, for 10 seconds or more - fainting and fibrillation of the heart muscle, requiring urgent medical care within 15 minutes, otherwise it will be too late.
That is, if the master is “grabbed,” you need to pull him by the clothes and crash together on the floor, and not run into the hallway to turn off the machine. It’s better to lie together with bruises or fractures than to lie alone in the ground and the other under investigation.
Socket device
The electrical outlet consists of a contact block assembly, a decorative cover with a captive screw(s) and a socket box. The block is equipped with:
- Fastening tabs, solid cast, fixed (in the figure on the left) or movable, supported by screws, in fig. in the center and to the right.
- Contacts, phase and neutral, identical in design, and grounding, located separately.
- Terminals for connecting wires to contacts.
Socket contact blocks
Notes:
- Blocks with movable legs on screws are somewhat more difficult to install in a socket box (see below), but this design allows you to adjust the position of the block in height and inclination exactly along the wall. You just need to make sure when purchasing that the paws have two teeth. The block with single-toothed legs will soon become loose, see fig. in the center.
- The terminals can either be attached to the contacts with screws or be made integral with the contacts. The latter are more reliable. Before installing the first sockets, you need to sort them out, lubricate the mating parts with conductive paste (cold solder) and tighten them tightly with screws.
- The terminals on the wire side can be either screw or “brush brushes” into which the bare ends of the wires are simply inserted. The latter are very reliable, but do not allow for overhauling: the wire has to be pulled out with force, and the brush breaks. Screw terminals are lubricated with cold solder before inserting wires.
Types of sockets
Sockets with switches can be either single or combined into one structure with a common cover and socket box, see fig. left. The last one is the socket module. Several sockets installed on the wall in a row are called a socket group, in Fig. in the center. The switch, either as part of a module or as a separate one, is installed in a regular socket box.
Types of sockets, socket group and socket module in the wiring box
The socket module may also include signal sockets (telephone, television, Internet), a timer, “foolproof” that turns off the socket when touching the phase contact, etc. Complex socket modules are most often included in electrical wiring boxes, in Fig. right.
Special mention should be made about the boxes. According to PTB, PUE and electromagnetic compatibility requirements, power and signal wires should not touch or cross each other, therefore electrical boxes are sectioned, and each section goes to its own terminals. When laying cables in the box, you need to pay attention symbols in sections so as not to rearrange everything later.
Lifesaver socket

Overhead socket
A simple but very useful invention is a modern overhead socket, see fig. It allows:
- Replace the socket when the socket box is “completely dead” without disturbing the decorative covering of the wall: the cover completely covers the mounting plate.
- Replace old sockets with Euro ones without changing the socket and without touching the walls.
- Place sockets on the wall sheathing along the sheathing, without checking the distance to the base wall.
- Complete with a special socket box, see below, install sockets in plasterboard sheathing with increased strength and reliability.
- With it, you can install fireproof sockets in wooden walls - even if an arc occurs, it first closes through the metal clip, without spreading further along the wires. The protection is triggered, or the wires burn out in the terminals before the fire reaches the tree.
Dangerous curiosity

Pull-out sockets
In terms of consumer qualities, the exact opposite of the overhead socket is the retractable socket, which is steadily gaining popularity in Europe, see fig. They justify it by design: they say that the “blade” of a pushed-in socket does not spoil the interior. But, excuse me, an outlet into which nothing is ever plugged in is not needed at all, and a module pulled out from the wall or floor (yes, yes, they do that too!) creates an injury, electrical and fire hazard. There are more than enough reports of incidents caused by retractable sockets, but marketers, relying on consumer psychology, still successfully promote this “achievement” on the market.
Rules and regulations

Low mounted sockets
Modern standards for the installation of household electrical fittings are quite liberal: the installation height of the switch is 160 cm from the floor, and sockets of 80 cm are no longer required, but only recommended. It is widespread to install socket modules 30 cm from the floor, see fig. Unofficially, the minimum height is considered to be 25 cm; with less, the probability of an accident during wet cleaning. Reducing the installation height of sockets does not raise objections from electricians if the apartment has an RCD (residual current device). The number of outlets in the apartment is not limited in any way.
In a nursery, on the contrary, it is recommended to install socket modules with light switches and touch protection at 150-170 cm from the floor. In this case, the little ones will not be able to reach them, and those who are older and already know how to handle electricity will be less tempted to click or poke to no avail - to pull their hand high.
However, some rules for terminating wires into sockets should still be followed. They greatly reduce the likelihood of an accident and make troubleshooting easier.
Firstly, it is customary for electricians to have the phase contact located closer to the window. If the position of the socket relative to the window is ambiguous, the phase should be on the left when facing the socket.

Sealing the cable into the socket
Secondly, it is impossible to insert wires of minimum length directly into the terminals: due to thermal deformations of the wall and cable, the contacts are broken over time, and it will be very difficult to reliably reconnect short ends into a new socket. The socket must be connected by passing the cable under the terminal block (there is always a gap there specifically for this purpose), as shown in the figure. If the cable is round and too thick, you need to remove a piece of its sheath and run the wires in a row.
Thirdly, when wiring the block, the zero and protection must be on one side, and the phase on the opposite side. This is also shown in the figure.
Fourthly, two wires can be inserted into each terminal, but this is done only for the electrical connection of sockets in groups and modules. In no case should you power stationary lamps, remote groups and modules, not to mention “snot-powered” consumers, through sockets, see next. rice.

Connection of sockets in the module
Here the question arises: how much will such wiring cost if a separate branch is pulled from the meter to each group? Just a socket module with a built-in terminal block, one per room or less. Such modules are also called modules with mini-shields. When wiring around the room from a mini-panel, statistics do not show an increase in accident rates. The bottom line is that power should be consumed at the point of connection, and not go far through the outlet terminal.

Switch connection
Finally, about such an operation as installing a switch. Technically, the switch is installed in the same socket box using the same methods as the socket, see below. But when installing a single-pole switch, it must be connected to the PHASE wire; Including a zero in the gap is unacceptable! Phase and neutral in a two-pole switch must be located uniformly with the sockets (phase is on the left).
In any case, you need to run a cable loop to the switch, and leave the zero and protection uncut, in Fig. left. In order to save cables, it is unacceptable to connect random wires to the switch, and leave the cut phase of the cable in the distribution box (dose) under the ceiling, as was done before, in Fig. right.
Tools and materials
To work with electrical fittings in an apartment, you will need the following tools and materials:
- Phase indicator (phase indicator).
- Screwdrivers 4-6 mm, straight and Phillips.
- Pliers with insulating handles.
- Side cutters No. 1 or No. 2.
- Assembly knife.
- Vinyl and cotton insulating tape.
- To transfer sockets - C-type insulating caps (not for signal connectors, see the figure below in the center) and conductive paste (cold solder).
- Silicone sealant in the smallest packaging; consumption - grams.
- To install new or move sockets, use an electric drill.
- To install sockets on drywall, use a 67 mm core drill or a 32 mm spade drill, depending on the installation method, see below.
- For installation on concrete - a concrete crown with a diameter of 70-75 mm and a height of 45 mm.
- Small drills, dowels for flea screws.
- For beginners - an insulation stripper.
Note: with the operating methods described below, electrical tape may be needed as a damper, for winding cable sections passing through holes, and not as insulation.
We need to talk specifically about removing insulation and other work operations.
Working methods
Removing insulation
Professionals remove insulation from wires this way: using side cutters, holding them with the back of the jaws towards the end of the wire, bite the insulation without bringing the blade of the jaws to the copper, and pull. The main thing here is to become skilled enough to become automatic. The author of these lines, while still a young cable technician of the IV category, once, as a bet, stripped a five hundred telephone cable (500 pairs, 1000 wires) in this way. Examination by opponents under a microscope did not reveal a single bite of solid copper wires of 0.32 mm. The worst thing happened to everyone afterwards: they bet on a box of vodka.
However, for a beginner, bites from side cutters are the rule rather than the exception. The bite becomes a source of corrosion, local heating at maximum load and often leads to malfunctions. Therefore, to begin with, it is better to get an insulation stripper, especially since it allows you to remove the cable sheath without bending it or cutting it with a knife.
Insulation strippers and insulating caps
There are many types of insulation strippers, manual and automatic. For self made The most commonly used pullers are pliers (on the left in the figure) and pincer pullers, on the right in the figure. The pliers need to be adjusted to fit the wire, which slows down the work, but for a beginner they are preferable:
- The diameter of the current-carrying conductor and the thickness of the insulation of the wires, even from leading manufacturers, differ somewhat: today's pros use pliers to actually work like side cutters, without cutting to ensure guarantee. Precise adjustment with a screw allows you to 100% avoid snags on the wire from one coil.
- The tongs need to be pulled with a longitudinal, rather than lateral, movement like pliers, which is much more convenient without skill, especially if the ends are short.
- Using pliers, turning the adjusting screw all the way out, you can cut the cable.
- Tongs are cheaper than pliers.
Wire splicing
When moving sockets (see below), you will most likely have to extend the cable. Modern methods When installing electrical wiring, it is strongly recommended not to make splices of wires, but do not rip off the cladding or ditch the wall for the sake of one socket!
Electrical wires are twisted together in this way:
- Remove 4-5 cm of insulation from the ends of the wires.
- Both wires are taken, without pinching too much, with duckbills, holding them in the left hand, by insulated areas.
- The wires should be parallel, close to each other.
- The insulation cuts must match.
- Using pliers in the right hand, twist the veins clockwise.
- The twist is again passed through with sliding pliers under light pressure.
- Using the end of a flathead screwdriver, apply cold solder to the twist.
- Quickly, while the paste has not set, put on the insulating cap, also turning clockwise.
- After the solder has hardened, silicone is squeezed into the socket of the cap.
We work with fittings
Replacing a burnt one
In that case best option– installation of a surface-mounted socket in an old socket box, especially since the socket blocks are not sold separately, and the old socket box may have become damaged by time.
Transfer

Modular block
Moving sockets to a new location during the process of wall covering comes down to extending the cable to the required length and laying it in the sheathing before the actual covering begins. Splicing of wires is carried out as described above. The cable is run parallel to the floor at the height of the old outlet, secured to the wall with clamps. The new outlet is mounted either on the sheathing or on the base wall, see below. It is important to leave a fairly long cable tail, at least 15 cm, in the new location; this will simplify the installation of the socket.
If the walls are finished, and the socket needs to be “pulled out” from behind the cabinet, and additional sockets must be added, then best option– corner modular block, see fig. It can be installed on standard mounts in a corner, under a window sill or in any suitable place. The unit is simply plugged into the old socket permanently.
But before blocking the old socket, it is necessary to go through: completely disassemble it, clean all internal contacts (say, contact lamellas with a terminal) and reassemble it using cold solder. Before inserting wires into them, also lubricate the terminals with solder. Immediately before turning on the unit, remove the socket cover, lubricate the contact lamellas with solder, put on the cover, turn on the unit and do not touch it again. If you follow these rules, the old socket will never remind you of itself.
Installation on concrete
To install a socket in concrete wall It is important to know the thickness of the future finish: the edge of the socket box should be flush with the wall, plus or minus 1.5 mm. The standard height of the socket box is 40 or 44 mm. For a “puffy” finish, you may need a plywood cushion, on the left in Fig. It is advisable to secure the socket box with self-tapping screws and dowels. If it does not have mounting holes, you can drill them yourself, but the line of mounting holes should be perpendicular to the line of contacts, in Fig. – on the right!
Installation of socket boxes on concrete
If the wall is already finished, or the finish will be thinner, you need to use a crown to select a hole with a reserve in diameter and depth for the socket box. Before installing the socket box, the hole is filled with alabaster or gypsum mortar. Then they quickly level the socket box and, until the solution has set, wrap a couple of “fleas” in it for reliability, see fig. in the center.
It is convenient to align the socket box using a template made of plywood or boards as thick as the finishing height, with a hole along the diameter of the socket box. But the most important thing is that before installing the socket box, do not forget to thread the cable into it! Murphy's laws, you know.
Installation in drywall
Installation of the socket in drywall is done using special sockets for drywall with sliding (on the left in the figure) or rotating (in the center there) fixing stops.

Socket boxes for drywall
The technology is elementary:
- A hole of 67 mm is drilled with a crown.
- They bring the cable into it and pull it into the socket box.
- Put the socket box in place.
- If the stops are sliding, pull the retaining tape as far as it will go and bite off the excess.
- If the stops are rotary, screw in the screws pulling them until they stop; The paws will turn themselves as they should.
- They strip the wires, insert them into the terminals, place the block in the socket box until it stops and, turning one by one, tighten the screws of the block's legs.
- Place the cover and check the fit to the wall; If necessary, loosen the screws of the pad legs and adjust it.

Installation of a socket box in plasterboard with increased reliability
If the sheet of drywall is not yet on the wall, there are overhead sockets and a socket box with swivel legs, you can secure the sockets more securely (see figure on the right):
- Use a pen and a jigsaw to select a hole for the metal socket clip.
- Drill holes for the self-tapping screws of the socket box legs.
- Pull the clip with the socket box into a bag; The socket box stops are not needed.
- Install the socket block and cover.
With the described method of installing sockets in drywall, a large space is created under the holder of the block, which makes it easier to terminate the cable and its possible extension in the future.
Bottom line
As we see, subject to certain simple rules Installing sockets and switches in an apartment with your own hands is not a difficult task. Elementary accuracy - and everything will work like a clock, and the hissing, itching and smell of burnt insulation will never be heard.
Video: professional installation of sockets
Electrical sockets and switches are a necessary element in any apartment. Installation of such parts requires compliance with height, distance, and other conditions. The basic rules are relevant when arranging and installing sockets and switches in various rooms, and in a living space the design of these elements is also important.
Technical requirements for installing sockets and switches in an apartment
Switches and sockets are used to control lighting. Elements of the electrical network need correct installation. For this, there is a set of requirements, which includes the main points that must be taken into account during installation. At the same time, the requirements are of a general nature, and the rules are necessary to ensure safety.
The most modern are the requirements of the European standard.
The European standard assumes a convenient arrangement of elements
The recommended installation height for switches is 90 cm from the floor level. This placement makes the elements invisible electrical circuit in the general interior of the room. Ease of use is also an advantage of the location of the switches. The distance from the edge of the door to the switch must be at least 10 cm.
Previously, elements of the electrical network were installed according to the rules of the Soviet standard. In this case, the switches are located at a height of 160 cm, which often causes inconvenience. The rules are optimal for residential premises. IN production workshops, public places and other similar areas use slightly different bases when installing switches and sockets.
Security measures
Preparatory work
Correct installation of any elements electrical system involves preparation. To do this, the location of each element is determined. External devices are mounted on the wall surface and do not require the use of complex tools. For built-in types of sockets and switches, you need to make holes in the wall according to the size and shape of the part. Channels for laying wires are also needed. Grooving is carried out when the electrical wiring and switches are completely replaced. After preparing the holes, socket boxes are installed.
Design
Before installing switches and sockets, it is important to determine their location, place for distribution box and other significant points. This takes into account the location household appliances. In a living space, sockets and switches are needed in every room.

There are many outlets in the kitchen
For outdoor location
When placing elements outside the wall, special types of sockets and switches are used - overhead ones. A plan for the location of all parts is drawn up in advance. The installation process then includes the following steps:
- In place of the socket or switch, a wooden block made of plywood about 10 mm thick is attached with screws. The size of the element must exceed the dimensions of the socket by 20 mm;
- the top one should be removed from the new socket plastic box and remove the plug covering the place for the wire;
- The terminal block is screwed to the block with self-tapping screws, and the electrical wires are connected.

External sockets do not require a complex set of works
For internal location
The internal placement of switches and sockets makes them more compact. At the same time preparatory stages The work consists of cutting grooves for cables and making holes for socket boxes. To do this, use a hammer drill with a suitable cup-type drill. In this case, the depth of the hole should be equal to the height of the walls of the socket box.
Video: installation of socket boxes
When the devices are located low, the channel for the wire can be directed downwards, while the cable is then laid under the baseboard and there is no need to drill many holes.

The cable is easy to lay through the technological channel
A socket box is installed in the hole, wires are brought out, to which a switch or socket is attached. Finally, the top cover is fixed.

Clear hole size allows for easy installation of the part
The internal design of sockets and switches has a single design principle. These details are especially varied according to appearance. Models with a white body are classic, but there are also color options. Also often used in interior design various methods design of electrical system elements.

The original decor will easily disguise all the elements
Sockets and switches can be easily matched to the same color of the walls. If this decor option is not possible, then it is best to decorate the elements in an unusual way. If possible, sockets and switches are hidden behind furniture, decorative items and other details. It is important to prevent foreign parts from getting inside the devices. If children live in the room, then special plugs and “curtains” are used.
See also the material on arranging retro electrical wiring:.
Do-it-yourself standards for height, location and installation of sockets and switches
Standards for installation and operation of various parts of electrical systems are regulated by the Electrical Installation Rules (PUE) and GOST. These standards require compliance with basic standards when selecting, installing and operating devices. This ensures the safety and high quality of the systems.
Installation height according to PUE
The main points of the PUE regarding the installation of switches and sockets suggest the following features:
- the minimum distance from switches, sockets and electrical installation elements to gas pipelines must be at least 0.5 m;
- any switches and sockets must be located at a distance of at least 0.6 m from the doorway of the shower stall.
It is recommended to install switches on the wall on the side of the door handle at a height of up to 1 m; they can be installed under the ceiling with control using a cord. In rooms for children in children's institutions (kindergartens, nurseries, schools, etc.), switches should be installed at a height of 1.8 m from the floor;
Requirements for placement according to GOST and SP
According to the established GOST standard, the number of sockets and switches in the room residential type user defined. At the same time, the norms for the placement of these elements are observed. The distance from sockets to kitchen stoves and air conditioners is not standardized.
Installation height according to European standards
The European standard requires a convenient and safe arrangement of electrical network elements. The height of the switches is 90 cm from the floor level. Sockets can be located at a height of 30 cm.

The layout makes it easy to install sockets
Nuances on requirements for various institutions
In rooms and institutions where children of any age stay, sockets and switches are located at a height of about 1.8 m from the floor level. In public catering establishments, sockets are mounted at a height of 1.3 m. The height of the lighting fixtures and their power are selected depending on user convenience and operational efficiency.
You may be interested in material about installation and connection cross switch: .
Myths about installation requirements
The established requirements are basic when installing sockets and switches in residential and other premises. In this case, you can use a free arrangement method, that is, fix the elements in an order that is comfortable for the user. This option is often considered the only one, but we must not forget about the standards that ensure safety.
Video: DIY installation of switches indoors
All elements of the electrical circuit are important and require safety during installation and operation. Compliance with requirements and standards is the solution required to achieve high quality work.
When engaged in construction or renovation, many homeowners are wondering how to install switches or sockets correctly and at what height from the floor. After all, not only the ease of use, but also the safety of operation largely depends on this.
In order to understand this issue, let's consider the rules for their placement that existed in the recent past, and the new European standards that came from civilized Europe.
Standards for installation of electrical components
Today, there are no strict standards or rules regulating the location and number of sockets and switches. “Eurostandard” is just a convention, because here the main importance is only ease of use plus safety precautions. The only documents that address this issue are: a summary of rules for the design of public and residential premises (SP 31-110-2003) and electrical installation rules (PUE), therefore the installation of electrical wiring should be carried out based on these recommendations. The first are the following installation rules:
- It is desirable that the installation height of the switch from the floor be up to 1 m, and it should be located on the side of the door handle.
- Sockets can be placed in any place and at the same distance from the floor.

Extract from PUE
The PUE discusses some safety rules that must be followed during placement.
- It is recommended to place the switches on the door handle side. The height of the switch from the floor is 1 m.
- It is allowed to place them under the ceiling, with the control of a light cord that bends to the recommended level.
- Distance from switch and socket to gas pipes and heating, as well as batteries - at least 0.5 m.
- In the kitchen, each power supply point should be located at least 0.5 m from the gas pipeline, and at least 0.8 m from the sink, and quite high from the floor.
- Electrical components in bathrooms can be installed from plumbing equipment and the floor at a distance of 0.6 m.
Installation of electrical components in a residential area
There are 2 ways to locate switches and sockets in apartments and houses. These are old, familiar to many Soviet standards, and the so-called European standards. Let's look at each of them in detail.
Old traditions
IN Soviet era In residential premises, it was customary to install switches at shoulder level or under the ceiling. based on convenience and safety. As a rule, they were installed at a distance from the floor of approximately 90-100 cm.
The ceiling switches worked as follows. To control the light, a cord was attached to a spring-loaded mechanical lever hidden inside the housing. At his first pull the light came on, and at another pull it went out.
The height of the switch from the floor was 160-180 cm. This distance at that time was considered the most suitable and optimal for controlling light. And today, especially for older people, this is the most convenient option. The switch will not be blocked by low furniture, such as cabinets, and it will be located at eye level. In addition, small children will not reach it. Many people are accustomed to this arrangement of switching devices and consider it the norm.
The specified height of sockets and switches from the floor has its advantages and disadvantages:
- Plus - the socket is convenient to use, since you don’t need to bend over to it, and the switch does not interfere with the placement of furniture and is located at eye level;
- The downside is that power cords from appliances hang down, and you have to raise your hand to turn on the lights.

Eurostandard
The height of the switch from the floor according to the European standard is 90 cm, the socket is 30 cm. However, standardization as such never existed in reality, and this concept came into our lives along with the concept of European-quality repair, replacing the “Soviet standard”. Of course, it has its advantages and disadvantages:
- Plus - the sockets are not “conspicuous” and do not interfere with anything, and the switches are located at the level of your lowered hand - they can be turned on without any effort, and without even looking. The height of the switch from the floor is 90 cm.
- The downside is that in order to insert the plug into the socket, you will need to bend over, and the switch should not be blocked by anything.

The height of sockets and switches according to “Soviet” standards, in terms of convenience, is considered by many to be very dubious. Today, much more preference is given to the notorious European standard. And there are many reasons for this. For example, it is less noticeable than a lot of sockets with cords and tees. The height of the switch from the floor is 90 cm (at the level of a lowered human hand) is also very convenient, since it can be quickly found even in the dark.
It is highly not recommended to install sockets and switches that do not have protection against current leakage to ground (difavtomats, RCDs) in bathrooms and toilets. The same applies to the washing machine outlet.

How to install?
Before proceeding with the actual installation of a switch or socket, you must outline their outline on the wall. A hole is made in concrete using a hammer drill with diamond crown. The socket box can be square or round. Special installation boxes are inserted into the prepared holes. To fix them, use building gypsum, plaster or gypsum glue. The box is attached using sliding legs or screws, then a plastic case is put on it.
Installation into a plasterboard wall is somewhat different, and the tools are different. All holes in the plasterboard sheets where the cable will be routed are made in advance. To fix switches and sockets, special claws are used. They will hold them on the sheet.
Open wiring is done extremely rarely and, as a rule, is fixed temporarily (for example, during repairs), because the wires spoil the interior. Agree, looking at a wall where everything is aesthetically pleasing and neat is much more pleasant.

At independently conducting When installing wiring and connecting sockets and switches without involving a specialist, you should adhere to the recommendations listed above and certain rules that will allow all work to be completed without any problems and, most importantly, safely.
- First of all, you need to decide on the placement of electrical appliances and furniture in the room. To do this, it is recommended to draw up a diagram, preferably on such a scale that you can mark all the equipment that requires an electrical connection, as well as furniture.
- Then designate the location of switches and sockets, and calculate the required number for each room.
- It is better to place sockets for equipment (computer, refrigerator, etc.) so that they are always easily accessible, but at the same time they are hidden behind these electrical appliances.
- Sockets above desk, chest of drawers, etc., it is best to place it at a height of 15-20 cm from the furniture.
- Switches or sockets cannot be installed above or below the sink.
- The wiring diagram should be selected in such a way as to prevent network congestion.
Let's sum it up
So, there are no clear standards regarding the height of sockets and switches from the floor (Euro or Soviet standards). But there are many recommendations that must be followed, primarily for safety reasons.
Switches and sockets are necessary elements in every room. They allow you to control lighting and connect electrical appliances to the network, so their location should be the most convenient. However, many people forget that these elements are the outputs of live wires. Therefore, their location should be as convenient and safe as possible.
To ensure these parameters, various standards have been created. They provide optimal location and installation of electrical network elements. One of the most reliable is the European standard, which is widely used in Europe.
Switch standards
There is simply no uniform standard for the location of switches and sockets. As a replacement, there are various standards regulating this issue. However, most people prefer to set these elements only according to their own preferences, ignoring recommendations and safety. This leads to damage to the network, which can contribute to a fire.
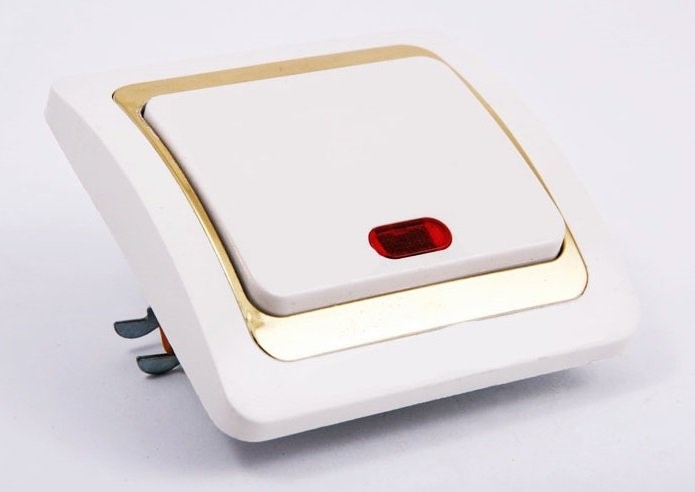
As for switches, there are three options for their installation:
- Soviet;
- Eurostandard;
- Free installation.
The first method is to fully comply with the rules established back in Soviet times. It means that the switches are located at a height of 160 cm from the floor. This installation has several advantages, including the height at eye level, as well as ease of arranging furniture.

Another advantage is child protection. The child simply cannot reach such elements, which ensures his safety. However, gradually the demand for the Soviet method is falling, and only people who are accustomed to it use it.

The European standard is somewhat different from the previous version. It is the most modern and comfortable. When using it, the switches are located at a height of 90 cm from the floor. This method also has several advantages: there is no need to raise your hands and the element is invisible against the general background of the room.
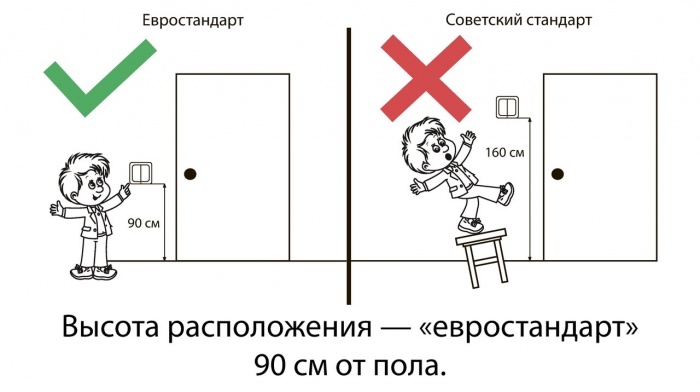
The last option involves installation at the request of the client. In this case, height standards are omitted, but the basic rules and regulations of installation are observed. Free installation is often used in rooms where both standards are simply not suitable.
Socket Standards
Sockets also have their own standards for installation. Although they are slightly different from those used for switches, there are significant differences. The installation options are still the same, Soviet, European and free.
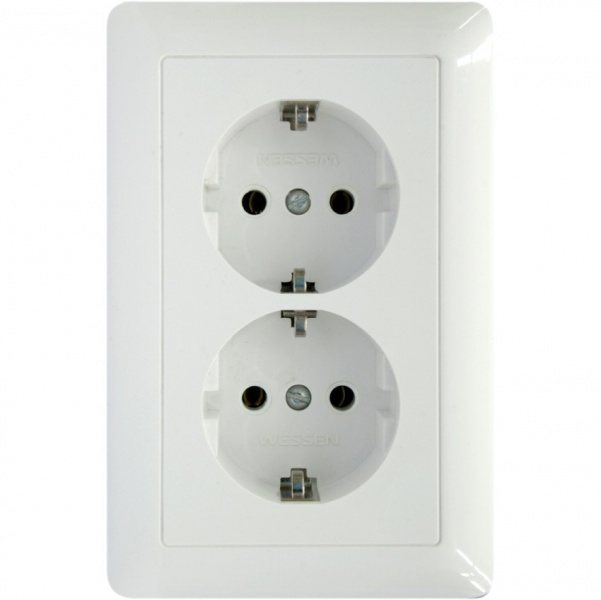
The Soviet standard for sockets implies their installation at a height of 90 centimeters from the floor. This was quite inconvenient, because it led to a large tangle of wires, visible from anywhere in the room. In addition, the volumetric plugs were easily touched by residents, which could lead to element breakage or damage to the device.
The European version is much better here. He recommends installing sockets at a height of 30 centimeters. This allows you to hide wires behind furniture and hardly notice them. For convenience, you can make 1 socket according to the old standard to connect chargers and so on.

The freestyle installation here has the same standards as before. It is only important to follow the basic installation rules that most electricians know.
Interesting ! Eurostandard also uses other types of sockets. They have wider recesses for plugs. Soviet sockets are practically no longer used, because modern devices are not designed for them.
Recommendations for the location of sockets and switches
As mentioned earlier, the European standard is widely used in Europe. It is more convenient and its safety is high. However, you should not install elements only according to it, because this parameter can be adjusted in accordance with your requirements.

The low location of sockets and switches is quite convenient. It allows you to use them without unnecessary movements, which is especially important for people with limited motor skills. In addition, it looks aesthetically pleasing and beautiful. Bundles of wires no longer cause damage general view premises.
However, the location of these elements around the room is not regulated in any way. There are several recommendations in this regard:
- Mount switches at arm height.
- The light should turn on near the entrance to the room.
- In large rooms, you can install several switches.
A person’s height does not always correspond to the statistical average. Therefore, it is worth adjusting the installation height according to the position of your hand, which will simplify your future life. In addition, the location of such elements should be convenient for humans. He should be able to quickly turn on the light when returning home or entering a room. In the bedroom, it makes sense to install duplicate elements near the bed so as not to get up before bed.

Location requirements may vary depending on the type of room. This is especially true for the kitchen and bathroom. It is worth remembering that there is a risk of liquid getting on the wires, which can close the circuit and lead to injury. Therefore, it is important to treat this issue especially carefully.
In the bathroom, installing sockets according to European standards is not recommended. A height of 30 centimeters may result in liquid getting onto the contacts. Therefore, it is better to install them at a height of 90 centimeters, which corresponds to Soviet standards. In this case, the entire body must be made of plastic and have good insulation.

Important ! There are special types of enclosures suitable for use in areas with high humidity. Their use in the bathroom is preferable.
In the kitchen, the recommendations are similar, but for a slightly different reason. The high location of sockets is welcome here due to kitchen furniture and the regular use of various appliances. Therefore, such elements are mounted at a height of 110 centimeters with an average height of kitchen furniture of 90 centimeters. This will make their use more convenient.
Installation process
The installation of sockets and switches is almost identical. First you need to turn off the power and conduct preparatory work. These include purchasing the item and cleaning the work area. For further work you will need the following tools:
- Screwdriver;
- Wire cutters.
As well as the housing and socket box. The socket box is the component that serves as the basis for the interior of the socket. The housing serves to connect wires and further operate the element.

The process includes several stages:
- Stripping wires;
- Installation of a socket box;
- Connecting wires;
- Fastening the body.
First you need to clean the outgoing wires by first leading them into the socket box. You need to leave bare 8 millimeters required for connection. Next, a socket box is mounted into the wall hole.
After these steps, the connection of the socket begins. Metal part connect to the network by inserting wires that match the color into the holes. If there is no color marking, then you need to find out in advance correct location wires and find the phase.
Important ! After these steps, you need to carefully clamp the wires into the structure. Otherwise, poor contact may occur, resulting in sparks.
After this, the socket is installed and the plastic case is mounted. The electricity is turned on and the structure is tested for functionality.
Mandatory location requirements
Regardless of the height and standard, the basic location requirements must be observed. They are necessary for the safety of residents, protecting them from various risks.

Among the main location requirements are:
- Half a meter away from heating and gas supply pipes;
- Distance from openings and frames by 10 centimeters;
- Distance from the sink by a meter;
- Distance from the corner by 10 centimeters.
In addition, it is important to consider the dimensions of the furniture, as well as the material from which it consists. If it is flammable, then it is important to place the outlet at a certain distance from such structures.
It is also important to consider the availability of such elements. Often the switch is located behind furniture or at a great distance from the door, which makes it inconvenient to use. These calculations must be made in advance.
All these tips will help you install sockets and switches correctly. And for a better understanding of the installation process itself, it is recommended to watch this video. The process of connecting such elements to the network is described here: