Many people have old furniture stored at home or somewhere in the country. And most often these are not expensive antiques from tsarist times, but the most ordinary cabinets, chests of drawers, tables and chairs. At first glance, it may seem that most of these things should be thrown away long ago, but take a closer look - often these are high-quality products made of solid wood or maybe even forged metal, which will last for many more years if they are beautifully restored. In this article we will talk about ways to decorate tables - kitchen, dining, coffee, work - of different sizes and shapes.
However, many of the presented options are equally suitable for other interior items. Perhaps these examples will inspire you to turn nondescript, shabby furniture into a real work of art, because it’s so nice to contemplate the beauty made by yourself!
12 ways to give new life to an old table
1. Painting
The best way to update a worn-out table is to paint it, but first you need to prepare the surface. A paint remover will help remove the previous finish from the product.
If there is rust on metal legs or fittings, it should be soaked generously with vinegar, Coca-Cola or a special product, and after 15-20 minutes wiped with a hard scraper.
The wood is sanded with sandpaper, dust is removed, then impregnated with an antiseptic and a primer is applied. All chips, cracks and irregularities are rubbed over with acrylic wood putty.
For painting, you can use alkyd enamel, acrylic or epoxy paints, varnishes, and aerosol compositions for metal. You will also need painting tools - brush, roller, sponge, sprayer.
To give the table a more impressive look, you can paint it not entirely, but only individual parts. For this you will need masking tape or stencils.


2. Artistic painting
If a monochromatic coating seems too boring, try decorating old table patterns. Drawings can be applied with a brush and acrylic paints - manually, through a stencil or according to outlines made using tracing paper.
Table with artistic painting will perfectly complement the interior in ethnic or rustic style, and children will like images of animals, fairy-tale and cartoon characters.


3. Decoupage
For this decor you will need a brush, paper napkins with a pattern, PVA glue and transparent furniture varnish.
The pictures are carefully torn off or cut out with scissors, the bottom layers of paper are removed, then the resulting thin appliqués are placed in the designated place and coated with glue on top, trying to avoid folds and tears.
If any element cannot be attached the first time, it must be immediately wiped with a sponge dampened warm water, and try again with a similar fragment.
Dried decoupage is coated with transparent furniture varnish in several layers, otherwise the paper decor will quickly be erased.


4. Craquelure
Craquelure is a cracking varnish that is used to deliberately give a product a look that imitates the texture of antique paintings. It can be one-step (the composition is applied in one layer and cracks as it dries) and two-step (two mixtures are used - one based on epoxy resins, the second on water based, they interact and a characteristic texture is obtained). The color of the veins is determined by the bottom layer of acrylic paint, as well as the shade of the grout. Most often, powdered golden pigment or pastel is used for this purpose.
Two-step craquelure is usually used to complement decoupage or hand painting to achieve the effect of an aged painting. One-step is more suitable for products without patterns.

5. Tiles
It happens that after repair there is a small supply left ceramic tiles. It can be used to decorate an old table - just tile it wooden base. The installation technology in this case is practically no different from finishing walls or floors.
The ceramic surface is ideal for a table in the kitchen, terrace, veranda, gazebo or even outside.
To give the table an attractive look, in addition to plain tiles, you should use patterned borders, decorative panels(possibly even with some plots) or a stylish patchwork.

6. Mosaic
Paintings from small fragments decorate many galleries, temples and palaces. They will look just as elegant in the home, for example, on the surface of coffee tables.
Mosaic elements can be ceramic (even broken tiles will do), glass or acrylic.
From available materials, small round cuts of wood, cut CDs, and colored pebbles are suitable. You just need to come up with an interesting pattern and attach the pieces to the table using glue or liquid nails.


7. Self-adhesive film
The simplest and nice option decor of an old table that does not require fiddling with paints - gluing film.
This available material can imitate any coating - from rare wood to marble, it can have any designs, patterns and textures.
Self-adhesive film is sold in rolls, and it is easy and pleasant to use.


8. Decorative tape
Stationery and creative supply stores have recently offered a wide selection of decorative self-adhesive tapes. It will take you no more than 30-40 minutes to decorate an old table with multi-colored tape and a new bright thing will appear in the interior.
If you want to change the finish, the adhesive strips can be removed just as quickly, and if there is any glue left somewhere, acetone will easily dissolve it.


9. Epoxy resin
Epoxy resin is a liquid substance that hardens quickly when exposed to air, turning into a hard, transparent plastic.
Cracks in wood filled in this way look very unusual, and if luminescent powder is added to the liquid phase, they will glow brightly in the dark.
Also in epoxy resin You can place dried flowers, leaves, shells, coins, and thanks to the transparency of the substance, you get the effect of ice or amber.
After the renovation, the apartment is pleasant to the eye and easier to breathe. But the return old furniture to its original place can spoil the impression of a fresh renovation. If getting rid of ancient interior items is not part of your plans, remodeling old furniture can improve the situation - be it a cabinet, shelves, or even updating an entire kitchen set.
A little imagination and effort will help you update your interior at low material costs. Main, Before you start work, decide what you want to do:
- Choose a style.
- Draw a sketch.
- Make a list of required materials.

And, of course, study the technology of remaking with your own hands those interior items that you decide to change. Remodeling furniture that has lost its appearance with your own hands is not as difficult as it might seem.
For work Tools required:
- screwdriver or screwdriver;
- sandpaper;
- wood putty;
- brushes or rollers;
- glue;
- wood paint;
- furniture varnish.
Preparatory work

Regardless of what style will be used for remodeling, old furniture will need to be given time for preparatory work. For example, if the object of alteration becomes old wardrobe, it will be necessary to dismantle it. To clean:
- remove all doors;
- remove drawers and shelves;
- unscrew the fittings;
- remove decorative elements.
If the cabinet does not need repair, it is not necessary to completely disassemble the cabinet yourself. It is wiped with a damp sponge and a solution of laundry soap. After this, the cabinet is wiped of moisture and allowed to dry.
Getting rid of unnecessary things
Next important step preparatory work– removal of old varnish. Things will go faster if you use a grinder.


Rare furniture should be cleaned of varnish using more gentle means. To do this, use special washes. It is more convenient when the surfaces on which such gels are applied are in a vertical position.
You can remove a layer of varnish from furniture using ordinary sandpaper. To make it more convenient to hold it in your hand, a block is wrapped in a sheet. An old chipboard-based cabinet must not only be sanded, but also degreased.
If necessary, replace old rusty bolts and screws. Small cracks are coated with wood glue. More significant faults are masked with putty to match the wood.
Painting old furniture: plain classic or two-tone modern?
The easiest way is to give old furniture more modern look, refreshing the surfaces new paint. For cabinet good choice It will be acrylic. Among its advantages:
- no odor;
- once thickened, simply dilute with water;
- you can adjust the shade by mixing colors;
- easy to wash off if necessary;
- dries quickly.

Before painting furniture, the surface must be primed. The primer is applied in a thin layer. To do this, use a roller.
The paint is applied in 2-3 layers. The next one is applied only after the previous one is completely dry. Movements of the brush on the surface are made in one direction.
When painting a cabinet with your own hands for the first time, you can start with one color of paint. A monochrome design in ivory or natural wood tones will look organic in any interior.

If plain furniture seems boring to you when the main color is applied, you can emphasize certain details with others. Having chosen a pattern, sticky tape is glued to the cabinet along its contour. paper tape. This way you will avoid unevenness and errors when painting parts.
The remodeling will not be complete unless the product is varnished. It dries quickly, forming a transparent film. Such kitchen cabinet Can be washed with warm water and mild soap. All that remains is to add the fittings.
Sophisticated shabby chic

A popular trend in furniture design today is shabby chic. This original style combines objects in pastel color scheme with a touch of antiquity, artificial wear and cracks. It is used in the interior of bedrooms, children's rooms, and kitchens.
It’s not difficult to create an exclusive item with your own hands in this style. Especially if you are going to experiment on old furniture.
Surface aging
To remodel your kitchen cabinets in a shabby chic style, you will need:
- PVA glue;
- one-step crackle varnish;
- sandpaper;
- paraffin candle;
- dark acrylic paint;
Paint to create the effect of artificial wear is applied to the cabinet using a special technique:
- One coat of paint is applied to the surface.
- When the product is dry, you need to go over it with fine sandpaper.
- The next layer is applied across the previous one.
- This procedure is repeated 3-4 more times.
- To achieve a texture with the effect of scuffs and cracks, dark paint is applied to these places.
- The top of such spots is coated with one-step craquelure varnish.
- The varnish can be replaced with PVA glue, which is applied in a thick layer to the dark spot.
- When the glue dries a little, apply the main tone and immediately dry it with a hairdryer.

Rubbing the surface paraffin candle, you can create the effect of an “old surface”

It’s easy to achieve the antique effect with your own hands in another non-standard way. To do this, rub areas with dark paint with a paraffin candle where you want to see cracks. After full painting After drying, these areas are rubbed with sandpaper. Light tone will be removed, and dark cracks will appear through it.
Decoupage of old furniture: floral motif
Decoration using the decoupage technique is perfect for decorating furniture in the shabby chic style. To do this, use paper napkins with patterns of flowers:
- Separate the top layer of the napkin with the picture.
- Carefully cut off the pattern along the contour. If you use scissors, sharp transitions of cut edges will be visible on the surface.
- The napkin is applied with the front side to the stationery file.
- Moisten with salted water from a spray bottle.
- Apply the file with a wet cloth to the surface of the furniture.
- Straighten the pattern through polyethylene using a rag.
- The file is removed, and after 1-3 minutes the napkin is coated with PVA glue.
Decoupage of a chest of drawers in shabby chic style (video instructions)
If the design looks too bright, it can be easily aged with a stiff-bristled brush and basic-tone paint. Blot the paint brush with paper and lightly move over the drawing. When the strokes dry, the pattern is rubbed with fine sandpaper.
Varnishing the work
The finishing touch will be varnishing the product. If the cabinet will be in the kitchen, it is better to choose a waterproof one. For furniture in other rooms you can use parquet.

It is important to take into account that different varnishes create a different effect on surfaces. They can be glossy or matte, silky. For a shabby chic style, the coating should not give a strong shine.
It is more convenient to work with varnish in a spray bottle. It is applied several times in a thin layer. Drips and unevenness can be easily removed with moistened fine sandpaper.
Conclusion
As you can see, remodeling furniture is not only a budget saver, but also a very exciting activity. Look at your old closet from a new angle. Surely you will see in it a wide scope for creativity, which will be limited only by your imagination.
Soviet-era furniture - walls, cabinets, chests of drawers - is not beautiful, but reliable and strong. Well, I just can’t bring myself to take it to the landfill. And rightly so. It is very easy to update it, giving it a completely new sound and modern look. Remaking cabinet-type furniture may not be very difficult: there are materials that allow you to significantly change with little effort appearance. Most easy way— change color and accessories. Everything is clear with the fittings - choose what suits your style best, and the color can be changed in two ways - paint and glue film (or wallpaper).
Remaking an old wall: changing the design
Covering old furniture with self-adhesive film is the easiest option for changing the decor. Today, film is available both plain and colored, in different colors, textures and shades. There is no point in gluing a film with a wood pattern; otherwise, it is in trend today. But plain or with a pattern - this is what can turn an old wall into new furniture. The steps are simple, but the work requires care. But the result is excellent. See two photos. The first one shows the old Soviet wall before the renovation, the second one shows it after.
Updating an old furniture wall - before and after
Now about how it was updated. Compacted furniture self-adhesive film was used, cream color, matte surface. The open part of the old wall was closed glass doors, for glass we took a translucent matte film. The edging is furniture layout (also self-adhesive) chrome color. The order of work is as follows:
- Everything that can be removed, you remove and disassemble. Remove old fittings.
- Surfaces must be clean and free of grease. This can be achieved more easily by using a soft cloth soaked in detergent for dishes. Then everything is washed off with warm water and a small amount of vinegar. Wipe with a dry cloth.
- Cut out the details. It is better to cut the film 8-10 mm larger. The remains are then cut off with a paper knife.
- Spray the part to be glued with water from a spray bottle. On a wet surface, the film can be moved if something goes wrong. You can even peel it off without damaging it.
- After removing the protective layer from the film, carefully lay it out. Once leveled, begin to smooth soft cloth from the middle to the edges. Try not to have any bubbles. To do this, you need to move gradually, without jumping from place to place.
- If there is still a bubble, you can pierce it with a thin needle approximately in the middle. Then expel air from the edges of the bubble to the hole and rub the puncture site.
- Having glued the film, take a clean thin cotton cloth, spread it on top and iron it with a warm iron (medium heat).
- We glue the trim and install new handles.
This is the sequence of work with every detail. It’s the same with glass, you just need to glue it to the inner surface. After assembly you have a renewed wall. This technique can be used for any item: chest of drawers, bedside tables, wardrobe, etc.

For example, after a successful experiment with a wall, we remodeled an old cabinet in the same way and added it to the right. Now the entire wall is occupied. You can also update your kitchen set by gluing self-adhesive film and replace the handles.
There is a second way. It is a modification of the proposed method, but it is simpler and not so labor-intensive. Only the doors are covered, not with film, but with non-woven wallpaper. The wallpaper is glued with PVA glue. To prevent the edges from riding up, the parts are cut 5 mm smaller on all sides. It turns out a kind of edging. Everything looks good (example in the photo below).

What's good about this method: it's easy to change the decor. Tired of the old appearance, they tore off the wallpaper and put on new ones. Despite the fact that the method seems frivolous, the appearance is maintained for several years. Its author even tried it on kitchen set. Only the wallpaper on top is coated twice with PVA glue. In this case, the cabinets can be washed. It is important to apply the layer of varnish evenly, without sagging; there are no other difficulties.
Sometimes wallpaper is varnished. But before you do this, try it on a scrap piece: see how they react to it.
When choosing a varnish, you need to remember that acrylic and cellulose varnishes remain transparent after drying, while polyurethane varnishes turn yellow after time. Also, polyurethane is almost not softened by solvents: it can only be removed mechanically (from wood - cleaned with sandpaper).
Dresser update
The old chest of drawers had stood for who knows how many years in the attic, but it was very strong and reliable, it had not dried out one bit, only the polish was cracked. It is much stronger than modern products. This is a feature that is inherent in old, Soviet-era furniture. It's not very detailed (to put it mildly), but after standing in poor conditions for several decades, it remains strong. Remaking a chest of drawers is more complex: two techniques were used: painting, and then decorating using polyurethane moldings and wallpaper.

Step 1. We remove the fittings and remove the old coating. In some places the polishing was scraped off, in others it was sanded with sandpaper. The chips were covered with wood putty and waited until it dried. At the final stage, everything was cleaned with fine-grain sandpaper. At the same time, the chest of drawers became the same as in the photo below.

This is after it was puttied and leveled with sandpaper
Step 2. Installation of polyurethane moldings. When choosing moldings, make sure that they are not bulky: too thick ones will look very rough on a small chest of drawers. They should be no wider than 5 cm and as narrow as possible when looking at them in profile.
The purchased polyurethane moldings were carefully cut, the corners were filed at 45°. (). The pattern match must be perfect. We glue them on PVA. For reliability, you can additionally secure it with self-tapping screws wide hats. A small recess is made under them, after the self-tapping screw is screwed in, the hole is covered with putty. Try to ensure that the putty immediately lays down perfectly (you can correct it with a wet finger), since it is problematic to clean off dried putty.

Moldings are glued and mounted on self-tapping screws
Step 3. Everything is treated with a primer. You can use PVA glue diluted with water in a ratio of 1:2. After the primer has dried, paint (two layers). For this case, water-based acrylic paint was chosen. The color is coffee with milk, although it looks completely different in the photo. Color rendering is inaccurate.

This is after the second application of paint. Cute
Step 4. For decoration, wallpaper was chosen whose coating was made using the silk-screen printing technique. Pieces are cut to the size of the inside of the frames from the moldings and glued to PVA. After the glue has dried, the entire chest of drawers is coated twice with water-based varnish.

Step 5. And the last to be installed are new legs (furniture wheels) and handles.

We install the handles and legs)) The updated chest of drawers is completely different from the one you saw in the first photo.
As you can see, complex work No. Everything is really elementary. But all processes require accuracy - the appearance depends on it. You can update in the same way old wardrobe. Get a set for the room. Stylish and original.
When updating furniture, the worst thing is if the surface is varnished. The varnish takes a long time and is difficult to remove. If the surface is smooth and the polishing is not damaged, you can apply primer for complex surfaces and paint after drying. This greatly speeds up the process of painting lacquered furniture.
If you have children and a cottage or yard, you may be interested in reading with a lot of photos. And about
How to update an old nightstand
In the photo gallery below you can see the process of restoring an old polished bedside table. First, the old polish was removed from it, puttyed, sanded and after processing it was painted twice acrylic paint. Then paper with an interesting design was glued to the doors (it was a gift paper bag). Once dry, the whole thing was coated with two coats of semi-gloss acrylic varnish.
The sequence of work is not difficult if you know how to do it. All processes will repeat the sequence of actions that you saw in the example of updating the chest of drawers. The result is also impressive.
Remodeling furniture with your own hands is a painstaking task, but the result is worth it. Below is a photo of a bedside table restored using a simple method: it is covered with embossed wallpaper, and varnish is applied twice on top.

Table makeover
Using the same technology, banal coffee table can be turned into a modern piece of furniture. In this case, it was covered with wrapping paper. It is dense, adheres well and does not become limp when applying varnish.
Before starting work on decorating the table top, the legs of the old table and the edges of the table top were painted in light color: this way it fits better with the new design style. Then the process of its transformation began.
When pasting, the panel is cut out significantly larger than the dimensions of the tabletop. It's necessary. The paper is glued to PVA and rolled with a roller so that there are no lumps or blisters. The surface must be absolutely smooth.

After gluing, take sandpaper with fine grain (it is more convenient to work if it is attached to a block). By running it along the edge, they bend and at the same time separate the excess paper.

Even cutting with a guillotine will not give you a fairly even edge. And with this method, it turns out professionally designed. There is no smell of amateur activity.

After the glue has dried, the surface is coated twice with a thin layer of varnish. It should be applied with a soft brush in a small amount. Layers are applied in different directions: first along the long side, then across.
Furniture remodeling: photo ideas
Remaking furniture with your own hands is a creative endeavor. Even something boring can be turned into something great. And it is not at all necessary to repeat exactly what you saw. Many useful ideas comes during the execution of the “project”. It’s just a pity that some of what was planned turns out to be not as attractive as it seemed. Try it, experiment. Good modern technologies allow this to be done at minimal cost.
Very often we throw away an old wardrobe, but before throwing away an old wardrobe, you need to think carefully, because you can give it a second life.
For example, an old wardrobe can be restored by using varnish, paint, film, then it can be beautifully decorated or painted, varnished and placed in the living room, kitchen, hallway or nursery. It all depends on which room needs additional cabinets, as well as on the interior.

If you don’t want to bring life back to an old closet, then you can remake it, for example, you can make a table out of it for a child. An excellent option would be to make for the kitchen beautiful shelves to place the dishes.
If the closet is large, you can divide it into parts and make small cabinets for different rooms. You can make a beautiful chest of drawers from an old wardrobe or coffee table, you can make a TV stand.

If there is no work space, then the closet can easily turn into a computer desk.

The cabinet can be taken to the pantry and arranged. The cabinet will serve as shelves for different cereals. You can make shelves for shoes from a closet, or make a greenhouse for flowers.
There are many options for creating something new and interesting from a closet, the main thing is to figure out what you want to make from it.
Remaking old furniture is not only an interesting, but also useful activity. So, let's discover the hidden charm of discarded things with the help of our creativity and skillful hands.
Ideas for repurposing old furniture. Let's arrange the hallway.
This chest had a torn top and rusty wheels, but the seat and large storage space under the lid make it ideal for a hallway.

Primer, two coats of white paint, simple cushions, and new wheels complete the look of this refurbished chest. To make the same picture on top, paint old frame match the color of the chest, insert a piece of wallpaper inside and attach the branches with glue, which will serve as a hat hanger.
Updating an old cart.

The second-hand tea table was functional, but nothing special.

Sand, prime and paint the cart to make it look new again. After drying, make a simple pattern on it with a pencil. Cut scrapbooking paper into small pieces and then attach them to your design with decoupage glue. Apply two more layers of decoupage glue to the finished pattern.
Cover for foot ottoman.

This second-hand pouf retains all the charm of furniture from the seventies. Colorful fabric and accessories presented to the ottoman new life.

Update that boring ottoman with a fun cover. Cut a circle of fabric for the top and a strip of fabric for the sides (don't forget the seam allowance). Sew the piping along the top seam of the side fabric and the frill to the bottom. Add five elasticated top pockets in contrasting fabric. Place the cover on the ottoman. Screw the painted legs to the bottom of the ottoman.
Rescuing a broken chest of drawers.

Unsightly, used and damaged, this chest of drawers languished in a thrift store for a ridiculous price.

Give your furniture originality and modern style using paint. Paint the tabletop a bright, contrasting color to the rest of the furniture and screw in painted legs. Decorate the fronts of the drawers with a pattern using a stencil. Take out the small drawers and replace them with baskets with tags. Make open shelves out of small drawers, place patterned paper inside them and hang them on the wall.
Chair update.

This formerly excellent chair had worn parts and terrible upholstery.

New paint and fabric brought this one back to life. old chair. Remove the fabric, cut off the top decorative finishing, sand, prime and paint the chair. Once dry, add batting to make the chair even taller and cover it with new fabric. Apply the monogram to the back of the chair using fabric paint using a stencil.
Let's freshen up the bookcase

The substantial but boring bookcase was functional but hid its potential.

Your bookcase will be more useful if you add a drop-down table and a door for the lower shelves. Cut the doors out of MDF, then prime and paint the bookcase and doors. After the paint has dried, hang the bottom door on the French hinges and install the horizontal opening door using hinges and chains. Screw new handles to the doors.
New lamp from old

A used tea can was on its way to landfill until it was given new life.

The design of this lamp turns an ordinary gray tin can into a bright one. decorative element rooms. Dip a paper towel into the paint and run it over the entire surface of the can. Wipe off excess paint with a dry paper towel until the original finish shows through. Once dry, drill one hole in the center of the lid and another in the back of the jar near the bottom. Following the manufacturer's instructions, install all parts for the lamp, which can be purchased at a home improvement store. Place a beautiful lampshade on top.
Damaged TV stand

Ugly TV stands like this one are a regular item at thrift stores.

To turn this old, useless cabinet into a charming one bedside table, start by replacing the rollers with new ones wooden legs. Prime and paint the cabinet. Remove the doors and cover their front parts with decorative paper. Cut out the back part from plywood and cover it with paper suitable color. Screw the new handles onto the doors and hang them back on the nightstand.
Let's repurpose trays

Trays are a must-have for 60s and 70s apartments—they're a dime a dozen in thrift stores. Boring designs have little to offer a modern interior.

Repurpose old trays into artwork contemporary art. After priming them and painting them in colors that match your interior, print patterns on magnetic paper using an inkjet printer. Cut them out and glue them onto metal trays.
Remake your bed

The discarded bed had a decorative silhouette, but the finish was dull and damaged.
The bed turns into a charming sofa. Saw the bed base in half vertically to make arms for the sofa. Cut a piece of MDF for the seat and a piece for the front crossbar. Assemble all parts using screws and glue. Sand, prime and paint the sofa. After it dries, attach an ornamental decorative strip. To make a soft base, wrap the foam rubber with batting and a blanket. Or sew a cover from the bedspread to create a finished look.
Transforming an old mirror

Deep drawers and charming patterns set this piece apart, but the finish and shape are too dark and worn.

Color and patterns transform the old dressing table V small table, ideal for small room. Remove the mirror, sand, prime and paint the table. After it dries, stick it on beautiful paper on the fronts of the drawers and on the handles using decoupage glue.
Chair transformation

Although this chair is sturdy and well made, the upholstery and wooden parts worn and tattered.

The paint and fabric give it comfortable chair absolutely new look. First remove the soft base. Disassemble the chair in the following order: inner back, wooden base, inner arms, outer arms, outer back. Prime and paint all wood parts. Using old pieces of fabric as templates, cut out fabric for each section of the chair. Attach the fabric to each part of the chair and reassemble it into reverse order. Attach an ornamental decorative strip.
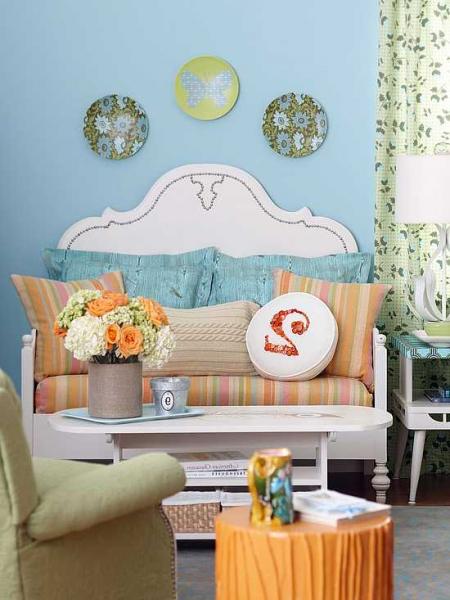
Let's decorate the table

The retro table had a good shape, but not a very attractive finish.

With a little paint and fabric, a new original piece of furniture emerged. Prime and paint the table in white. Once dry, cut the fabric the size of the tabletop plus a few centimeters so that it can be tucked. Glue the fabric to the surface of the tabletop using decoupage glue, smoothing it with your fingers to remove any air bubbles. Once the glue has dried, wrap the fabric under the table and secure it with a furniture stapler.
Let's revive the coffee table

This table is not bad, but too provincial for a modern interior.

A simple remodel will give a country-style table a more modern look. Take out the table legs and make a paper template for the new simple legs. Cut the legs from MDF and attach them to the tabletop with screws. Paint the coffee table and when dry, add a decal to the tabletop for a flirty finish.
Dressing up a chair

The ugly cane chair, out of its kit, had little chance of salvation.

Bring out the inner beauty of the chair with bright colors. Sew a fun patterned pillow using two napkins or towels. Decorate the back of a chair by attaching fabric flowers and leaves to it with yarn.
Remaking a rarity

I saw and saw the old cedar wardrobe better times. The dark, unadorned façade was featureless and featureless.

Become more emotional and sensual with your transformed furniture. Make large stencils on contact copy paper by enlarging the words or patterns on the computer, or freehand the designs on contact copy paper and cut them out. Peel off the back and glue your design onto furniture painted white. Paint the cabinet in brown and let it dry, then remove the contact copy paper. Attach a bow shape to the doors and complete the design with yarn and wool.