Earlier we already started making partitions, the beginning. Since the time for finishing the house is formed in this way: in the summer we do exterior finishing and yard affairs, and in winter - internal, then in accordance with these motives, and also with the arrival of funds for it, he began further work. More precisely, he continued installing the electrical wiring...
And I immediately encountered the problem of running the wires inside the corrugation plasterboard walls not entirely simple, not all profiles have special holes for wiring, and their sizes are limited, and their locations are inconvenient, so you need to punch holes yourself in the right places, in addition, I, as a reinsurer, was very worried that the corrugation would slide along the torn edges holes in the profiles, in order to avoid accidental damage to the corrugation and cable, each pass in the profile was made through a rubber hose...
To begin with, I pulled all the wires to the future location of the distribution panel, from the main panel I used a 10-amp machine, from which a wire was drawn to the 2nd floor, for LED lighting more than enough...
At first I made do with 3 6 ampere circuit breakers...
In the future, we will also add an RCD to the bathroom, even a “wet room”; a DIF automatic device will be installed on a group of sockets, one of which also exists in the bathroom; we will also add an RCD to the lighting group.
Bathroom from the inside, ventilation duct, penetrations of ventilation pipes and sewerage are visible, 3 ventilation pipe (corrugation) is still plugged with a plastic bag. As it should be in “wet” rooms, we sew it up with moisture-resistant gypsum board...
High quality interior decoration attic will turn it into extra room, not devoid of warmth and comfort
In our previous articles, we described the possibility of converting an attic into an attic and promised to tell you about the next stage - finishing works Oh. Finishing the attic with your own hands is a completely doable task, especially after you have dealt with the installation of the rafter frame and production roofing works. Expensive finishing material in current realities it is no secret to anyone. But by using little construction tricks and doing everything ourselves, we, of course, can save a fair amount. Therefore, armed with a set of necessary electrical and hand tools, we can get to work. But first, it would be nice to think through the entire process, draw up a work plan for yourself and calculate the required amount of consumables.
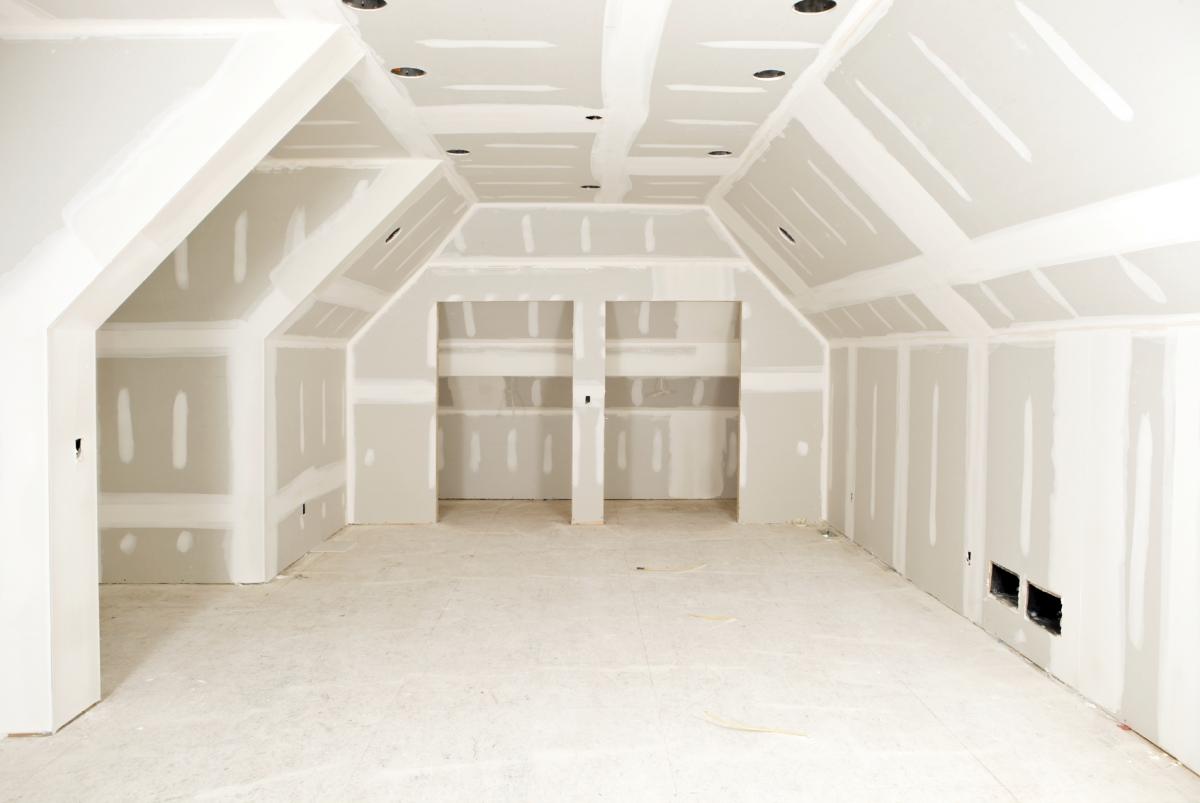
Floor, walls, ceiling
Let's start with the floor. Having previously taken care of the thermal insulation of the interfloor space mineral wool, let's start installation. We have ready-made logs on which the slabs are laid. You can use a CSP board (cement-bonded particle board) or OSB (oriented strand board). This coverage option will allow us to further improvise with the main (final) floor covering: from standard, boring linoleum to everyone, to decorative laminate with a wide choice of colors and textures. You can, of course, follow in your grandfather’s footsteps and close the floor edged board 25-40 mm. It will also be nice, especially if it is pre-treated and then covered with stain and varnish.
 OSB finish considered to be slabs universal option
 To decorate the walls, as well as the under-roof space (), all the above materials are used, but you can also add plasterboard to them - a material that has proven itself with the most the best side ease of processing and installation. This entire motley row of slabs and sheets is attached without any problems with ordinary self-tapping screws. The slabs are cut to size with a jigsaw, and the GC sheets construction knife. Therefore, there will be no problems with installation, despite the squaring of the lining, which may initially be intimidating. It is recommended to pay special attention to slopes skylights, if any. This is not a flat plane, so you need to be extremely precise when marking. It doesn’t matter at all which of the listed materials you use when sewing up the inside of the attic. The main thing is that everything fits correctly, without large gaps or protruding irregularities. All this can subsequently lead to excessive consumption of building mixtures.
Advice!
If suddenly, as a result of an uneven cut when cutting DSP or OSB boards, a gap has formed at the joints (which happens when professional use jigsaw), and there is no way to use a new sheet, this technical flaw can be filled with a mixture of putty and sawdust during the puttying process.
 The best way finishing the attic slopes - facing with plasterboard slabs
 Installing windows
The next step, of course, will be the installation of translucent structures. In each attic, their number and configuration naturally differ. Some even completely glass the gables, some limit themselves to just windows, and in some places they install glass door blocks to exit to the balcony. We will not raise the topic of dormer windows now. You can learn about this from other articles on our website. We will try to describe, in as much detail as possible, the sequence of installation of vertical translucent structures using the example of installing a banal PVC window. First you need to know what the window actually consists of. Its components (standard for all window, door and stained glass translucent structures):
- PVC frame made of extruded profile with galvanized metal reinforcement inside;
- double-glazed window (two or three glasses connected into a monolithic, sealed block. Glasses can be of different thicknesses and carry different functional loads);
- plastic beads with rubber seals;
- inserts for double glazed windows;
- accessories, where provided.

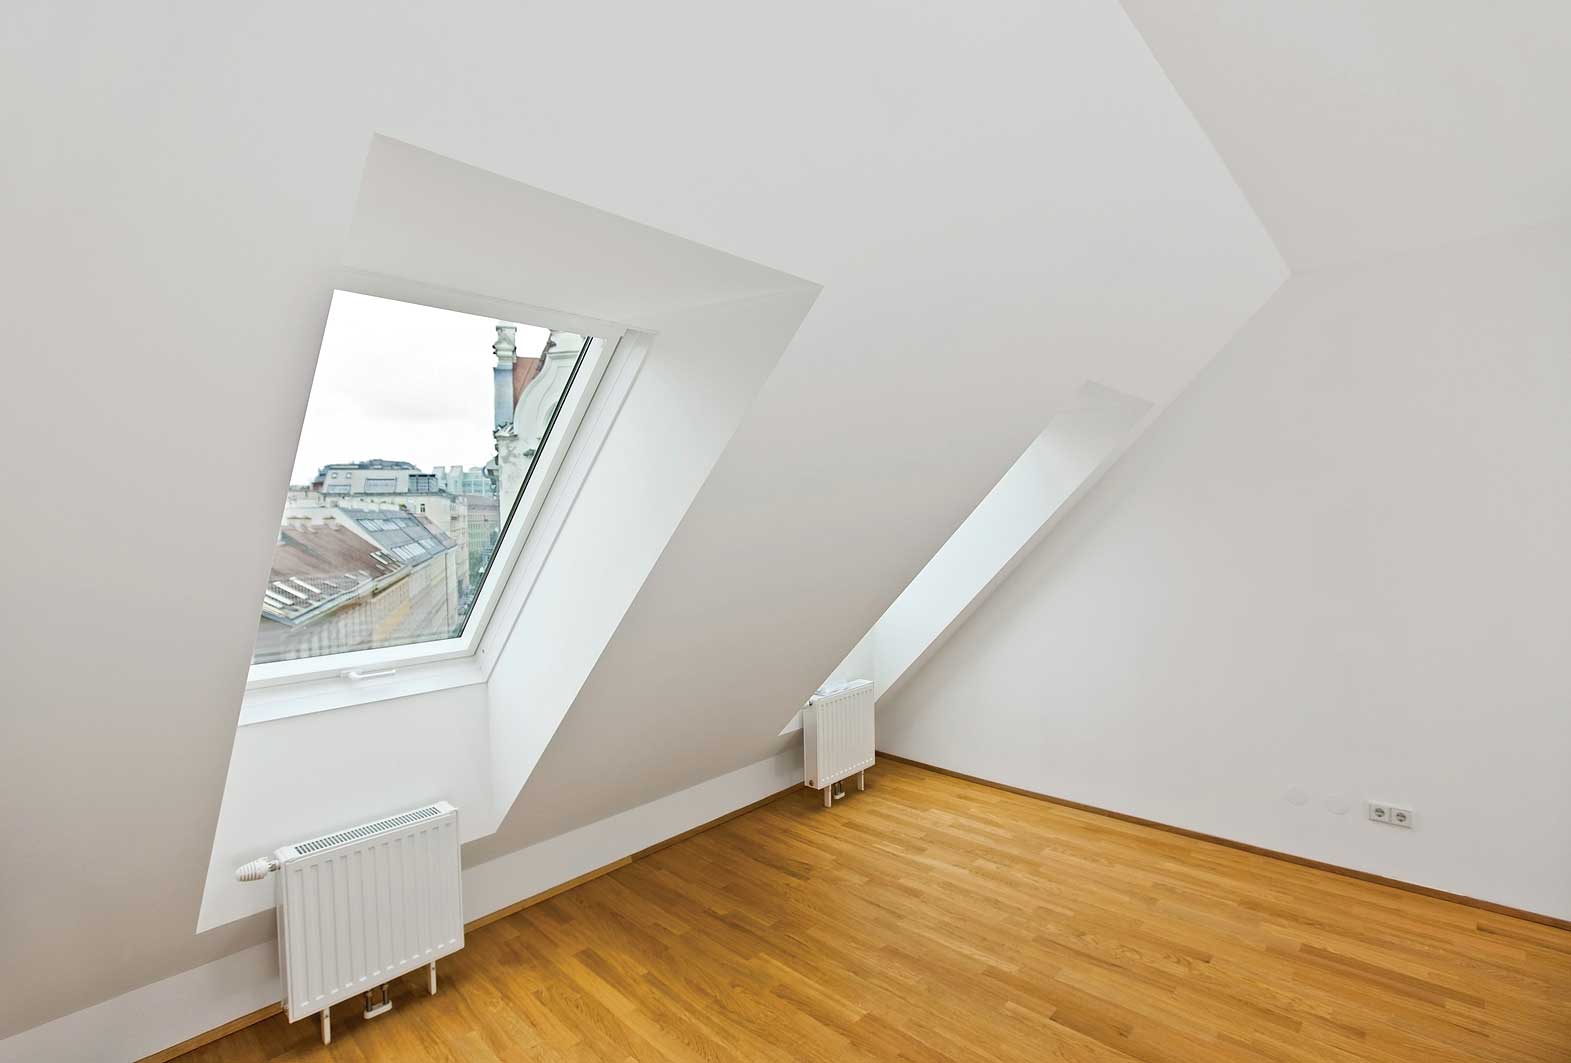
 Dormer windows are an excellent source of daylight
 For self-installation translucent structure, in our case a window, we will need the following tools:
- hammer;
- Phillips screwdriver (or screwdriver);
- level.
Having placed the window against the wall, remove the glazing beads, prying them up sharp end knife blade and using it as leverage. Carefully remove the glass and plastic inserts. We insert the light frame into the opening, and using a level we align it horizontally and vertically, making the appropriate marks with a pencil. Make sure that the gaps between the frame and the wall around the perimeter are approximately the same. Using a metal drill (8 mm), we drill the PVC profile (and with it the reinforcement profile) halfway. If our base is wooden, and self-tapping screws are used as fastening elements, then use a 6 mm drill for the second half. Using a screwdriver or screwdriver, screw the self-tapping screw into the hole until it stops. Make sure that when tightening the screw, the frame does not deform. To do this, use wood scraps as substrates.

 Installation of roof windows should be carried out only according to the instructions and with constant checking of the quality of installation
 Advice!
For fastening into brick, foam concrete or concrete wall best to use anchor bolts. In this case, the holes are drilled through, taking into account the length and diameter of the anchor.
You can also use mounting plates inserted into the grooves at the ends PVC profile. In this case, the profile is not drilled. The plates are attached to the slopes and subsequently covered with decorative inserts with mandatory insulation. We check the level for any distortions in the frame and you can install a double-glazed window. We put the plastic inserts back, put the glass on them and secure it with glazing beads. If you do not have a special rubber hammer for such manipulations, you can use a block of soft wood and a regular hammer. If the glazing bead fits very tightly, bend it and insert the ends first and, moving towards the middle, carefully seat it in place. After the double-glazed window has taken its place, we can begin foaming the perimeter. There is no rush in this matter. The foam should fill the gap evenly. After standing (at least a day), the excess can be easily cut off with a construction knife. All that remains is to adjust the fittings (where they are provided). Our translucent structure is installed, and you can start working on the slopes.

 Correct installation roof window will ensure its reliability and durability
 A few words about wiring
We should probably go back a little and say a few words about electrical wiring. The wiring is done immediately before sewing.
Important!
The wires are corrugated to provide additional safety and only the ends are brought out.
The holes are cut using a special drill attachment. The wires brought out are twisted into a knot. It is worth noting that any electrical installation work start with drawing up a wiring diagram. Only careful planning of the location of lighting fixtures and power supply points will protect your walls from unnecessary, unnecessary holes.

 Electrical wiring in the attic is a factor of increased danger, because the roof structure mainly consists of wooden and, therefore, fire hazardous elements
 Well, let's assume that you did an excellent job with the attic cladding, and wires are already peeking out of the neat holes, waiting in the wings. And translucent structures pleasantly please the eye, simultaneously protecting from drafts. Time to move on directly to the finishing work. For this we don't need much:
- electric drill with a nozzle for kneading mixtures;
- roller;
- spatulas (from small to wide, usually 3-4 of different sizes are used);
- aluminum corners (for external corners);
- primer;
- putty.

 Sealing joints and seams of drywall on walls and ceilings
 Can be used immediately on smooth walls finishing putty, having previously carefully primed the entire surface. Should be paid special attention for mixing construction mixtures. The putty should be brought to the consistency of thick sour cream. To do this, after kneading it with a mixer once, we leave the mixture for about five minutes and only when it is properly saturated do we knead it completely. Add water in small doses so that the putty does not turn out too liquid and “float”. When the mixture is ready, taking a wide spatula (40-50 cm) in one hand and a narrower spatula in the other, apply the mixture over the entire width of the wide spatula, as if using strokes. Now take a wide spatula working hand and carefully apply a layer of putty to the wall. You should get an even layer 1-2 mm thick. After repeating this manipulation several times, and eventually obtaining about a square meter of “closed” area, we moisten the spatula with water and smooth out the resulting irregularities. We strengthen the joints of any material with tape putty mesh. Don't worry if you don't succeed the first time. You need, as they say, to “get your teeth into it.”
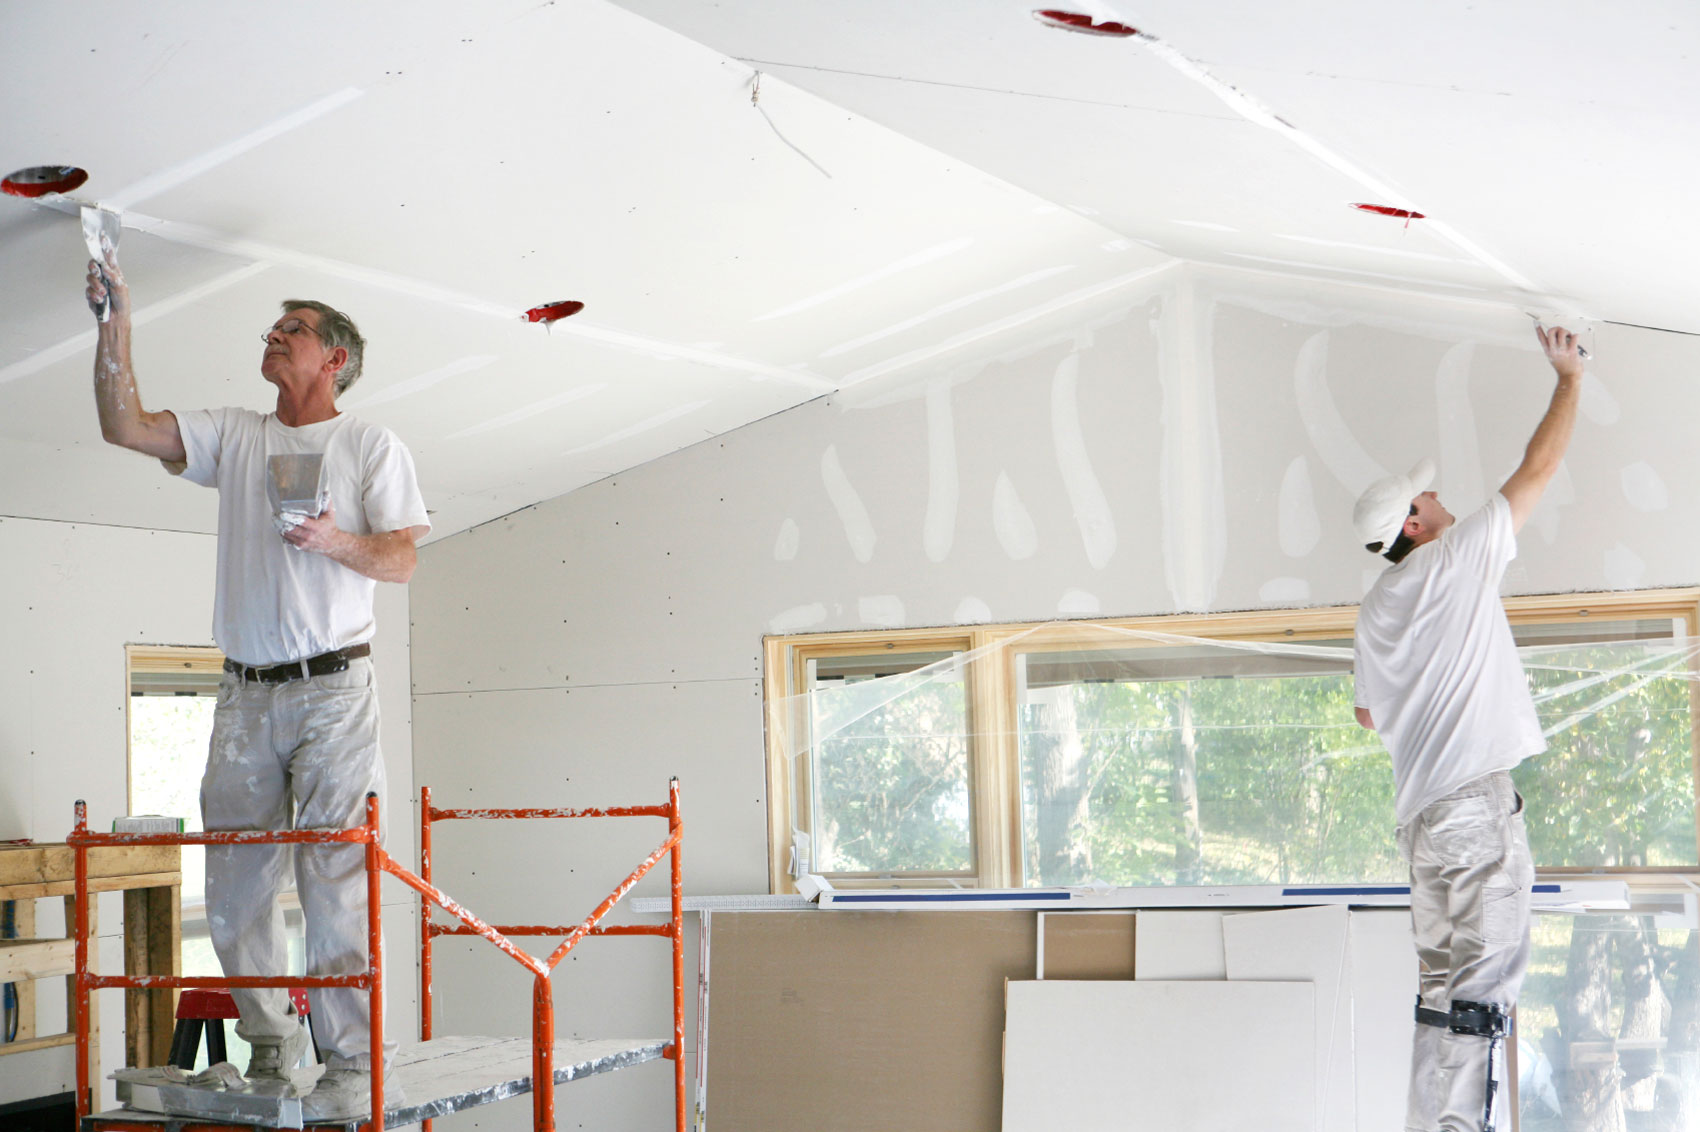 The service life of the attic space depends on the quality of the putty.
 Important!
An important nuance is that the spatulas are always clean and that in the bucket (or any other vessel) where you are preparing the mixture, there is no putty left dried out from the last batch of putty.
This will lead to the formation of stripes, scratches and other unpleasant “surprises”. Therefore, do not be lazy to thoroughly wash the container and spatulas after each batch. If you do develop such defects, do not rush to correct them “raw”. Let the putty dry. Afterwards, sand the desired area with a sanding mesh, and then carefully apply the putty with a small spatula. After it dries, you will see that there is no trace left of the grooves. All that remains is to go over this place again with the sanding mesh. A flat and smooth surface is guaranteed. On such a surface you can apply paint, glue wallpaper, ceramic tiles, and, in principle, anything. Decorating a room in the attic or in any other room includes many works, each of which is very important to achieve the final desired result, and one of them should not be neglected.

 For finishing surfaces are recommended to be used light colors, well scattering light in all directions
 Another option is wood finishing. By and large, you can do without stitching here. DSP sheets, OSB and GC. You just need to secure it cross beam between the elements of the rafter frame. A size of 50x50 mm is quite enough. You can attach it using metal corners with holes for self-tapping screws. Having prepared such a frame, you can safely begin sheathing. Usually clapboard finishing is practiced, but you can find other, more interesting options, for example, imitation of a log house. The tree is selected completely differently than for load-bearing structures. Here, the more knots, the better.
Important!
At self-training The required stages of wood are sanding and treatment with an antiseptic.

 If you want to organize a design in an eco-style, then finishing the attic with wood will suit you
 Coating with stains and varnishes, as they say, is a matter of taste. Natural wood was and remains one of the most popular materials for finishing work, especially in country houses. Its natural structure will not leave anyone indifferent, the main thing is to present it correctly.
Has your attic already acquired a residential look? Well, almost residential. Now is the time to do the lighting. We install sockets, switches and lamps in the holes prepared in advance. When the lighting is turned on, the interior decoration of the attic walls will take on a residential and finished look. And, in general, trust your imagination and do everything according to technology. The results will pleasantly surprise you.
An attic is a non-standard room that can be decorated completely differently from other rooms in the house. Its advantage is the natural light coming through the roof window.
However, not all attic rooms have the opportunity to install a window, and it is not always comfortable to depend on the whims of the weather. Therefore, it is better to take care of enough light in the dark and on cloudy days. To do this, you need to successfully place lamps, lamps or a chandelier in the most suitable places in the attic.
We will tell you in this article how to determine the optimal types of lighting and their best location.
Types of lighting fixtures for the attic
The attic space can be filled with light using one or more sources. General lighting is provided by a chandelier with several bulbs. Local lighting devices are especially popular when illuminating such premises. They come in several types.
- Sconces, wall lamps, portable lamps.
- Spots for ceilings and walls. These are directional lighting fixtures that are located on a bracket. They can be rotated in different directions and brightness adjusted.
- Floor lamps. Their ideal place is near an armchair or sofa.
- Point light sources: they are used both independently and as additional lighting. Indispensable for small area space. Installed in plasterboard and suspended ceilings.
- Crystal light diffusers. They favorably emphasize decorative elements. Different sizes refracted elements of the lamp creates the effect of crystal reflections.
- LED lighting for the attic. With its help, you can organize lighting for mirrors, shelves, beds, and the perimeter of the ceiling. It is a special tape that can be single-color or multi-color.
- Fiber optic threads. They consist of a stationary storage source and lighting fibers. With their help you can decorate the starry sky and other design solutions.
- Fluorescent lamps. Installed in suspended or plasterboard ceiling and create the effect of scattering light rays along the perimeter of the ceiling. This is an option that saves electricity.
You can combine several local lighting devices with the main light source. For example, installing a chandelier in the attic in the center and spotlights along the perimeter of the ceiling will make the room evenly illuminated over the entire area.
How to choose a lighting fixture for the attic

- To the room on attic floor seemed light and spacious, even if it actually is not, you need to pay attention not only to natural and artificial lighting, but also to the decoration of furniture and walls.
- Here are several ways to organize lighting in the attic that will make the top floor more comfortable:
- you can install spots or sconces and direct the light flux to the wall;
- spotlights installed around the perimeter of the room can visually increase the height of the walls, and lighting near the mirror also further expands the boundaries of the room;
- light sources can be evenly placed inside the room so that there is light in all parts of the room, but if the attic is divided into zones, then their lighting must be appropriate;
- the work area needs bright light, which falls from the general and local level, and the space around the bed is often decorated with dim lighting;
- if your house is hidden under gable roof, then it is better not to use a chandelier for the attic, this way you will not concentrate attention on the narrowed space, it is preferable to use floor lamp a chair and a bedside lighting fixture;
- if the ceiling has a multi-level structure, then a combination of spotlights and LED or neon lighting will fit perfectly;
- You can hang identical wall lights on both sides of a mirror or picture.
Lighting design for an attic with a sloping ceiling

- For an attic room with sloping ceilings, lighting with point sources is suitable. In conditions limited space It is better not to use general lighting concentrated in the center of the ceiling, as it further narrows the area of the attic room.
- Conventional lamps are large in size, while diode light sources do not take up much space. They illuminate the room quite well in places where it is needed.
- Lighting fixtures are often installed on inclined surfaces of the attic. In this case, the play of light will make the space of the room bright and harmonious.
Attic lighting for different styles

Lighting the attic will help enhance the atmosphere of the overall style of the room. The play of light using the refraction of rays can be created using mirrors, glass and other reflective surfaces. Chandelier bottles, floor lamps and lamps should be chosen in accordance with color scheme rooms or use them to create bright contrasts.
Classic attic style
If the attic is decorated in an antique or classic style, then a chandelier suspended in the center of the beam will become a bright accent. Such lighting will help enhance the effect of high cost from the presence of antiques in the interior of the room.
Modern design trends for the attic
- If the attic is decorated in Art Nouveau style, then fluorescent light sources built into the suspended ceiling will be a successful addition. You can also use spotlights, which can have rotating and stationary designs.
- When installing stationary lighting fixtures, you must immediately determine the optimal direction of the light rays. Spot rotators allow you to change the direction of the light if necessary.
- Glass and metal elements in the design of the attic also successfully emphasize current trends in high-tech style and will create glare when lighting is directed in their direction.
Eastern attic style
- Romantic attic setting in oriental style should be accompanied by very delicate and subdued lighting. It can be made in the style of openwork lanterns hung on the walls, carved floor lamps, as well as massive elegant chandeliers, if the space of the room allows.
- To decide on the type of chandelier in the attic and make good combination light and room furnishings, check out the photos of various design solutions attic interior.
- Local lighting sources visually expand the space of the room. Sconce, table lamps and floor lamps put bright accents on pieces of furniture and decor and add completeness to the interior.
Lighting of the attic - children's room

- When designing a children's room, it is worth considering that more light will be needed here than in other rooms. First you need to correctly divide the room into zones. In an area where the child will be active, it is worth placing many light sources. Moreover, they can be arranged in the form of celestial bodies or other decorative objects.
- The child's study area also needs bright lighting. Here it is appropriate to install a table lamp in a discreet design so that it does not distract attention from educational process. The brightness of the light should also not be excessive, otherwise it may cause eye strain.
- For children, it is recommended to install controlled lighting in the study area. In this case, it should be possible to regulate not only the direction of the light, but also its intensity.
- It is convenient to use lamps with a bending leg or with a mount, with which you can attach the lighting fixture to any convenient surface. You can also opt for a spot mounted at the bottom of the book shelf.
- The sleeping area of the children's room needs softer and subdued light. Decorative lamps that can burn while the child falls asleep are appropriate here. The night light can be made in the shape of an animal or plant, as well as another object that is pleasant for the baby.
- If there will be more than one child in the room, it is recommended to install a bedside lamp for each of them. This will help create a friendly atmosphere between children and evenly divide the space of the room.
Safety rules for lighting the attic - children's room
- It is worth considering that if there is a children’s room in the attic, then often balls, toys and other objects will fly near the ceiling, walls and lighting fixtures installed in these places.
- To avoid injury, you need to choose lighting options that are suitable for children.
- All lighting fixtures in a child's room should be made of unbreakable material, such as metal or fabric. Chandelier bottles should be installed so that the bulbs are hidden inside.
- If the room is infant, then the light from the ceiling should not be too bright, because the baby will look at bright light sources for a long time.
Lighting for a study room on the attic floor

The attic, equipped as a study, must have high level illumination This can be achieved thanks to several levels of light, one of which will definitely be located near the desktop.
Lighting for the leisure area in the attic
- Many families use the attic space to spend time together. A home theater is often installed here. To ensure that watching movies only brings pleasant sensations, the attic windows should be closed from daylight using blinds made of dark-colored fabric.
- The cinema area looks good in the lighting of laconic spotlights.
- A gym can be equipped on the attic floor. In this case, it is correct to install 2 light sources: central and side. Additional lighting should be placed near the mirror, then in its reflection you will clearly see your actions.
How to properly install electrical equipment in the attic
- Now let's move on to the more prosaic part when designing attic lighting. It should not only be beautiful, but also safe.
- Electrical wiring of an attic room requires honed skills, since the roof most often consists of wooden beams, prone to fire when provoking factors occur.
- To eliminate the possibility dangerous situation, it is important to consider the following points:
- metal staples should not be used to secure wiring to wooden elements of the attic due to the risk of damaging the insulating layer;
- it is important to use a special tube with a smooth inner surface to cover the electrical wire, this will help minimize the likelihood of a fire as a result of a power surge;
- It is best to use a three-wire cable; if the choice falls on single-wire or multi-core cables, then you need to be sure of their insulation;
- It is best to entrust the installation of electrical wiring to a professional.
- Watch video instructions on the Internet that show how to properly organize attic lighting.
Work plan for attic lighting
- Before installing electrical wiring, you need to sketch out a diagram indicating the installation locations of light sources, sockets and other electrical appliances. In this case, we calculate the number of sockets using this simple formula: 1 piece for each electrical appliance + 2 additional sockets.
- After this, we determine the amount of cable we need. For every 20 sq. m. the room will require at least 1 cable.
- For sufficient lighting of the attic room, taking into account the increased load on the electrical network, the following limitation is used: 10 points for light sources and 6 for sockets.
With good attic lighting, this room can be equipped to suit almost any need. With the help of light and thanks large selection lighting fixtures can hide a small area of the room or play up the triangular shape of the roof, as well as direct attention to decorative elements.
Electrical wiring in the attic is a factor of increased danger, because the roof structure mainly consists of wooden and, therefore, fire hazardous elements. Therefore, installation of electrical wiring requires professional knowledge and skills, as well as extreme caution.
The main difficulty is that the space between the wooden elements of the roof structure is usually densely filled with thermal insulation. Electrical wiring, in turn, has virtually no ability to dissipate heat and, therefore, can heat up, especially from high current.
Adding to the difficulties is the fact that there are no clear domestic rules and standards regarding the installation of electrical equipment in under-roof spaces. Therefore, in the process of installing an electrical network in the attic, you should be guided by existing GOST standards and, of course, common sense.
* for installation of lighting fixtures - copper wires with a cross-section of at least 1.5 sq. mm;
* for installation of sockets - copper wires with a cross-section of at least 2.5 sq. mm;
* to protect wiring - fuses with a rated current of 10A;
* to protect sockets - fuses with a rated current of at least 16A.
Besides:
* network installation should be carried out avoiding the use distribution boxes, i.e., each cable must be routed from one power source to one “point”;* the power supply must be provided separately circuit breaker with trigger setting 30 mA.
For electrical wiring installed in the attic, it is recommended to use a three-wire cable; in extreme cases, three single-wire cables laid in a special protective casing or tube. If necessary, wiring can also be installed using double-insulated wires or multi-core cables.
Note:
Electrical wiring laid on a wooden base should under no circumstances be secured with metal clamps. Such fasteners not only do not provide the recommended distance between the wire and the base, but can also damage the insulation.Creating a plan
Before you begin installing electrical wiring, you must carefully consider the future needs of your users. You should create a plan diagram indicating the installation locations of lighting fixtures, sockets, etc. If some "points" are designed to power too powerful devices ( electric stoves, convector heaters, fan heaters), separate wires must be allocated for them. If you plan to install a water heating boiler in the under-roof room, power to such a unit must be supplied separately.The number of “points” for lighting fixtures depends on the purpose of each individual room. But the number of sockets can be easily calculated in advance - each electrical appliance requires a separate socket, plus two spare ones.
After counting required quantity"points" we can begin to determine the amount of cable we need. On average, there is one cable for every 15-20 square meters of living space. Well, there can be much more wires in the under-roof room.
Many sources clearly indicate maximum quantity"points" for one electrical network. Typically this includes 20 lighting fixtures and 10 sockets. But in the attic, lighting fixtures are located at a higher height than in other living spaces. Consequently, for high-quality attic lighting, it is necessary to use more powerful lamps. In this case, to reduce the load on electrical wiring, the following limitation for electrical networks should be accepted: 10 points for lighting fixtures and 6 for sockets.
Cables intended to power particularly powerful devices should terminate in only one connector. This primarily applies to refrigerators, freezers etc.
Laying wiring
Next preparatory stage consists in determining the routes along which the wiring will “go”. There are no special requirements for both routes and locations for installing “points”. Horizontal electrical wiring routes are carried out at a height of 10 - 30 cm from the floor, or at the same distance from the ceiling. Typically, the attic is not easy to route in the upper area, so the wiring is placed in the lower area. Vertical sections are laid at the joints of walls or along openings (for example, doors or windows). For lighting fixtures mounted on inclined surfaces, the wires should be laid along the fixed elements of the roof structure.Lighting points
It is not difficult to determine the places where the lamps will be located. You just need to imagine the future layout of the room. A pre-drawn plan for arranging the room can make the task even easier, since the location of the furniture often determines the type and intensity of lighting. It is important to remember that artificial light should not cause discomfort, and lighting devices must be protected from possible damage.For stable, uniform illumination of the attic room, lamps are placed as high as possible. As for other lighting fixtures - good decision There will be placement of “night lights” near the attic windows. Thus, artificial light can complement and replace natural light. Wires leading to pendant lamps or sconces must be “hidden” using special recessed plastering boxes. If the lamps are planned to be integrated into the ceiling or walls, then special boxes that remove heat from the lamp and wiring should be installed in advance. This is especially necessary when using halogen lamps, since they can get quite hot.
Sockets
Sockets, first of all, must be easily accessible to users. They are usually mounted at a height of about 20 cm above the floor. One socket should be placed immediately at the entrance to the room, under the switch. Other sockets, depending on their purpose, should be located in places where electrical appliances are used.In addition, a certain number of sockets must be installed in places that may be useful in the future (for example, when changing the purpose of the roof space).
Many manufacturers offer special blocks that can accommodate several connectors for devices of various types - for example, a block that includes 3 sockets, 1 computer output and 1 television cable.
Switches
The placement of switches depends on the layout of the attic. Switches are located at a height of 1.1-1.3 m from the floor, as a rule, at the entrance to the room, as well as in other easily accessible places. Recently, they are increasingly being installed at the height of the lowered arm. In order to minimize risks, the connecting cables of the switch should be brought to the switch and already there connected to the wires leading to the lamps. There is another connection method, which consists of connecting the cable to the connectors of the switch itself, because modern switch models are equipped with double clamps.Cable route
Electrical wiring should be laid along the simplest and shortest routes. Depending on the architectural layout of the attic, the route may run directly behind the plasterboard ceilings or in an unused space, for example, between the suspended ceiling and the roof structure. Wires are always attached to stable structural elements.If the electrical wiring route will run in unused space, it must be laid in special channels so that the wires do not hang down. After completing the installation of the plaster wall fasteners, you should first install the cable channel, and only then lay the wire itself into it. Each wire must be securely insulated on both sides.
Power wires for pendant lighting fixtures must be routed above the suspended ceiling. If suspended ceiling it is not provided in the attic, it remains to carry out the electrical wiring in the lower zone - at a height of 10-30 cm above the floor. In order to simplify your work in the future, you can immediately install three channels (one above the other), intended for different purposes - for sockets, lighting, and communications.
In this case, the sockets will be located at the level of the wires intended for them, and the power supply to the lighting devices will pass in vertical directions along the stationary elements of the roof structure through special tubes or using fasteners.
No matter how rationally we design the route for electrical wiring, in some places it will be necessary to run the cables not along, but across the elements of the roof structure. If it is not possible to install wiring behind these elements, then special holes will need to be made in the roof structure.
Drill wooden elements and it is not recommended to pull wires through the resulting holes, as this can damage them. It is much better to make a die cut into which the cable will then be inserted. In any case, regardless of the location and method of creating the hole, the wiring must be protected by a special tube with a smooth inner surface and a diameter that allows free movement of the cable. They can also be protected with additional insulation, for example, heat-shrink tubing, and secured in the created cut using polyurethane foam. Remember that electrical wiring should never come into contact with sharp wooden edges, and especially metal elements, in particular with plasterboard wall cladding profiles.
The attic is a great opportunity to increase your living space. The room under the roof of the building can be equipped as a bedroom, living room, children's room, recreation room, study, kitchen or bath. It would be a good idea to provide a balcony or loggia at the roof design stage. They will provide the attic with high-quality ventilation and additional inflow fresh air and fill the room with natural light.
 So that the interior design and good lighting attics play an important role. When designing comfortable conditions in the attic floor, it is necessary to take into account not only the configuration of the apartment, the shape of the ceiling, but also the number of lighting fixtures and windows, as well as their placement. After all, it is very important that sources of artificial and natural light were installed correctly.
During the day sun rays penetrate through hatches and window openings, which are located on a vertical or inclined plane of the roof. But on cloudy days and in the evening it comes to the rescue artificial lighting. It not only has a functional, but also a decorative purpose. Correctly chosen lamps can change or emphasize the style of interior decoration and hide imperfections.
Some lighting rules in the attic
In rooms with sloping ceilings, where, on the one hand, they are very high and low, on the other, it should be especially light. This must be taken into account when selecting lighting fixtures, the color of trellises or paint for walls, and the color of material for a stretch ceiling.
 If the room is small, then a combination of shiny stretch fabrics with ceiling and wall lamps directional light will visually push the walls apart. And the installed lighting from LED strips or fluorescent light bulbs around the perimeter of the system will help make the apartments taller.
They will visually reduce a large room on the attic floor, but at the same time it will look cozy, incandescent or halogen light bulbs, due to the warm yellow light.
In order for the entire area to be evenly illuminated, you need to carefully consider the number and location of lighting devices.
Lighting for balconies or loggias
Many designers recommend that when choosing the type of lighting on a loggia or balcony, limit yourself to local light only. Although this is not a dogma. But there are examples when they are used as ceiling lighting for a loggia, a candlestick with lace, a closed lampshade, a neon lamp for a balcony or a decorative lantern made of wrought iron. The main thing is not to forget that lighting devices for the balcony should be in harmony with interior decoration adjoining room. Gentle warm lighting from a floor lamp or sconce will create comfortable atmosphere, and shelves with cabinets can be illuminated separately.
 If the loggia is adapted into a recreation room, then you can hang wall sconces. An interesting solution would be to install hidden light sources that are disguised as decoration. Flat sconces that are the same color as the walls look beautiful. If you like to read on the balcony, then it is appropriate to attach lamps above the chair. And diffused lighting will help you fully relax and unwind.
Instead of a sconce, you can use a floor lamp. If there are no separate sockets, then the only correct solution to the problem of lighting the loggia is an autonomous lighting device on a stand. It can be complemented with a table lamp with a textile lampshade that matches the interior.
When decorating a balcony space or loggia in modern style You can use spots installed on a metal strip equipped with halogen lamps. With this design you can adjust the direction of the light. This option is suitable for a balcony greenhouse.
 There are always different shelves, racks and cabinets on the loggia, and they can be illuminated with a track system consisting of pendants or lamps on clips.
If the balcony space is small, then you can visually enlarge it with the help of good illumination of walls made of material with high reflective properties.
On a small balcony, it is not advisable to hang lighting fixtures in the middle of the ceiling, as the space will visually shrink.
Built-in halogen lighting fixtures are very popular and effective these days. With their help you can achieve bright illumination of the loggia. Local balcony lighting will compete with conventional chandeliers and lamps. To increase the space on the loggias, they combine the usual and the local, for example, around ceiling lamp attach point ones. They are also installed on walls.
Types of light sources
The design of lighting gadgets on the attic level in most cases is determined by performance characteristics premises and the general style of interior decoration.
 For basic lighting, you can use a chandelier or built-in lamps with fluorescent lamps. If the decoration of the apartment is in a classic style, then it is better to fix the hanging candle holder on the central beam, and round ceiling panels are suitable for a minimalist design.
They will look beautiful on suspended ceilings attics rotating and stationary illuminators small size. When installing fixed illuminators, you should take into account the direction of the light, because their rigid fastening will not allow you to change the line of the light flux in the future. To solve this problem, you can use spots on special structures and change the light level during the day.
We must not forget that in addition to full illumination, there is also local illumination. Auxiliary lighting of individual zones will visibly expand the rooms in the attic. With the help of local light, you can highlight important areas in your home, various elements of interior design or basic furnishings.
 Local lighting devices include wall or spotlights, table lamps, sconces, floor lamps, neon and LED lighting.
We must not forget about emergency lighting. Low wattage light bulbs are used in night lights and staircase landings and flights.
When planning decorative lighting for the attic level, you must first pay attention to ensuring that the room is not dark and gloomy. A combination of general and local light sources is an excellent option for such a room.
Spotlights in combination with neon or LED backlight on multi-level ceiling. If there is a picture or a mirror, you can illuminate them by hanging sconces on both sides, and a floor lamp near an armchair or sofa will create an intimate, calm atmosphere.
Attention to electrical wiring
Light is not only light bulbs, but also live cables. And the attic is most often built of wood and insulated with thermal insulation material. Electrical wires tend to heat up, and they can become a source of fire. Therefore, it is better to contact a professional installer.
Before laying electrical wiring, you must know the exact number and placement of lighting devices, but at the same time remember about the interior design and furniture. Therefore, you first need to draw up a diagram of the location of balcony lamps, chandeliers, switches and additional sockets in case the furniture is rearranged.
To conduct a power line, experts recommend using a three-core conductor. The main condition: it is strictly forbidden to attach electrical wiring with metal clamps to a wooden base. Such fasteners can damage the insulating material and will not provide the required gap between the cable and the base, so it is advisable to hide the wiring in a special protective tube or casing. It is also necessary to avoid installing distribution boxes on the attic floor; therefore, it is necessary to start laying electrical wiring directly from the panel.
To provide lighting for the loggia and balcony, electrical wiring is laid in exactly the same way as in the attic.
Video about lighting in the attic