There was a time when it was believed that growing melons was a lucky opportunity for residents of the southern regions. However, the achievements of breeders have expanded the geography of growth of these heat-loving false berries. New early ripening varieties of melons ripen successfully on summer cottages Urals and Siberia. Today we will learn in detail when and how to properly plant melon seedlings in order to get strong and healthy seedlings.
Melon belongs to the pumpkin family and, like cucumbers, does not tolerate even slight drops in temperature. Therefore, growing false berries seedling method, you should pay attention to the following parameters.
- The air temperature during the day should be between 25-30°C.
- At night it should not fall below 15°C.
- Optimal soil temperature is +20°C.
- The threat of return frosts must be completely eliminated.
In Siberia, where the summer is short and quite cool, the use of greenhouses will help to grow the melon crop. In addition, preference should be given to zoned varieties. They are more adapted to weather conditions region and have early dates maturation. The seedling method of cultivation also shortens the period of crop growth in open ground.
The melon variety has the same parameters “ Barnaulka».
« Early 133" refers to the mid-season ripening period. Two months should pass from germination to fruit harvesting. Weight does not exceed 2 kg.

Melon varieties for the Urals
In the Urals, the climate is a little milder, but it is also impossible to grow a late-ripening melon variety here. Therefore, early and mid-season types of this melon crop are most suitable for growing in open ground and greenhouse conditions. An interesting variety
« Delano F1" An early-ripening hybrid, the harvest of which can be harvested two months after emergence. The weight of its fetus, with proper care and sufficient nutrition, can reach 6 kg, but more often does not exceed 3-4 kg.

« Nectarine" The crop enters the fruiting period after 3 months. The fruit has an elongated shape, with a characteristic melon orange color and light beige flesh. Its weight can range from 1.5 to 3 kg.

Melon variety " A sybarite's dream"gives a lot of fruit small size and weight (300-400 g). It will be possible to harvest the first harvest in a month and a half, two months. 
Melon for the Moscow region
The following varieties are suitable for central Russia and the Moscow region.
« Caramel» – has a high sugar content. Well tolerated stressful situations. The average weight of the berry is 2 kg. The variety is mid-season. 
Variety " Yukar F1"Differentiated by early ripening. It can be grown in open ground using the seedling method. From germination to the first ripe fruits, no more than two months will pass. The berry has a sweet taste and is very aromatic. Weighs about one and a half kilograms.

“- the fruit of this variety is ready for consumption in less than three months. Weight about 1 kg. Sweet taste, pleasant aroma and excellent presentation make this variety quite in demand.

List of these varieties possible options the choice is not limited. From the early and mid-season varieties you can choose such as: Galileo, Altai, Assol, Princess Maria F1, Kolkhoznitsa, Zolotistaya.

The only thing you should pay close attention to when buying seeds is the ripening period of the melon. The quality of the harvest will depend on this. The unripe fruit will take place in compost heap, and it will be a pity for the time spent on leaving.

To grow melon seedlings at home, followed by transplantation into open ground or a greenhouse, it will take 25-30 days.
By this time the weather should be completely warm. The period of return frosts must end. Only under such conditions will the seedlings be able to develop normally and, subsequently, produce a good harvest.
In the central zone, the planting of heat-loving crops occurs at the end of May and the beginning of June. This means that sowing melon seedlings should be done on the 20th of April.
You can spend a week on seed treatment, provided that all its stages are included in the pre-sowing procedures.
When to plant melon according to the Lunar calendar for 2020

If you look into Lunar calendar, then it will help determine the sowing time of the melon.
Knowing that you should not rush to sow melons, so as not to be hit by return frosts when planting seedlings, determine the timing of their sowing.
The lunar calendar offers optimal options for garden crops taking into account the phases of the Moon and its passage through the signs of the zodiac.
Residents of cold regions should sow melon seeds for seedlings in early April. U early varieties The fruiting period will begin approximately 3 months after the appearance of the first shoots. Seedlings are planted in a greenhouse at the age of one month. The following dates will be favorable for sowing melons in 2020:
- in April – from 6 to 18;
- in May – from 6 to 18;
- in June – from 4 to 16;
- in July – from 3 to 16.
To harvest a full harvest of melons, you should not neglect their agricultural technology. You should adhere to the recommendations of the lunar calendar not only when planting seeds for seedlings, but also during further care for melons.
Prohibited days for sowing and replanting plants in 2020
- April - 5, 19;
- May - 5, 19;
- June - 3, 17;
- July - 2, 17.

Selection of seeds and preparation for sowing
If the gardener has decided on the variety of melon to plant on his plot, then he now needs to find them on the shelves of gardening stores.
The next condition for obtaining a decent harvest is that best seeds must be two or three years old. In addition, if they have not been processed by the manufacturer, or seeds collected from their own plot are used for sowing, they must be thoroughly processed.
Calibration
Melon seeds are quite large and selecting whole, healthy and full-bodied ones is not difficult. But if there is any doubt about the quality, they should be immersed in a saline solution.
A 3% concentration is quite suitable for use. The seeds are immersed in brine, where they will spontaneously divide into two fractions. Full ones will settle to the bottom, and pacifiers will end up on the surface.
Unusable seeds are removed, and the remaining ones need to be washed and disinfected.
Disinfection
Tested and reliable way Protecting seeds, and subsequently melon sprouts, from possible diseases is the use of potassium permanganate. Prepare a pink solution and dip the seeds into it for 20-30 minutes. Then rinse again.
For those who like non-standard methods, we can recommend a mixture of garlic juice and water. To do this, it is cleaned and crushed, poured with warm water in a ratio of 1:3. The seeds are kept in the strained solution for 1 hour and washed well.
Hardening
This technique allows you to grow healthy seedlings that are stress-resistant.
- Selected seeds are wrapped in soft cloth and soak in warm water. But you can’t leave them completely immersed in water.
- Place the package on a saucer and monitor its moisture content.
- The seeds are kept in this state for a day, then transferred to the refrigerator for 18-20 hours, where the temperature is close to 0°C.
- If time is not in a hurry, then change temperature conditions 2-3 times.
Germination
The final stage of preparing seeds for sowing. Some summer residents do not recommend this, because such seeds require more careful and careful sowing. There is a possibility of damage to fragile sprouts. Therefore, after hardening, the seeds are treated with growth stimulants and sown in prepared containers.
The gardener decides which types of treatments to carry out and which to exclude from the list based on the condition seed material. But these measures should not be completely ignored, as this is a guarantee of healthy and strong seedlings.
Preparing soil for seedlings
The soil mixture is prepared from equal parts of peat, soil and humus. The last ingredient can be replaced with ready-made compost. The land taken is turf. It is better in composition and structure when compared with garden soil. Adding sand will improve the penetration of water and air to the root system, and ash (1 cup per bucket of mixture) will enrich the soil with potassium and phosphorus.
Additionally, it is subjected to disinfection. It is good if the soil was prepared in the fall and stored in a cold room. Freezing helps destroy pathogenic microbes and will also minimize the germination of annual weeds.
Another option would be to water with a manganese solution or just hot water. The prepared mixture is laid out on peat or plastic cups and watered with water with the addition of biological preparations. They can be Fitosporin or Baikal - EM 1. Detailed instructions instructions for use are indicated on the packaging.
Other types of containers for sowing melon seeds are usually not used, since the root system of the plant is very sensitive. Even minor damage leads to a long recovery, and this will delay the time for receiving the first fruits. For which, in principle, melon is grown through seedlings.
If by the beginning of the third ten days of April the gardener has prepared the seeds and soil, then it is quite possible to start sowing.
- Make two small holes in each cup and place one hatched seed in them.
- The embedment depth is 1.5-2 cm.
- The crops are covered with film and put in a warm place.
- If the temperature is within 25-28°C, then well-prepared seeds will germinate in 4-5 days.
It is important not to miss the appearance of seedling loops and move the pots to a bright windowsill, where the temperature is slightly lower.
But it should be borne in mind that the length of daylight for melon seedlings should be 12-15 hours, so additional lighting will be required in cloudy weather.
A fluorescent lamp should be installed in close proximity to the container with seedlings, and turned on for 2-3 hours in the morning and evening. In this case, the plant will spend energy on developing the root system and building up a strong above-ground part, rather than searching for required quantity Sveta.
If two sprouts appear in a glass, one should be removed, but not with the root, but by pinching it at the very surface of the soil. After the third leaf appears, you need to limit the growth of the melon in height, also using pinching. This gives an incentive to the growth of lateral shoots, which will be more likely to contain female flowers.
Watering is carried out based on a visual inspection of the soil in the pot. A dry top layer signals the need for watering, but in reasonable doses. There should be no stagnation of water.
Seedlings are fed at least twice during cultivation at home. The first time - at two weeks of age, the second - 7-10 days before planting and gradual hardening immediately begins.

By the end of May, the melon bush is ready to change its growing location.
Humus or well-decomposed compost is added to the holes before planting. Mix with soil and water generously. The plant is planted in damp soil and covered with a layer of dry soil. This will prevent a crust from forming on the surface.
The seedling should not be buried to a greater depth than it grew in the pot. The capricious and delicate plant reacts to this very painfully, the stem rots. The sprout is dying.
The distance between melon bushes should not be less than 70 cm. While adapting to new conditions, the seedlings must be shaded. The best option will be any non-woven material, such as agrotex or spunbond.
In addition, it will serve as protection against changes in day and night temperatures. In the first week, the plants will not require additional care other than airing the plantings.
Growing melon in open ground: video
The relatively short period of growing melon seedlings allows you to get the first tasty and aromatic fruits a month earlier than if they were grown by sowing seeds in open ground. A small investment of time and labor brings remarkable results.
Melon is a very tasty and heat-loving plant, but it is also easy to “tame” for our cool agricultural latitudes. And in order for the melon planting to be successful and for it to produce a rich and tasty harvest, you just need to choose the right varieties and start the plant’s life with home seedlings.
Planting seedlings
As with any other seedlings, the process of planting melons begins with selecting seeds. This question is most relevant for those gardeners whose plots are located in the middle part of Russia or in even colder regions from the point of view of agriculture. The best solution will buy ready-made seeds with appropriate zoning. Purchased seeds are usually good quality, are properly stored, treated with antifungal agents and ultimately produce stable shoots. In addition, zoning varieties will help you choose a melon that can bear fruit as quickly as possible and at the same time be content with the temperature conditions of your region. By choosing an unregistered variety, you simply risk not waiting for the harvest, even taking into account preliminary preparation plants seedlings. Therefore, you should come to terms with the fact that melons zoned for northern and middle latitudes will be significantly smaller than their southern counterparts (they usually weigh up to two kilograms).
Purchased seeds guarantee that the variety is suitable for your region, but you can try to get seeds from melon yourself
Choosing the time for sowing
Of course, the choice of time to sow melon seedlings will be determined by your region and climatic conditions. The fact is that 25–30 days after the appearance of the first shoots, the seedlings must be transplanted into open ground or a greenhouse, otherwise the plants risk stretching out, becoming painful and ultimately not producing full-fledged fruits. If we talk about average values, the soil is Central Russia warms up well in late May or early July. So if you sow seedlings at the end of April or beginning of May, successful plant transplantation is almost guaranteed.
The greenhouse will be an excellent addition to the process of growing melons
If you have a well-equipped greenhouse on your site, you can plant seedlings in early April, then transplant the plants into the greenhouse in May and continue growing there. But since the melon needs large quantities sun and warmth, it is still more comfortable for it to grow in open ground in hot weather. So the best option will again transplant your plants from the greenhouse into open ground around the first days of June. It is worth remembering that crops like melon or watermelon are very difficult to tolerate the transplantation process. Therefore, it is worth making this moment as gentle as possible for the plant, for example, by initially planting it in individual peat cups for seedlings.
Container and soil for seedlings
Seedlings of any plants should be done in three stages. First, simply germinate the seeds, then wait for the first shoots in a large container and, finally, plant the plants in individual containers.
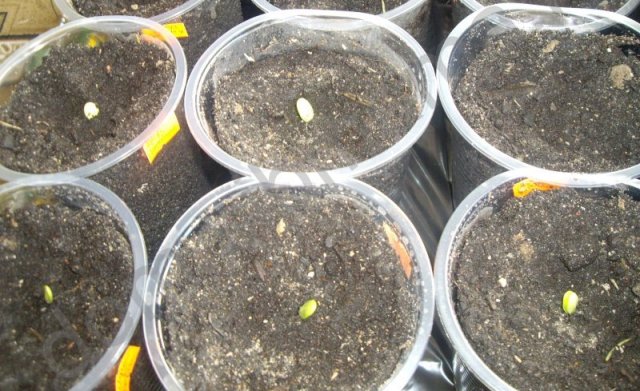
The appearance of sprouts is a signal that it is time for future melons to live separately
For the first stage of seed germination, you do not need any special means. The point is to leave the pre-prepared melon seeds at a warm temperature and at maximum high humidity for several days until the seeds wake up and sprout small sprouts. This can be done in any flat container that can hold some water, after wrapping the seeds in a napkin or woven material.
The second stage of preparing melon seedlings is to plant the awakened seeds for further germination. It is best to carry out this operation in a large container with a flat surface of sufficient area so that the seeds can grow without interfering with each other. This stage will ensure comfortable maintenance of all sprouts, and will also help you prepare seedlings with less labor and time, since all the plants will be in the same area and it will be convenient for you to change their temperature, humidity and light levels.
Please note: if you plant seeds in plastic containers or containers, they must first be sterilized and disinfected.
On last stage you should transplant each plant into an individual container. Ideally, each plant should occupy an area of about 10 by 10 cm or 12 by 12 cm. In this case, a young melon sprout will be able to obtain all the necessary substances and microelements from the soil and develop proper and stable growth. root system, ah, everything depends on the quality of the roots future life plants, including its yield.
Peat humus cups or cassettes of sufficient size are suitable as individual containers
It is best to buy soil for melon seedlings in a specialized store: a mixture for pumpkin crops. The purchased soil will be optimal in terms of nutritional value and acidity, and will also be already treated with a variety of antifungal solutions, which will ensure high quality further work with her.
If necessary, you can prepare the soil mixture for seedlings yourself. To do this, for one kilogram of turf soil you need to take the same amount of peat and the same amount of ready-made compost or humus. The resulting mixture must be thoroughly mixed and sifted, after which you can add a fifth of sand, which will enhance soil drainage, and wood ash at the rate of 300 g per 5 kg of the finished mixture. Ash will enrich the soil with valuable microelements and also serve as an additional disinfectant.. But such soil disinfection, of course, will not be enough. To achieve the desired result, you can shed ready mixture hot (about 80 °C) water, a three percent solution of manganese, or even prepare the soil in the fall, and leave it in sub-zero temperatures for the winter, which will destroy most pathogenic bacteria.
Landing instructions
To obtain high-quality melon seedlings, it is very important to do the following:
- Select the desired melon variety, perform manual seed selection (remove small and damaged specimens).
At the first stage, it is important to carefully sort through all the seeds in order to separate the healthiest and most beautiful ones.
- The material remaining after the initial selection should be immersed in a 3–5% salt solution for 10 or 15 minutes to get rid of hollows that will float to the surface of the container during this procedure.
- Selected seeds need to be washed running water and immerse for ten minutes in a three percent solution of manganese for disinfection or in a pre-purchased preparation (for example, Fitosporin). In this case, you should act according to the instructions on the drug. If desired, you can also immerse the seeds for an hour in an aqueous solution of garlic, which is prepared in a ratio of 1:3 - this will also protect the seeds from further diseases and damage.
Potassium permanganate - simple and affordable way disinfect seeds
- Prepare the correct soil mixture and disinfect it, or purchase suitable soil from a specialized garden store.
- Germinate the seeds in conditions of extremely high humidity and at a temperature of about 30 °C for 2-4 days. At the first stage of seed germination, one day after being in high humidity and temperature, the melon should be hardened by moving it to a temperature regime close to 0 ° C for 19 or 20 hours - this will not harm the seeds, but it will harden them and make them much more resistant to to all kinds of temperature fluctuations in the future.
A cloth and film moistened with water will create the moisture level necessary for the seeds.
- Fill the planting container with the prepared soil mixture and water with warm water. In this case, the soil should be placed in the container in layers, carefully pressing and tamping each layer with your hand. Remember to leave about 2-3 cm of space up to the edge of the container so that you can freely add more soil later.
- Carefully transfer the sprouted seeds into a planting container and immerse them in pre-prepared holes about 2 cm deep.
When planting in a container, you should pay attention to the direction of growth of the seed and immerse it in the ground with the correct side
- Sprinkle the immersed seeds with soil, compact the soil a little and additionally moisten it with a spray bottle so as not to wash out the seeds.
- For two or three days, containers with seedlings can be covered with transparent glass or cling film to increase humidity and create greenhouse effect in a container. Then the film should be removed.
- If you planted sprouted seeds in a common container, then after germination the seedlings must be picked, that is, planted in individual pots.
You need to replant the seeds carefully, using tweezers, after thoroughly moistening the soil with a spray bottle, so as not to damage the extremely fragile melon roots
Video: how to sow melon correctly
Caring for melon seedlings
If you were able to plant the seedlings correctly, then caring for them will not be difficult for you. It is very important to remember temperature conditions. You need to keep melon seedlings at a temperature of about 25 °C and in no case allow cool conditions, especially below 15 °C, as this will significantly slow down the growth of the plant, and our goal is precisely to speed up its development as quickly as possible.
If you have the opportunity to create more for the melon high temperature, for example, at 28 or even 30 °C, she will like it!
The specific air humidity for seedlings should be about 60%. Lower humidity will not allow the melon leaves to open correctly and have sufficient area, and higher values will lead to rotting of the seedling's stem. It is also worth monitoring the watering of the plants and avoiding stagnant water: the melon reacts very strongly to such inconveniences and often begins to rot or get sick. The sprouts should be watered after a real assessment of the soil - it should be dry by at least 0.5 cm. It is best to water the seedlings warm clean water(filtered or at least settled) and do this with a spray bottle, evenly spraying the liquid over the surface of the earth. Avoid getting moisture on the sprout itself - this can cause irreparable damage to it.
Daylight hours for optimal melon development should last about 14 hours. To do this, place the container with seedlings on the south side of the house, and also, if necessary, turn on fluorescent lamps for two or three hours in the morning and evening. In this case, the plant will receive enough light, and will spend all its energy on developing strong roots and high-quality seedlings.
To strengthen the plant's root system, it is necessary to limit its growth at the third leaf stage by pinching it with tweezers or fingers. This will guide vitality sprout for its strengthening and proper rooting.
To ensure sufficient daylight hours, you can use special phytolamps
It is also worth taking care of the smooth transplantation of melon into open ground by hardening off the seedlings. To harden off, a week before the planned planting date, begin to lower the temperature of the plant, gradually lowering it to 16 °C during the day and 13 °C at night. This procedure will help the melon to better settle down in a new place and not suffer from a sudden change from a comfortable regime to a more severe one.
You can feed melon seedlings twice during the period of their growth, and this is best done with a special preparation of complex fertilizer. Please ensure that the mixture matches your crop type and does not contain chlorine. When choosing the period for feeding melons, it is best to focus on the external state of the plants and carry out the first stage when there are two full leaves (that is, after about a week of growth in separate containers), and leave the second feeding at the end of the development period and produce 7-10 days before expected landing. In this case, the second fertilizer will coincide with the plant’s hardening stage and will help it cope with the current stress.
Possible problems
Melon is a somewhat whimsical plant for our latitudes and requires intensive care, but nevertheless, it is usually quite simple to take into account all the subtleties of planting it through seedlings.
Table: possible problems with melon seedlings
| External manifestation of the problem | Causes | How to solve the problem |
| Sprouted melon seeds do not sprout for more than 4 days | Low temperature and/or insufficient humidity |
|
| Melon shoots are sluggish and unstable | Lack of moisture |
|
| Shoots are strongly elongated upward | Lack of light |
|
| The seedlings have several small leaves, but the stem is not yet strong enough | Insufficiency of the root system |
|
After 25–30 days of seedling growth, with proper care, at least three strong, full-fledged leaves will appear on it and, if the weather is already quite warm, you can transplant the plants into open ground. Don’t forget to harden the seedlings a week before planting so that the melon can better adapt to new conditions.
Before transplanting the plant, it is necessary to prepare the soil for its further growth. Choose sunny, well-warmed areas with good drainage water and neutral soil acidity. If necessary, reduce the acidity, dig up the future place of melon growth along with wood ash at the rate of 400 g per 1 m2 of area. In addition, it is worth additionally fertilizing the soil with compost or humus, and also moisten it well.
Before planting, you need to prepare planting holes for melons. They should be 60–70 cm apart from each other, and their depth should not differ from the height of the seating glasses. If the soil height is much higher than what the seedlings had previously, your melon may begin to hurt, and its stem will simply rot.
Make sure that after transplanting the conditions for the melon will not be much different from those in the room
Transplant melon seedlings in the evening or in cloudy weather, having previously watered both the seedlings and the planting soil, and after planting, sprinkle the wet layer of soil with dry soil to avoid the formation of airtight crusts. It is also worth covering the melon sprouts with non-woven insulating material such as Spunbond or Agrotex. It will protect young plants from daily temperature changes and allow them to more comfortably survive the adaptation period, but do not forget to ventilate the melons and remove the material after 5–7 days.
The delicious southern beauty of the melon will delight you even in the northern garden if you plant the plant correctly and select a zoned variety. Take care of the seedlings and the plant will respond to you with delicious sunny fruits!
Melons and watermelons have long ceased to be exotic guests in garden beds in central Russia. Now they are grown freely in the Moscow region and even in the northern regions of the country. It is quite possible to grow melons in a compact area without using large areas. Agricultural technology involves planting these crops both in greenhouses and in open ground.
Let's talk about the timing of sowing melons and the features of their cultivation in different regions.
Melon and watermelon are considered heat-loving crops; they have increased requirements for air and soil temperatures when planting. Their full growing season is much longer than other crops grown in the garden. That's why in a seedless way melons are grown only in southern regions Russia.
But with skillful agricultural technology you can get a good harvest in the middle zone. This can be achieved by planting cold-resistant varieties of melons and watermelons, growing them through seedlings, and also sheltering young plants from possible spring frosts.
When to plant watermelons and melons for seedlings in 2020

The timing of planting melons depends on the region and the selected variety. It also matters where you are going to grow melons and watermelons - in a greenhouse or in open ground.
If your climate zone allows you to grow melons outdoors, remember that In this case, sowing the seeds should be done 60 days before planting on the dacha plot. This means that you need to purchase seeds in the first half of March, and start sowing in the middle of the month.
Note! Please note that last year's seeds are not suitable for planting. Best Harvest Watermelons can only be obtained from seeds that are five years old. For sowing melon, 3-year-old seeds are used.

Only early-ripening hybrids are suitable for cultivation in the middle zone, which reach the stage of technical maturity in 70-85 days. Preference hybrid varieties They also give because they are the most resistant to adverse weather conditions.
Attention! The timing of growing seedlings for these crops is the same. For watermelon and melon, it will take 30 days to grow seedlings at home or in a heated greenhouse from the moment of germination. But watermelon seeds should be sown a little earlier, as they take longer to hatch.
It is best to sow watermelon seeds in mid or late April. Melon seeds are also sown for seedlings in the 2nd half of April.

In the middle zone, even the presence of a greenhouse will not provide your watermelons and melons with the climatic conditions to which these crops are accustomed in their hot homeland. Therefore, when selecting seeds, it is better to opt for ultra-early and early ripening varieties. Then there is every chance to enjoy juicy, sweet watermelons and melons grown with your own hands.
You should also not chase large-sized fruits, because taste qualities they will be worse than smaller ones. To grow in a greenhouse, watermelon and melon seeds must be sown in mid-April. A month after the emergence of seedlings, the seedlings are planted in a permanent place.
Timing for sowing seeds in the Moscow region
For planting melons and melons in the Moscow region, zoned varieties should be selected. It is best to buy them from a local nursery or from friends who grow melons and watermelons. The variety must be early or early ripening.
To get an early harvest of watermelons and melons, sowing should be done in the first half of April for early-ripening varieties and in the third ten days of April or early May for mid-ripening varieties. After 25-35 days, the seedlings will be strong enough and ready to be transplanted to a permanent location.
When to plant in the Urals
If you do this earlier, the seedlings overgrow greatly, and certain inconveniences arise with them - the tendrils intertwine with each other, clinging to anything around them.
Some sow seeds directly into the greenhouse under film cover; it is advisable to do this in mid-May. But then the timing of fruiting will be delayed.
Planting dates for melons and watermelons in the Leningrad region and Siberia
For growing in Leningrad region Ultra-early ripening or early varieties of watermelons and melons are suitable. It is also permissible to plant mid-early species. Select varieties for planting that take 60-90 days from germination to harvest. This information is on the packaging.
Melons are grown as seedlings in order to have time to harvest before the first frosts, which can occur as early as August. For open ground, seeds for seedlings are sown in the last days of April, for growing in a greenhouse - in early April.
It is recommended to grow ultra-early varieties of watermelons and melons in Siberia. The climatic conditions of the region require the most short term growing season. During the Siberian summer, southern large-fruited watermelons will only have time to grow a lush green mass.
Preference should be given to greenhouse cultivation; if you don’t have a greenhouse, you can try growing melons under a film. Sowing seeds for seedlings must be done in early or mid-May. It will take 5-7 days for seedlings to appear. After 25-30 days, the plants are planted in open ground.
When to sow melons and watermelons according to the lunar calendar in 2020

To obtain high-quality seedlings and good harvest In the future, gardeners are recommended to coordinate the timing of planting melons and watermelons for seedlings with the lunar calendar. It is best to sow and plant seedlings in open ground on favorable days.
Planting on neutral days will not in any way affect the quality of seedlings and the subsequent harvest, so it is completely acceptable. After all, the decisive factor still remains the agricultural technology of the crop grown and proper care behind her.
Seeds sown in unfavorable days, will have a lower percentage of germination, seedlings may grow weak and sickly.
Favorable and unfavorable days for sowing and planting seedlings
Experienced summer residents claim that half the success in growing crops depends on the correct timing of planting. Especially for gardeners, a Lunar calendar is published annually, the recommendations of which are advisable to use so as not to be surprised why plants are lagging behind in development or getting sick. Depending on the region, watermelon and melon are sown in different months. Favorable days for planting in 2020 will be the following dates:
- in March – from 7 to 20;
- in April – from 6 to 18;
- in May – from 6 to 18;
- in June – from 4 to 16;
- in July – from 3 to 16.
In March and April, seeds of early ripening watermelons are planted. Transplant the seedlings into the ground when the sprouts become strong and sufficiently hardened. It is necessary to choose zoned varieties for planting in your region.
In the last days of March and the first days of April, seeds are sown in the southern regions. In the last days of April, it is recommended to sow seeds in the middle zone. Planting of seedlings in May and early June is carried out in the Urals and Siberia.
Unfavorable days will be those when there is a full moon and a new moon. In 2020 these numbers are:
- in February – 5, 19
- in March – 6, 21
- in April – 5, 19
- in May – 5, 19
- in June – 3, 17
The rest of the calendar numbers will be neutral.

By sowing seedlings according to all the rules, the gardener can count on the appearance of friendly shoots and high-quality fruits.
Preparing soil and seeds
An ideal soil mixture suitable for growing melons and watermelons should include the following components:
- 3 parts lowland peat;
- 1 part sawdust;
- 0.5 parts of humus.
You can also use a mixture of humus (3 parts) and turf soil (1 part). Before planting seeds for seedlings, it is recommended to heat the soil in the oven, or spill it with a hot solution of potassium permanganate. This will kill pathogenic microorganisms and grow healthier seedlings.
For each seed, it is advisable to take a separate pot with a diameter of 10 cm. Then there will be less risk of damaging the root system during diving or planting in the ground. If you reuse planting containers, they should be thoroughly washed with soap and a brush, and then disinfected with a solution of potassium permanganate.
Plastic pots are best suited for growing seedlings. You can also use peat cups suitable size. Their advantage is that the roots of the seedlings will not need to be freed before planting, which means that the plants will more easily adapt to the soil.

You can determine whether the seeds are suitable for planting using a saline solution. Dissolve 1 teaspoon of salt in a glass of water and add watermelon or melon seeds. High-quality seed material will sink to the bottom. Seeds that float can be discarded. After this, the planting material must be washed in clean water and dried.
The seeds are then kept at a temperature of 60°C for two to three hours - this stimulates the formation of female flowers, from which fruits are subsequently formed. On final stage To prepare the seeds, they must be pickled with a solution of potassium permanganate for 30 minutes. Now the planting material is wrapped in damp gauze and wait for the sprouts to appear.

Containers for planting must be filled only halfway with substrate. As the plants grow, the soil will need to be replenished. Before planting, the soil is moistened with a sprayer and a hole is made in it to a depth of 4-5 cm from the surface using a pencil or pen, where the sprouted seed is placed.
After planting, the containers are covered with film and placed in a warm place at a temperature of 23-25°C. When the seedlings appear above the ground, the temperature readings are reduced by several degrees, creating a difference between day and night temperatures. This is necessary so that the seedlings do not stretch.
The film is removed when sprouts appear. Only strong seedlings are left to grow - they are more viable. Since planting usually occurs in mid-spring, there is no need to add additional light to the seedlings. However, she should be given the most illuminated place in the house. Pots with plants are placed in such a way that the leaves of individual specimens do not touch each other.

Melon seedlings grow in 20-30 days, watermelons require 30-40 days. While the seedlings are in the house, they need to be fed twice. The first fertilizing is carried out a week after germination, using complex mineral fertilizer diluted in a proportion of 20 g per 5 liters of water. After another 7 days they will be paid organic fertilizers, for example, mullein infusion at a concentration of 1:10 with the addition of superphosphate (1 tbsp per liter of infusion).
One tablespoon of ready-made fertilizer is used for each plant. Plants can be planted in a permanent place after 3-5 true leaves appear. Before the “relocation” takes place, the seedlings are hardened by reducing the daytime temperature to 15-17°C, and the night temperature to 12-14°C. Hardening should last for a week. The room also needs to be ventilated regularly.
Useful advice! Melon seedlings must be pinched after 3-5 leaves appear. This is due to the fact that female flowers appear on the side shoots earlier than on the main one.

If you are going to plant seedlings in open ground and live in the middle zone, there is no need to rush into it. Melon crops require warmth, so planting should be done no earlier than the end of May. It is also worth taking into account the weather forecast given for the near future.
In the first week after planting in open ground, young plants will need film cover. In a greenhouse, plants are more protected from temperature changes, wind and other disasters, so seedlings can be planted there 2 weeks earlier.
Holes for seedlings should be made at a distance of 1 meter from each other. Two plants can be planted in one hole at once, provided that during the growth process the shoots will be directed in opposite directions. 7-10 days before planting seedlings, compost or humus must be added to the holes.
Just before planting, water the plants and plant them in the resulting slurry. Seedlings should not be buried; after planting, they should be located slightly above ground level, this will protect the roots from rotting. Next watering produced no earlier than in a week.
In the future, experts recommend regularly loosening and weeding the area, as well as pinching the tops of the shoots. Scourges without ovaries are removed so that they do not needlessly weaken the plant. When the bulk of the ovaries reaches the size of an apple, weak and poorly growing fruits also need to be removed. Don’t forget to feed the melons several times over the summer. mineral fertilizers and slurry.
When planting indoors, you should carefully consider the issue of pollination. If for some reason insects do not fly into the greenhouse, pollination is carried out artificially. In such conditions, melons and watermelons are grown in a vertical position, tying the plants to a trellis, and the fruits are placed in a net.
Watermelon and melon seedlings: video
Knowing all the features of growing melons and watermelons, you will be able to enjoy them after harvesting and receive complete satisfaction from the result achieved. And in subsequent years, this process will seem like an easy task to you.
The question of how and when to plant melon in open ground in the middle zone is relevant for summer residents who are not afraid to experiment. In the Moscow region, it is advisable to grow melon crops in seedlings in stationary greenhouses with a height of at least 2 m or in warm beds in open ground.
In the Moscow region, it is advisable to grow melons and melons using seedlings.
2-3 year old seeds are best suited for sowing, since those obtained from the previous year's harvest produce powerful plants with predominantly male inflorescences. The largest and densest seeds are selected and dipped in a 3% solution of table salt for 2 minutes. Those that have sunk are suitable for sowing. They are washed, soaked and placed in the refrigerator for 2 days to harden. In the middle zone, melon seedlings are planted from early April to mid-May. The timing depends on when it is supposed to be planted in open ground. It is not recommended to grow melon seedlings in cups more than 40-45 days after germination.

2-3 year old seeds are best suited for sowing, since those obtained from the previous year’s harvest produce powerful plants with predominantly male inflorescences
In order to injure the plant during replanting as little as possible, the seeds should be planted (2-3 pieces at a depth of 3-4 cm) in separate pots. The optimal temperature for germination of melon seeds is +18...+23°C, at night - not lower than +15°C. The first sprouts usually appear within a week, after 5-7 days the strongest ones are left in the pot. After 3-4 true leaves appear, the seedlings are pinched - this gives impetus to the development of lateral shoots, on which the melon bears fruit.

Caring for the plant consists of fertilizing with mineral fertilizers and moderate watering (not on the leaves and stems). Seedlings can be planted at the age of 25-40 days, as soon as the soil warms up to +11...+12°C.
Soaking seeds in two ways (video)
Soil for planting
- Recessed. Suitable for dry areas not flooded by rain. To arrange them, remove the turf and dig a trench.
- Elevated. For them, a fence is made from any material - a box. Need frequent watering.
- In the form of an elongated hill without sides. It has more usable area.
The principle of filling all warm beds is the same. They contain layers of various organic wastes, which, when rotting, release the heat needed by the melon. The raw materials for the beds are branches, sawdust, manure, wood chips, hay, and freshly cut grass. The bottom layer can be made from removed turf, laid with grass down. The upper one consists of fertile soil. Each layer must be compacted well and watered. Height warm bed for melon it should be at least 50 cm.

The seedlings are planted after May 5 in holes at a distance of 70 cm, 2-3 cm deeper than they grew in pots. After planting and subsequently, water the beds only warm water, which enhances the processes of photosynthesis and continuous division of the root. The plants should be shaded for the first 2 days. If there is a significant temperature difference during the day and in rainy weather, the melon needs to be provided with a film cover, which is removed in sunny weather. As a heat accumulator, near each bush they place plastic bottle with water.
The second pinching of the melon is carried out when it has taken root in a new place. 6-7 ovaries are left on each plant. The lashes are pinched over 3-4 leaves from the fruit, this is done so that the nutrients go not into the green mass, but into the fruit.
Melons in open ground in Siberia (video)
Lunar sowing calendar
Throughout the entire summer season, gardeners and gardeners turn to sowing calendar, which is compiled taking into account the effect of the Moon on the juices and vitality of plants. The 2017 sowing calendar recommends carrying out activities for growing melons on the following days:
- soaking and sowing melon seeds - April 1-2, 4, 12-13-14, 17-19, 28-30, May 1, 9-10, 24-29;
- watering, fertilizing and loosening - April 4, 28-30, May 9-10, 24-27;
- thinning and pinching of seedlings - April 14-16, 20-21, 24-25, 28-29, May 11-13, 20-27;
- pest control - April 17, 20-21, 28-29; May 12-18, 23-26;
- planting seedlings - April 23, May 9-10, 28-29.

If you planted seedlings in May, then at the end of July the harvest will begin to ripen, the harvest of which will last for 1.5 months
If you planted seedlings in May, then at the end of July the harvest will begin to ripen, the harvest of which will last for 1.5 months. For growing in open ground, you need to choose early varieties of melons with a short ripening period and short vines. It is better to opt for large-fruited ones, since with a lack of sun the fruits become smaller. By following all the rules, you can grow a melon in the middle zone that will be truly juicy and aromatic.
Rate
In the middle zone, melon cultivation begins with sowing seeds for seedlings. It is necessary to select only zoned varieties. In a pot on a windowsill or balcony, the plant can live only 25–30 days from germination. During this period, the following are necessary: good lighting, ventilation, fertilizing, moderate watering and a certain temperature regime.
Sowing melon seeds for seedlings
When to sow
Melon can be grown in any region of Russia. The main thing is to choose zoned varieties. In the conditions of the middle zone, Siberia, and the Far East, early-ripening melons are better suited for planting in open ground, and melons of medium-early ripening are better suited for greenhouses. Approximate sowing dates: late March - early April, but you can calculate the exact date.
Melon seedlings are planted in the ground or greenhouse at the age of 25–30 days, add another week for germination and emergence of seedlings. Now we decide on the sowing date. For example, if you plan to grow melon in open ground, and morning frosts in your region stop after June 7, then you need to start working with seeds (soaking, germinating, sowing) from April 25 to May 1. There is no point in sowing earlier: the seedlings will outgrow, take a long time to take root, and the yield will decrease.
How to germinate seeds
If the packaging does not say that the seeds have been treated with any preparations, then before germination it would be a good idea to keep them in a growth stimulator. Suitable: Epin (4 drops per 100 ml), Energen (1 ml per 50 ml of water) and others. You can use melt water, a pink solution of potassium permanganate, aloe juice, etc. in the old fashioned way. Then the seeds are laid out on a damp cotton pad, cover with another one on top, place in plastic container, close with a lid and leave for 4–7 days at a temperature of +25… +30 ⁰C.
Photo: preparing seeds for sowing
Melon seeds are pre-soaked in a growth stimulator. Seeds are sprouted between two damp cotton pads placed in a disposable container. After 4–7 days, sprouts will appear, you can start sowing
The minimum germination temperature for melon is +18 ⁰C; at +15 ⁰C and below, the seeds will not germinate.
Selection of container and soil
Melon is painful to transplant, so each seed is planted in an individual cup with a diameter of 10–12 cm and a depth of 10–12 cm. You can use disposable opaque cups or special cells for seedlings. Ideal option- peat pots. Seedlings are planted directly into them in a permanent place; the pots completely decompose in the ground in 25–30 days and serve as additional fertilizer. Whatever containers you choose for seedlings, each should have a drainage hole.
The pots are filled with ready-made soil: “Universal”, “Garden soil”, “For seedlings”, etc.
Recipes for homemade soil mixtures for seedlings:
- 1 part peat, 1 part turf soil, 2 parts humus, 1 part ground sphagnum moss or river sand, 1 glass of ash per bucket of soil mixture:
- 3 parts peat, 5 parts compost, 1 part rotted sawdust or sand, 1 glass of ash per bucket of soil mixture;
- 2 parts humus, 2 parts turf soil, 1 part river sand, 1 glass of ash per bucket of soil mixture;
- 1 part turf land, 1 part leaf soil, 1 part humus, 1 glass of ash per bucket of soil mixture.
Video: how to prepare the soil for seedlings yourself
Sowing seeds: step-by-step instructions
- Fill the glass with soil, leaving 3–4 cm of soil short of the brim.
- Pour boiling water over the soil in each cup, allow the water to be absorbed, and allow the excess to exit through the drainage hole.
- Place the sprouted seeds on top of the still warm (but not hot!) soil: one in each cup.
- Cover the seeds with a 1.5 cm layer of soil and water with water at room temperature.
- Cover the cups with film or glass and place in a warm place (+25… +30 ⁰C) until shoots appear.
Video: how to soak and sow melon seeds
How to grow melon seedlings at home
Lighting and temperature conditions
Shoots from germinated seeds appear very quickly, after 2–3 days. The pots are freed from the film and placed on a sunny windowsill or glazed balcony. The temperature should be within +20… +25 ⁰C. To prevent the seedlings from stretching, they are turned to the sun with the other side every day.
Watering
Melons do not like dampness; they need to be watered only when the top layer of soil dries slightly. If after watering the soil turns into a lump, be sure to carefully loosen it. You can add coarse river sand on top. Three hours before planting in a permanent place, the seedlings are well watered.
Feeding
Melon grows on the windowsill for only 3-4 weeks. For this period nutrients, available in the soil mixture, are enough for small plants. Only one feeding is carried out - three days before planting in a permanent place. Complex fertilizers are used: BioMaster “Universal” (25 g per 10 l of water), Fertika Lux (20 g per 10 l), etc. As a result of this technique, the seedlings will become stronger and stock up the necessary elements and will more easily endure the stress of the transplant.
Video: fertilizers and protection products for seedlings
Hardening
A week before planting in open ground, hardening begins: the seedlings are placed on open window, balcony, taken out into the garden, etc. Time spent under open air increase every day starting from 15 minutes, then by an hour, two, etc. until the whole day. Young plants should not be suddenly exposed to the scorching sun from the first days; hardening begins in a shaded place. At this time, monitor the soil: blown by the wind, it dries quickly.
Possible problems when growing melon seedlings
The seedlings are stretched
If the seedlings are reaching towards the window, it means there is not enough light for them. Other reasons: the room is too warm, the melons shade each other, the weather outside is cloudy for too long.
Ways to solve the problem:
- supplementary lighting with phytolamps (12–17 hours a day);
- add soil to the pots;
- reduce the temperature to +18 ⁰C;
- expose the plants to the sun every day on the other side.
Blackleg
The disease develops if the plantings are dense, poorly ventilated, and experience sudden changes in temperature and humidity.
What to do?
- remove dead plants;
- pour the remaining potassium permanganate solution (3 g per 10 liters of water);
- if the melons do not grow in separate pots, but all in one box, urgently plant them in another soil, add to the water for irrigation: “Baktofit” 0.5–1%, “Maxim”, “Fitosporin” or another fungicide according to the instructions;
- Ventilate the plant regularly, observe temperature and watering regimes.
White mold
White mold spores can be found in any living space. They settle in any, even sterile, soil. Mature, hardened seedlings, ready for planting in the ground, cope perfectly with white mold. But young seedlings that are deficient in ultraviolet radiation need to be protected.
Ways to protect against white mold:
- mulch the seedlings with a mixture of crushed charcoal with ash (1:2), after 3 weeks add another layer;
- mulch with Ermak sorbent mixture, repeat after 3 weeks;
- sprinkle the soil with crushed activated carbon and spray with a solution of brilliant green (pale green);
- Ventilate the sprouts regularly.
When can you plant in the ground or greenhouse?
If the greenhouse is unheated, then seedlings are planted in it at the same time as in open ground. During frosts at night and early in the morning, the greenhouse is only a few degrees above zero, and such a temperature will destroy heat-loving plants. Melon grows well in hot and dry climates, and it can be created in a greenhouse, but only when the weather is warm. Film, glass, polycarbonate will protect from rain and create a higher temperature on sunny days. In the middle zone, melon sprouts are planted both in open and closed ground in early June.
The transplant is carried out in the evening, preferably in cloudy weather. During the first few days, shade the melons and monitor soil moisture. It is better to mulch the holes. In such conditions, the seedlings will take root faster and begin to grow.
Growing melon seedlings is not difficult. If you sow with sprouted seeds, the shoots will appear quickly. The sprouts are large and develop very actively on sunny and warm balconies or windows. One of the main tasks is to constantly monitor the condition of the soil, keep it moist, loose and healthy.