Before installing a suspended structure, it is important to determine the scope of work in advance. If you prepare thoroughly, you will not need to be distracted by purchasing missing parts.
You will need:
- choose a coating for installation;
- draw a sketch;
- prepare the necessary tools;
- make an estimate;
- purchase Construction Materials.
What are suspended ceilings made of?
The market provides a wide variety of products; you can always choose a sample that harmoniously fits into the interior, matches your finances and design ambitions.
The main function of suspended structures is to level the surface. In addition, they have excellent noise-absorbing properties.
It is enough to place between it and concrete base a layer of mineral wool or other insulator. This will eliminate sounds from the upper floors and reduce heat loss.
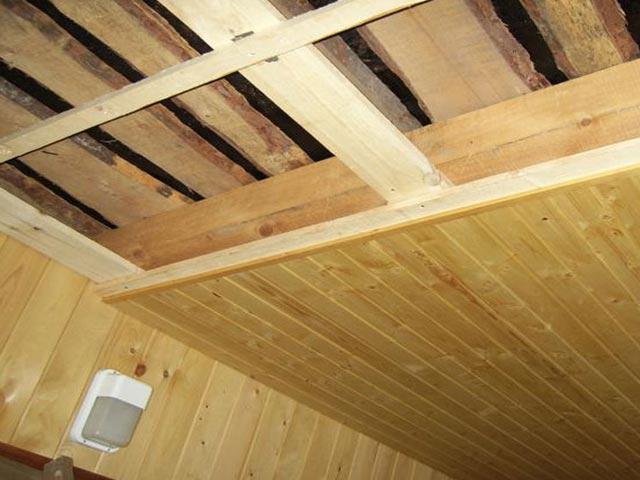
Suspended ceilings made of plasterboard are very popular. If the interior of the room allows, do-it-yourself installation is done from the following materials:
- PVC panels or siding (bathrooms);
- wooden lining (saunas, baths, eco-style, country style);
- Amstrong ceiling tiles (kitchens, hallways).

Frame installation
Regardless of the material, before installing the suspended ceiling, the base is marked and a wooden sheathing is made for plastic or lining, or metal UD and CD profiles for gypsum boards are used.
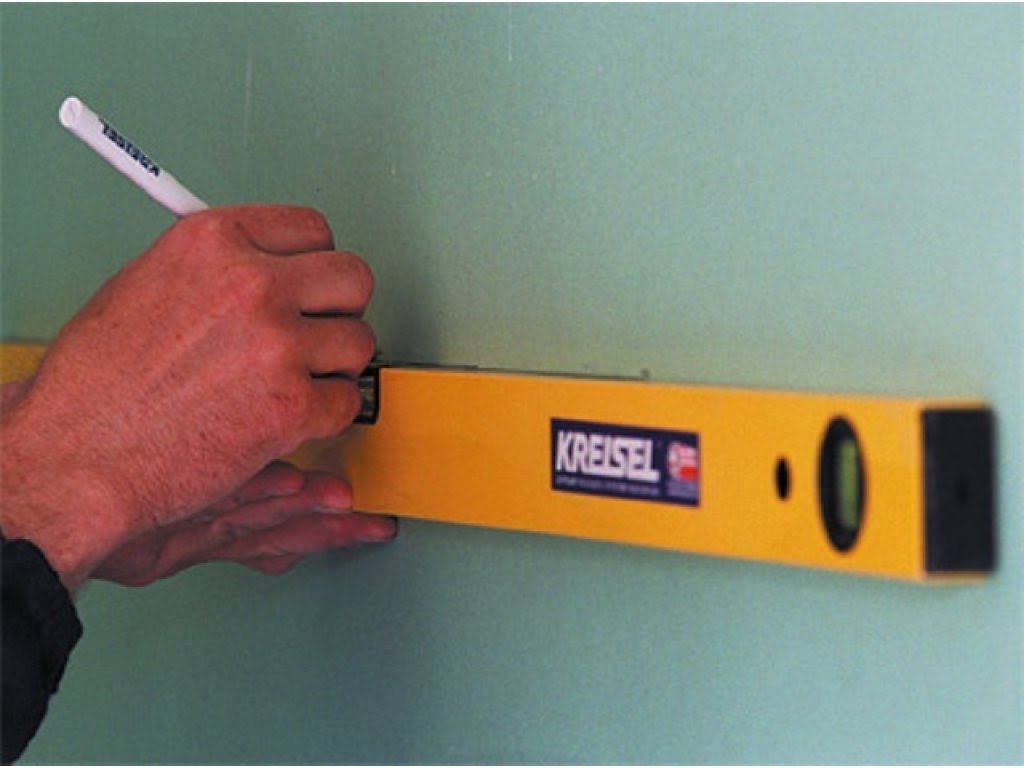
The marking principle is common in all cases. Availability laser level simplifies the cutting of a horizontal plane around the perimeter of the room. If it is not there, take a hydraulic device, the principle of operation of which is based on the interaction of fluid in communicating vessels. When the edge of the tube is raised or lowered, the water at the other end will be at the same level. This method takes longer, but the end result is just as good. In addition to the spirit level you will need:
- impact drill or hammer drill;
- screwdriver;
- tape measure, meter, pencil;
- beater cable (painting cord);
- metal scissors;
- building level;
- Bulgarian;
- wallpaper knife;
- rule.

Start marking from the lowest corner, which can be determined with a tape measure. If you involve an assistant, the process will take a little time.
Before installation, it is advisable to decide on the lighting source. If point devices are provided, there must be enough space for their installation.
Marks are made at a distance of 5-10 cm from the corner, departing from the ceiling 5 cm more than the size of the soffit.
If spot lighting is not planned, it is enough to set aside a segment equal to the profile width + 1 cm.
One end of the hydraulic level hose is aligned with the marked mark, and the other is taken to the opposite wall and left at risk until the liquid stops oscillating.
Work in the same way with other corners of the room. Then, with a strong thread in dry dye powder, the applied marks are connected - pulled between the marks, carefully pulled back and thrown. Paint that crumbles as you move will leave a connecting mark.
Mark lines on the ceiling in increments of 50 cm.
The following is important - before installing the sheathing, it is necessary to bring out electricity for the planned lighting and find out where the existing wiring is located, because it often runs at the base of the wall where the frame is made.

The UD guide profile is attached along the marked line using a dowel and nails 40 mm long, d 6 mm. Pre-drill holes in profiles and walls. Then, combining them, they screw them to the base so that the shelves are parallel to the ceiling.
They begin to install the ceiling profiles, placing them under the hangers attached along the transverse pieces in increments of 70-100 cm and inserting each edge into the groove of the UD profile. Fix the structure with self-tapping screws and a drill.
To place the profiles in a single plane, a strong thread is pulled between the starting strips, along which they are guided during alignment. Before fixing, check the horizontal position using a bubble level. The question often arises about how to make a suspended ceiling yourself. To do this, it is convenient to use levels with built-in magnets; they can be attached to vertical guides. The hangers are screwed with self-tapping screws to the profile shelves and the edges are bent upward.
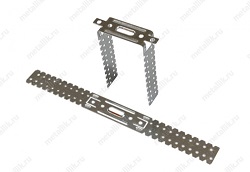
The transverse sections are secured using crab connectors.

Installation process
When finishing ceilings in bathrooms, toilets, and kitchens, they use moisture resistant drywall with a wall thickness of 0.9 cm. Externally it can be distinguished by its green color. In other rooms, ordinary sheets are used.
Mount the gypsum boards with self-tapping screws using a screwdriver. Preliminary markings are carried out corresponding to the pitch of the sheathing so that there are no difficulties during assembly.
Start installation from the corner of the room, gradually moving forward. Self-tapping screws must be installed at a distance of at least 15 cm from the edge of the sheet. The heads of the fasteners are not allowed to protrude above the plane, but they should not be screwed in too deeply - the protrusion on the back side should be no more than 10 mm.
Cutting drywall construction knife– apply a long rule and carry it out with a sharp blade. Then the material can be broken quite easily.
Installation in several levels
If desired, you will need to draw a detailed sketch. It may seem that it is quite difficult to build such a structure, but if you follow the plane and observe the dimensions, there will be no difficulties.

For curved ceilings you will need to make a drawing template.
To bend metallic profile, according to the drawn picture, cut both shelves opposite each other every 5 cm. Devoid of stiffeners, it will take the given shape.
Using the template, draw a line on the ceiling along which the cut material is screwed. The protruding part of the frame is assembled from curved profiles connected by transverse fragments. They are made in length corresponding to the desired distance between ceiling levels.
The frame of a less protruding plane is assembled from profiles, fastening them with U-shaped or anchor suspensions. Sew up each part in turn with plasterboard, using the rules for assembling single-level structures.
To close the vertical gaps, you will need to cut the sheets into strips of appropriate sizes. If the surface is straight, it is enough to screw them to the vertical stiffeners.
But how to make suspended ceilings with a curved bend? Back side the parts must be cut with a wallpaper knife, the plaster base must be broken, while the front paper part must remain unharmed. The result will be a kind of tape with independent gypsum fragments, which will take any shape.
The assembled structure will need to be puttied. How to make the solution is written on the packaging. To prevent the seams from cracking, sickle tape is glued to them, and then a layer of putty is applied. After waiting for the composition to dry, the surface is sanded with an abrasive mesh.
How to level an old concrete ceiling and hide its other imperfections? The answer is simple - you can make a suspended ceiling. The design and installation work are quite complex, but provided that you know exactly how to do everything and what such a structure consists of, you will succeed.
What is a suspended ceiling?
Based on the name, you can immediately understand that a suspended ceiling is a special structure that is attached to the ceiling and performs various functions, mainly decorative, of course. This ceiling has good soundproofing and insulating properties, and is also capable of changing appearance the main ceiling is beyond recognition.


When installing a suspended ceiling, a special system of hangers and profiles is used, which are attached to the base ceiling. Then the material is installed on the mounted structure, which will serve as a new ceiling. Repair specialists usually use drywall for these purposes.


On a note! Suspended ceiling in fact it can be different. It can be rack, cassette, lattice. These types of ceilings are also called modular. However, the article will discuss the usual plasterboard coating - this type is also known as continuous. A ceiling that is installed without the use of suspensions is called a suspended ceiling.

Slatted suspended ceiling in the bathroom
Advantages and disadvantages
A suspended ceiling has a lot of advantages - there are many more of them than disadvantages.
The advantages of suspended ceiling coverings include:
- the ability to hide the imperfections of the main ceiling (stains, crevices, cracks, steps, etc.);
- beautiful appearance - such a ceiling changes the entire room beyond recognition;
- the opportunity to implement various design ideas up to the installation of complex structures;
- convenient installation of lighting (as well as the ability to install lamps in accordance with the design plan);
- excellent sound and heat insulation characteristics,
- easy to maintain - just wipe off the dust with a dry cloth;
- large selection of options finishing surfaces;
- the ability to hide electrical wiring and other communications inside the ceiling.

But a suspended ceiling also has a few disadvantages that are worth mentioning so that you know what you're dealing with.
These include:
- reducing the ceiling height by installing a suspended structure (minimum 7-8 cm);
- duration of installation (depending on the complexity of the design, installation may take more than one day);
- quite high cost of finishing;
- the need to create a special hatch so that it is possible to get to the communications installed in the ceiling (if any);
- low moisture resistance of plasterboard, due to which it is not suitable for finishing rooms with high humidity (such as a bathroom, sauna, swimming pool, bathhouse, etc.).

Calculation of components, tools, materials
To make a suspended ceiling at home, you will need materials for making a frame, drywall and finishing material, which will give the new coating a beautiful appearance.
Before starting work, you should decide which frame to choose. It comes in two types - metal and wood. To make the second option, you will need bars that will need to be attached to the main ceiling with hangers. In the first option, as you might guess, metal profiles are used.
Prices for suspended ceiling
suspended ceiling


On a note! There are two types of ceiling frame elements - load-bearing and main profiles or bars. If in metal version If you can only use load-bearing elements, then when working with a wooden frame, both main and load-bearing elements are used. Note that the manufacture of a metal frame is still often carried out using basic profiles.

Metal profiles are made of galvanized steel and have the names PP 60/27 and PNP 28/27. You may also come across profiles called CD and UD - these are their foreign markings.

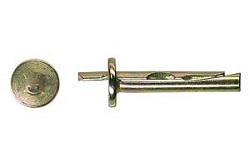
Also, to install the frame, you will need fastening elements - special hangers for ceilings, dowel-nails and anchors, “crab” connectors for connecting jumpers, two types of self-tapping screws (“kids” with a gimlet for metal and special ones for drywall).


Drywall prices
drywall

Photo of the “crab” for the frame plasterboard ceiling
The main finishing element is drywall, which comes in several types:
- GKL – standard;
- GVKL - it is able to resist moisture;
- GKLO – fireproof, glass fiber is used in manufacturing;
- GKVLO - combines the properties of resistance to fire and moisture;
- GVLV is the highest quality plasterboard, it is also called super sheet.


As a rule, due to its price, optimal weight, and also due to the lack of special fire safety requirements in residential premises, standard gypsum plasterboard is usually used for ceiling installation.

They usually take a sheet whose parameters are as follows:
- thickness – 9.5 mm;
- width – 600-1200 mm;
- length – 1500-2500 mm.
To calculate the number of sheets per room, it is best to use online calculators, but you can calculate this number yourself. Knowing the area of the ceiling, as well as the dimensions of the drywall, this is quite simple to do in accordance with detailed diagram the entire ceiling structure.
Armstrong ceiling prices
Armstrong ceiling

Attention! Plasterboard structures have a decent weight. 1 square meter of this structure weighs about 13-15 kg. Therefore, it is better to work together with an assistant.
Another trouble that is associated with the heaviness of a plasterboard structure is cracking in the places where the seams will pass. You will not be able to install the whole structure at once, again, because of its weight. Therefore, during finishing you need to very carefully monitor how the work is progressing.

In addition to materials, the following tools will be needed to install suspended ceilings:
- screwdriver;
- perforator;
- roulette;
- laser level;
- ladder;
- a simple pencil for marking.

You may also need spotlights, a chandelier and other lighting elements. It is worth remembering that the installation of electrical wiring should be carried out before you begin covering the frame.
For exterior finishing suspended ceiling you need to purchase:
- primer;
- putty;
- putty knife;
- sickle tape.

Table. Approximate consumption of materials per 1 square meter suspended ceiling.
| Material | Consumption |
|---|---|
| 1 sq. m. |
| 1 PC. |
| 2.9 m |
| Along the perimeter |
| Along the perimeter |
| 1 piece each |
| 1 PC. |
| 2 pcs. |
| 2 pcs. |
| 0.2-0.5 pcs. |
| 2 pcs. per 1 m of PP 28/27 profile |
| 23 pcs. |
| Along the perimeter |
| 1.2 m |


On a note! Be sure to make detailed plan installation of plasterboard ceiling. It will make it easier to understand the work process and also help calculate required amount components and materials for construction.

Plasterboard ceiling diagram - calculation of materials
Installation of a single-level ceiling: step-by-step instructions
After all have been purchased necessary materials, you can begin installation work on installing a suspended ceiling. First, remove from the room all pieces of furniture that may interfere. After this, proceed to preparatory work– marking the ceiling and walls and installing the main elements.

Step 1. Measure the height of each corner in the room using a tape measure. This way you will find the lowest angle in the room. This is where you start working.

Step 2. Make marks on the walls at a distance of 5-8 cm. Remember that the first option should be chosen if you do not have additional lamps. If you decide to install spot ones, then leave more space between the main and future ceilings.
Step 3. Take a level and use it to find points in other corners at the same level. Make appropriate notes.

Step 4. Apply markings around the entire perimeter of the room, connecting the dots with perfectly straight lines.
Advice! Use painter's cord to mark.


Now proceed to installing the frame.
Step 5. Take PP 28/27 or UD profiles and strengthen them along the drawn line. This is done like this: place the profile above the bottom border to the line, make marks on the walls through the holes in it. Drill holes in the walls.

Attention! Usually the profiles have holes for fasteners along the edges, but if they are missing, drill them yourself at a distance of 10 cm from the end of the product.
Step 6. Cover the profiles with sealing tape and screw them to the wall using dowel nails.


Step 7 The pendants are attached in increments of approximately 40 cm, which is why draw lines on the ceiling at a distance of 40 cm from each other.

Step 8 Approximately every 2.5 m you will make jumpers on the ceiling. Based on this, expect that the step between the hangers will be 50 cm.
Attention! Attach the first row of hangers close to the wall (25 cm) for structural reliability. And the second row is at a distance of 75 cm. Next, maintain a step of 60 cm.
Step 9 To properly drill holes in in the right places, apply hangers at the marked points, make new marks and then prepare places for the anchors. Strengthen the hangers and bend their ends thoroughly so that there is no “free movement” left. The hangers should no longer sag, so as not to ruin the rest of the work.
Glass ceiling prices
glass ceiling

Step 10 Start installing the profiles on the ceiling. Depending on the size of the room, they may need to be lengthened or shortened.

The length can be increased by connecting two parts using a special extension. Please note that the joints of the profiles should not subsequently be at the same level and far from the suspension.
And their total length should be 1-2 cm shorter than the length of the ceiling. Start installing each profile from the corners - screw it to the hangers and guides using self-tapping screws. Then secure the middle.

Step 11 Having secured two profiles in a row, go to the other side of the room and do the same work. Then attach the central ones.

Step 12 Install jumpers using “crabs” and self-tapping screws. They are attached every 2.5 m - where the joints will be made plasterboard sheets.


Step 13 The most awaited stage is attaching the drywall itself. Cut the edges of the sheets with a knife at a slight angle - this way you will improve the result of the putty. Where the end is covered, there is no need to cut anything.


Step 14 Start attaching the sheet from the corner of the room. In this case, the distance between the sheet and the wall should be 0.5 cm. Attach the drywall to the profiles with self-tapping screws in increments of 20 cm. On adjacent sheets they are screwed “in a spaced pattern.” The caps must be recessed into the drywall, i.e. e. should not stick out. By the way, do not install gypsum board sheets at the same level - they should be attached with offset seams. The joints of the slabs should not be located near the corners.
The self-tapping screw must be recessed inside
Video - How to make a suspended ceiling from plasterboard
Surface finishing
A suspended ceiling is also good because it allows you to use a variety of finishing options. It can be finished, etc. But before that, the remaining seams must be sealed. After treating them with a primer and waiting for it to dry, seal all seams, joints, holes from self-tapping screws with durable putty.

After waiting for the putty to dry, glue all seams and joints with sickle tape, and then coat them again. The widest seams between plasterboard sheets must be filled with putty material and wait for it to dry completely. It is possible that while sealing the plasterboard seams on the ceiling, you will find some damage - for example, a torn paper layer that has exposed the core of the sheet. Such problem areas should be eliminated in advance. You can, for example, apply serpyanka and apply an even layer of putty on top.
For joints it is better to leave rounded edges of the sheets. In principle, the manufacturers have already thought about this point - the edges of the sheets have a rounded shape, thanks to which the putty will fill the seams to the maximum. Serpyanka tape and a layer of putty must be applied at the level of the plasterboard sheet. For what? The fact is that the edges of the drywall have a narrowed thickness so that the tape can be recessed under the surface level of the sheets.
How to properly seal the seams of plasterboard sheets, the edges of which are cut off yourself? First of all, it is necessary to chamfer, that is, plan the cut edge of the sheet with a special plane or knife at an angle of 45°. As a result, a wedge-shaped groove is formed at the junction of the two sheets, in which the sickle tape can easily “drown” and the putty material will reliably grip.

Then, having filled the entire surface with regular putty, apply finishing putty. The ceiling is ready.
Video - Plasterboard ceiling putty
And finally, a few tips that will simplify the installation of a suspended ceiling with your own hands.
- Choose to work only quality materials. Remember that you are creating a ceiling for more than one year, so it should serve you for a very long time.
- Don't forget about the diagram and markings. Take your time: it’s better to spend some time drawing up a plan and making accurate calculations than constantly stopping work in order to buy or try on something.
- Work with plasterboard only in a dry room.
- Don't forget to use your level all the time.
- For soundproofing use mineral wool. It can be used to fill the frame before the final covering.
- Before starting work, allow the drywall to rest in a horizontal position.

In this way, following the instructions, you can create a suspended ceiling with your own hands. The work at first glance seems extremely complicated, but if you look into it, it’s easy to understand that in fact everything is quite simple.
Not everyone can boast of beautiful, smooth ceiling coverings in their apartment or house. Many people face the problem of leveling old concrete ceilings. One of the best leveling options is a suspended ceiling. It is worth noting that the design and installation of a suspended ceiling is highly complex, so before you begin this work, you should be thoroughly prepared.
However, if to plaster the ceiling you need the skills to do this work, then anyone who knows how to use a drill, screwdriver, or jigsaw can install a suspended ceiling.

Peculiarities
First, let's understand the concept of “suspended ceiling”. From the name it is clear that it is a specific frame structure that is installed on a regular ceiling covering using special materials. It performs different functions, the main one being decorative.
In addition, suspended ceilings can serve as sound insulation and additional insulation.

A suspended structure can change the overall appearance of the ceiling and embody design ideas. Creating a suspended ceiling is one of the simplest and most inexpensive ways leveling the ceiling covering, which can be done without the help of specialists. Another advantage of this design is the ability to create stunning multi-tiered, figured ceilings that can be emphasized favorably different options backlight.
The ceiling can hide obvious imperfections (unevenness, cracks, pipes, etc.), get rid of noise (especially important for people who prefer not to hear noisy neighbors, the fuss of pets or neighbors' children), it does not darken over time and does not become cracked, unlike conventional coatings.


Despite the fact that the procedure for installing a suspended ceiling is quite complicated and time-consuming, many people prefer to install the suspended ceiling themselves. You can really do this yourself, knowing the nuances. Before starting work, you should evaluate how advisable it is to install a suspended ceiling. You must take into account factors such as the occurrence of condensation under the structure, the likelihood of rodents and insects appearing in the space between a regular and suspended ceiling.
You should also understand that installing such a ceiling will visually reduce the height of the room.
If you have no doubt about the correctness of your choice, then you can begin preparing for installation.

First, it’s worth familiarizing yourself with the varieties of this design. A suspended ceiling is a system of suspensions and profiles that are installed on a regular ceiling. The material that will become the ceiling is then attached to the created structure. Today there is a wide variety of materials that differ in structure, design, texture and color, thanks to which you can create real masterpieces.
Most often, gypsum plasterboard, plastic panels, wood paneling, tiles and other materials are used to create a suspended ceiling. There are several types of suspended ceilings. It can be slatted, cassette, solid, lattice, hemmed. Most suspended ceilings are installed on a structure made of wooden planks and metal.


Advantages and disadvantages
Suspended ceilings have a number of advantages and disadvantages. Before starting any repairs, you should familiarize yourself with them so that you are prepared for the result.
The advantages of suspended ceilings include:
- Fast and affordable way hiding the disadvantages of the main ceiling. This point is especially relevant for those who want to give a good look to the ceiling in old rooms with problem areas, for example, with the presence of deep cracks and depressions due to the partial absence of layers of plaster. Installing a suspended ceiling will help save on dismantling and reinstalling the plaster layer.
- Availability and variety of materials. For installation, you can select the material based on quality, cost, texture, color scheme, own preferences.


- No restrictions on color solutions, texture. Suspended ceilings allow you to realize different ideas designers, turning the coating into a unique element of the apartment. Skillful use of lighting will help highlight important details.
- Easy to use. The difficulty of maintenance depends on the materials chosen. Most of them repel dust and do not allow moisture to pass through. For washing, you can use regular detergents.
- Installing such a ceiling helps to hide wires and other elements of communication systems (alarm, ventilation, electrical wiring, etc.), increasing the attractiveness of the ceiling.


- Easy complete or partial dismantling if necessary.
- Long service life if the operating rules are followed. A suspended ceiling can last from 15 years with correct installation and proper care for it.
- Possibility of installing additional lighting fixtures mounted in the ceiling.
- Soundproofing to prevent noise from neighbors.
- Heat retention, fire safety, resistance to temperature changes.

There are also a number of disadvantages that may affect the decision to install this design:
- Changing the height of the apartment. A slight change in ceiling height becomes a significant problem for small rooms.
- Quite a high cost compared to maintaining a conventional ceiling. When assessing this point, it is worth considering the difference in care. An ordinary ceiling needs to be periodically tidied up using whitewash and paint. The worse the condition of the ceiling, the more difficult it is to bring it back to normal.
The suspended ceiling is durable and does not require constant maintenance.


- Dependence on external conditions. Most suspended ceilings do not tolerate high humidity, in case of water penetration into the structure, partial or complete reconstruction of the ceiling elements will be required.
- Favorable conditions for the reproduction of insects and rodents. In some private and multi-storey buildings There may be cockroaches, mice, rats. If they get into the space between the regular ceiling and the false ceiling, you will have a hard time getting rid of them.


Materials and tools
The future result depends on the choice of materials. Therefore it is worth paying attention Special attention selection of elements to create a suspended ceiling.
To install it you will need:
- Aluminum profile of two types. The guide is needed for fastening along the entire perimeter of the room; it serves as a frame for other elements. The ceiling profile is used for further installation of external ceiling material on it.
It is advisable to use elements of a set of profiles from one manufacturer.


- Drywall. The choice of plasterboard depends on the type of room; the particular operating conditions of the ceiling should be taken into account. For rooms with high humidity, it is recommended to choose green plasterboard. This type of drywall has moisture-repellent properties, so it does not lose its shape and quality when in contact with moisture.

For living rooms you can take gray sheets 8-10 mm thick. Do not choose thick materials; the thicker the sheet, the greater its weight, which means you will need additional elements for its installation.
- Fasteners. Without them, it is impossible to install a suspended ceiling. Fasteners are needed to secure profiles and external materials. To fasten profiles, you need straight hangers, “crabs,” and extensions.


To install the hangers, you will need 8x10 mm dowels and 4.2x51 mm galvanized screws. To install gypsum board sheets, you need 25 mm self-tapping screws.
In addition to materials, you need to prepare the following tools:
- pencil;
- roulette;
- building level to determine the marking line for the profile and drywall, usually 2.5 m;


- painting thread;
- electric drill or screwdriver;
- hammer drill with drill;


- construction knife;
- grinder for metal carving;
- scissors for metal carving.


After installing the suspended ceiling, you will need materials for finishing:
- putty for filling seams, gaps, irregularities;
- serpyanka;
- acrylic-based primer;


- fine-grained sandpaper;
- medium sized spatula;


- paint brush or roller for painting;
- material for sound and heat insulation;
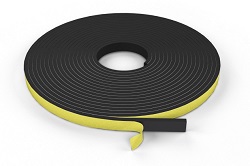
- porous sealing tape to ensure maximum tight contact between the ceiling and the base.


Calculation
The amount of materials required is affected by the size of the ceiling area:
- The number of guides depends on the perimeter of the room; to calculate, you need to know the width and length of the room.
- The ceiling profile is installed along the entire length every 60 cm.
- The plasterboard should cover the entire area of the ceiling; to calculate the number of sheets, the area of the ceiling should be divided by the area of 1 sheet (about 3 sq. m).
- The number of fasteners depends on the number of intended connections.


Construction device
Not a single job, especially such a complex and responsible one, takes place without prior planning and exact compliance with the technology. Before you begin installing a suspended ceiling, you should make a design drawing on paper and purchase components.
The marking must be competent and accurate, so that in the future you do not have to redo all the work from scratch.


To create a drawing, you need to measure the length and width of the room as accurately as possible. To begin with, using a level, draw a horizontal line at a distance of 10-15 cm from the ceiling level. The exact height depends on the type of luminaires chosen (surface, recessed, etc.). At this stage, you should determine the degree of curvature of your ceiling so that you can take this into account when installing your suspended ceiling. This is a mandatory stage of work.
After calculating the height and perimeter of the ceiling, you should draw longitudinal and transverse lines along the perimeter in increments of 60 cm. You should get even squares. The hangers will be attached on longitudinal lines; they are marked with dots every 60 cm.

Installation
Installing a suspended ceiling with your own hands does not mean working alone. You will need one or more assistants to complete the job.
You should start with a simple single-level ceiling.

First stage
The first step is to prepare the room. You must remove all unnecessary things from the room so that nothing interferes with your work. Check the walls carefully; if necessary, they need to be leveled. Carry out all the necessary communications so that you don’t have to do this after installing the ceiling.
If there are cracks in the ceiling, they need to be sealed. Make sure the ceiling surface is dry; if necessary, let the room dry.


Marking work
Before starting ceiling installation work, you should consider the placement of lighting fixtures. The level of ceiling height will depend on the type chosen. If there is spot lighting, you need to lower the ceiling 3-4 mm below the height of the lamps; for an overhead source, you need to lower the level by 5-10 cm.
If the main ceiling was not level, the lowest point should be determined. This will be the reference point for marking. If you select any other point, the suspended ceiling will be inclined.


After marking, a straight horizontal line is drawn along the entire perimeter. This can be done using a rule or a long level.
Base fastener
According to the markings made, holes need to be drilled at intervals of 35-40 cm. Then you can start collecting ceiling structure. In this case, a guide profile is first applied, and plastic dowels are inserted into the drilled holes. Self-tapping screws are screwed into the dowel, preferably for wood.
Please note that the strength of the suspended ceiling is directly related to the quality of the fasteners, so you need to drill deep enough holes. The depth to be drilled is usually between 40 and 80mm.


After completing the installation of the guide profiles along the entire length and width of the ceiling part, rack (ceiling) profiles should be installed. They are laid every 60 cm, their ends should be on the side guide profiles. It is worth noting that for simplicity and strength of the base, the length of the rack profiles should not exceed 2.5 m. In general, their length should correspond to the width of the room minus 1 cm due to the side guide profiles.
The rack profiles are inserted into the center of the marks, then they are fastened with self-tapping screws with a press washer to secure the fastening. Suspensions are used every 40 cm to avoid sagging of the ceiling; they ensure reliability and rigidity of the structure.

Laying wiring, preparing to install the chandelier
Preparations for installing lighting fixtures depend on their type. If you chose spotlights, then you will need to drill holes in the drywall in the right places. Please note that the hole should not fit into the profile. If you plan to install a chandelier, you will need additional fastening to the ceiling or to the ceiling base.
To avoid sagging, additional hangers and mortgages are needed at the installation site of the chandelier.
All wiring must be hidden in a PVC corrugated sleeve.


Laying insulation
If you want to increase sound insulation and insulate the ceiling, you will need to lay insulation on top of the frame. The insulation is attached to the main ceiling using dowels with a mushroom-shaped cap.


Drywall fasteners
Before starting fastening, you need to cut out panels from plasterboard to cover the ceiling area; for this you must strictly adhere to step by step instructions. First of all, lines are marked with a pencil, then a construction knife is used to cut along the marked lines.
The drywall is attached to the profile with self-tapping screws, the distance between the screws is 20-30 cm, there must be such an indentation. The edges of the two sheets can be brought together closely, or a small gap can be left between them (up to 5 mm). The heads of the screws need to be recessed into the sheet by 1-2 mm, then they are covered with putty.


Then they can be hidden in glazing beads, covered with curtains, etc. If the heads are left uncovered, then over time they will rust and ruin the aesthetic appearance of the ceiling. All cracks are filled with putty, and sickle tape is glued to the joints using Perlfix.
As you can see, assembling a suspended ceiling with your own hands is not at all difficult if the assembly is carried out in strict accordance with our recommendations.

Decorative works
After the installation of the suspended ceiling is completed, the next phase begins - decorative finishing. Now it can be covered with wallpaper, painted, covered with panels made of plastic, wood, etc. As in the previous stage of work, you can do the necessary finishing with your own hands to give the surface absolute evenness and smoothness. Regardless of the material chosen for the finishing coat, you need to carefully eliminate the seams formed at the joints of the drywall sheets.
To do this, use a primer. The primer is applied to the butt seams, then you need to wait until it dries completely. After this, the surface is leveled using putty, any seams, joints, or holes left by self-tapping screws are completely filled. After the putty has completely hardened, it is treated with serpyanka; it is needed for more durable gluing of problem areas.


Serpyanka tape, due to the porosity of the surface, improves the drying quality of the next layer of putty. The areas where the serpyanka was glued are covered with putty again after the material has dried.
Sometimes when doing installation work Problems may arise due to damage to parts of the drywall, for example, a tear appears somewhere in the top paper layer. This hole should be repaired so as not to spoil the aesthetic appearance of the finished coating. In the area of problematic unevenness, you can stick a serpyanka, after which it dries, give the surface an even appearance using putty.

At the stage of installing gypsum sheets, it is worth leaving the seams rounded. Drywall manufacturers have thought about this, so the edges of the sheets are rounded. It is much easier to seal seams that are round holes rather than ditches due to the more convenient filling with putty. After gluing the serpyanka and laying the putty, no unevenness should appear on the surface; their level should strictly correspond to the level of the drywall, the edges of which are narrowed in thickness for processing the seams with finishing materials.
Special attention should be paid to the seams formed at the joints of the drywall sheets that you cut while performing the work. The ends of such sheets will have the usual thickness; if you glue the serpyanka without special treatment, a small bump will appear at the seam site. To avoid this situation, you should chamfer the end of the sheet.


In other words, you need to plan the sheet of drywall at an angle of 45 degrees in those places where it had to be cut to fit the dimensions of the ceiling. To do this, you can use a construction knife or a special plane. Then small depressions will appear at the joints, which can easily be filled with sickle or putty to the level of the drywall. After the rough layer has dried, the final putty can be applied.
Preparation for the next stage is completed, you can begin decorative finishing. Now you can start painting the surface, wallpapering it, tiling decorative tiles, panels.


Manufacturers
Today, many companies produce materials for creating suspended ceilings. Some of the leading manufacturers of ceiling tiles are the companies Armstrong, Celotex, Saint-Gobain, Cesal, Albes. Products from different companies have different properties.


Ceiling tiles "Armstrong", "Selotex", "Saint-Gobain" are made using mineral fiber and cellulose, so they are quite durable. But such ceilings can become deformed after an impact; they must be installed very carefully. The materials for the Saint-Gobain ceiling are softer, they are quite resistant to external influence. Soft ceilings are easier to transport and install; they are not prone to deformation.


The color scheme and texture of materials vary widely; companies present a large assortment so that everyone can choose best option to decorate your premises. The classic option is considered White color, it is often used to decorate suspended ceilings in offices.
Manufacturing companies produce ceiling tiles with shaped elements and roughness. Such ceilings can be emphasized favorably using the right lighting. Statistics show that most buyers choose the classic white color, so the majority of manufacturers produce white materials.
It is worth noting that such surfaces can be painted, giving them other shades.


Trying to satisfy the needs of all customers, manufacturers produce different groups of materials that differ functional purpose, quality and price. Large companies divide products into groups, making recommendations according to the area of destination.
For example, famous company Armstrong produces suspended ceiling materials in four main directions, each of which has an additional classification (by smoothness, color, type of pattern, etc.).
Their products are divided into the following categories:
- "Basis";
- "Prima";


- "Functional";
- "Exclusive/Designer".


Each of these groups has its own characteristics. The Basis group is considered the cheapest and simplest. These ceilings are made from simple materials, they are not resistant to water. Such slabs should not be hung in rooms with high humidity to avoid the formation of swelling on the ceiling and sagging.
The Prima group is designed for the climate of Central-Eastern Europe, these products tolerate high humidity well, maintaining their original shape. They are a little more expensive than the basic ones, however, they are in great demand.

Group " Functional ceilings» are designed for installation in places with certain conditions; they have additional properties. For example, improved sound insulation properties due to the presence of microperforation or friability of the structure. Special hygienic ceilings are also produced that can be installed in hospitals and children's institutions. Such models are distinguished by the presence of a special vinyl film that kills bacteria well.

Functional ones also include models with increased moisture resistance, capable of absorbing moisture without losing their properties. Naturally, such materials are significantly more expensive than conventional ones.
The “Designer” group represents elite models developed by designers. They differ high quality and unique appearance.

Installing a suspended ceiling covering and decorating it does not require any specific skills; anyone can do it. These procedures are of medium complexity; accuracy and precision are important when performing the work.

If you follow a few tips and recommendations, you can greatly simplify your work and spend a minimum amount of time creating and installing the ceiling:
- Choose quality materials. It's better to pay a little more than to have to start working again soon. Do not forget that this design is durable; a well-made ceiling can last for many years without reconstruction. You don't have to clean it every month.
- When counting the amount of materials, you can use special programs on the Internet. You will significantly reduce the time spent on calculations by using the correctly measured length and width of the ceiling.

- Before starting installation, be sure to sketch out an accurate layout diagram.
- Take the preparation stage seriously so that you don’t have to interrupt the process to search for materials or take repeated measurements. As they say, measure seven times, cut once.
- Do not rush to install the drywall; let it lie horizontally for a while.
- To ensure sound insulation, it is worth using mineral wool.
- To prevent loss of drywall properties, you should work with it in dry rooms.


Beautiful examples in the interior
Glossy suspended ceiling looks very stylish. It adds sparkle and chic to the room.

Satin ceiling coverings are distinguished by their originality. Come up with a fun design and start bringing it to life.

Multi-level stretch ceilings have long occupied a leading position. You can create various designs with your own hands.
Before answering the question of how to make a suspended ceiling, and what’s more, with your own hands, let’s define what it is and how suspended ceilings differ from other types of wall coverings.
A slatted ceiling is a structure based on aluminum ceiling panels (slats). The panels are connected to each other using intermediate profiles and corners.
If we are talking about installation in a room with high ceilings, for example, in an office, then you will not be able to install it yourself. In this case, the craftsmen who will be entrusted with this work will have to worry about how to make a suspended ceiling.
A suspended ceiling is more expensive than its plasterboard counterpart, but significantly cheaper than a suspended ceiling.
Advantages of suspended ceilings
Noting the advantages of suspended ceilings, we will focus on the modular version of its design.
Drawing of a slatted suspended ceiling: blue outline - the perimeter of the room; red crosses – places where the stringer is attached to the ceiling; green dotted line – stringer.
This design, depending on the configuration of the module, is divided into cellular, tiled, cassette, panel, lattice and slatted ceilings.
Before installing such a coating, it is necessary to analyze its positive and negative properties. We recommend not to make hasty final conclusions, because many of the positive properties indicated here are also possessed by other species. ceiling coverings, which can also be done with your own hands. Since manufacturers are constantly improving the quality of their products, eliminating certain shortcomings, then, focusing on the latest data, we note the following advantages of suspended ceilings, which can be divided into certain groups.
Return to contents
Possibility of creating a variety of designs
They can be installed quite quickly without the use of “wet” technologies at any time of the year.
They allow you to hide flaws ceilings buildings, such as cracks, stains, exposed electrical wiring (this is rare, but does occur). Thanks to this, it is possible to eliminate existing but unnecessary differences in the heights of panel floors or create a relief ceiling on a flat floor.
With their help it is easy to hide utility networks office premises, for example, ventilation and thermal, electrical and computer. At the same time, these elements, if necessary, remain easy to access.
A set of slatted suspended ceilings usually includes four elements: the slats themselves, a supporting profile (stringer), a suspension and a wall corner.
Possibility of creating a variety of room designs. For a bathroom or bedroom, you can choose the option of a mirror ceiling. Indoors with high walls you can mount a multi-level suspended ceiling option. To create domes, vaults and arches, inexpensive plasterboard slabs and mineral fiberglass slabs, as well as various structural elements made of metal.
The ability to install lamps of almost any shape and size, well-reflecting aluminum ceilings improve the overall illumination of the room.
Return to contents
Operating Parameters
Resistance to vibration and dynamic loads. For example, in a gym you can install a “sports ceiling” option, an anti-shock coating that will withstand significant impact loads.
Ecological cleanliness. Only natural ingredients are used.
Ensure that the premises comply with sound insulation requirements. These coatings usually improve acoustic properties. To reduce the noise level in the room, acoustic liners are installed in suspended ceilings in certain places. This achieves noise reduction of up to 40 dB (about 100 times).
In most cases, slatted ceilings are equipped with tires that are slightly larger than required. Therefore, before installing slatted ceiling the tire needs to be cut.
The modular design of the ceiling makes them moisture resistant. So, even at a temperature of 30°C and a relative humidity of 90%, the maximum deflection will be no more than 2 mm.
The modular design increases fire resistance, and fire resistance is ensured by the ability to install special temperature sensors in them, which turn on the fire extinguishing system at the right time.
The ability to quickly disassemble and reassemble individual sections of the ceiling if there is a need to repair elements utility networks premises or, if necessary, reach the lighting network. This property turns out to be very useful in everyday life.
They provide good ventilation of the room, which is very important for office spaces where heat is continuously generated, for example, from working computers.
Return to contents
Disadvantages of suspended ceilings
The mounted busbar is connected directly to the end profile.
The minimum distance from the concrete floor of the building to the bottom of the suspended structure is 150 mm. A significant reduction in the height of previously not very high ceilings can have negative impact on the well-being of those living in the apartment.
Quite a high cost compared to conventional whitewashing, but there is no need to seal cracks and remove defects in floor slabs.
You will have to hire a specialist for installation, which means additional costs.
In the case of a suspended ceiling using plasterboard sheets, it is quite difficult to adjust the sheets so that the joints are not visible.
For those who, despite this warning, decided to mount a suspended ceiling with their own hands, we will give, if possible, detailed description This process for the rack version is perhaps the easiest for installing a suspended ceiling with your own hands.
Return to contents
Types of slatted ceilings
The panels are inserted into the grooves of the end profile and fixed to the rail using a latch.
Slatted ceilings are made from thin aluminum strip. To improve acoustics with inside slats secure a mineral or fiberglass coating. WITH outside they can have a matte or glossy finish. The rail can be plated with chrome or gold, any currently existing veneer, and even mahogany veneer. The profile of the slats can be embossed.
The slats are attached to the ceiling through a supporting profile called a stringer. Exist different kinds stringers. On some, you can attach slats of different widths (for example, P and V profiles), or mount slats, placing them vertically or even vertically diverging (S-profiles).
One edge of the last panel is inserted behind the wall corner until it stops. The panel itself bends down, and its edge wraps around the corner on the opposite wall.
The slats are attached to the stringers by simply snapping them into place. To the wall along which the rail runs, either metal corners, or U-shaped profile. There are ceilings with independent and built-in jointing. They are called closed. Coverings with independent jointing consist of a main strip 80-120 mm wide and a jointing 15-20 mm wide. Slats with built-in jointing can be compared to the well-known “lining”. The length of the slats is 3 or 4 m. For ventilation, holes must be made in the slats of such ceilings.
Structures with no jointing between the slats are called open-type ceilings. To ensure that the gaps between the slats are unnoticeable, this design is used in rooms with walls whose height is 5 meters or more.


Modern suspended ceilings delight with the splendor of shapes and shades, making the house more spacious and brighter. Unusual design arouses great interest and makes a pleasant impression on visitors. New construction technologies help to effectively use ceiling space. As a result, each room turns out to be interesting and unique in its own way.
Today the market offers an abundance of available materials for ceiling finishing. By experimenting with shape and color, you will be able to create the most unusual design ideas. This article will help you with this. She will talk about the technology of installing plasterboard suspended ceiling and will teach you to understand the intricacies of work.
Preparing for installation of a suspended ceiling
Installing a suspended ceiling is a technically painstaking job that requires preparation. Buy building materials, collect necessary tools. Everything must be prepared so that the work process is not interrupted.
Required tools and materials
- drill with a set of drills;
- building level;
- hydraulic level;
- screwdriver;
- pliers;
- square;
- hacksaw;
- hammer;
- roulette;
- marker;
- knife
Materials:
- plasterboard sheets;
- guide profiles;
- metal profiles;
- profile hangers;
- metal screws;
- concrete anchors;
- brackets;
- dowels
Installation of a suspended ceiling
Hanging structures consist of metal or wooden frame, onto which sheets of drywall are attached. Thanks to hanging technologies, it is easy to give the ceiling any shape. Overlappings can be single-level or multi-level.
The first option is the simplest and most quickly erected; its main task is to hide the unevenness of the old ceiling. The second option is more complex and time-consuming; its purpose is not only to mask defects, but also to perform a decorative function. The installation of any suspended structure follows the same pattern and is divided into several important stages.
Ceiling markings
At the first stage, it is necessary to make markings on the surface of the old floor. Mark the height of the future ceiling, as well as the location of the frame.
- Determine the lowest corner of the room. Measurements are taken using a tape measure, applied to the corners of the room. When the minimum level is found, make a mark on the wall, 5 cm away from the ceiling. If you plan to install lighting in the form of built-in lighting, step back 10 cm.
- Transfer the mark you made to all other sides. Use a hydraulic level; it can be made from a thin hose. This handy tool, but you will need an assistant to work with it.
- Now connect the marks on the wall. Use a dyeing cord, but if you don’t have such a tool, take a long and even strip. Draw horizontal lines along it along the entire perimeter.
- Attach the guides to the wall and make marks using a drill. The profile has ready-made holes for fastening. Drill a hole through them for the dowels.
- Glue to the back of the guides sealing tape. It is needed to dampen vibrations, this will help prevent the appearance of cracks. Then use dowel nails to attach the profile to the wall.
- Do parallel lines on the ceiling for longitudinal load-bearing strips. Width standard drywall 120 cm, so the distance between the profile should be 60 cm. This will allow the sheet to be securely fastened to the slats.
- Draw marks for the hangers. Mark points in 50 cm increments on the lines of the ceiling profile. They are installed so that the structure of the profiles in the middle part of the ceiling does not sag.
Frame installation
At this stage it is established metal carcass. The ceiling profile and hangers are attached according to the marks made. The work is carried out carefully so that the base is level.

- Insert the longitudinal strips into the groove of the guides. The distance between them should be 60 cm. The profile is three meters long; if the length is not enough, attach another plank to it and join them with a special bracket. The total length of the longitudinal profile should be one centimeter less than the length of the room.
- Attach the suspensions to the ceiling along the profile in increments of 50 cm. Fixation is done anchor bolts, which, unlike dowels, hold well and do not fall out of the holes.
- Start aligning the ceiling slats; it is convenient to use a cord for this. Stretch it, tying it to the outermost profiles. Using this cord you will make a single, even plane.
- Fix the profiles on the hangers with metal screws. Bend the excess pieces outward until they stop.
- Attach the transverse pieces of the profile to the longitudinal strips in increments of 60 cm. For screeding, use “crab” brackets, which are installed in the marked places. Secure the cross profile with the tongues protruding from the crab.
- Bend the bracket flags towards the planks and screw small self-tapping screws into them. At this stage, the installation of the profile is completed. Now the frame is ready and you can start laying the electrical wires.
Wiring installation
Once you have completed installing the hanging frame, begin running the electrical cables. It is recommended to make an external gasket. To prevent accidental fire in the ceiling, all wiring must be protected by a metal box or corrugation.
- Mark the future cable route. It should run along the wall from the switch with an outlet to the ceiling for connection to the lamps.
- Install the boxes according to the markings. If you lay wires in corrugated wires, use clips as fasteners.
- Lay the wire in a box or tighten it into a corrugation, and then secure it with clips. Each line must have a separate box or corrugation.
- When connecting the cable to the locations of the lamps, leave a reserve of wire 15 cm long for each.
Drywall installation
After finishing the wiring, install the drywall. Installation of the first sheet begins from the corner. It is necessary to leave a gap of 2–3 mm between the wall and the drywall. The next sheet is installed with an offset - in a checkerboard pattern. The drywall is fixed with metal screws in increments of 15–20 cm. The depth of the cap should not exceed one millimeter.
- Mark the sheets of drywall. Draw lines on its surface repeating the location of the profile. These marks are convenient for tightening screws. It is also necessary to make a drawing of the location of the lamps.
- Bevel the edges of the sheet - they should be beveled. This is done so that the plaster penetrates well into the gap at the joint of drywall.
- Screw the sheets to the profile. For convenience, you can use homemade T-shaped spacers that will hold the drywall. Use self-tapping screws to scroll through all the profile cells.
Creating holes for lamps
Having sheathed the hanging profile with sheets, check the accuracy of the location of the intended holes. There may be deviations in the drawing, correct them. If everything is according to the design plan, start creating the holes.
- Find the right hole saw for your drill. The diameter of the nozzle must be equal to the diameter of the holes.
- Wear glasses to prevent plaster dust from getting into your eyes.
- Make holes in the drywall, being careful not to damage the sheet.
There are many nuances in the matter of puttying the ceiling; to take them into account at this stage it is necessary to follow the technology. Cover the joints with special putty. These are especially durable compounds made for plasterboard sheets. Prepare the solution in small portions in order to have time to putty before setting.

- After diluting the solution, begin to cover the seams. Do this with a small amount of putty, otherwise the joint will be noticeable and uneven.
- After grouting, take paper tape KURT and apply to the seam. Press it down with a spatula so that the tape does not protrude above the surface of the drywall.
- When rubbing large joints, try to make a wide layer. The excess can always be removed. The wider you apply the putty, the smoother the surface will be.
- After applying the first layer to the entire joint, let the putty dry. This takes 10–12 hours.
- After drying, use a sanding float to sand all the areas where the putty was applied. After sanding, a lot of dust will remain on the ceiling surface. To remove it, use a vacuum cleaner or a wide brush.
- Prime the entire ceiling. This is done because the base has become heterogeneous after sealing the seams. Drywall and putty absorb moisture differently. Therefore, it is necessary to equalize the absorbency. A primer is used for this.
Ceiling putty
The ceiling is the most critical place during repairs. It is always visible and must be perfect, without cracks or irregularities. In a ceiling with a high-quality surface, irregularities are not visible when illuminated from the side.
To achieve the ideal, apply the first layer of putty one millimeter. This will help remove any unevenness in the ceiling. Apply a second layer of fine putty to vinyl based. It penetrates well into micropores and makes the surface smooth.
Installing the backlight
After finishing the plastering, all that remains is to install the spotlights. To do this from drilled holes take out the wires, grind the ends and put on the terminals. Then they connect it to the lamp and insert it into place. It is securely fixed thanks to spacer plates.
When creating a suspended ceiling from plasterboard, each stage is important. This article describes in detail how to create a single-level floor. By following the basic rules and technologies, you will be able to make a wonderful and durable ceiling yourself.
Video: installation of a two-level suspended ceiling made of plasterboard