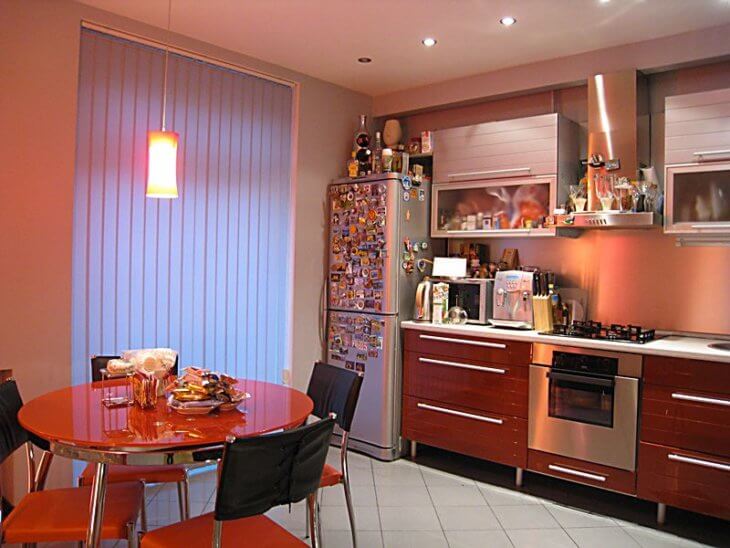
How to decorate the walls in the kitchen? - this question interests many people who decide to do repairs on their own.
The kitchen is somewhat different from other rooms in the apartment, because there high humidity, and heat, and fire, and soot, and splashes of fat.
This means that all finishing materials for the walls and floors of the room must adequately withstand these difficult conditions. But at the same time, both aesthetic and decorative properties must be preserved.
So how can you decorate a kitchen as efficiently as possible from a technical and aesthetic point of view?
The best finishing materials to cope with this task are ceramic tiles, paint, and wallpaper.
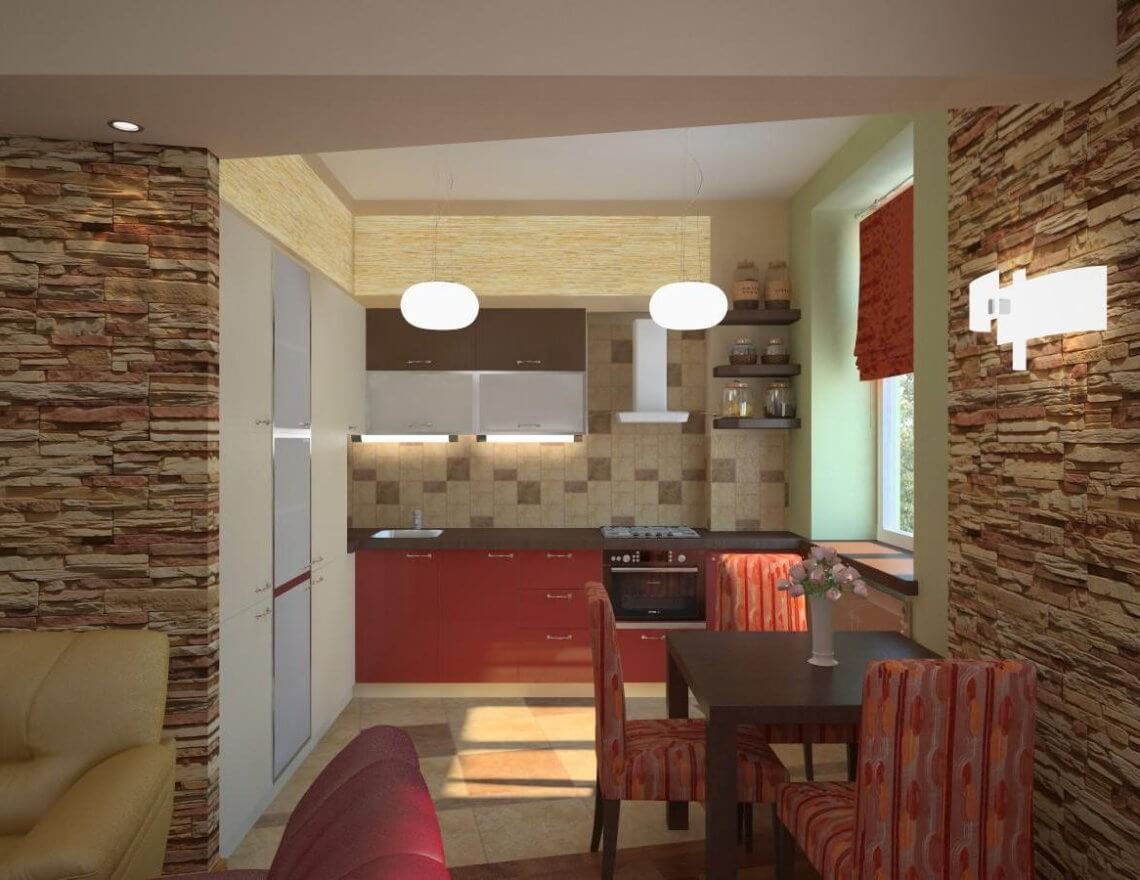
Sometimes they use decorative plaster, lining, special wall panels, and OSB boards. Also recently, decorative stone, either natural or artificial, has begun to be used for finishing kitchens.

Ceramic tiles
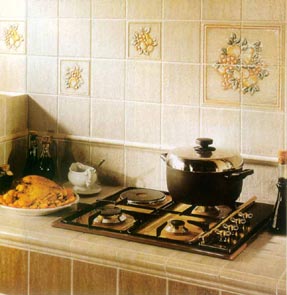
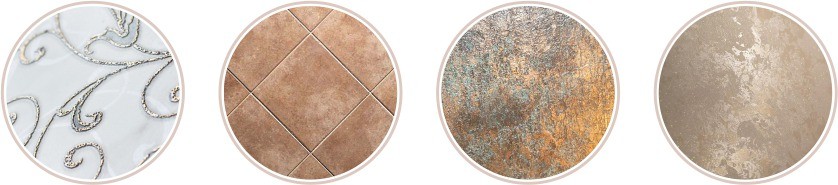
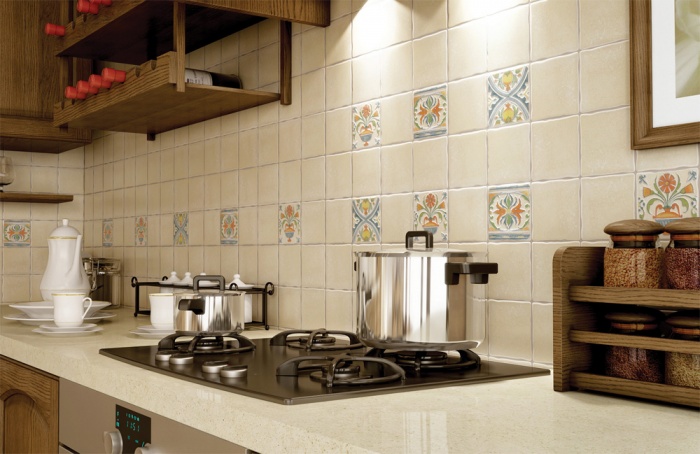
Ceramic tiles can be different sizes, smooth, glossy or textured, matte. The choice of colors is fantastic.
Previously, when the question arose of how best to finish it, the answer was unequivocal: cover it all tiles.
However, now this standard repair is not relevant and more and more people prefer to use ceramic tiles only in the area of the so-called kitchen apron, in combination with plastered, painted or wallpapered walls.
In fact, it is in the area of cooking and washing dishes that tiles are so necessary: they protect against grease, soot, and withstand temperature and humidity. And very easy to clean.
Painting the walls
Paint is another design method when the question arises of how to decorate the walls in the kitchen.
This is the most affordable material, and, in addition, it is possible to mix colors, inventing the most unpredictable shades. However, you should pay attention to some nuances.
So, in particular, the surface to be painted must be perfectly flat, without cracks. The paint must be moisture resistant, breathable and washable. Glossy paint is easy to clean, but unfavorably highlights all the imperfections of the walls. So, semi-gloss or matte paint is ideal for the kitchen.
Wallpaper
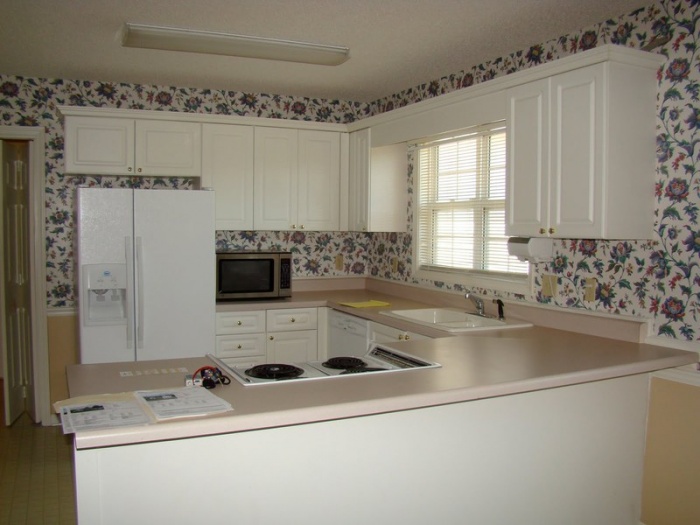
As for wall decoration, for many years our fellow citizens have become accustomed to the very simple way: wallpapering. Of course, the usual paper wallpaper They are completely unsuitable for the kitchen, especially if it has high dampness. Ideal option for kitchens - this vinyl wallpaper.
Due to their coating, they are easy to wash even with a sponge and detergent; they do not peel off due to excess moisture. The fact is that they are covered with a special PVC film, which protects them from dust, dirt, soot, grease, sun rays and moisture.
Non-woven wallpaper appeared on the market relatively recently, but has already gained popularity. They are not only durable and lightweight, but also able to hide the imperfections of the walls. Non-woven fabric allows air to pass through, which means the walls “breathe”.
They do not swell or peel off, and besides, they do not “shrink” after painting. Modern models are not afraid of even a washing brush. Another type of wallpaper is glass wallpaper. Their properties are colossal.
Not only are they easy to clean, they can withstand multiple repaints, provide water resistance and do not tear. In addition, they are absolutely fire-resistant, unlike other wallpapers, and are also capable of reinforcing walls.
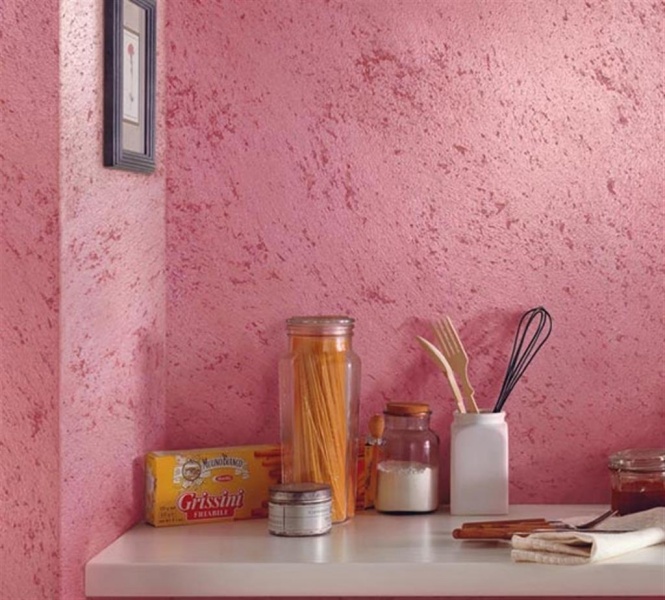
Decorative plaster
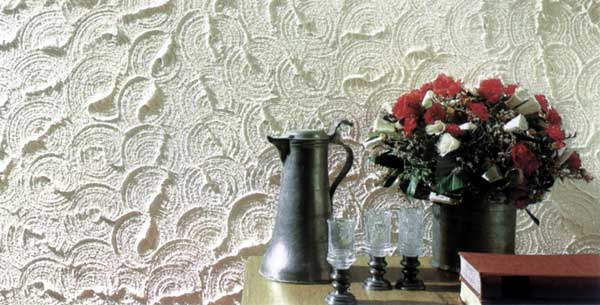
Another popular, although more expensive way to decorate walls in the kitchen is decorative plaster . This material looks quite impressive. It can be either water-based or water-free. Plasters are also divided into two types: structural and textured.
Before applying plaster, walls require pre-treatment: strength, evenness, cleanliness. Before you begin finishing, you should apply a layer of special primer under the decorative plaster.
Other types of finishing
As for the lining, this option is more suitable for those who are interested in finishing the walls at the dacha.
The lining can be either plastic or wood. Last option Ideally suited for a country house, because... In an apartment, such a kitchen will look somewhat out of place.
Wall panels may also be different types. Both plastic and wooden, MDF and even glass. Regardless of the material from which the wall panels are made, they require certain interior solutions to make the kitchen look organic.
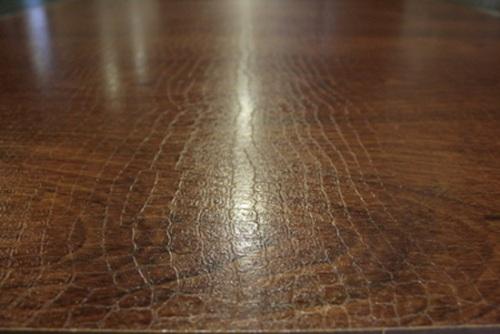
OSB boards as a material appeared quite a long time ago, more than 50 years ago. But since then they have not lost their relevance. They are used for both internal and exterior finishing walls, floors, ceilings, etc.
Essentially, OSB, or OSB, is an oriented strand board. According to its characteristics, it is excellent for the kitchen, because... has high level moisture resistance, does not delaminate, is resistant to fungus and does not deform.
How to finish OSB?
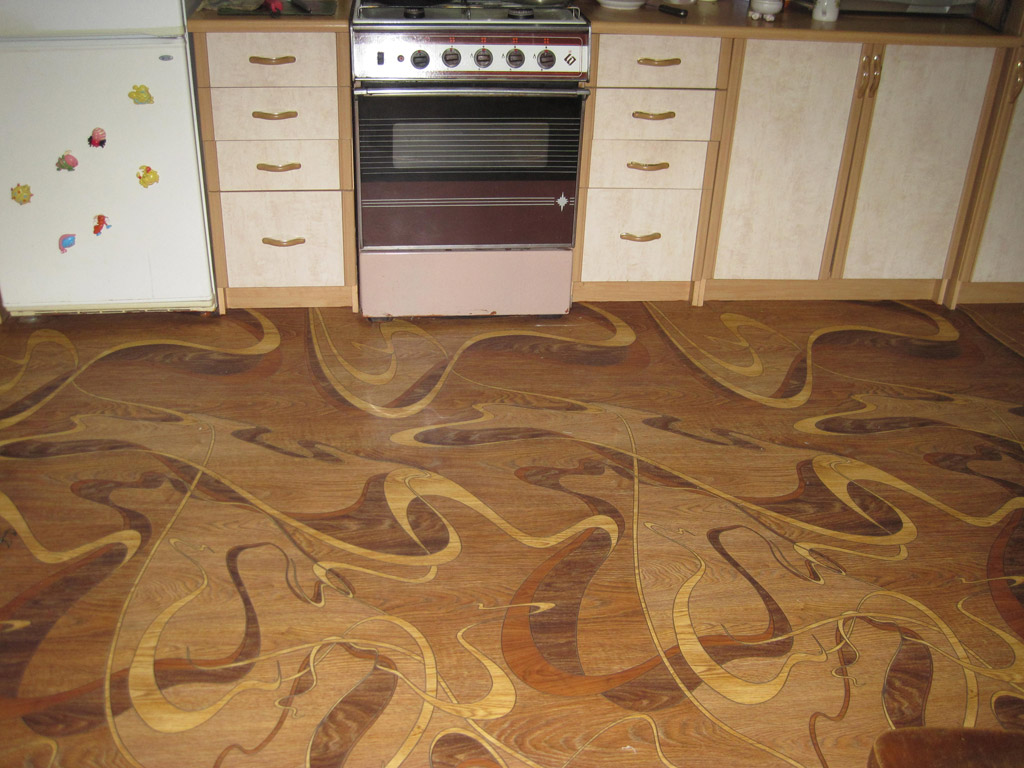
In principle, these slabs already look good thanks to their natural, intricate pattern. It is enough to cover them with varnish. Or you can plaster and paint. If the slabs are used as flooring, then linoleum can be laid on top.
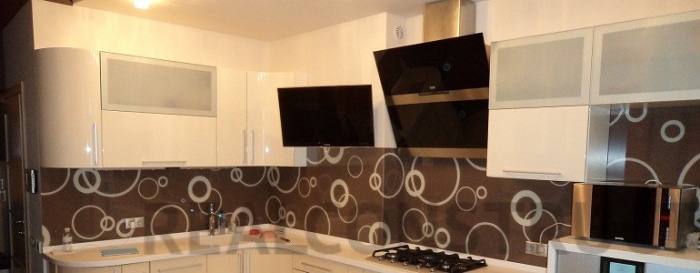
Apron
Perhaps the main focal point in the kitchen remains: the place at the stove and at the sink (no matter how sad it may be for housewives to hear).
These places are most exposed to heat, steam, grease, water and other delights associated with cooking and washing dishes.
Of course, simple paper wallpaper has no place in this area.
Thus, widespread received so-called kitchen aprons, or work area.
But, although the name of this piece of kitchen space is so prosaic, the work area, i.e. kitchen apron can be finished so beautifully that it will become the dominant interior detail in the kitchen.
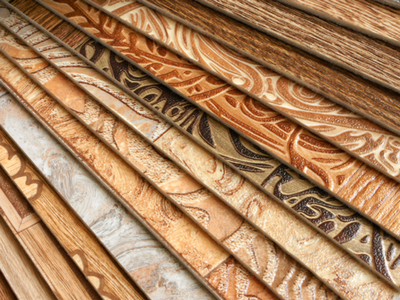
The apron can be trimmed with wood. Look especially effective noble trees with a pronounced texture: linden, maple, ash. However, wood is very susceptible to moisture.
Modern technologies come to the rescue, processing wood in such a way that it acquires both strength and moisture resistance. You can later coat the surface with a clear varnish to preserve the texture and provide additional protection to the surface.
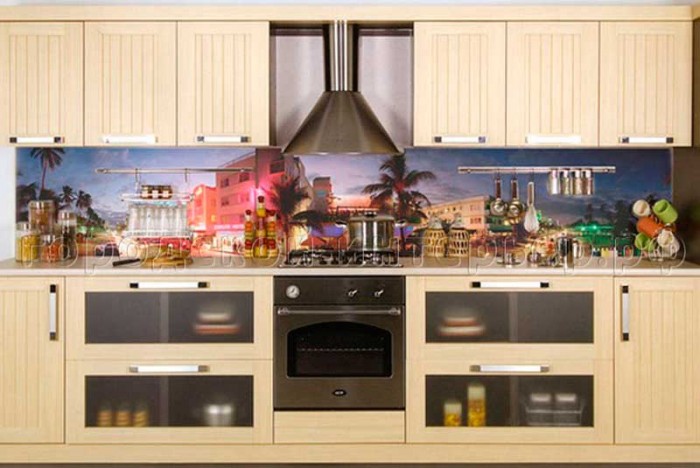
Glass aprons look especially impressive. This material is known for its unsurpassed qualities: it is easy to clean, comfortable, and most importantly, durable.
Modern glass processing technologies have made it possible to make this material also impact-resistant and heat-resistant. This means it will take its rightful place on the kitchen wall. There are many types of glass processing.
It can be tinted, mirrored, colored, engraved, or with an optical effect. The only negative: the better the processing, the more expensive the glass.
Laminated panels- another simple solution. But at the same time it is also quite budget-friendly.
A laminate backsplash can come in a wide variety of shades and textures. It can be wood, metal, with prints, etc. Special treatment makes it impervious to dust, heat, greasy stains, exposure to chemical treatments, as well as to sunlight.
Those who make custom-made furniture with a countertop will certainly want the apron to look as harmonious as possible with the overall design of the kitchen furniture.
This apron is made from MDF. This material has already proven itself to be moisture-resistant and impact-resistant. In fact, its characteristics are not inferior to either decorative stone or ceramic tiles.
The apron can also be made of metal. This is a very extraordinary approach to finishing. This is how, in particular, a stainless steel sheet of the required size is attached.
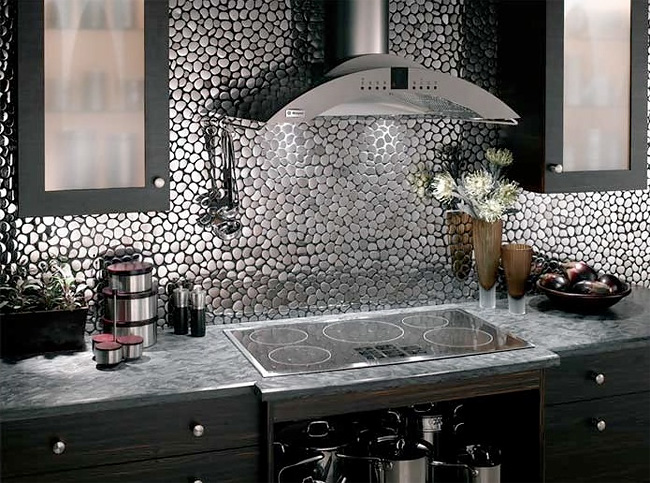
It is perfectly smooth and has a glossy shine. Just what you need for a kitchen in a modern or minimalist style.
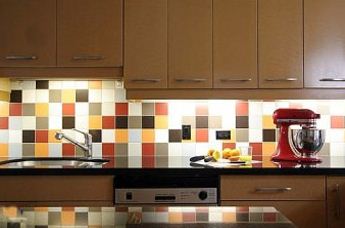
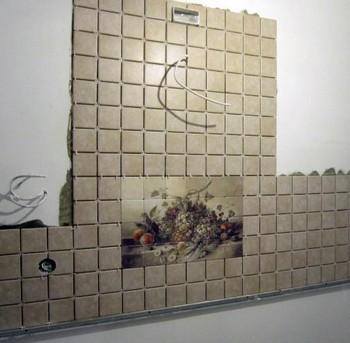
Ceramic tiles are perhaps the most common material for finishing a backsplash. As mentioned above, ceramics has all the properties that are so necessary for decorating walls in the kitchen. Ceramic mosaics have recently gained particular popularity. Essentially, these are tiles of very small sizes (mostly 1-2 cm in width and length), from which simple or complex pattern. Even paintings and panels are created from mosaics.
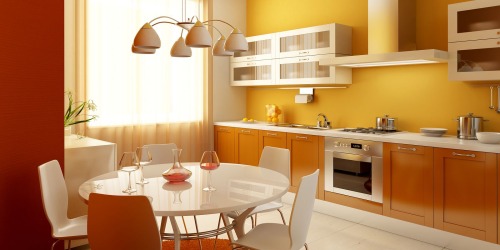
How to decorate the walls in the kitchen, we share secrets
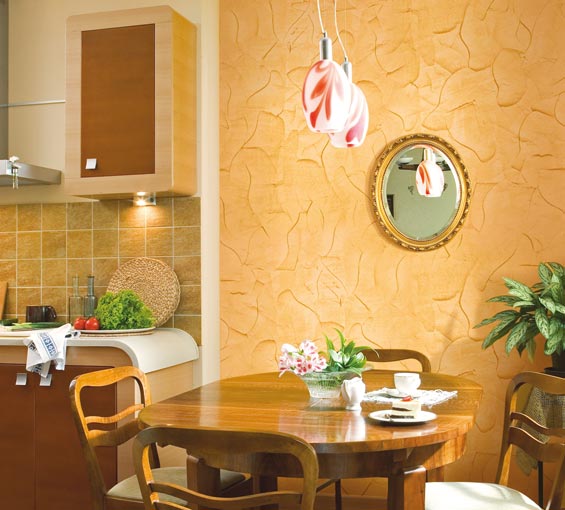
Backsplashes are traditionally tiled. The walls in the kitchen are painted or covered with washable wallpaper. Modern materials They allow you to make a room with steam and spray stylish, and you can forget about repairs for a long time. Natural and artificial stone, frescoes, decorative coating peach colors will suit for a dining room combined with a living room. For small interior light plastic design or painted brick wall.
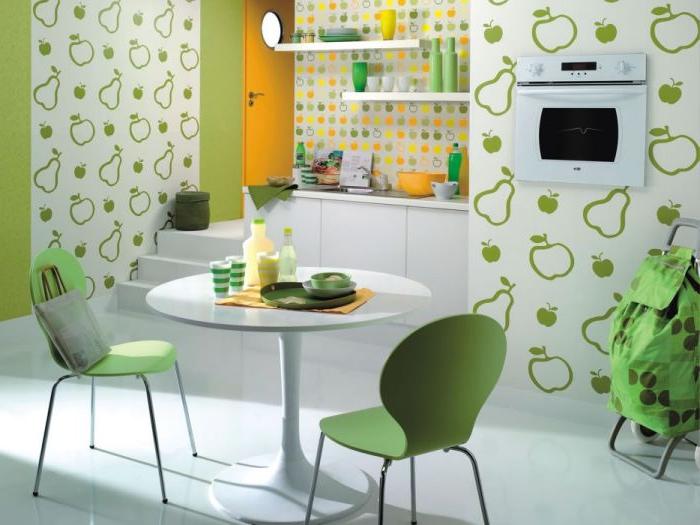
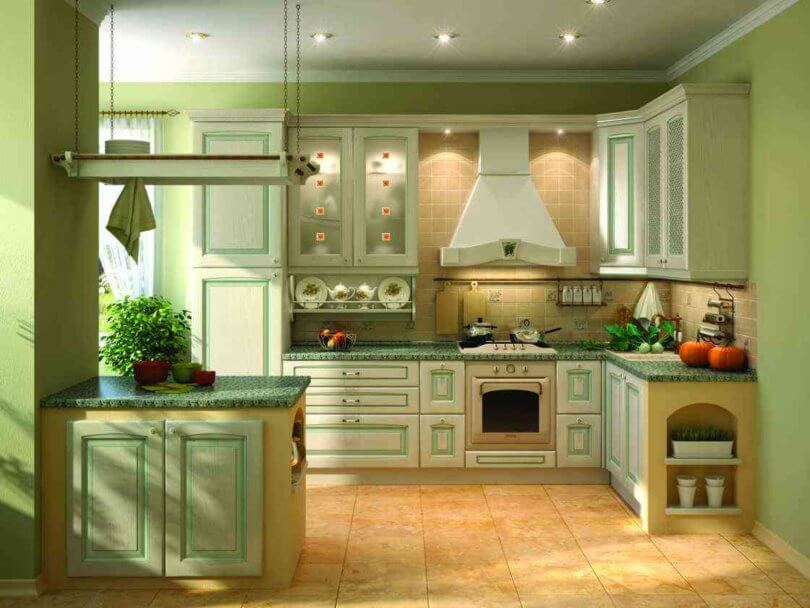
Wall decoration in the kitchen
The kitchen should be stylish and everyone will like it
DIY wall decoration in the kitchen
We again had an interesting evening with a friend. He was interested in options for wall decoration in the kitchen. Wallpaper fashionable color and make an apron out of artificial stone Vadik could do without me. He was interested in ideas for stylish walls in the kitchen, and it would be better if he did not do the next renovation soon. I told a friend what finishing materials were available that were suitable for steam and fire conditions. There are many options:
- washable wallpaper;
- plastic panels;
- natural stone slabs;
- painting in any color;
- brickwork;
- ceramic tiles;
- artificial stone;
- decorative plaster;
- frescoes;
- mosaic made of glass, stone and ceramics.
Original design ideas can be created by choosing any coating. But it's better to combine various materials, use frescoes as decorative element, stone for contrasting textures. Warm background peach color with light green edging or turquoise inserts, suitable for walls in a kitchen of any size. Slate paint in the interior will make stylish walls in the kitchen.
The choice of material is influenced by the design in a certain style, the size of the kitchen, its combination with the dining room and living room. Working wall in the kitchen is done after selecting the background color and decorative style in the interior. Renovation begins with the purchase of furniture and ends with an apron.
Advantages of plastic for a small dining room
DIY kitchen interior
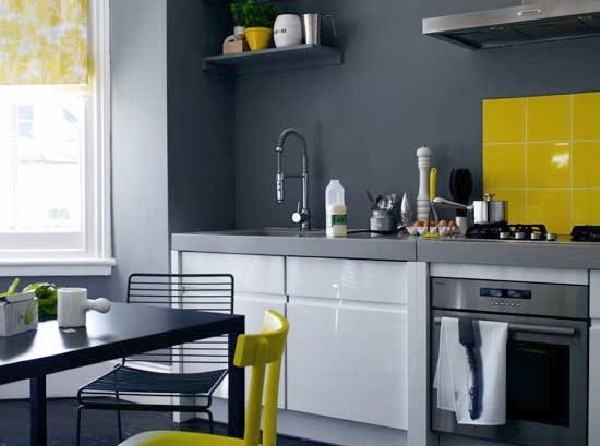
Installation of plastic can be done on the lathing and attached directly to the surface of the wall and ceiling. The glossy light surface visually moves the walls away. The color of the plastic is uniform throughout its thickness. Scratches and abrasions are almost invisible; they appear several years after the repair is done. It will help to change the design in the interior self-adhesive film with any pattern. Any ideas will work for worn plastic. The film can partially cover the affected areas or turn into a picture on the entire wall in the kitchen.
Kitchen walls can be any color. For small interior panels made of appetizing peach or warm beige plastic are suitable. If the window is large and faces south, it is better to use turquoise panels of cool-looking matte plastic for the apron. The color combines the sea, sun and forest, comfort and coolness.
Wall cladding in the kitchen with plastic slabs is moisture resistant and easy to clean. Disadvantage when mounting on a frame, emptiness between the finish and the wall. Insects settle there over time. Plastic panels practically do not allow the walls to breathe. If above the stove good hood, then the steam will be removed in a timely manner, and the plastic finish will require repairs in 15 years.
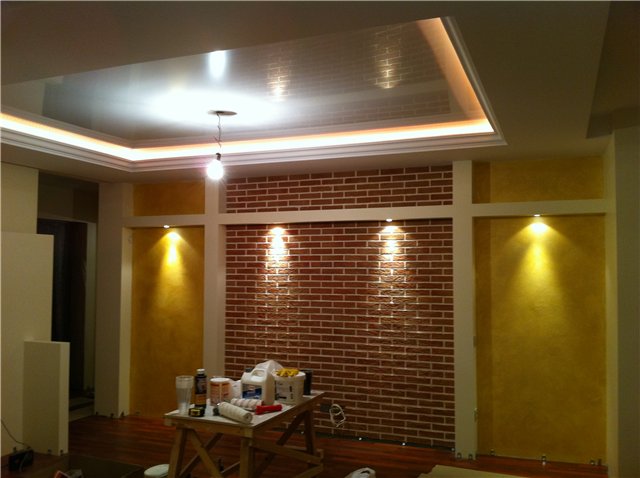
Brick wall and its correct painting
![]()
Bricks for walls in the kitchen
Brickwork is a universal material; it can suit any style. It must be properly coated:
- paint;
- transparent matte varnish;
- make aging.
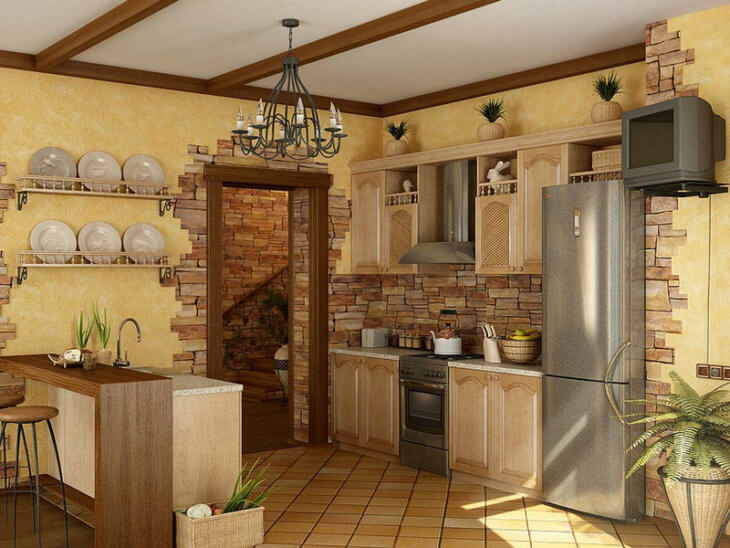
The brutal brick wall in the kitchen emphasizes the glossy surface of glass and chromed metal. It is used in spacious rooms, interior design in loft, industrial, and black box styles. Rough brickwork looks better on an open wall as a decorative element. The color remains brown or the brick surface is aged under soot with black paint, or slate paint is used. The work area can be sealed, a special film is sold, or an additional varnish coating can be applied. A soft transition of the finish will demonstrate peach-colored plastic. Turquoise glossy fragments will create contrast.
The design can be ordered from specialists, but it is better to use your ideas in the interior and the brick wall will appear from an unusual angle.
To visually increase the space, a brick wall in the kitchen is painted in light colors white, milky, peach. The glossy textured surface of artificial stone with the correct geometry of the seams will move the walls away and create a feeling of airiness and light.
Brickwork in the interior also looks great in large rooms. Ideas for zoning walls with artificial stone fragments in the case of studio-style design, when the food preparation area is combined with the living room and dining room. Repairs can be done in parts without completely emptying the house. It is important to think about the color combination, materials and sequence of work.
Brickwork, like stone, is a hard but porous material. They have a surface that absorbs water, so the wall in the kitchen needs a protective coating. Used for this:
- film;
- dye;
- wax;
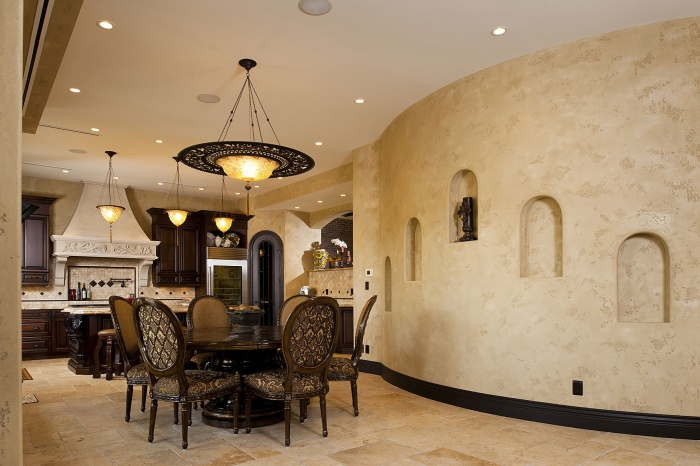
Natural and artificial stone create coziness and a contrasting background for furniture
Decorative stone in the kitchen interior
Artificial and natural stone heavy. You can decorate a kitchen wall with it if you are confident in the strength of the foundation and that it will withstand the load. An alternative is to repair it with gypsum tiles with stone relief and the appropriate color, most often peach or sand.
Stone finishing is possible in a studio style, when the work area is combined with the living room. A rough textured surface reduces space. Stone, even peach-colored, will make a small room feel cramped. Repairs are difficult to do on your own; experience in laying stone is required. horizontal surface. You can use the ideas that interior design gives with stone slabs. It is easier to work with this material; the stone-look panels have the correct shape and fit together easily. Disadvantage of artificial decorative stone in the repetition of elements.
Natural stone is durable, has a unique color and pattern. The disadvantage of the stone is:
- porosity;
- hygroscopicity;
- the surface crumbles.
Artificial stone is devoid of such unique decorative look. When creating it, the disadvantages are eliminated, and the material has advantages that allow it to be used in interiors with steam, moisture and temperature changes.
- The protective film on the surface of decorative stone is hard and resists damage by abrasion and impact. It is difficult to make scratches on it.
- Artificial material with imitation stone has a dense, uniform texture and does not absorb water.
- There is a large selection of colors. In addition to natural tones, you can choose shades of peach, yellow, and any other color to suit your taste.
- You can do repairs with artificial stone slabs yourself.
- The material will serve in the kitchen interior as a decorative element and at the same time as cladding for more than 20 years.
The material has a significant drawback. If the finishing ideas and design are not successful, then it will be difficult to redo expensive repairs. Stone is not a film and can only be removed from the walls by destroying the cladding. After this, the surface must be leveled, plastered and puttied.
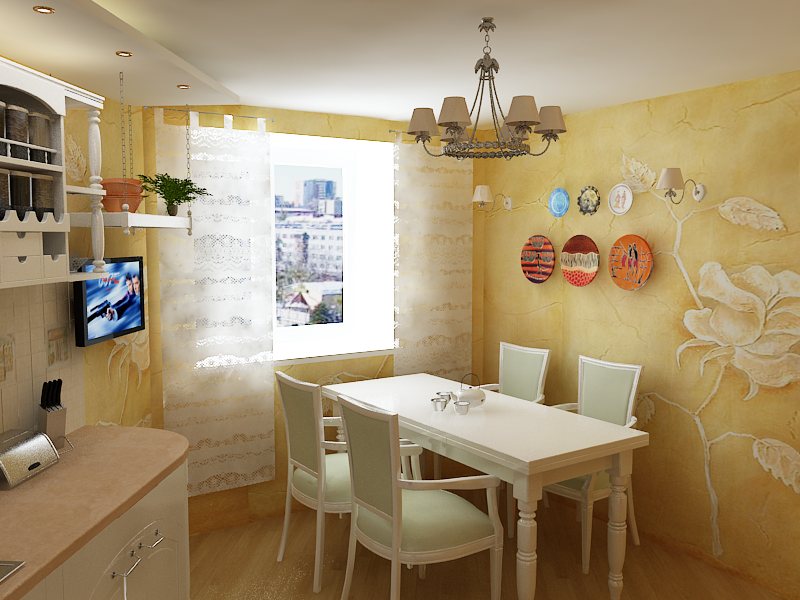
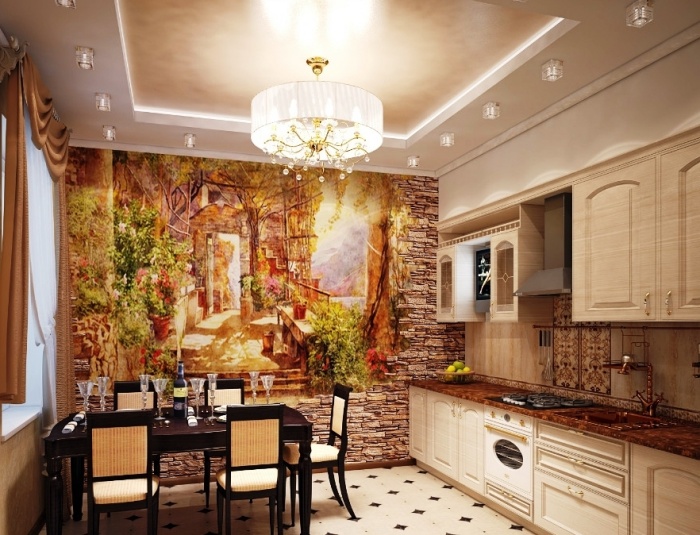
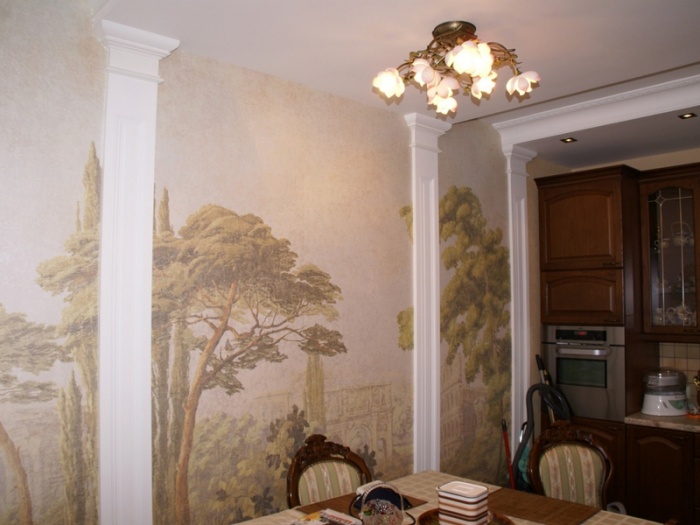
Frescoes on an open wall like a piece of ancient art

Fresco on the walls in the kitchen
Frescoes are often used as a decorative element. Repairs can be made using any materials and finishing colors. The main thing is to leave space on the open wall for the mural.
The ideas of painting on wet plaster have been used for a long time. The frescoes were painted by experienced artists who did not make erroneous strokes. Creating the fresco required special preparation and quick work. The painting was created quickly while the plaster was wet.
Currently, frescoes can be ordered ready-made with delivery and installation. They are created on canvas covered with a thin layer of plaster. The basis can be film and gypsum board. For the dining room and living room, frescoes can have any design theme and be an accent that creates coziness.
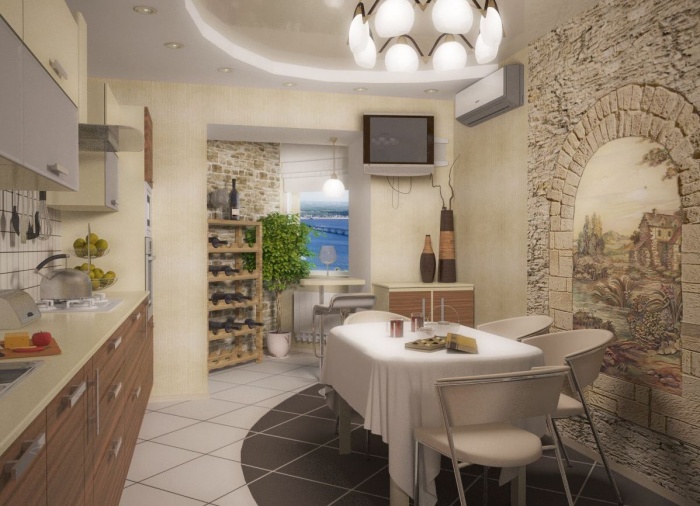
Ideas for decorating a cooking area combined with a living room
How to decorate the walls in the kitchen?
The design of a dining room combined with a living room includes many ideas. A slate board can be used here for children to study in the same room with their vacationing parents.
Zoning of the living room is done by wall decoration and ceiling level. The design uses various materials and textures. Stone can alternate with plastic. Chalkboard paint as low panels will protect the walls from being abraded by feet. It is durable and easy to repair. Children can draw with chalk and markers.
In the combined living room, you can place an island as a partition between the dining room and work area. It also serves as a bar counter. A slate board with lettering and LED lighting turns an ordinary room to a luxurious holiday destination. The design can be in any style and create comfort.
The kitchen space is essentially a production space. The cooking process is accompanied by a large amount of fumes and splashes, and do not forget about objects accidentally falling on the floor and spreading liquids. All this negatively affects the interior cladding. In this article we will take a closer look at the most suitable materials for finishing the kitchen, taking into account their aesthetic and practical qualities.
The more information you receive, the better your decision will become. Let's start with the floor.
Flooring
Tip: it is recommended to use it as a rough leveling base for the kitchen floor. cement screed, and not boards with lags.
Firstly, wood is hydrophobic, and secondly, a plank surface will significantly limit the range of materials that can be used.

The following options are worth highlighting:
Ceramic tiles
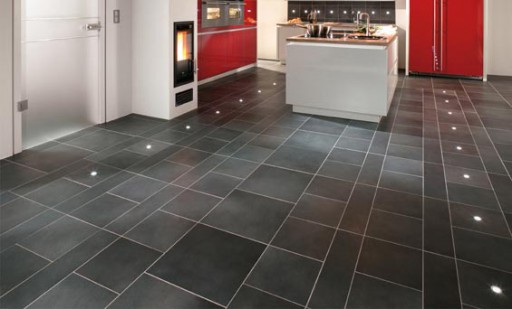
Tile floors in the kitchen can be found very often, and there are completely justified reasons for this, since such a material has many advantages:
- Very high water resistance. Neither fumes nor accidentally spilled liquids will harm such a coating;
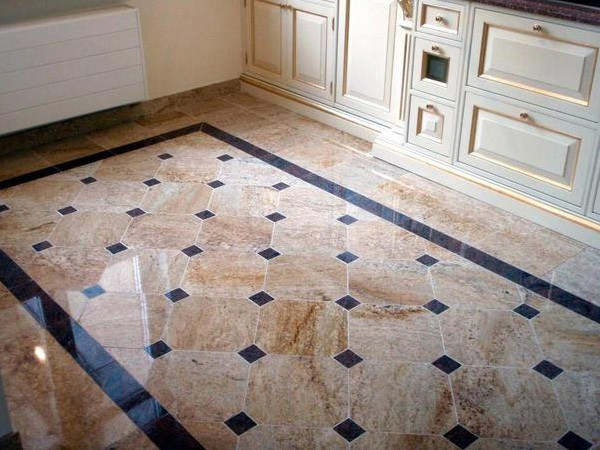
- Excellent resistance to mechanical stress provided the base is level;
- No tendency to get dirty. Dirt practically does not stick and is easily removed by simple wet cleaning;
- Wide range of different models, which makes it possible to fully demonstrate your own design abilities;
But there are also negative sides:
- Complicated installation instructions. To lay out a ceramic floor smoothly and beautifully, you will have to try and accurately follow all the necessary instructions;
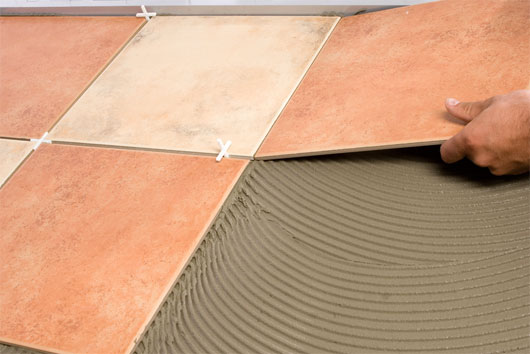
Advice: if you are not confident in your abilities, it is better to seek help from a professional tiler.
His services will cost less than the subsequent elimination of your possible errors.
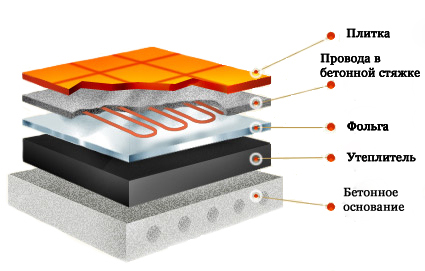
- High thermal conductivity. But here it is also worth noting that this quality, on the other hand, goes very well with the use of the “warm floors” system.
But that's all general description, let's take a look at specific technical specifications of this material:
The price starts from 400 rubles for one square meter, which also gives you flexibility for your family budget.
Linoleum
If you are looking inexpensive materials for finishing the kitchen, then linoleum will be an excellent choice.
Here are its main advantages:
- Easy installation on your own;
- Relatively low cost, which starts at 210 rubles per square meter;
- Spill resistant;
- Wide range possible colors and patterns.
The only significant disadvantages include susceptibility to cuts and punctures, which are possible as a result of accidental falls of various kitchen utensils.
When purchasing, keep in mind that:
- The roll width can be 150-400 cm;
- Roll length – 12-27 m;
- The thickness of linoleum ranges from 1.35 mm to 4 mm. Soundproofing and thermal insulation properties material.
Cork
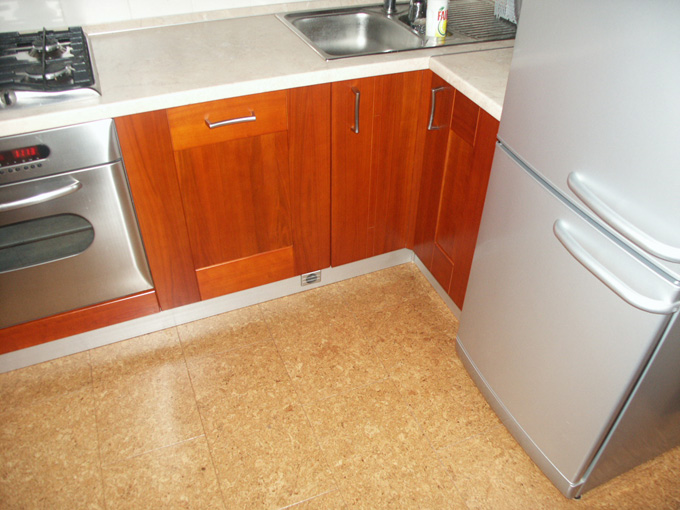
This is a fairly new finishing material for the kitchen, created from the bark of a cork tree.
It is distinguished by the following qualities:
- Incredibly pleasant tactile sensations. It is convenient to walk on such a surface even barefoot;
- Environmental friendliness;
- Low thermal conductivity;
- No tendency to absorb vapors;
- Presence of bactericidal qualities.
Cons:
- Possibility of grease stains;
- Relatively low resistance to mechanical damage.
Specifications:
Laminate
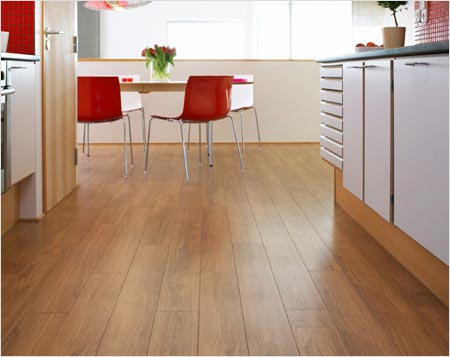
This is a multi-layer material consisting of a durable base with lock connection, decorative pattern and protective top layer, which has the following advantages:
- Easy to install thanks to the convenient tongue-and-groove system;
- Good strength properties;
- Acceptable cost;
- The ability to imitate expensive natural materials.
There are different classes, and the 32nd is ideal for the kitchen, which has certain technical characteristics:
Walls
Washable wallpaper
![]()
It is immediately worth noting that, or, moreover, silk fabrics are absolutely not suitable for cladding kitchen walls, since they will not last long in such conditions.
You should use non-woven wallpaper, which has the following advantages:
- High density structure, and this also determines the low level of moisture absorption;
- Acceptable fire resistance, which will not be superfluous near a gas stove;
- Easy to stick. Do not form folds;
- Availability of models with relief patterns;
- Washable and even paintable. This will allow you to always keep your walls in proper condition at minimal cost;
- Long service life.
Cons:
- Relatively high price, starting from 700 rubles per roll. In addition, if you purchase models intended for painting, then add the cost of the paint itself;
- If there is a textured ornament, there is a danger of it being damaged by pets, which should also be taken into account.
Dye
The most economical finishing materials for kitchen walls are paints. Matte washable compounds will do the job quite well. But remember that this cladding method will leave all the flaws of the wall visible and will require frequent updating.
Decorative plaster
This material for decorating kitchen walls will hide absolutely all unevenness and other imperfections.
In addition, there are several other important advantages:
- Possibility of creating original thematic compositions;
- Easy to care for;
- Harmonious combination with most popular styles;
- Environmental friendliness;
- Water resistance.
There are, however, certain inconveniences regarding the use of such cladding:
- Complexity of installation and dismantling work;
- Considerable cost of the material itself.
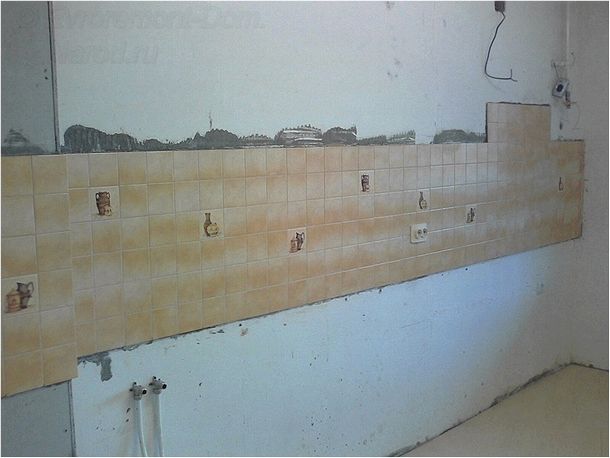
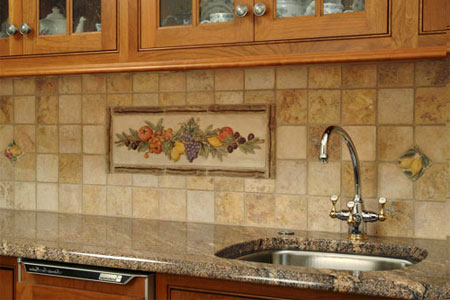
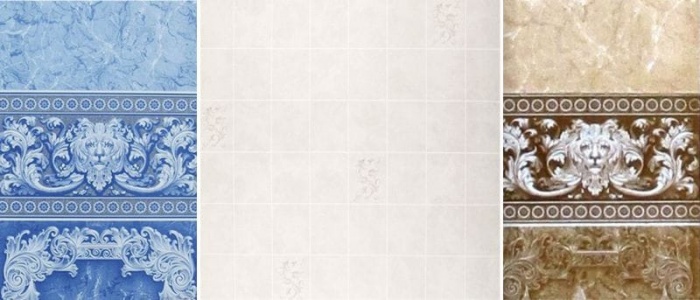
Ceramic tiles
The best finishing materials for a kitchen backsplash are tiles or ceramic tiles. The rest of the room, as a rule, is decorated using one of the methods listed above, and the area most exposed to various types of loads is decorated with ceramics.
The tiles used for walls have slightly different characteristics than those that are laid on the floor:
Ceiling
What materials can be used to decorate the kitchen ceiling? Let's look at this issue:
Suspended ceiling
For arrangement suspended ceiling you can use one of two materials:
- Plastic panels. They withstand moisture, evaporation, and drops of fat. Easy to care for;
- Moisture-resistant drywall. Allows you to create stunning multi-level structures, but requires periodic whitewashing.
The main inconvenience of both options is the “lowering” of the height of the kitchen by several centimeters due to the installation of the sheathing, which is very noticeable for small rooms. But, on the other hand, this factor also allows you to hide all necessary communication.
Stretch ceiling
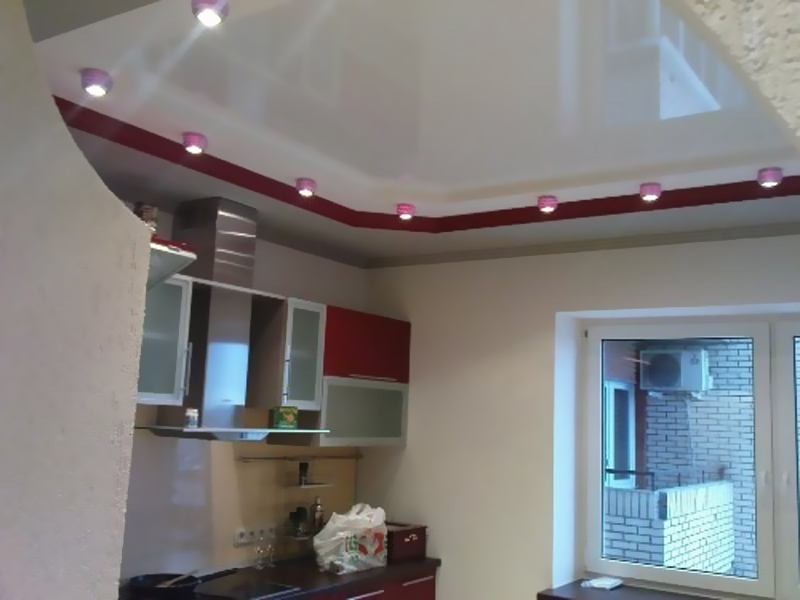
This option has very significant advantages:
- High moisture resistance. In addition, not only the internal part is protected, but also the external part in case of a roof leak or a water supply failure in the upper neighbors;
- Easy to care for. Fat and soot practically do not settle on the PVC surface of this type of finish;
- Beautiful, perfectly smooth appearance.
But there are some clouding circumstances:
- Relatively expensive. Possible cost starts from 360 rubles per square meter;
- Difficult to install. That is, to the price of the canvas itself, you will most likely have to add the services of a qualified specialist.
Ceiling tiles
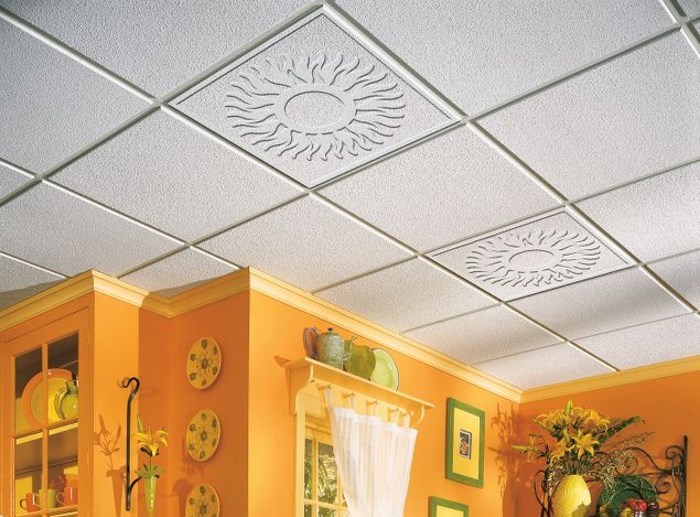
This material is made from polystyrene foam, which makes it the cheapest method of ceiling cladding. It is attached with glue, which is very easy to do with your own hands, and perfectly hides any surface defects.
Flaws:
- Need for frequent care;
- Low heat resistance.
Conclusion
As you can see, the kitchen can be finished in the most different materials, which have their own both positive and negative sides. The choice is yours!
When decorating the kitchen interior, you should take into account the specifics of this room and select appropriate materials. Kitchen walls are constantly exposed to steam, quickly become dirty, fade and lose their attractiveness, so the finish must be waterproof and resistant to mechanical stress. When decorating the walls in the kitchen with their own hands, many choose paint as the most convenient and practical finishing material. But there are other design options that are no less practical, but much more attractive.

Simple paper wallpapers are not suitable for the kitchen, but vinyl, fiberglass, liquid or pressed paper wallpapers are widely used in such rooms. Thanks to the variety of textures and colors, these wallpapers can decorate the most unprepossessing room, filling it with color and a cozy atmosphere.

In the process of finishing the walls you will need:
- starting and finishing putty;
- spatula;
- paint brush and roller;
- primer;
- sandpaper;
- wallpaper;
- wallpaper glue;
- clean rags;
- scissors and a sharp knife.
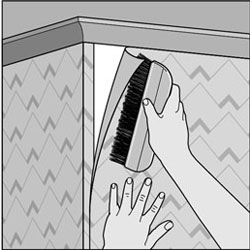
Step 1: Clean the base
In order for the wallpaper to hold as firmly as possible, it is necessary to thoroughly clean the surface of the walls: remove old wallpaper, peel off peeling paint and plaster, and wash off the whitewash. If the walls are too uneven, the old finish is removed down to the very base.
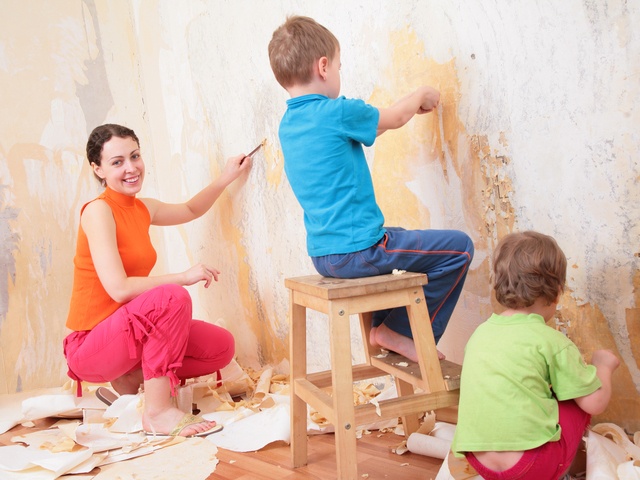
The cracks in the corners need to be expanded in order to seal them properly. After this, wipe the walls with a damp cloth to remove dust.
Step 2. Alignment
The clean surface is treated with a deep penetration primer mixture, which will prevent the development of mold and other microorganisms under the finishing layer. Mix the starting putty and first seal noticeable recesses and small gaps. Deep cracks are filled cement mortar, after drying, leveling is carried out with putty. When the recesses are leveled, you can cover the entire surface of the kitchen wall with putty mortar.
The thickness of the putty layer should be within 1-2 cm; thicker layers may crack when dry and become detached from the base. When leveling, you should check the plane of the wall with a rule or a long wooden strip. When the putty is completely dry, the surface is sanded with sandpaper and then checked again with the rule. If necessary, apply another layer of mortar to make the wall as smooth as possible.
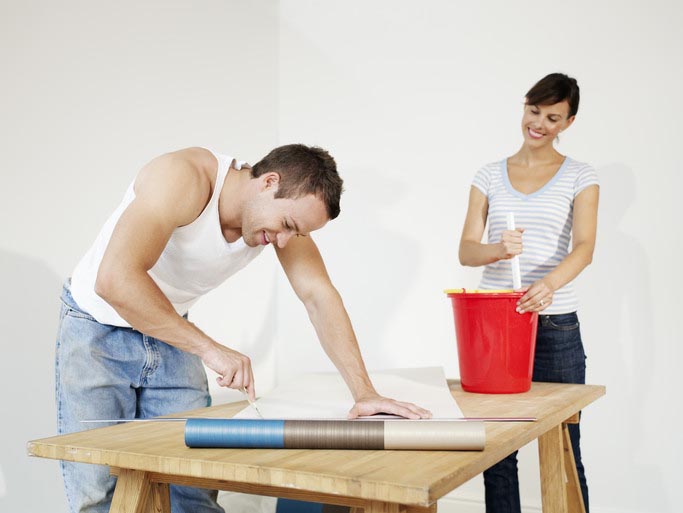
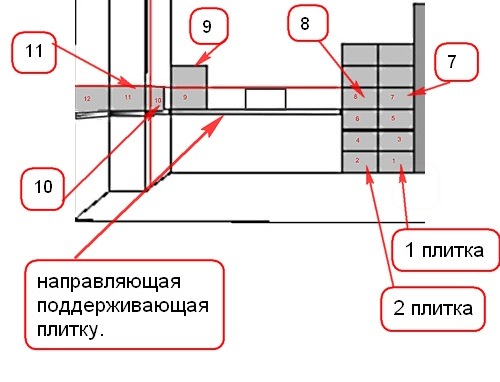
Step 3. Wallpapering
There is no need to paste over the area near the stove and cutting table - it is better to lay out a tiled apron here.
Begin gluing from the corner: cut the wallpaper to length, coat it well with glue and leave for 5 minutes to soak. In the corner, the strips are glued with a vertical overlap so as not to leave gaps. Heavy waterproof wallpaper is glued end to end, otherwise the seams will stand out too much. Each strip is carefully straightened, pressed against the wall and smoothed with a clean rag or rubber spatula. Excess glue protruding around the edges must be wiped off immediately.
Liquid wallpaper is ideal for the kitchen; it looks elegant and original. They are prepared very simply: the dry mixture is diluted warm water, stir thoroughly and leave to swell for 5-10 minutes.
Next, the mixture is applied to the walls with a wide spatula and leveled, creating a certain texture. After drying, liquid wallpaper forms a seamless, durable surface that is resistant to washing and mechanical stress. If any area is accidentally damaged, it can be easily restored by applying a small amount of the working mixture.
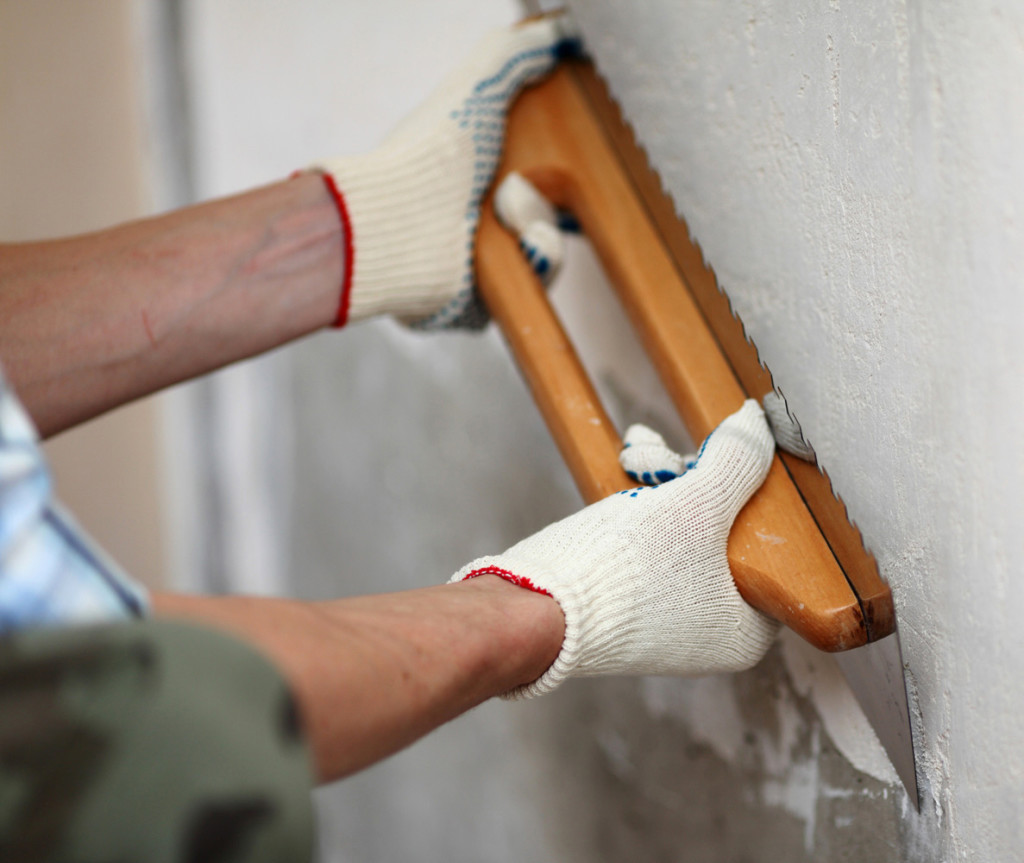
Using plaster to decorate walls
Decorative plaster is also great for the kitchen. It easily tolerates temperature fluctuations, high humidity, reusable cleaning from dirt. This material is very plastic, and therefore can be given any shape and texture. Imitation of brick or stone masonry looks attractive on kitchen walls, which is not difficult to do. Surface preparation is carried out as standard, except that leveling does not have to be done very carefully.


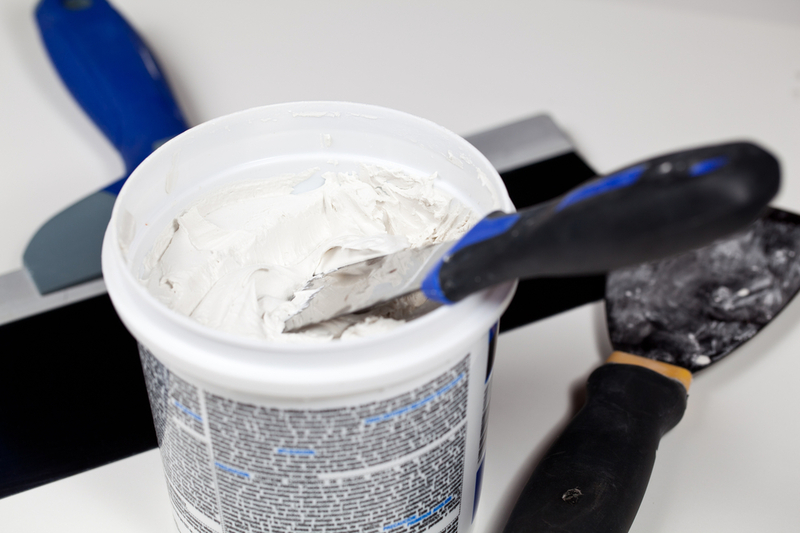
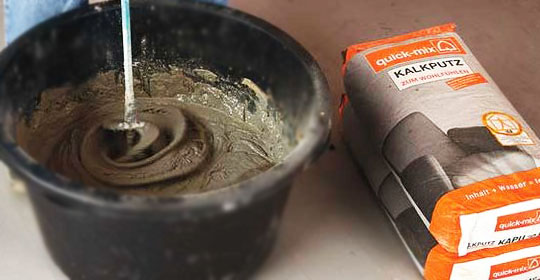
Step 1. Mixing the solution
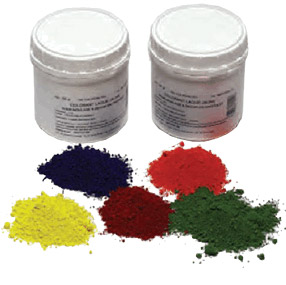
Water is poured into a small container room temperature and pour dry plaster. By using construction mixer The composition is stirred well and, if necessary, a coloring pigment is added. Leave the solution for 10 minutes and then stir again until smooth.
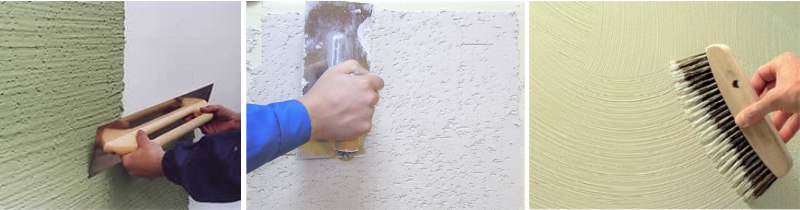
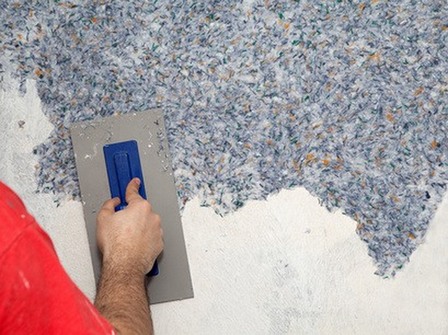
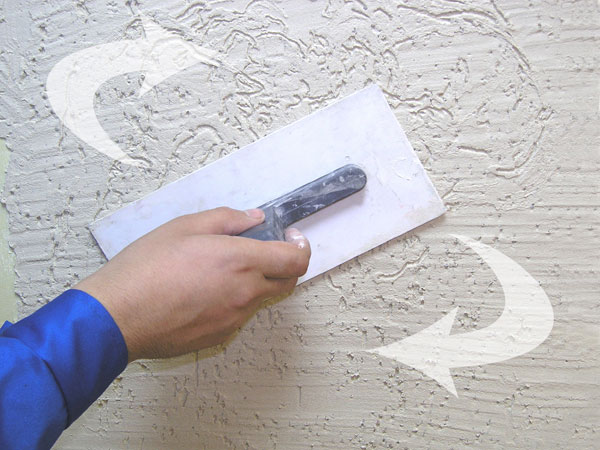
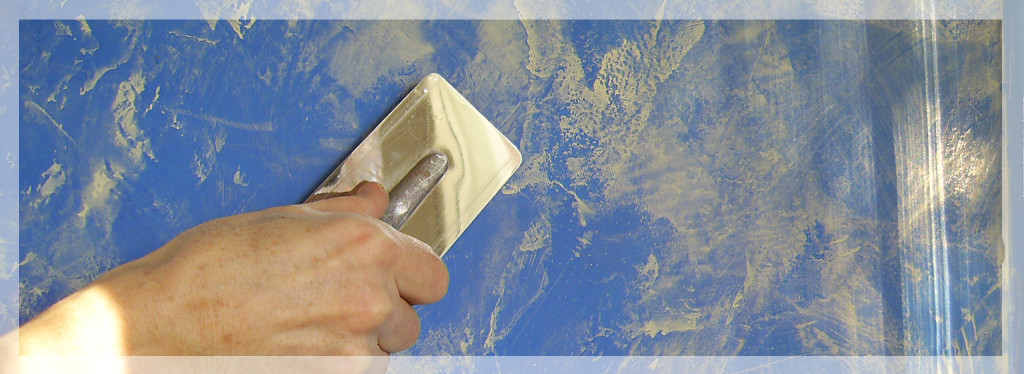
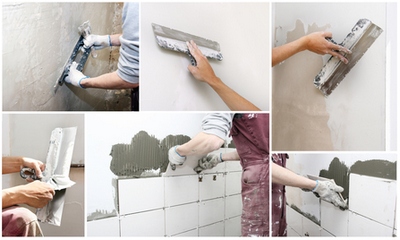
Step 2. Applying plaster
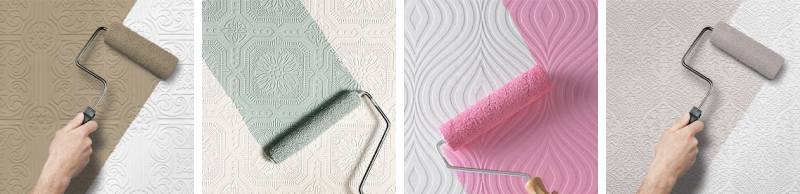
The solution can be applied with a regular or notched trowel, textured roller, a paint brush and even your hands. The relief of the wall depends on the method of application, so you should think about the desired pattern in advance. You can apply the plaster composition in an even layer, and then squeeze out patterns with your fingers, a thin stick, or something else.

To create brickwork, you will need a ruler and a pencil: on a wall covered with an even layer of mortar, draw horizontal solid lines under the ruler. There should be at least 8 cm between the lines. Further in checkerboard pattern vertical sections are pressed between the lines, resulting in neat brickwork. For masonry, lines are drawn arbitrarily, by hand, drawing stones of various sizes and shapes.
![]()
![]()
Patterns made with a notched trowel look original and unusual: to do this, take the solution onto the spatula and distribute it over the surface with uniform circular movements. The depth of the grooves and their number depend on the pressing force and the angle of inclination, which allows you to create a unique pattern.
Step 3. Finishing
The decorative coating should be treated protective composition; it can be varnish, special wax or paint. Most often, it is paint that is used, which is always waterproof and environmentally friendly. The most practical are considered acrylic paints based on silicone and latex: they are easy to apply, dry quickly, allow the walls to breathe and do not wear off with repeated washing.
Ceramic tiles are widely used for finishing kitchen walls and floors. Modern tiles has high strength and a wide variety of colors, shapes and textures. Properly selected ceramics will make the kitchen irresistible. Without relevant experience, it is not so easy to veneer walls, but if you practice a little, everything will definitely work out.
For finishing works you will need:
The walls are prepared using the technology described above - cleaned, cracks sealed, leveled and primed. If the surface is not perfectly flat, it’s okay, the main thing is that the differences in height do not exceed 2 cm per square meter. Minor defects will be hidden by a layer of glue, so they do not affect the location of the tiles.
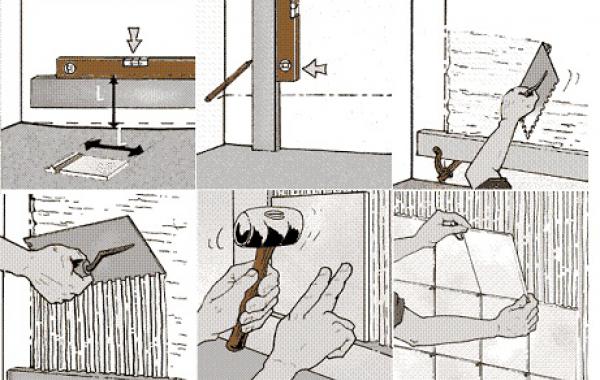
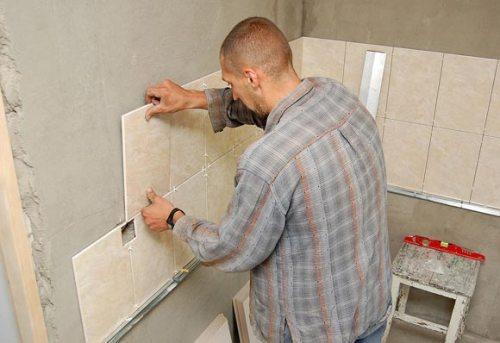
When preparatory process completed, you can begin cladding:
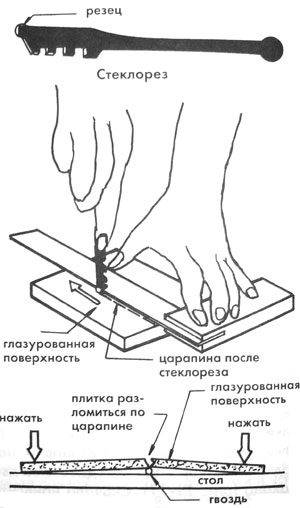
The outer fragments are cut with a grinder into pieces of the required width. All subsequent rows are laid with offset joints, pressing tightly against the wall surface. Be sure to follow the pattern, turning the tile at the desired angle. Changing fragments after the glue has dried will be problematic, so it is better to avoid such mistakes when cladding.
After completing the installation, the walls should not be touched for 5-7 days until the glue is completely dry. After specified period You can start grouting the joints. This process is necessary to protect the seams from excess moisture and destruction, and grouting also gives the cladding a finished and neat appearance. The joints are thoroughly cleaned of glue and dust residues and wiped with a clean damp sponge.
Mix the grout and apply it to the seams with a rubber spatula. Lightly pressing, spread the mixture along the seam, and then apply it with a spatula and remove the excess. So fill all the joints and leave for 20 minutes.
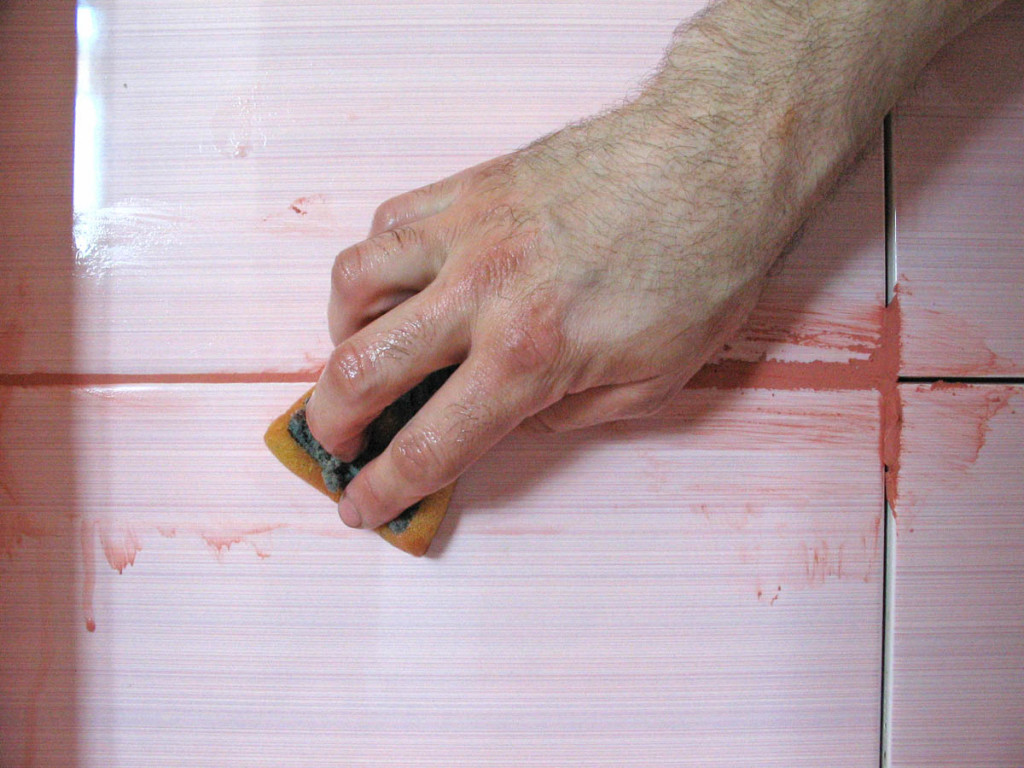
Grouting tile joints
After this, take a bucket of water, a thick sponge and begin to wash the seams. The sponge must be wrung out very well, otherwise the joints will differ in color. The seams are formed with the same sponge, making small, uniform indentations.
Kitchen finishing options
Video - DIY kitchen walls: painting with water-based emulsion
Video - Do-it-yourself wall tiling
Video - DIY kitchen apron
The variety of finishing materials does not facilitate, but complicates the selection process suitable option. You can solve a similar problem by making an overview of the advantages of each position. High-quality wall decoration in the kitchen can withstand high humidity, strong soot, and splashes of grease. The most important indicator is the ease of removing contamination. Only some materials meet such requirements. Let's talk about each in more detail.
Materials for finishing kitchen walls
Whatever the design of the room being described, the materials for finishing the walls should first of all be practical. These groups include:
- Ceramic tiles.
- Painting materials.
- Washable wallpaper.
- Decorative plaster.
- Plastic panels.
Ceramic tiles
Ceramic tiles are a universal finish for kitchen walls. Available for sale different options its designs: with a smooth glossy surface, with a matte finish, textured, very textured and decorative. Tiles help to make high-quality repairs, which are very affordable and durable.

With the help of ceramic tiles, a beautiful wear-resistant surface is formed that is not afraid of contamination; it can easily withstand the effects of chemicals. And this is very relevant for the room being described. A variety of decorative solutions allows you to decorate walls with tiles, like mosaics. But you can’t cover all the walls in the kitchen with tiles. Otherwise, the room will resemble a hospital ward.
Ceramic tiles are usually used to decorate the walls where there will be a stove for cooking and a dishwasher. That is why the use of this wall decoration involves the use of a combination technique. Paints and varnishes most often act as a companion.
More on them later, but for now it is necessary to note one more drawback of the described choice. A mosaic apron above the stove, created using ceramic tiles, can only be installed on a perfectly flat surface. This matter is problematic. To ensure the desired result, it is better to invite a professional tiler. Otherwise, unevenly placed ceramic tiles will quickly fall off the wall. The kitchen will need to be renovated again.
Painting materials
Many of us, when thinking about the design of our own kitchen, are initially inclined to choose paint and varnish materials for wall decoration. There are a huge number of paints on sale, with different compositions. You can tell which paint is best for the kitchen by studying the following recommendations:
Pay attention! For wall decoration, it is necessary to choose moisture-resistant paints that are highly resistant to abrasion and the effects of hot steam.
If you choose glossy compounds, they will significantly simplify the cleaning process, but with matte paints, dirt settles faster and is more difficult to wash out.
Acrylic paints for the kitchen are not the best finishing option, but as a companion with ceramic tiles they work well. With their help, a film is formed on the walls, which allows you to wash the walls during wet cleaning.
Experts recommend choosing water-based compositions for painting the kitchen. No chemical solvents are used for their dilution, which means they are completely safe from an environmental point of view. Water-based paints don't have unpleasant odor, they dry quickly, they can be applied in several layers if desired; when used indoors, the layers will not flake off or peel.
Special antimicrobial paints can be a good alternative to water-based paints. They went on sale quite recently, but have already managed to gain popularity among consumers. Such compositions, after being applied to the walls, form a thin antimicrobial film, which protects the surface from steam, moisture, and mold. Over time, such paints (unlike water-based compositions) do not turn yellow.
Pay attention! There is one important condition for the correct application of antimicrobial paints - they can only be applied to a dry surface.
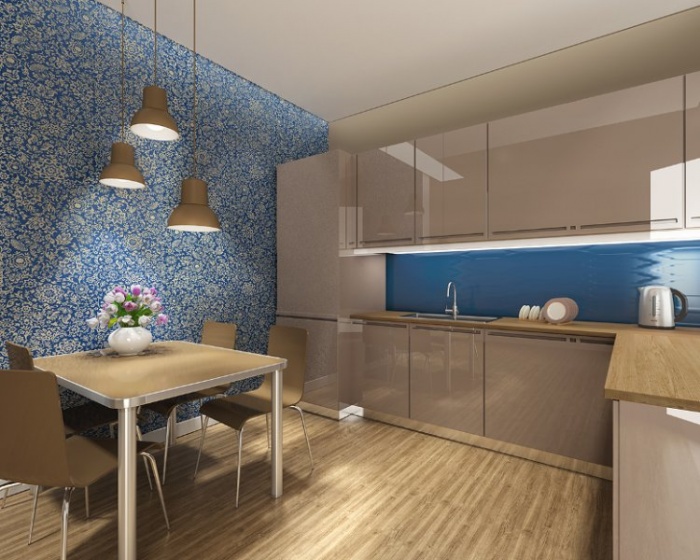
Wallpaper in the kitchen
Thanks to modern technologies Wallpaper has appeared on sale, which can also be used to decorate the described room. For small kitchen It’s better not to choose them; it’s difficult to think through the design of a small room using washable wallpaper. Experts recommend using canvases for decorating large rooms.
For these purposes, it is better to use vinyl wallpaper (they were specially designed specifically for decorating such premises), glass wallpaper and paintable wallpaper.
Vinyl wallpaper - canvas on paper based, the front layer of which is treated with vinyl spraying. After such processing, the canvases are dense, smooth with minimal relief. The described finishing option boasts high wear resistance and durability. But there is one significant drawback: vinyl does not allow air to pass through. The walls in the kitchen will not breathe, so before covering the walls with vinyl, they must be treated with any antimicrobial agent.
Wallpaper for painting It is better to use when there is a need to frequently change the design of the room being described. There is no need to level the walls to paste them. This is a significant plus for those who want to quickly and inexpensively carry out renovations in their apartment. After painting the canvases are no longer afraid of moisture, paint rolled materials best with acrylic compounds.

Fiberglass wallpaper allows you to make repairs that are called “forever.” They are ideal for small spaces. The finish is not afraid of moisture, it does not burn in fire, and can withstand any mechanical loads. The canvases have one drawback - they are quite expensive, you need to buy special glue to glue them, and the installation process itself requires precautions. But the end result is worth it.
![]()
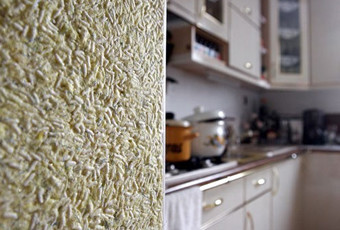
Structural coating
Is it possible to use textured plasters in the kitchen? Yes, if you use them to finish walls that will not stand household appliances. Decorative compositions help create a beautiful structural coating and implement any luxurious design. If necessary, you can select compositions and create a mosaic pattern on the walls, form Venetian covering. Some of them can be applied directly to an unprepared surface.
When choosing relief plasters, it is important to remember that the rough surface absorbs dust and dirt well. Cleaning such walls is very problematic, so experts recommend covering them with special protective layers after finishing. In addition, given the fact that any decorative plaster perfectly absorbs moisture from the air, it is advisable to install good ventilation in the kitchen during renovation. And these are additional costs.
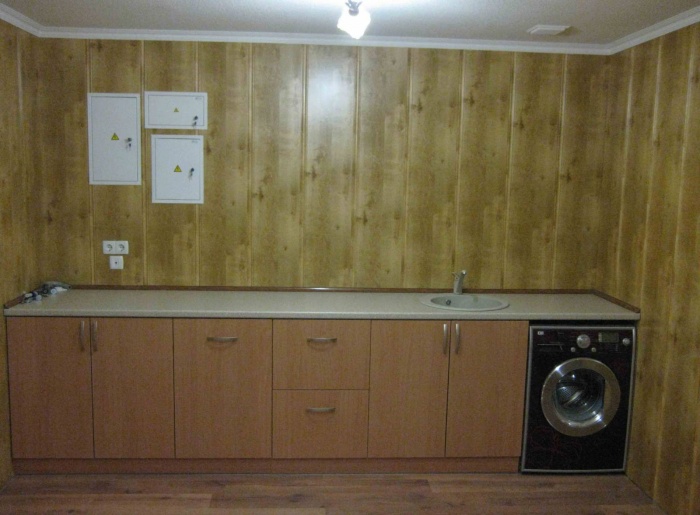
Plastic panels
The walls in the kitchen can be lined with plastic. Wall panels have their pros and cons. They weigh little, installation of the panels occurs quite quickly, maintenance plastic panels Quite easy, they can be washed with water, using the usual household chemicals.
Kitchen panels are made of durable plastic that can withstand impact high temperatures. Modern manufacturers produce lamellas that allow them to imitate any natural material. Wall cladding with plastic is the most budget option kitchen wall decoration.
Speaking about the disadvantages, it should be noted that the described material allows for the implementation of a rather simple design; the material does not have a sufficient margin of safety, it cannot demonstrate high wear resistance. When in contact with an open flame, plastic burns quickly. And this is the main argument for a negative vote in favor of the material described.
Conclusion
Summarizing all of the above, it is important to note that the choice of finishing material largely depends on a combination of several factors. It is important to consider the renovation budget, possible time exploitation of its results, the significance of the decorative component of the issue.