In today's article we will look at extremely interesting homemade product, which will surely come in handy for every DIYer. Namely, today we will look at how to make a jigsaw. This tool very useful in the household and it itself very often comes in handy when building any homemade products. Today we will look at one of the cheapest and available options assemblies. The homemade product will consist of the cheapest and most available materials, which you probably have at home, and if not, then you can easily find them in your city, or you can order them from our Chinese friends. In general, the homemade product is very interesting, so let’s not delay with a long introduction, let’s go!
For this homemade product we will need:
- 775 class commutator motor. (these are usually installed on professional RC models).
- Wires
- Some kind of plastic flywheel (large flat gear)
- PVC pipe, the internal diameter of which will be equal to the external diameter of the electric motor
- Corner for PVC pipes
- Jigsaw blade
- Small metal plate
- A small (but thick) board
- Thick wire (or, for example, a bicycle spoke)
- Button
- Power connector
- Power supply (12-24v 1-2A)
- Not a large sheet of laminated MDF panel or plywood
We will also need the following tools:
- Soldering iron
- Solder
- Marker
- Hot-melt adhesive
- Wire cutters
- Pliers
- Round nose pliers
- Cold welding
- Self-tapping screws
- Screwdriver
- Heat shrink
- Drill and core drill (with a diameter equal to the diameter of the engine)
To begin with, we need to choose the most main element design, namely an electric motor. In our case, it should be with a large number of turns (such an engine has a large torque). And also, in order for the homemade product to serve you for a long time, you should take into account that it is desirable that the electric motor shaft rests on bearings, and not on bushings, as is often the case. We also need some kind of flywheel; for this, the author of the homemade product took a large and flat gear that he had.

We put our flywheel on the electric motor shaft, and since the diameter of the internal hole of the flywheel is slightly larger than the diameter of the electric motor shaft, the author of the homemade product decided to strengthen the connection with a small piece cold welding. This connection turned out to be quite strong and reliable. Then, using a simple soldering iron, we solder two 15cm wires to the contacts of the electric motor and insulate the connection with heat shrink.


After which we will need to take a PVC pipe, the internal diameter of which will be equal to the external diameter of the electric motor. This pipe will serve as both a motor mount for our engine and a handle for our tool. We also need one suitable PVC corner for this pipe.

To begin with, we need to make all the necessary holes in the PVC pipes. Namely, on a long pipe we should make a hole for the button. To do this, use a marker to leave a mark in a place convenient for you and make a through mounting hole for installing the button. And at the corner we should make a hole for installing the power connector (to make a hole, we repeat the same steps as we did with the pipe above).


Then we “press” the electric motor into the PVC pipe that we prepared earlier. Note that the engine must be installed so that there is a minimum gap between the PVC pipe and the flywheel (but the flywheel itself should not touch the pipe).


For the next step we will need to take a jigsaw blade (whichever you plan to use) and a small metal plate. We apply the canvas to the metal plate, as shown below, and trace it around the office using a marker. Then, using wire cutters, we cut out triangles from the metal plate so that we end up with antennae where the blade expands.


We apply the canvas to the plate in the same way as we applied it earlier, and using pliers we bend and press the antennae first, and then bend the plate, as shown below. Next, use round pliers to twist the same “roll” as in the photo (see photo).


The next step we will again need to take a small metal plate. We bend this plate using pliers so that we get a “T” shaped part with a groove inside. Inside the groove itself, the canvas that we previously prepared should move quietly.


After which we will take a small, but wide board with dimensions approximately as in the photo below. Then in the indicated place (see photo) using a core drill we make through hole such a diameter that a PVC pipe with an electric motor fits securely in it.


We apply another metal plate to the newly made workpiece in the place indicated in the photo. Metal plate should be slightly larger in width and length than the “T” shaped part that was made earlier. Then we attach the “T” shaped part to the plate that is already lying on the board and, having drilled holes, screw these plates to the board using self-tapping screws.


Then we need to take a thick and stiff metal wire or, for example, a bicycle spoke. And from this knitting needle we should make a kind of connecting rod (see photo). This part must connect the blade and the flywheel so that when the flywheel rotates, the blade moves “back and forth.” You should end up with a piece approximately the same as shown in the photo below.


After which we install the “connecting rod” first on the canvas, and then install the PVC pipe with the electric motor in its place (to the board, as in the photo below). And the second “connecting rod” goes into the flywheel hole. By rotating the flywheel by hand, we check the functionality of the mechanism.


Let's move on to the electronic part of the homemade product. Namely, we install the button. We solder one wire from the electric motor to the button, and the second wire is just a 5-6cm piece. We insert the button into its mounting hole and secure it with hot glue. Then, having inserted the wires through the corner, we will install the corner itself on plastic pipe, as it is shown below.


Next we should install the power connector. We solder the wires coming from the electric motor and from the button to the connector itself (the wires should be inserted through the mounting hole for the connector), and finally, we install and secure the power connector in its place using hot glue.


We insert a piece of the same PVC pipe to the second end of the corner. The length of the pipe should be such that when we place the structure on the table, the handle itself should be exactly parallel to the table. After which we will need to take some small sheet of laminated MDF panel or plywood, the main thing is that it glides well over the surface. From the panel we took you, we cut out a similar blank as in the photo below and connect it to our mechanism using hot glue, and in the place where it connects to the wood, we fix it with self-tapping screws.


Everything is ready! In the end we got very useful tool, which will definitely come in handy for you on the farm! All that remains is to connect the power supply and test it, you can see the homemade test below.
A jigsaw allows you to quickly and efficiently cut wood. consists of a working surface, stands, motor and spindle assembly. Some devices are made on stands. Clamps are quite often installed on the side of the work surface. It is also worth noting that the models differ in power. The manufacture of a jigsaw can only be carried out if the instructions are followed.
Desktop devices: expert reviews
If you believe the reviews, then making a desktop modification is very simple. First of all, a stand is prepared for work surface. Its width should not exceed 30 cm. It is more advisable to select a single-phase motor with a maximum voltage of 220 V. Homemade jigsaw machine(desktop) produces an average operating frequency of 55 Hz.
Reviews from experts say that it is better to use yews made of steel; if desired, you can cut them yourself. The file is installed on a spindle assembly, which is attached to the stand. Many models use a latch that acts as a stop. A screw is used to secure the file. small size.

Models with legs
If necessary, you can do this yourself. Modification drawings include frames different sizes, and spindle units are usually used with guides. Many models are made on a wide bed. Legs can be installed from tubes. There are also machines with plates. After cutting out the working platform, you should work on the spindle assembly.
If we consider devices with control units, then the model will require a controller. It is more expedient to use a 220 V commutator type motor. Yews on jigsaw machines are installed as a rotary type. The direction must be welded to the edge of the plate. In this case, the file must be securely fixed. The optimal height of the spindle assembly is 2.2 cm. At the end of the work, it is important to start installing power cable and connecting equipment.
Reviews of devices with wide frames
Professionals are able to assemble a jigsaw machine with their own hands. Device drawings indicate the presence of wide stops. However, first of all, you need to install the bed. If we consider a simple machine, then the lock for modification can be selected of a small length. Reviews from experts indicate that two racks are enough for the model. To assemble the machine it is used welding inverter. The spindle assembly itself is installed in the central part of the working platform. The hole for the file can be made with a milling cutter. It is also worth noting that experts do not recommend using two-phase motors.

Compact modifications
By following the instructions, you can assemble a compact jigsaw machine with your own hands. Device drawings include double racks and narrow frames. Beds are used with a low profile. Many models have a spindle assembly without a holder. In this case, the guides are installed to a short length. For self-assembly For models, it is recommended that you first select a high-quality frame.
Additionally, a clamp is soldered under the working plate. To reduce vibration levels, you can use a pad. Regular glue is used to fix it. The file for modification should be selected with a small thickness. The optimal installation distance for the central unit is 14 cm. At the same time, the average platform width is 17 cm.

Jigsaws 2 kW
If you wish, you can make this jigsaw machine with your own hands. Drawings for assembling the modification are very easy to find. As a rule, frames are used with a width of 35 cm. The thickness of the plate should be about 1.5 mm. The hole for the file must be made before installing the central unit. If we consider models without stops, then the frame is used with a low profile. It is also worth noting that it is more advisable to install the spindle assembly on a lining.
A casing is used to reduce noise levels. Many models use multiple stops. In this case, the unit is installed at a height of 10 cm. It is better to fix the file on the plate. The clamp can be used screw type. After fixing the central unit, the motor is installed. For modification of this type, a device with a single-phase unit is suitable.

3 kW models
It’s quite easy to make a 3 kW desktop jigsaw with your own hands. Experts recommend using racks with wide stops. The clamps need to be installed only after the central unit. The modification file can be adjusted to 1.2 mm. Some experts make the hole after installing the frame. In this case, the supports are soldered to the sides of the table.
Next, it is important to evaluate the spindle size. It is more advisable to use the motor with a protection system and casing. It is also worth noting that collector devices that operate at a frequency of 45 Hz are very popular. They have low energy consumption and do not overheat. Holders are used to secure workpieces. The optimal spindle height is 15 cm. It is also worth noting that there are models with tuning plates. A flywheel is used to control the stand. A conventional controller is available to install the control unit.
How to make a 5 kW device
Having prepared several stops, you can make a jigsaw machine with your own hands. Reviews from experts indicate that 5 kW models are well suited for longitudinal cutting. Before starting work, all necessary tool. You will need a saw and welding machine and cutter. It is more expedient to assemble the frame for a jigsaw from steel plates with a thickness of 1.3 mm or more. You need to immediately provide a place for the motor. The frames in the devices are installed with a high profile.
At this stage, you can immediately cut a hole for the file. The plug assembly must be mounted on the top of the plate. Additionally, it is worth noting that the file will require a large holder. If we consider simple model, then the racks can be installed on the sides of the frame. Yews are of the rotating type. There must be a stand at the top of the frame. A small casing is fitted under the motor. On average, the width of the frame should be 35 cm. If we consider professional models, they use adjustable clamps.

Modifications for two quills
How to make a jigsaw machine with your own hands? The model with two quills is assembled only on a wide frame. First of all, the plates for the bed are cut out. If we consider a desktop modification, then it is more appropriate to install the control unit at the top of the device. Optimal width frame is 45 cm. In this case, the spindle assembly is installed behind the stops.
There must be provision for racks. Many models use transmission units. In this case, motors are only suitable for commutator type with a frequency of 30 Hz or more. The file is installed as standard in the holder. The optimal height of the spindle assembly for models is 35 cm. Quills for adjusting the bed are used with flywheels.

Models with three quills
It’s easy to make this one with your own hands based on a single-phase motor. Tools should be prepared in advance. Many models are equipped with frames with four stops. They have a long length and a high profile. It is also worth noting that spindle assemblies are selected from. At the beginning of work, it is very important to calculate the length of the frame. If we consider ordinary spindle units, then the stand for them is prepared in a short length.
The central support must withstand heavy loads. A welding inverter is used to install the plates. The motor will require a casing that will significantly reduce the noise level of the device. The saw for modifications of this type is suitable for 1.2 mm. With a power of 3 kW, a device with three quills will produce a frequency of 55 Hz. To fix the flywheels, brackets are needed.
Lately I have been very interested in cutting out with a jigsaw, I don’t even know why. It all started with the fact that I needed to cut out several gears from plywood...
And off we go. At first I cut out the gears by hand, then I thought, pumping the muscle with a hand jigsaw is of course good, but if you automate the process, it will be much faster!
So, first of all, let's get to know this manual jigsaw For artistic sawing.
(all photos in this article were found on the Internet)
To saw you need files, they are thin as wire, with sharp teeth. Previously, such files were sold in a pack of 50 pieces, recently I went to the store, and these “bimesmen” started selling them individually. You can break a couple of these files in an evening.
For cutting, we will also need a special table, it can be a board with a conical slot, screwed to the table with screws or a clamp.

To make it easier to attach the files to the machine, it is better to use a special device that will compress the contour of the jigsaw, so you can easily change the file without effort. With the help of a wooden eccentric, compression occurs.

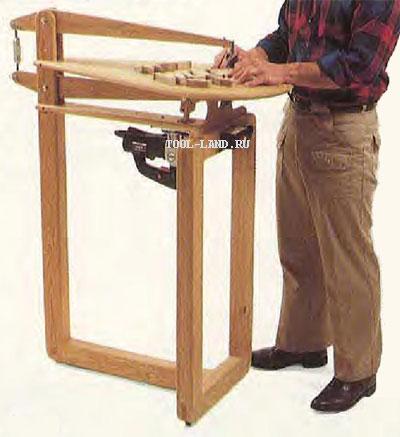
And now about automation. In the next photo you see a factory-type tabletop jigsaw; you can find a sea of different modifications on the Internet. This thing is not very expensive, but even if I really want it, I won’t be able to find it in my city, and in principle there’s no need for it. 
Industrial machines are, of course, good, but I’ll probably use them for a couple of months and give up on this activity, and in general, such a machine, as I learned, can be easily assembled yourself from plywood and wooden blocks.


The following photo uses an industrial manual jigsaw and a spring to return the saw.

So, we can easily assemble a tabletop jigsaw with our own hands at home. I personally did just that, but I have a special design, there are no photos of me in this article, but I will definitely post them, as well as a video in progress.
The article will primarily be useful to those people who often work with wood as a hobby, without making money from it. The author presents a fairly budget-friendly project for a desktop jigsaw, which can be assembled in one day, with minimum costs for materials.
To create the machine you will need the following materials:
- Working manual jigsaw;
- Plywood;
- Self-tapping screws and bolts with nuts;
- Guides for furniture drawers;
- Two bearings;
- Compression spring;
- Spray paint;
- Self-adhesive paper.
Materials and tools are standard, available in every workshop.
Step 1. Body.
The first step is to create a body for a manual jigsaw from plywood. Here you need to think in advance where the holes for the switch and speed controller will be located.
It should look something like this:

Step 2. Tabletop.
It is better to take a thick piece of chipboard with good coverage, since the workpieces being processed will rub against it during operation of the machine.
A hole for a saw blade is drilled in the chipboard. The jigsaw itself will be attached to back side countertops.
A stem for attaching the boom is also made from furniture guides:

Here's what it looks like assembled:

And the tabletop is attached to the body:

Step 3. Arrow.
The boom itself will be made of two furniture guides. They are bolted together to increase rigidity.

Boom supports are made of chipboard. Before painting and installing them, the point at which the boom is attached to the support is measured. Before doing this, they need to be installed in their place:

After this, it is necessary to drill holes in the support for the bearing seats.

Step 4. Painting.
The prepared supports are spray painted.

While they dry, the machine itself is covered with self-adhesive tape.

Step 5. Assembly.
Bearings are inserted into the supports and screwed into place.

The boom mounting axis will be made of two bolts screwed into the guides as shown in the photo. The diameter of the bolts is selected in accordance with the diameter of the inner race of the bearing.

The bolts are tightened securely, after which the two halves are screwed to each other.

This clearly shows how the boom will be secured in the supports:

The boom is installed in its place and secured with nuts.

Next you need to install the garter spring. It is necessary in order to return the arrow to its original position after the jigsaw pulls it down. This is how the saw will move back and forth. It must be adjusted so that it is not too soft (this will complicate the operation of the machine) and too hard (this can lead to overheating of the jigsaw motor).
How to secure it is shown in the photo:


Then, from a thin strip of metal (1 mm), it is necessary to make fastenings for the file to the arrow. They must rotate freely on the axis, since during operation the boom changes its angle of inclination to the jigsaw, and if they are static, this can lead to breakage of the saw.
This is what the mounts should look like:

The boom supports are additionally reinforced with a long bolt, it can be seen in the photo:

Step 6. Electronic part.
Since access to a manual jigsaw is limited, it is necessary to place the controls on the outside of the body.
To adjust the rotation speed of the jigsaw electric motor, the author used a phase power regulator. Here is its electrical diagram.
A jigsaw is a very common tool. However, when working with it you have to face certain difficulties: the file either breaks or jumps out of the clamps; when cutting along a curved contour, it often twists, which makes it difficult to maintain the required direction. A homemade electric thermal jigsaw is much more convenient, which allows you to cut parts of any shape, both from plywood (wood) and organic glass, ebonite and other flammable or melting materials. Although it also has some disadvantages.
So, I’ll try to tell you how to make a heat-cutting jigsaw
The design and main dimensions of my electric-thermal jigsaw are shown in Fig. 1, however, everyone is free to select the dimensions of the jigsaw themselves (often these dimensions are determined by the parts at hand).
In general, a jigsaw consists of a tubular arc, a handle, an electric button, nichrome wire, wing nut screws, insulating gasket, earring and electrical wire.
The arc (frame) of my jigsaw is made of a duralumin tube with a diameter of 12 mm. It can also be made from multilayer plywood. But in any case, this frame should be light and durable. The handle is made of textolite 10 mm thick. On one side, a cylindrical shank is attached to the handle, the diameter of which corresponds to the hole of the arc tube. A groove is cut in the shank for the power wire to pass inside the tubular frame. On the other side of the handle there is an earring (Fig. 2). It is made of 1 mm thick copper sheet and is screwed to the handle with two screws. The end of the nichrome wire, the “cutting” element, is attached to the earring with a screw and wing nut. In the middle of the handle, with the help of two cheeks (plates) made of sheet duralumin 0.8 mm thick, an electric button is fixed. At the other end of the frame, a PCB plate with a clamp for the “cutting” element is attached (see Fig. 1).
 Rice. 2. Earring. |
A spiral from an electric iron (spiral wire diameter 0.5 mm) is used as a “cutting” element. The length of the wire, of course, depends on the size of the tubular arc. The nichrome wire in the frame is fixed with some tension.
To heat a nichrome wire, a voltage of 12...14 V is required, and a rheostat is desirable to regulate the degree of heating of the wire.
The operating current of a heat cutter depends both on the characteristics of the material being processed and on the length and thickness of the nichrome wire. With the jigsaw dimensions shown in Fig. 1, and using nichrome wire with a diameter of 0.5 mm, the current consumption is determined accordingly by the properties of the material being cut and is usually 3...5 A. Before starting work, the rheostat is set to the current required to heat the wire to the appropriate temperature. It must be taken into account that at high current ( high temperature wire), the same plywood can catch fire, and if the wire is not heated sufficiently, for example, when processing plexiglass, the latter will only soften, but it will not be possible to cut it. A jigsaw is simple in design, easy to use, and allows you to cut (burn out) parts of any shape.
The only disadvantage of the tool is that when working with a heat-cutting jigsaw, smoke is released that occurs during the combustion of the material being cut. Remember also that working with an electric jigsaw requires compliance with certain safety measures. Thus, flammable objects must be removed from the workplace, and the room itself should be constantly ventilated. And protect your hands from burns!
I. Kovalevsky, “Homemade jigsaw-heat cutter.”
All materials from the “Ideas for the Master” section
Home / Likbez / Why do you need a manual puzzle?
Why do you need a hand puzzle?
According to its origin, then the word "saws" is an analogue German word"laubsäge", which means sawing along a curved path. There is a manual frame builder in the shape of an arc of arms and clamps, built to mount saw blade.
This canvas is very thin and narrow, which allows you to cross uneven paths, that is, whenever you change direction.

Due to insufficient space between the frame and the blade, the saw can encircle the edges of the material to be processed. The disadvantages of this tool should be noted for its weak mechanical strength, which leads to the fact that the “strip” saw often breaks under special loads and the relatively small size of the frame, which makes it impossible to work at a large distance from the edges of the material being processed.
The hand puzzle is used for processing wood and its derivatives (plywood, fiberboard, etc.).
This tool also finds its application in stacked processing of non-ferrous metals. The handmade puzzle allows you to cover beautiful patterns in wood, so its meaning never fades. It is actively used in the production of elegant design elements.
There are many advantages that allow us to saw with lumber from plywood and other wood products:
- Economy. Basically, a wooden pile with a dozen saw blades will cost 5-6 cubic meters.
A 1500x1500 mm plywood pattern will cost about 6-8 USD. However, it is sufficient for several large or much smaller crafts.
- Associations with meditation.
Sawing with a handsaw can be compared to relaxation. Imagine: a sheet of plywood becomes your own image. For many, it may seem that this work is monotonous and boring, but when you take the puzzle and the plywood leaves, the person completely focuses on the work and forgets about returning the city.
What is a hand puzzle?

- Finger motor skills and strength training.
Cutting out small and complex parts, concentrating on learning and knitting with fingers, and in case of failure, the person does not throw his hand - again takes a new sheet of plywood and saws. This is the formation of a sign.
- Saving on the purchase of expensive decorative elements. Nothing is more impressive than decorating your home with your own hands.
- This is the accessibility of a hand saw for children.
It's hard to imagine how much fun this baby could bring to a child.
What advantages we noticed, the only disadvantages are the fragility of the saw blade and the small size of the frame. Thus, we should not avoid this tool: it is not obsolete! It is still capable of delivering its electric counterpart!
Photo: hegner-gmbh.com, selbst.de
Building facade

The façade is located outside any building, its “face”.
We evaluate appearance building, firstly, we pay attention to its facade, so nowadays more attention is paid facade work. Glazed facades are one of the most popular facade details today.
Because of appearance The building is impressive, modern and attractive, allowing…
Installation of facades in a modular way

Lately, shiny facades that are made entirely of glass have become very popular. Today, architects prefer to combine glass with expensive materials - steel, ceramics, terracotta - to create durable and elegant facades.
In this case, the technology of installing hinged blocks of external walls is used. This method allows glazed items and large panels to be directly assembled directly from the factory and...
Gypsum systems with insulation.
Heaters and their mounting technology

The plaster system with an insulating layer of insulation is attached to the facade and makes it difficult to use special technologies. Heating the occupation in this process is one of the most important roles - it depends on the insulation characteristics of the final façade of many - thermal conductivity, humidity and the location of the dew point and subzero temperature zone.
How to Draw a Puzzle - DIY Saw Blade with Your Hands
To prepare the wall for installation of insulation, ...
Gypsum systems with insulation. technology

The basis for creating the system can be any concrete slabs, solid hollow bricks, concrete blocks, multi-layered, even wooden beams, but only if the house has already given final shrinkage. The rendering system, within the walls of “warm” honeycomb blocks, is made very carefully.
As a rule, they do not need a large layer of insulation, but a high...
Gypsum systems with insulation. General information

Gypsum facades can be made in two ways - with insulation and without insulation.
A “warm” facade is necessary to insulate the SNiP of the house and have a perfect finish. Gypsum systems are much more efficient in terms of heat savings than any other end façade method because they do not have rigid connections (fasteners,
etc.), which could theoretically...

Desktop jigsaws: advantages and features
The jigsaw is designed to perform straight and curved cuts on various sheet materials and workpieces of complex shape, including without violating the external contour.
Homemade jigsaw machine for sawing: drawings and video
Most often, jigsaws are used for cutting wood and wood boards, plastic blanks, parts with complex contours made of plasterboard and laminate, as well as for cutting sheet metal.
Bench jigsaws They are a stationary structure, which accounts for most of the advantages of this type of cutting tool.
Modern models of desktop jigsaws are designed to work with wood materials 40-50 mm thick.
The working body is a narrow file, which makes progressive and return movements in the vertical direction. At the same time, due to the peculiarities of the notching of the teeth and the mechanics of the movement of the saw, cutting into the material occurs during the upward stroke.
Advantages of tabletop jigsaws:
- high precision and accuracy of cuts;
- wide customization options depending on the material and the required shape of the cut workpieces;
- increased safety and comfort of work.
The disadvantages of desktop jigsaws include their rather large dimensions and the difficulty of working with large workpieces.
Reasons for choosing a table jigsaw
Choosing to buy a tabletop jigsaw is justified when you need to make clean cuts of complex shapes and work with small parts.
High cutting accuracy is achieved due to the stable, fixed position of the tool during operation. The stability of the saw stroke is ensured by the tension system and guides, which are absent hand tools. Relatively large sizes The table provides a larger support surface for the part being cut, which means greater stability and smaller deviations from the given sawing direction.
To some extent, a tabletop jigsaw is a mini-machine for cutting workpieces.
Some models of tabletop jigsaws provide the ability to select the power (for example, the Corvette Encore jigsaw) supplied to the engine, as well as adjust the frequency of saw strokes ranging from 500 to 1600 movements per minute (for example, the DS 403 Vario jigsaw). As a rule. The design of the file clamp allows you to quickly replace it, as well as install it in one of several positions. Adjustable tilt of the table relative to one or two axes complements the capabilities of cutting at an angle.
Many table jigsaws equipped with additional devices, such as an angle stop with degree notches, a transparent protective screen and a blowing system that frees the cutting area from sawdust.
Tweet 
Good to know:
DIY Jogging Puzzle
Cutting miniature and small parts can be performed using various tools. It is relatively easy to handle these pieces with an electric puzzle. But in this case there are some problems that need to be solved.
Self-winding puzzle
For example, working with small parts will be very difficult because there is no reliable fixation. But a large file width will not allow for a large curvature of the cut.
Fortunately, these problems are solved very easily, in this situation the problem of creating an electric puzzle machine is solved.
The essence of the machine is to ensure that the working parts are securely fixed and then processed easily. Thus, a composite machine from a hand assembly can be made very in a simple way. For example, you can take a panel of plywood and create a gap in it. This slot will contain a saw blade.
Then make several holes to securely attach the blade. After that, on a plate with plywood, you need to do everything necessary to secure it to the table.
The floor surface can be secured to the table using clamps. As I work, I may ask questions about how to make a slot on the stove. This can be done in different ways, be it one of these. Mark a line on the plywood panel at the point where the hole will be. Then take a drill bit and start drilling holes along this line, puckering each other if possible. As a result, only a smooth round hole will be required in one continuous slot.
Finally, something similar to the device shown below appears.

As you can see, this version of the machine remains with a standard file, which greatly limits the curvature of the cuts.
So give an example in which the saw can be made miniature, which increases the curvature. The only difference when using thin files is that it requires an additional clamping device. So make the car from the previous example, you need to do a little check on the levers. This lever should be secured with a spring to provide a soft grip on the saw. On the punch side, the thin file must be attached to the thick part. Don't forget to turn off the rotation function.
Below you can see this exact version of the car.

And, of course, how to consider the possibilities of self-employed machines, without the use of an almost complete assembly machine.
In this case, the thin saw is already fixed between two arms - upper and lower, and the electric pile crosses the path to the lower arm.

Well, there are many options for creating jackets that can be seen from the puzzle, so the final choice will depend on you.
More information about tools, machines and equipment:
— Rotary saws
— Electric saws
— Glue gun
— Rubanok
— Drilling machine from drilling
— Circular saw from drilling
— Crusher
— Round hand saw
— Abrasive tools
Loading...
Electrical equipment for workshops
For technical work
Lecture No. 2.7.1
Electric jigsaws and hacksaws
Course, group, faculty: 2nd year, 2nd group, Faculty of Technology, full-time,
Date of the lesson: ________________
Purpose of the lesson: study of the purpose, general structure, technological characteristics, operating principle and safety measures when working with power tools and household appliances in technical workshops.
Lesson objectives:
Formation in students of the minimum required knowledge of the basic laws of electricity and mastering the methods of conducting electrical measurements in electrical circuits and performing verification of electrical measuring instruments
2. Formation of knowledge about the purpose, general structure, technological characteristics, operating principles and safety measures when working with power tools and household appliances in technical workshops.
Instilling skills electrical installation work in workshops and performing primary repair work electrical equipment in technical workshops.
Lesson plan:
1. Purpose, general device and classification by technical capabilities and manufacturers of electric jigsaws and hacksaws.
Technological characteristics and principle of operation.
3. Operation and safety precautions.
Purpose of electric jigsaws and hacksaws
Jigsaw is a universal tool designed for cutting.
Unlike a conventional hand saw, a jigsaw allows you to work with a wide variety of materials. The main advantage of a jigsaw is the ability to make curved cuts. A jigsaw is needed when you need to cut out some shape more complex than a rectangle - a circle, a wave, an oval.
Reciprocating saw (electric hacksaw)- to some extent a relative of the jigsaw. Reciprocating saws are equipped with a blade that makes pendulum movements of small amplitude, moving in a straight line and rising in the opposite direction.
The shape of the tool is similar to a large drill with saw blades extended forward.
Electric reciprocating saw considered a professional instrument. In everyday life there are extremely rarely tasks that require the participation of this specific unit. As for carpenters, installers, roofers, mechanics, finishers and even rescue workers, a reciprocating saw is, without exaggeration, indispensable.
General structure and principle of operation of an electric jigsaw
The structure of an electric jigsaw is presented in a schematic diagram:
 Basic elements of a jigsaw
:
Basic elements of a jigsaw
:
An aluminum or steel guide plane, also called a base plate. It allows you to correctly set the cutting angle, ensure accuracy, quality, and ease of cutting.
Homemade jigsaw machine
File for cutting material. It is designed to perform a number of jobs with specific materials. There are no universal saw blades that would allow you to cut metal, wood or plastic equally well, but you can always choose exactly those working blades that best meet all the requirements.
Electric motor with a power of 300-900 W. This parameter allows you to determine what kind of material can be worked with, what thickness can be processed. When choosing equipment, not everyone pays attention to this criterion. You should not take too much power if you plan to perform household work, and the saved money will do the work with certain materials impossible.
A holder that ensures correct and smooth running.
5. The rollers that hold the mechanism ensure its movement.
6. A system that ensures smooth running of the saw.
 The main working element of a jigsaw is a small file 50-120 mm long.
During operation, it makes reciprocating movements vertically with an amplitude of 20-30 mm and a frequency of 500 to 3000 working cycles per minute.
In this case, the thickness of the cut is approximately 1 mm.
The jigsaw blade is driven through a special gearbox by an electric motor.
To make the cutting process efficient, most modern models are equipped with a pendulum mechanism. With its help, the file not only moves up and down, but also makes oscillatory movements back and forth according to the principle of a clock pendulum. This speeds up the sawing process and reduces the load on the engine.
When moving downward, the cutting blade is retracted from the material, and cutting is performed only when it moves upward, which makes the tool more productive and stable in operation.
To obtain a clean and even cut, as well as when cutting fragile and hard materials, it is better to turn off the pendulum mechanism.
 Because cutting tool jigsaw - a file, which is also the main expense item when working with it.
The range of saws for jigsaws is very diverse, and each of them has its own purpose. Files vary in shape, size, and sharpening.
They are made from various materials and are designed for a specific class of tasks.
Jigsaw files
You should pay attention to the pitch of the saw teeth: for wood, a blade with a pitch of 2.5 to 4 mm is suitable, for metals and plastic - from 1 to 2 mm.
To cut non-ferrous metals, you need saw blades with a wave-shaped cutting edge.
For working with glass, ceramic tiles files with abrasive coating are used. High performance files differ from diamond coating, but they are quite expensive.
In order to guarantee high precision work, a base plate is attached to the jigsaw. It is also called the sole. Using a base plate frees the operator from having to hold the jigsaw suspended. Thanks to the sole, the distance to the surface being processed remains constant, which guarantees stable operation of the tool.