It’s easy and interesting to create a unique interior and coziness in your home with a patterned roller for wall decor. Artistic painting any surface has now become accessible to everyone. Do you want to decorate your walls with a classic or original openwork pattern? You will need only a few materials: paint of your favorite color, patterned rollers and a frame for them. This simple set will add its own charm to every room. Any meager bare walls in a couple of touches they will acquire a unique look.
Most importantly, pattern rollers can be used by anyone. Even without experience in this field. A large assortment of rollers and detailed descriptions for each of them will help you make this difficult choice. In our store you can choose a product to suit your taste. The cost of the rollers is justified by the quality and durability. The Tsvetnoye online store offers rollers only from the most the best manufacturers, time-tested.
The pattern of a new life is in your hands
You can buy patterned rollers in our online store; from a variety of designs, choose the one that will delight you every day. It’s worth casting aside all doubts and diversifying your life with bright colors and interesting patterns. Making this choice may be the most difficult part of the creative decorating process. Most likely, you will want to buy several patterned rollers for painting walls. The rest is a matter of technique. Similar information about correct use You will find patterned rollers in the description of each offer. There you will find inspiration to get started. The process itself will bring pleasure, because you do everything with your own hands. And the price of a patterned roller for wall decoration will increase your desire to diversify the interior when the work takes a minimum of time. Don't deny yourself this pleasure!
In the old days, plaster was used only as a base for painting, and the actual decoration of the walls was done with paint. However, progress does not stand still, and today it has become fashionable to cover walls with decorative plaster. At the same time, the process of finishing the surface of such plaster is not complicated. Make for the premises stylish design, adding unusualness to it is possible with the help of special rollers for decorative plaster. It is interesting that such an accessible and popular tool, designed for leveling walls, has become a full-fledged tool for performing decorative finishing walls The secret of this device lies in the textured rollers, which allow you to make shaped prints on the walls, imitating various types of surfaces and textures, for example, the texture of leather, wood, stone, and even the “fur coat” effect.
Decorative plaster is widely used for interior decoration. For many years it has been used both for external and internal work. It has wear-resistant qualities, it is waterproof, and after application to the walls it forms a reliable and durable layer.
Thanks to this species various finishing materials can be used for the home design solutions, give the room texture and unusual color design. Various designs are applied to the surface using special rollers for decorative plastering. If you carefully study the technology of work, then without much difficulty you can perform such finishing yourself, without turning to expensive specialists for help.
Among additional advantages One can highlight the absence of joints and seams on the surface, and this, in turn, significantly increases the aesthetic value of the finishing material. It can also be noted that there are many decorative qualities. To make your idea a reality, you should study everything better existing varieties rollers for decorative plaster, which are best suited for working with such finishing material for a particular case.
Features of a structural roller for decorative plaster
If the owners of a house or premises are interested in more pronounced wall decoration, then a roller with a hard coating is indispensable. Such rollers cost an order of magnitude higher than conventional pressure rollers, which is due to their higher aesthetic value compared to conventional tools. In addition, they can be used several times. The most productive are rubber rollers with a convex pattern to produce pressed patterns or slotted rollers to form three-dimensional textures.
Since such an innovation for finishing decorative plaster came to the domestic market from Western countries, this also determines the variety of their patterns and textures on construction markets. You can find textures in the form of birds, animals, flowers, leaves and geometric shapes.
Work with structural rollers is carried out in two ways:
- First of all, they apply the plaster and wait for it to harden a little, and then finish it layer by layer;
- Having dipped the roller into the composition, apply plaster to the wall, which has already been decorated with putty in one layer.
To carry out patterned color painting, the second method is mainly used by creating various prints with such a rubber product.
Types of textured rollers

First of all, rollers differ from other tools designed to add texture to plaster because of their purpose. Decorative tampons, sponges, stamps and applicators are intended for spot application or for decorating small areas. Using a structural roller for decorative plaster, it will be possible to process large surface areas, increasing work productivity several times.
All existing types of rollers can be divided into two categories: according to the type of material used in their manufacture work surface, and according to the pattern left on the plaster.
Types of rollers according to the material of the working surface
Foam structural rollers for decorative plaster
For a structural roller, the foam rubber must have deep pores of various diameters, leaving marks on the plaster according to their size in the form of lunar craters or burst bubbles. There is no need to press on the roller with great force, otherwise the plaster will lay down in an ordinary even layer without relief. Special attention The following points should be taken into account:
- Plaster for decoration should be finely dispersed, since relief rollers cannot cope with stretching large particles that come across, as a result of which the effect of the desired surface is blurred.
- It is not permissible to work with plaster containing solvents, since such substances will easily dissolve foam rubber, fragments of which will remain on the surface of the walls, creating an unsightly appearance.
Foam textured rollers for decorative plaster
This type is a cheaper analogue of a rubber roller. Using it you can also apply various types of plaster, creating a variety of patterns, but you need to take into account that such rollers do not last very long. Styrofoam cannot be called durable material, since it is prone to deformation. During operation, you will have to replace such a roller with a new one several times. In addition, foam patterns have a habit of flattening, causing the resulting pattern to not be as expected. As an option, it is permissible to use a foam roller with a flat surface, but, unfortunately, it will not give the plaster an unusual texture.

This tool option is the most preferable. A rubber roller on its flat surface has indentations and protrusions that create a pattern. This tool is suitable for creating clearly defined textures, for example, paintings, brickwork and other patterns various types. There are times when the plaster may stick to the surface of the roller. To avoid this, it is recommended to wet the instrument in soap solution, but one way or another, it is not known what manipulations this may affect the final covering of the walls.
Leather textured rollers for decorative plaster
Thanks to a roller with a leather surface, you can create one of the most popular effects, namely the effect of a marble surface. The skin, due to its elasticity, leaves beautiful stains like marble. This roller is most often used when working with Venetian plaster. It is necessary to choose a roller responsibly and purchase a roller coated with genuine leather, as artificial material can disappoint. Leather low quality at best, it will not leave any traces, simply sliding across the plaster, and at worst, it will dissolve and ruin expensive plaster.
Wooden textured rollers for decorative plaster
A textured roller made of wood is the simplest, but has all the advantages of its rubber counterpart and, moreover, additionally ensures the environmental friendliness of the coating, since wooden instrument will not spontaneously enter into chemical reaction with components from the plaster composition. For this reason, wooden rollers are often used to decorate walls for children's rooms.
However, wood also absorbs water from plaster mixture, as a result of which it may swell. This makes the resulting drawing less clear. This can be corrected by drying the roller, after which further work can be done.
Plastic textured rollers for decorative plaster
Plastic textured roller considered a cheaper analogue of a rubber roller. With it you can create a wide variety of patterns and textures. In construction markets you can find rollers with holes and holes to form bulges on the wall. This option is characterized by non-triviality. The disadvantage of this material is that the plastic becomes deformed after some time, becoming covered with chips and cracks. This, of course, does not have the best effect on the coating.

Rollers of this type create a “fur” effect on the walls. The material used for the roller pile is very diverse, ranging from natural furs to polyamide threads. The pile has a length of 2-25 millimeters. The longer the pile, the more “shaggy” the wall surface will be.
When buying a fluffy roller, you need to be careful to carefully check how well the fluff is attached to the rotating cylinder, since a low-quality roller can ruin the surface of the walls, leaving fluff that comes off on it.
Varieties of figured rollers according to the resulting final texture
Rollers can have a completely different texture, imitating textiles, wood, fur, marble, brickwork and even more complex patterns, for example, waves, ornament in oriental style, braids and others. Thanks to each of them, you can create a specific surface. The deeper the pattern is cut on the roller, the richer and more pronounced the final texture is.
It should be noted that it is necessary to select for each room its own texture of the pattern on the wall, and therefore its own type of textured roller. So, for example, in work area imitation will look good in the kitchen or hallway brickwork, which would be completely inappropriate for the bedroom. Therefore, it is better to immediately purchase a roller that comes with replaceable attachments.
Making a roller for decorative plaster with your own hands

Although construction stores offer a large assortment of factory-made textured rollers, many still prefer to make such a tool themselves. There are several reasons for this: the desire to save money, which is already spent on repairs in considerable quantities, or if it is not possible to find a roller with the desired pattern on sale, especially if there is a desire to create individuality in the interior by applying an exclusive author's texture to the walls.
Regardless of the reasons, it is possible to make a textured roller with your own hands using one of the existing methods:
- To imitate brickwork, the base is a foam roller. Using regular stationery knife Indentations in the shape of bricks are cut out on it. In this case, it would be a mistake to cut out the bricks themselves, since after smoothing them with a roller they will not be convex, but simply pressed into the wall, losing the effect of realism.
- It is impossible to think of a textile fabric to reproduce on the wall. the best way than the use of textiles themselves. In this case, a simple foam roller is wrapped with a strip of rough-textured canvas fabric and secured with threads.
- To imitate a marble surface, a plastic roller covered with a piece of genuine leather is ideal. Moreover, it is advisable to sew the leather carelessly and with folds.
- To give the wall surface the effect of a board made of natural wood, the plastic roller must be wrapped in a narrow strip of textile or sheathed with crinkled fabric.
- To get a specific design, you need to cut it out on the surface of the roller, which plays an auxiliary role. For these purposes, a foam rubber or foam roller is best suited. It should be taken into account that the foam rubber is required to be hard.
In some cases, kitchen items, such as a rolling pin, and even massage rollers can be used as a structural roller.
Step-by-step technique for decorative wall plaster

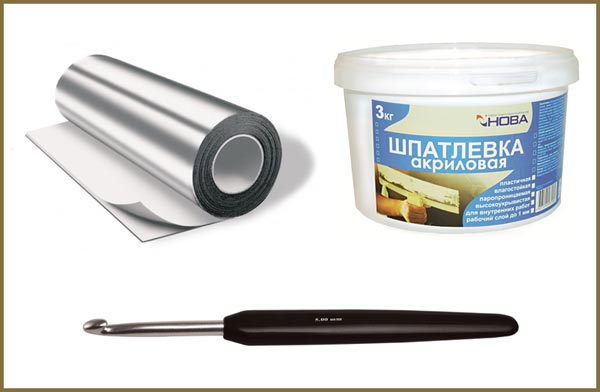
Before applying decorative plaster, it is necessary to prepare the walls. In order for the plaster material to last longer and not crack, it is carried out pre-processing walls To do this, the entire surface of the walls is cleaned of dirt, dust and old wallpaper, and a primer is applied on top. Then, to even out the walls even further, putty is applied. For this, spatulas measuring 40, 45 and 60 centimeters are used. The putty is applied as evenly as possible, without pressing it too much into the walls.
After the first layer of putty has dried, apply the second using a 60-centimeter spatula. The putty is applied and smoothed in two directions, mutually perpendicular to each other. Finally, after preparation, the process of decorating the walls begins, consisting of the following several stages:
- Dry plaster is mixed with water until a uniform consistency is achieved.
- Next, the mixture is applied to the walls in a layer of 2-4 millimeters to proceed to decoration. If it is necessary to level the surface of the walls, the layer is made dense. Everything is smoothed out with a spatula.
- Next, you need to pause work for about ten minutes to thicken the composition, and then use a textured roller to pass from top to bottom, forming a pattern. In this case, it is advisable to work in pairs, so that one worker applies the plaster, and the second creates the selected relief.
- Subsequent treatment of the walls with paint is carried out after 48 hours, that is, after the plaster has completely dried. If you plan to paint the entire wall, then you need to purchase a roller with a long pile, and in order to add color only to specific protruding elements, use a roller with a short pile.
Rules for carefully applying decorative plaster

When using textured rollers for decorative plaster, certain rules should be followed:
- You cannot press the roller too hard against the wall; movements should be leisurely and smooth.
- The second line of paint begins to be applied at the place where the border of the first strip passes, without overlapping.
- The roller in the ceiling area must be slightly pressed upward, while maintaining the same pressure further.
- Movements are made from the bottom up, and it is unacceptable to make chaotic movements, otherwise the structure of the drawing will be unclear. For the same reason, the strips drawn with a roller should pass close to each other, and not overlap.
- The first stripes need to be checked using a building level; otherwise, they can be “filled up” in relation to the ceiling and floor.
- Work should be carried out taking into account the time it takes for the plaster to dry. Even slightly dried plaster will become less flexible. It is acceptable to apply decorative plaster in fragments followed by working with a roller, after which you can begin next section on the wall.
- Do not forget that the rollers wear out, and when carrying out long-term work with a structural roller, it is necessary to periodically replace it.
- If the pattern turns out to be very embossed, then it can be smoothed using a wetted sanding mesh.
- Process finishing works can be made easier if you purchase it already ready mixture in special sealed containers. Then you won’t have to waste time and energy stirring the solution and pouring it into the paint bath.
- The bucket in which the finished plaster is sold is oval-shaped, thereby adapted for unhindered immersion of the roller. An important advantage of using a ready-made solution is that there is no need to use personal safety products. If when working with dry mixtures there is a need to use a respirator and safety glasses, then when working with ready-made plaster there is no such need.
It is important to note that after use, the structural roller, regardless of the material of manufacture, must be thoroughly rinsed under running water and dry.
Creating a “fur coat” effect using decorative plaster and a textured roller

A wall with a “fur coat” effect means spraying plaster onto the surface of the walls using a brush, broom or a special machine. the most popular is “fur coat” for facade surfaces, but it will also look interesting indoors. Modern method creating a “fur coat” effect involves using a textured roller, which allows you to apply an even layer, making the walls look presentable.
Facade treatment under the “fur coat” is carried out in the same way as indoors. First of all, putty is applied, plastering is performed and a decorative lint roller is applied over the layer of plaster. If a mistake was made during work or the surface turns out to be uneven, you can remove the excess with a spatula. It is not allowed to take breaks when creating the “fur coat” effect, since otherwise the composition will dry out, leaving very noticeable joints at the edges.
Technique for tamponing plaster with a sponge
In addition to rollers, a sponge is also used for decorative wall finishing, which allows you to achieve a soft spotty pattern. The sponge can be synthetic or marine. The image produced by a synthetic sponge is much different from the pattern produced by a natural one, since the first sponge has an ordered pore structure. This makes the drawing correct. A natural sponge has larger pores arranged in a chaotic manner, which makes the pattern itself also disordered. To achieve a more unique image, some experts advise cutting such a sponge in half, applying a solution of it inside. When working, you need to touch the base with light blotting movements.
Technique for tamping decorative plaster with fabric
Another unusual way to carry out decorative plaster - this is tamponing with fabric. As a rule, non-fibrous, highly absorbent materials are used. The design can be applied in two ways: with a fabric cord or with flaps. The first method can create a soft, unique pattern, and the second is similar to treating the surface with a sponge. There is also some combination of a tampon and fabric in the form of special tampon rollers. Such a roller does not create any differences in surface treatment, but it is much more convenient and faster to work with. Also on sale in specialized stores you can find design rollers that form complex and beautiful designs.
To create an orange peel effect, you can use a medium-grit sponge roller. To achieve a “country” effect, a honeycomb roller is used. If you want to leave marks with a brush, it is applied over the applied plaster. In this case, the brush should be Spanish or short-haired.
Cost of applying decorative plaster with a roller

Price for applying textured plaster per one square meter depends on the following factors:
- type of coating, for example, the most expensive of them are silicone and Venetian;
- on the volume of material consumed, which averages 1 kilogram per square meter, and in the case of finely dispersed plaster, the consumption will be less.
Materials for decorative plastering can be purchased at any hardware store. Prices for the material are very different and depend on the manufacturer and composition of the product. The most expensive is decorative Venetian plaster. Its high cost is due to the complexity of working with the composition, strict requirements for the quality of the base, as well as the technique of applying the composition in several layers. If you wish, you can make such a composition yourself or order its preparation from experienced builders. This will significantly reduce the cost of coverage per square meter.
The price range for textured rollers for decorative plaster is also wide. The higher the quality of the material used in the manufacture of the roller, the tool costs more. A wooden or rubber roller for plaster is more expensive than others, but has the longest service life compared to foam or plastic counterparts.
Conclusion
Structural rollers are tools with a simple design, but with wide possibilities. It can be used to imitate leather, fur, stone, wood and even animal paw marks. To apply textured plaster, you only need to select a roller with the required texture and begin to master the application technique. When selling, it is advisable to give preference to high-quality tools, observing the appropriate technology for wall finishing.
If you follow a few recommendations, this simple tool can become indispensable for creating your dream interior. After all, decorative plaster has long ago moved from its main function of leveling walls into a means for decorating them. A textured roller for decorating with plaster consists of a cylinder, its covering and a handle. The cylinder itself has a base, which can be made of metal, rubber or plastic. The covering is also made from various materials, for example, fabric, leather or foam rubber. Irregularities on their surface will be reflected in the wall covering various forms and images. The plaster is applied using a structural roller to pre-treated walls using upward movements. When working, it is important to remember that you cannot put pressure on the roller in order to get a clear texture of the design. After the surface has dried, in some cases acrylic paint cover individual elements, for example, bulges or depressions are painted over with gold or silver paint in accordance with the tone prevailing in the interior of the room.
You can create a unique relief pattern on the walls and ceiling. For this, in addition to the material, you will need textured rollers. They can be made from different materials: foam, rubber, plastic and so on. The easiest way is to purchase the product in a store, but you can make a textured roller with your own hands.
You will need a used but intact roller made of any material and any size. It is very important that the handle of the product is preserved. The remaining parts can be easily found in any home.
With a rope
To make a roller, you need to take a regular clothesline or any cord and wind it around the workpiece. The more often the cord is wound, the denser the pattern will be. Can be used various ways winding, making intersections and so on. The result is a relief pattern of depressions. Before using a homemade roller, it is recommended to check it for small area wall or an unnecessary sheet of plywood.

With a knife
If a foam roller remains in acceptable condition after finishing, then it can also be used. To do this, you need to take a stationery or sharply sharpened regular knife and cut out strips, squares or any other shapes of any size. The larger they are, the larger the texture of the drawing will be. You can process a foam roller in the same way. If there is an unnecessary new product made of foam rubber, then simply tighten it with thread so that wrinkles form.

With a plastic bag
This is the simplest and least expensive way to produce textured products. You need to take an old roller and secure the crumpled bag on it with tape. The folds create a complex, unique pattern of thin relief stripes. Instead of a bag, you can use hair bands, scraps of fabric, a net for storing vegetables, and thick paper.
 Making a roller for decorative painting using a plastic bag
 From a rubber roller
It is also possible to produce a textured roller for painting walls made of rubber products. To do this, you need to take a regular rubber roller and use carbon paper to apply a specific pattern to it. Then this pattern must be cut out with a knife. You can also use regular rubber, but its thickness must be at least 5 mm. Care must be taken to ensure that the relief pattern on the product forms a single whole, and the lines should be wavy. Finally, a sheet of rubber with a relief is fixed on a cylindrical blank.
 A textured roller can be easily created using a regular knife, which needs to be used to cut out the required pattern on a rubber tool
 From foil
To make a textured roller yourself, you will need the following:
- Thick foil. It is difficult to find such foil on sale, but you can use fragments of packaging for dairy or some other product.
- Acrylic putty.
- Crochet hook.
In this case, the roller is made using the embossing method. The first step is to thoroughly clean the surface of the foil from food debris and grease. Then a design should be applied to the foil, which is planned to be transferred to the ceiling or walls. Next, you need to take a crochet hook or any other product of a similar shape and squeeze out relief designs on the foil along the previously drawn lines.
Important! During minting, it is necessary to maintain a certain distance between the relief lines. To prevent the drawing from becoming blurred later, it is recommended to retreat by 5 mm.

Apply acrylic putty to the back of the product and then press it onto the surface of the roller. At this stage, it is important to give the foil a cylindrical shape as quickly as possible, before the putty has time to set. Then you need to leave the workpiece to dry (the hardening time is indicated by the manufacturer on the packaging of the material). The last step is to glue the foil to the roller using quick-drying glue.
Made from thin rubber and silicone adhesive
Before making a roller, you need to prepare:
- thin rubber sheet;
- silicone sealant and a gun for applying it;
- marker.
First you need to clean the rubber and thoroughly degrease the surface. Then you should apply a drawing with a marker or pencil that you plan to decorate the walls or ceiling with. Next, you need to load the gun with sealant and carefully apply it along the markings. It is better to opt for a simple pattern without thin lines and weaves. A pattern in the form of waves, leaves or simple geometric shapes is perfect.
 Using a sealant on the surface of the tool, you can create a convex pattern or imprint, thanks to which a decorative effect is achieved on the wall
To make a textured roller with your own hands, you can use any product that has a relief pattern on its surface. For example, heavily embossed buttons, leaves artificial plants, various gypsum products. The selected item is lubricated vegetable oil, apply a layer to the rubber silicone sealant, make an impression and leave to dry. The product can only be removed after the sealant has dried. Then the rubber sheet is glued onto the roller.
Roller from scratch
The above describes methods for making textured rollers, which involve the use of old tools. But there is an opportunity to make it yourself from scratch. The first step is to make a base - a cylindrical part. There are several options for blanks for the base:
- Wooden rolling pin. This is the most suitable product. If the rolling pin is equipped with a handle, it must be cut down, leaving only an even cylinder. Then drill in the center through hole, into which you need to insert a metal rod or wire. You can use a handle from an old product.
 Homemade instrument from a wooden rolling pin
 - Plastic pipe. For these purposes, you will need a pipe with a diameter of 5 cm and a length of 10 cm. After cutting the workpiece, you need to make plugs for the ends of the product; it is recommended to cut them out of plastic. Then you should glue the plugs and cut holes in them for the handle.

Making a textured roller is a fairly simple process. This is not to say that you can save a lot of money this way, but a one-of-a-kind roller will help you create a truly original coating.
Decorative plaster or paint has recently become particularly popular, as it allows you to give the room a stylish look. original interior. And to work with these finishing materials, a textured roller is used. And what types of them exist and what their features are, we will now try to find out.
Textured rollers and features of their use
To work with a textured roller, you do not need any special skills or knowledge. It is enough just to prepare the paint and roll the tool in a special ditch. This must be done in order to avoid smudges when painting the surface. And in this case the paint will lay down in an even layer. And the plaster is free of clots and lumps on the surface.
Pay attention! It is highly undesirable to use the same tool for various types coatings That is, for textured paint we use one type of tool, and for plaster, respectively, another. You can buy such tools in a store or make your own.
Materials for making decorative rollers
Modern instruments differ in the type of material they use. Today the following types of decorative rollers are available on the market:

There are also analogues with a base made of foam rubber, polystyrene foam and fabric. Foam rubber options are used for priming the first layer for subsequent application of decor. They are also great for creating bubbles on the surface. Fabric analogues, for the manufacture of which plush is used soft fabric, form relief marks (patterns) on the wall. Devices with a foam base resemble a rubber counterpart. But you need to remember that polystyrene foam is short-lived.
Classification of decorative rollers by pattern texture
Each tool has a different structure that produces the final design. It could be an imitation natural materials or arbitrary ornaments. All instruments are divided into two types.
Types of tools:

Also, the tools are divided among themselves according to the width of the roller. The minimum width reaches 30 centimeters. The wider the roller, the faster it is to apply textured paint. But a narrow roller allows you to create a clear, original structure.
How to make your own decorative roller
Some finishing tools are quite expensive. Therefore, making a roller with your own hands from scrap materials will be an excellent and inexpensive way out of this situation. And now you will find out how to do it.
First method
In this case, we will need: a clothesline and an unnecessary old roller with a strong handle and a reliable roller. Wind the rope around the roller and secure the ends. Please note that depending on the frequency of the winding, you can adjust the texture of the stripes and patterns on the wall.
Option number two
For this method we need an old foam roller. We make cuts on the foam rubber in several places with sharp scissors and get a texture tool with an original effect.
Third way
Another method is to wrap the roller with polyethylene and then secure it with thread. And to give the marks texture instead of polyethylene, you can use regular tape.
Fourth option
Skilled craftsmen offer to make a structural roller yourself, the creation of which will require some imagination and a little patience and perseverance. And in order to achieve high-quality coverage, you need to think through your idea in detail. You can also use templates when covering the surface with finishing material. So, to get structural plaster It is worth considering the following option for creating a tool yourself:

In a word, you can create absolutely any structure on the wall using scrap materials.
Technique for applying plaster with a structural roller
In order for the plaster to last long, you need to pre-treat the surface. If you plan to use a textured roller to paint the surface, then there is no need to paint the surface the main color. However, it must be remembered that when working with a structural analogue, such a procedure is mandatory. Otherwise, the pattern on the roller will stretch the finished mixture in the wrong direction.
Painting the surface correctly
To achieve optimal results, you should use the following tips:

To create a texture simulating a “fur coat”, textile fibers and marble chips, you can use a relief roller to apply paint with a textured base. Finishing material It is recommended to apply it to walls after first rolling the tool in a container with paint. If excess begins to form during the work, it must be removed with a spatula.
Using decorative rollers, you can create original design, which will be in no way inferior to the work of a professional. And all that is required of you is to choose an instrument with the desired structure and turn on your imagination - and the result will certainly delight you with its splendor.
Many people strive to design rooms in their home, and sometimes it can be very unusual. In order to finish the walls and ceiling, use various materials, but we will talk about decorative plaster, or rather about applying a pattern to.
The design is applied to the plaster using decorative plaster rollers.
It is very interesting that a simple and well-known tool like a roller has become a tool for.
Hand-made or purchased products
In modern construction stores, the choice of relief rollers is very large and you can buy a roller for decoration freely. Using a roller, they create unusual three-dimensional images on the walls.
There are several options for coating the roller cylinder:
- Tree;
- Plastic;
- Rubber;
- Foam rubber;
- Silicone;
- Textile;
- Leather.
How to choose a textured roller?
Before choosing a textured roller, you need to determine what specific pattern you want to make on the wall.
Roller from soft material, for example, such as fur, creates the effect of a “fur coat”, a foam roller -.
You can also use decorative plaster
If you want to make a marble pattern, then you need to use a roller that will be wrapped in compressed fabric, and if you wrap the roller in compressed leather, you will get a pattern reminiscent of natural stone.
Ordinary foam rollers can be improved by winding threads, twine or pieces of foam rubber, this is necessary in order to make unusual patterns on the walls or create different structures, for example, tree bark.
Features of relief rollers
If you need a pronounced decor, then use rollers with a hard surface.
Such rollers are a little more expensive, since they have different textures and can be used several times. Rollers with a rubber surface are most valued, because they have a convex or slotted pattern.
Using rollers to add texture
Work with a structural roller is carried out in two ways:
- First, plaster is applied to the surface, after which the finishing is done layer by layer;
- Or they apply it over a layer of plaster, dipping the roller into the paint.
The second method is used to make colored, patterned painting using a rubber roller.
Operating procedure

It is best to work in pairs: one will apply the plaster, and the second will create the relief.
After the plaster has completely dried, it will be possible to paint the surface with suitable paint.
If it is necessary to paint the entire wall, then it is necessary to use a long-pile roller, and if it is necessary to paint protruding parts, then use a short-pile roller.
Rules
To use plastering rollers you need to know a few rules:
- You cannot press the roller too hard against the wall; movements should not be sudden;
- The second path of paint is applied where the border of the first path passes, and there should be no overlap;
- The roller at the ceiling is pressed to the top, but not too much.
- If the pattern is too embossed, then it is smoothed with a damp sanding mesh.
Creating a “fur coat” pattern
"Fur coat" drawing in modern version created using a relief roller, which makes the layer aesthetically pleasing and uniform.
You can decorate surfaces with a “fur coat” pattern as follows: external walls buildings and interior walls. First, it is applied to the surface, and then passed over the plastered surface with a fur-wrapped roller.
If you make a mistake and see that the plastering is uneven, then remove the excess with a spatula.
You cannot take breaks in creating the “fur coat” pattern, otherwise the plaster will dry out and the joint will be too visible at the edges.
In this article we talked about what a relief roller is and how to use it. We hope that this article will be useful to you. We wish you good luck in your endeavors!