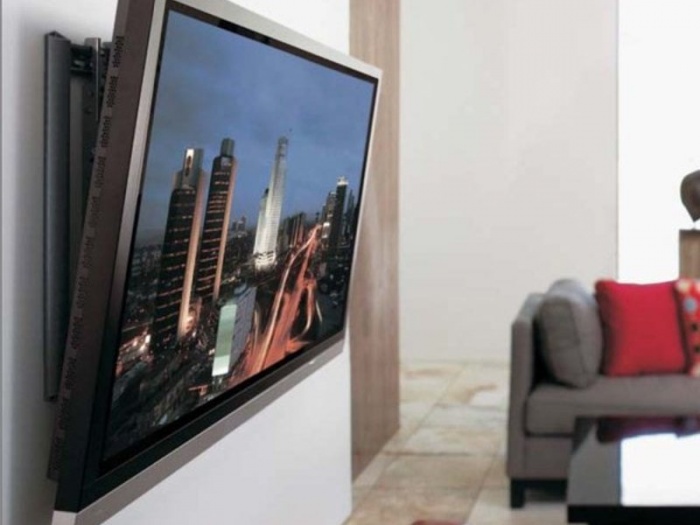
LCD (LCD), LED (light emitting diode) and plasma TVs in the interior they finally “waved the hand” of cabinet furniture and moved into the realm of decor and finishing. The reason is obvious: a flat-screen TV looks like a picture in a frame and therefore fits seamlessly into almost any room design. At the same time, useful space is freed up, which simplifies and reduces the cost of renovation with furniture.

However, at the same time, the happy owners of a high-tech window to the world are faced with a far from idle question: how to hang a TV on the wall? 28-inch (28”, 71 cm) LCD weighs under 15 kg; the same “plasma” approx. 20. With the optimal viewing distance of 3 screen diagonals recommended by doctors, a 35” TV can be placed in an ordinary living room. The back walls of all of them are thin, most often plastic. It's clear to a repeat student that the TV won't hang on a couple of hooks for a long time; a special holder is required. Which, in turn, must be securely fastened to the wall.
There are more than an abundance of offers from master “hangers”, but the prices for the work... In general, it turns out that the price in rubles for mounting a TV on the wall is obtained by multiplying the screen diagonal in centimeters by 100. For “plasma” the premium is approx. 10%, and for fastening to plasterboard, PHB ( tongue-and-groove blocks) etc. “problematic” (weak) walls – another 20%. Perhaps the craftsmen develop their own tariffs for some other reasons; say, the cost of working time and the cost of an hour of life for your family. However, the results of statistical processing by regions of the Russian Federation give the above values. Considering that many people have to take out a loan to buy a TV, the question arising from the first - how to attach a TV to the wall with your own hands - becomes no less relevant.
What about the bracket?
From an ergonomic point of view, fixing the TV on the wall motionless is only possible in some cases. Although the full viewing area of modern flat-screen TVs is, as a rule, at least 120 degrees horizontally and 60 degrees vertically, health requirements for long-term viewing impose additional restrictions: up to +/–30 degrees from the horizontal axis perpendicular to the center of the screen; vertical tilt of the screen plane up to +5 (up) and –15 (down) degrees. If long-term viewing is possible while sitting or lying down (studio apartment or small apartment with a living room-bedroom), a vertical tilt is permissible at +/–15 degrees. Those., the system for mounting the TV to the wall must ensure its rotation/tilt within certain limits so that the viewers' eyes are in the specified zones, and best of all - directly opposite the center of the screen.
Note: in what cases and how it is possible to mount the TV on the wall tightly/immovably will be discussed further.
Prices for TV holders don’t seem to be very high: a good one for a diagonal of up to 30” can be purchased for 2000-3000 rubles. , and one that will support it on a solid permanent wall - for less than 1000. But if the TV is a credit one, then this amount can also matter. Hence the third question: is it possible to make a TV mount on the wall with your own hands? There seems to be nothing complicated about store-bought products; For rotary hinges, small garage hinges (say, 10x120) or split door hinges with a ball bearing will do. Well, let's see at work.
Watch the video. It is not educational, it was chosen based on the number of viewer comments.
Video: how to hang a TV on the wall
If we discard purely “goblin (troll)” ones, it is still clear: there are more than enough completely justified questions and comments on the quality of the work and the progress of its execution. Although, it would seem: well, what kind of skills are needed here, to drill holes in the wall, drive dowels into them and install iron on the screws, specially designed for this?
When installing on a purchased bracket, related problems are also possible. For example, its reach when folded is 40 mm, which is aesthetically attractive. But the socket has already been moved upward so that the TV covers it. The protrusion from it of the power plug with the axial entry of the power cord, which is most often supplied with televisions, is from 60 mm. Should I cut the cord and install a side entry plug? The warranty is lost because Almost all TVs have an integral power cable.
Or vice versa, to view the TV in the sleeping area, you need to rotate it 80-90 degrees. But then the usual “breakable” bracket will be needed in such a way that when viewed in the living area, its hinge will stick out from the side and will make the entire interior design laughable. And for hanging on a special bracket for just such cases (see below), a regular TV is not suitable.
On the other hand, in 2 parts of another story it is shown how to make a bracket for a TV yourself.
Video: DIY LCD TV bracket
The finished product turned out to be quite good, but only with the 1st degree of freedom (see below), which is not always acceptable. The work is not easy, and the savings are no more than 3,000 rubles. at best.
Based on these conditions, it is possible regarding the purchase or self-made TV bracket, give the following recommendations:
- First of all, according to the requirements of health care, ergonomics and interior design (in that order), find a place on the walls for a TV with satisfactory load-bearing properties supporting surface: with a TV weight of 10 kg, each of the 4 points of its attachment to the wall will require at least 20 kgf; The rule of leverage applies here.
- Then choose a suitable fastening design.
- If it is possible to use welding equipment, access to metal cutting machines, appropriate working skills and a certain supply of suitable metal scraps (steel pipe from 25x15x1 and sheet from 1.5 mm), then you can make a TV bracket with your own hands. Saved cash enough to mark the successful completion of the work.
- Otherwise, search the Internet for a product that meets your requirements. The choice is endless, but how to choose a TV mount expertly and install it yourself is what all subsequent material in the article is about.
How the TV is attached to the wall
The vast majority of TVs are designed for mounting using the VESA system, which is based on mounting modules (typical distances between the centers of holes) of 75, 100, 200, 300 and 400 mm. An exception is televisions with a screen diagonal of more than 25” (63.5 cm) for studio apartments or other residential premises with combined functionality, i.e. with sleeping and living areas in one room. We'll remember about these later, but for now let's move on to VESA.
Note: with a socket for placing on the “leg” of the stand, TVs are not suspended on brackets, because small supporting area. When manipulating the TV on the bracket, large concentrated loads will arise in the socket and it will quickly collapse. Such an incident, of course, is not guaranteed.
On TV
The TV mounting points for VESA modules are located on its rear panel, most often in groups of 4 or, in rare cases, in pairs, pos. 2 in Fig. “Quadruple” VESA is most often organized in the form of a square, pos. 1 or more or less elongated rectangle, pos. 3 and 4. Sometimes, but very rarely - in the form of a trapezoid, isosceles or oblique.
Standard mounting bolts, pos. 1-3, are often already screwed into the mounting points. If not, when purchasing, look for them in a separate package and do not use others: mounting the TV on non-standard fasteners completely voids the warranty.

Sometimes, as a rule, in “cool plasmas”, the standard fasteners are poorly visible (item 3), the bolt heads are designed for special tools (for example, a 5-point wrench), and are also filled soft plastic. This means that a certified technician must hang the TV on the bracket. Upon completion of the work, he puts his personal stamp on the warranty card and makes a note about the completion of the work; Without this, all warranties are void.
The same situation arises regarding televisions with steel back wall, on which there are stampings for fastening with standard, and only standard, non-screw-out screws (red arrows on position 4). Such TVs are most often anti-vandal and “anti-theft”; fastening with self-tapping screws is intended for installation in public premises. For residential installations, as a rule, the usual VESA is provided (orange arrows), but you definitely need to check the user manual to see if a non-proprietary installation is acceptable, otherwise the warranty will be void.
Note: price for TVs by item. 3 and 4 above in branded dealerships, as a rule, includes installation at the point of use within the city. Brackets are also often offered as a choice for some extra charge or bonus. If you have your eye on this, find out all this before shelling out your money.
On the bracket
The diagram of a standard VESA mounting pad (cross, butterfly, crab, mill, cuttlefish - simply) is shown in pos. 5. It can be made independently from durable laminated plastic (getinax, textolite, fiberglass) with a thickness of 4 mm or sheet steel from 1.5 mm. In the latter case, it is highly advisable to stick elastic pads onto the seating surface, for example. from cork or linoleum; It is also better to take a purchased bracket with spacers, because any mechanical damage to the TV body, even minor scratches/dents, gives a formal reason to refuse warranty repairs.
A VESA wall mount of a simplified design for TVs with a screen diagonal of up to 12” (30.5 cm) is shown in pos. 6. This is exactly what it makes sense to do with your own hands; say, for a small TV in the kitchen. To mount the entire suspension, first attach the support bracket to the wall A, then to the TV mounting bracket b. It takes two people to put the TV in place: one holds it, and the other screws in the locking bolts. V. Eat as needed - in reverse order. “Telk” with a diagonal (8-10)” can generally be hung together with the mount on a hook. Only, God forbid, not on silumin or plastic: they tend to suddenly break off under load for no apparent reason.
Brackets
Most often, TVs are hung on “breakable” (fracture) brackets with 3 degrees of freedom: sideways rotation, sideways movement, tilt, on the left in Fig. If there is a need to rotate the TV more than 75-80 degrees, you need the full reach of the bracket rod (distance A) to be at least half the overall width of the TV. It is also highly desirable that the far hinge B be detachable without tools; this will make it much easier and easier to install/remove the TV.

Note: inexpensive brackets with 3 degrees of freedom, as a rule, are mounted only on solid walls. Fastening them to PGB and gypsum board (plasterboard, see below) is most often impossible.
For fixed mounting, much cheaper holders with 1st degree of freedom are used, which only allow you to adjust the tilt of the screen, on the right in Fig. They also allow installation on weak walls, so it is advisable, if the purpose and functionality of the room allows it, to find a place in it for a fixed mounting of the TV.
Mounting a TV on such a holder requires two people: with mounting units B pre-screwed to the body, holding it from the sides, it is placed on the support bar G. The “single-free” holder allows you to mount very large TVs with mounting modules over 400 mm and generally non-standard ones. However, if the TV mounting points are not arranged in a rectangle, installation may not be possible because The ability of mounting units to skew is very limited.
Special cases

When frequently manipulating a large TV in multifunctional rooms, in order to securely mount the TV on the wall, a pantograph or parallelogram mount and a beam suspension are required, see fig. right. VESA without beams (shown by red arrows) in this case will no longer be reliable: it quickly weakens, or even the case cracks. In addition, the pantograph bracket folds compactly, and the TV can be pressed tightly against the wall.
The absolute disadvantages of pantograph brackets are, firstly, the prices for them themselves: literally an order of magnitude higher than the turning point ones. Secondly, you also need a special TV, with ridges on the back panel for attaching beams and handles on the sides, by which you drag it back and forth, also seen in Fig. right.
A special TV will also be needed to install it in a niche flush with the wall, without clearance on the sides. The issue here is cooling: you need to ensure air circulation behind the TV. It’s not just “plasmas” that are sensitive to overheating; For LCD/LEDs operating without heat dissipation, screen delamination before the warranty expires is common, and any more or less experienced repairman can accurately determine the cause. From an LCD/LED TV with a delaminated screen, all that remains is to remove the electronics for spare parts and throw away the rest.
Note: Screen delamination first appears in the form of colored moire, which quite quickly turns into dark or light spots.

TVs for installation in blind niches are equipped with a special mounting box. In addition to VESA, they have hooks on the side of the case for hanging in a box. The installation diagram of the TV in the mounting box is shown in Fig. In addition to niches, these are hung on very weak walls; As a rule, the box provides at least 8 points of attachment to the load-bearing surface.
On the wall
To attach conventional brackets to solid walls, fasteners, unless otherwise specified in the specification for the TV, are selected according to the following rules:
- Dowels - at least propylene, and preferably steel;
- For walls made of PHB (foam blocks, cinder blocks), only propylene dowels;
- The diameter of the screws in mm is no less than the first digit of the screen diagonal size in inches, but in any case from 4 mm;
- Drilling the self-tapping screw into load-bearing wall, in mm, not counting the thickness of the finish - not less than the diagonal length in cm +10 mm for concrete walls, not less than the same diagonal length in cm +30 mm for brick walls and not less than 1.5 diagonals in cm +50 mm for walls from PHB.
For example, a 12-inch (31 cm) TV. The diameter of the screws is 4 mm. Deepening into concrete wall from 40 mm, in brick from 60 mm, in PGB from 95 mm. Diagonal 28” (71 cm) – from 7 mm, from 80 mm, from 100 mm and from 155 mm, respectively.
Drywall
The above does not apply to gypsum plasterboard walls, they are too weak. For installation on a main wall with sheathing, the dowels are driven into the load-bearing wall; The holes in the casing are drilled to accommodate the passage of the dowel head. The dowels are pushed into place by tapping a spacer made of steel rod with a hammer; A 6-sided socket wrench of a suitable size (so as not to fall into the dowel) will do.
If the partition is entirely plasterboard on a frame, then, firstly, the thickness of the sheathing should be from 12 mm. Otherwise, we look for another place for the TV or put it on a cabinet. Secondly, the weight of the TV per 1 point of attachment to the wall should not exceed 5 kg, i.e. when fastened to 4 points, it should not exceed 20 kg. Thirdly, the distance between the centers of the mounting holes should be, in mm, at least 20 of the TV’s weight in kg. In this example – from 400 mm.

Also, instead of simple dowels, anchor ones are used, with legs that diverge, in mm, by at least 2 the weight of the TV in kg; in our case, no less than 40 mm to the sides. The attachment points should not be too close to the frame and not too far from it; Approximately permissible distances of the ends of the “spread” legs from the frame elements are shown in Fig.
It remains to decide how to find the sheathing elements if their location is unknown. In the case of sheathing made of steel profiles, a simple metal detector will help out. Not an expensive field one, with which treasure hunters scour beaches and popular picnic spots, but a construction one, which you can do with your own hands, without delving into the jungle of electronics.
A means to find uneven bars in amateur conditions wooden frame under the drywall is a medical stethoscope. First, by tapping your knuckles on the wall, you find a place where the sound is louder. Then, tapping there, they listen to the wall with a stethoscope. Above the sheathing beams the sound weakens sharply.
Straight to the wall
If it is possible to organize a permanent long-term viewing area in a room with a TV, then in all respects it would be optimal to mount it tightly to the wall, without a bracket. The design of a holder without degrees of freedom can replicate that of a “1-free” bracket; drawing - at pos. 1 pic. Material – thin-walled perforated steel profile: corner 80x60 and U-shaped 40x40. Scraps can always be purchased at hardware stores or from drywall specialists. The smaller shelf of the corner is bent in half and slightly bent upward.

When suspended on such a holder, it is possible to set the screen tilt angle once by placing spacers under the upper or lower VESA bolts. For angles of +/–15 degrees and a viewing distance of 3 m, this will allow you to change the height of the suspension within +/–0.8 m, which is sufficient for most interior solutions.
A very simple way to hang a TV without a bracket - a piece wooden board thickness from 30 mm, pos. 2, and furniture hinges for shelves, pos. 3. To avoid “non-warranty” due to scratches on the body, it is better to attach them to a plywood spacer, pos. 4. If you take a supporting bar with a width of 150 mm and attach it in the corner, with a pair of screws on each edge, then for a TV with a diagonal of up to 70-85 cm it is possible to organize a long-term viewing area in the Khrushchev living room 3x4 m, where cockroaches nowhere to roam, pos. 5.
Where to put the wires
A modern TV, taking into account the available signal sources and the possibility of using it as a PC display, can accommodate up to 6-7 cables. In addition, it is fundamentally impossible to place effective acoustic design in a thin flat case, and full “juice” of sound can be achieved only with the help of external speakers ( speaker systems, speakers), that's another 2-3 cables. Such a “broom” even in the dark will ruin the impression of both the interior with the TV and the program, even if its plot is of the kind that makes some categories of viewers forget everything in the world, on the left in Fig.

The way to hide a bunch of TV wires is well known: this is a piece of cable duct with a color and texture that matches the interior. Attaching shelves for a tuner, DVD player, USB and containers with media is not a difficult task for home handyman middle level, center and right.
You can also find advice to pass the wires under the drywall through 2 holes in the sheathing, at the top and bottom. Let’s say it’s still possible to catch their ends at the bottom with a hook. Let's also assume that the connectors on the wires will be mounted after. But how to pass the elements of the sheathing frame? It remains to be assumed that the authors of these recommendations simply do not know that the wall is sheathed.
Garage-shed-dacha
Old “kinescope” (CRT, cathode ray tube) “bubble” televisions are usually sent here for retirement. They can also be hung on the wall. We don’t touch lamp-semiconductor “coffins”; workers, they are valuable technical antiques and there is no point in finishing them off. Let's deal with the later single-board ones with a slot mask in the tube.
Internal load-bearing structure still vigorous CRT veterans can be in the form of a frame from steel profiles or a three-dimensional frame made of a round rod. You can recognize them by their mounting legs: the first ones have visible heads of fairly powerful bolts with wide washers. For these, you can make a cantilever bracket from professional pipe from 25x15, pos. 1 in Fig. To attach the TV to it, holes are drilled in the consoles for the bolts of the legs; The standard ones need to be replaced with others, with the same threads, but extended by the thickness of the consoles + the depth of the hole in the leg. There is a nuance here: the bolts need to be changed one at a time, and the TV must be attached to the consoles carefully, otherwise its “guts” may move. It won’t break, but it will be difficult to catch the “lost” sockets with bolts without disassembling.

CRT TVs with a three-dimensional power frame are even easier to hang on the wall: on a cord with loops at the ends, pos. 2 and 3. The hinges are clamped under the standard rear cover mounting bolts. By tightening the cord in the holes of the plywood holder, you can adjust the tilt of the screen. This mount looks curious, but it is quite reliable and practically free.
Note: As a technical curiosity, what is shown in pos. 4. Even a steam locomotive can withstand it, but the design... Unless the owner adamantly and inexorably wants to hang a one and a half meter plasma in the garage.
Massive boxes with picture tubes are a thing of the past. Modern TVs have become much lighter and thinner than their predecessors. Nowadays, mounting a TV on the wall is a popular method for allocating space.
This page is about how to hang a TV with bracket on the wall. The TV on the wall looks good, and the decor in the room is not overloaded with extra bedside tables and cabinets. However, under no circumstances should you hang the TV on ordinary nails. The TV wall mount should be as strong as possible. Therefore, the fasteners must go deep into the load-bearing wall.
Types of brackets
A special holder for a TV device is called a “bracket”. This device is designed to properly mount the TV on the wall.
A wall-mounted TV looks aesthetically pleasing and saves space in the house. To further optimize the technology for mounting a TV on the wall, we are developing different options structures for wall mounting. Manufacturers produce a whole range of devices for wall mounting of devices.
Wall mounted TV brackets come in the following types:
- A fixed bracket is the simplest and most reliable wall mount for a TV. There is practically nothing to break in the design of this type of TV mount.
- An inclined wall bracket must be installed if you place the TV at eye level. The tilting bracket allows you to save space in the room, as well as watch TV shows in comfort and without putting strain on your neck. You can choose the angle of inclination required in your situation.

- Tilt-and-swivel – used to mount the TV to the ceiling. The device is equipped with a mechanism that allows you to rotate the structure to any point in the room.

- Ceiling mounts for TVs.

- TV stand. A mobile device, a kind of stand for the screen. The structure can be moved around the room and freely turned in any direction due to the fact that it stands on casters.

IMPORTANT! Please pay attention to the maximum weight of the TV bracket you are purchasing. To be on the safe side, it is better to provide a safety margin of 50 percent.
It is recommended to hang the TV on brackets so that the distance from the floor to the bottom edge is from 0.7 m to 1.2 m. Let your gaze fall on the middle of the screen, preferably one third from the bottom edge of the device.
IMPORTANT! Installing a DIY TV bracket may require the involvement of several people. Contact a specialist for guaranteed safe mounting of the TV on the wall. If you want to install the TV on the wall yourself, use the help of a partner.
Bracket Installation
To install a TV bracket with your own hands you will need:
- perforator;
- dowel-screws;
- drill;
- screwdriver and bolts;
- building level (sometimes also called “spirit level”);
- roulette;
- any easily soiled item for marking;
- fastening elements.
IMPORTANT! Make sure that the diameter of the drill matches the selected screws.
Steps to install a TV bracket on the wall:
- Mark the wall using a tape measure and a spirit level.
- Take a hammer drill and make holes for the fasteners.
- Secure the base of the bracket to the wall with dowel screws.
- Place the bracket guides on the TV. Screw them in with bolts.
- The bracket has special grooves on its base. Place the guides in the grooves.
- and connect power to the device.
If you are installing the unit on a non-split TV mount, screw it to your unit first. Then place the entire system on the dowels.
IMPORTANT! Even if the distortion when fixing the TV bracket with your own hands seems insignificant, after some time it will lead to the collapse of the structure. In this case, the television set will be broken. Make the markings as straight as possible.
Without bracket
How to hang a TV without a bracket? Many manufacturers produce devices with already built-in slots on the back panel. This feature can often be found on devices from 42 inches diagonally. The main condition for hanging the unit on the built-in grooves is that the TV mount on the wall must support the weight of the device. If the load on the fasteners is too great, the expensive device will simply fall and break.
Make your own bracket
You can mount the TV on the wall with your own hands in different ways. Let's consider one of them. To make your own wall bracket for a TV with, you will need:
- 4 metal corners;
- bicycle spoke or nail with a large head;
- plastic dowels;
- drill;
- plastic box for wires;
- building level.
To make a reliable TV bracket with your own hands, choose the right materials for fasteners and corners. Aluminum corners will be easier to work with. Decide on the width of their sides. The corners will set the distance separating the device from the wall. This distance must be sufficient for normal ventilation of the rear wall of the device. If the device is poorly ventilated, the device will inevitably overheat and quickly fail.
Choose stronger dowels to ensure the most secure mounting of the TV on the wall. If something goes wrong, the gimbal will collapse along with the television set.
The process of mounting a TV on the wall:
- Drill 2 holes on two corners for mounting to the TV. Make sure that the location of the holes matches the in the right places on the back of the device. The length of the corners is not as significant as the width. The main thing is that the length is enough to make the necessary holes. Make sure that all the holes you make are located exactly opposite each other, otherwise the device will hang crookedly.
- In the upper part of the corners, located perpendicular to the side of the mount to the TV, make one hole for a bicycle spoke.
- When these corners are ready, fix them on the TV block with screws. You can attach TV mounts to M4 screws.
- Take another pair of corners. Make holes in them to mount the TV on the wall, at least two. Calculate the optimal number of holes based on the weight of the device. For heavy devices, you will need more holes, otherwise the homemade TV bracket will not withstand the load.
- Drill holes for the bicycle spokes on the other side of the corners, at the top.
- Make markings on the wall using the holes in the corners. The distance between the corners should be slightly less than between the parts attached to the rear panel of the device. The corners on the panel should cover the wall corners on the outer sides.
- To place parts more evenly on the wall, use a building level. If the markings are not level enough, the TV will fall off the bracket. The wall may also be damaged.
- Plastic dowels are useful for securing aluminum corners to the wall.
- Raise the device to the level of the corners and align the fasteners.
- Thread a bicycle spoke through the holes. Remember that these holes must be at the same level relative to each other. The knitting needle can be replaced with thick nails, the length of which is approximately 100 mm. To prevent the nails from jumping off the bracket, they need to have a head with a diameter larger than the size of the holes.
- Secure the fastener.
Similar working principle:
The PVC box is needed to safely store the wires coming from the TV. How to remove a TV from this type of wall mount? Bend back the tops of the nails, carefully supporting the expensive device from the bottom or sides.
Another method for assembling a TV bracket with your own hands, using a wooden rail and 4 hanging hooks:
- Take a wooden strip with a cross-section from 3 to 10 cm. Divide it into 2 equal segments corresponding to the width of the device. If you need to set the angle when installing the TV on the wall, make the bottom rail one and a half centimeters thinner.
- Take 4 self-tapping screws with ringed heads. Screw 2 screws into the ends of the slats, not too close to the edges.
- Using a drill, make holes in the slats for fastening to the device. Secure the wooden strips to the device.
- Mark the wall. It will need to make holes for the rings at the ends of the screws.
- Drill the required holes.
- Secure the hanging hooks in the holes.
- How to hang a TV on a wall with a bracket self-made? Lift the device and place the rings on the hooks. The wall mount for your device is ready.
How to remove a TV from a wall bracket? Simply lift the device so that the hooks pop out of the rings.
Fixing the bracket on a plasterboard wall
If drywall is used as cladding, you can secure the bracket to the wall using a long stud screw. Drill holes for screws in the sheet of drywall and on the load-bearing wall behind it. The deeper the anchor goes into the load-bearing wall, the more secure the TV mount will be.
If the drywall is located at a considerable distance from the main wall, it will be easier and more reliable to attach the bracket to the metal guide profile of the frame. To find the screws holding the drywall to the profile, use a strong magnet.
Wall mounting for a small TV allows some liberties. Lightweight devices weighing less than 15 kg can be mounted on the wall using a butterfly dowel. If the weight of the device is greater, the drywall will not withstand the load and the wall will collapse. However, devices with a diagonal of 32 or 42 inches often weigh around 15 kg.
If a sheet of drywall is used as a full-fledged partition wall, you should not hang the device on it. Moreover, making TV mounts on a drywall wall can be dangerous. It is better to buy a special stand for this device. Also consider installing a special TV mount close to the wall, the weight of which will fall primarily on the floor. Screw pipes or a cut of laminated chipboard to the wall to attach the TV bracket to them. However, it is still not worth mounting a TV on a wall that is not highly durable. Better consider mounting your TV to the ceiling.
Before or after purchasing a TV, the happy owners of a new device are faced with quite logical questions: “Where and with what help to attach the newly purchased TV?” This article discusses the following questions: how to choose a TV bracket And how to make a TV bracket with your own hands.
The first thing that comes to mind is to find a ready-made TV bracket in a store, which is without a doubt ideal solution. But what are the differences between these products, and how to choose the right TV bracket, is a mystery to many.
How to choose a TV bracket
The price for these mounts starts at $7 and can exceed $150, so it makes sense to understand what it depends on and what to choose.
Adjustment

Expensive brackets have more possibilities to adjust the tilt and swivel of the attached TV. The greater the angles of inclination and rotation, the higher the cost of the product. The cheapest models have no adjustment, they are static.
Screen diagonal

The maximum and minimum diagonal of the TV screen for which the bracket is designed. Again, the larger it is, the higher the price.
Distance from wall

The cost of the bracket is greatly influenced by how far it is placed from the wall. The minimum distance of the bracket from the wall can be 10-13 mm, and such brackets are cheap. But to purchase a bracket with a reach of 400-550 mm, you will have to spend $60-100.

Brackets for ceilings, walls and tables are available for sale. The mounting location is selected individually, depending on preferences. Since wall-mounted brackets are more common, find suitable model at an affordable price it will be easier in this category.
Maximum load
The maximum load on the bracket directly depends on the weight of the TV. The more the bracket can withstand, the more reliable and expensive it is.
Now, let's move on to creating a bracket with your own hands. Since you have reached this section, it means that you have already studied the entire store assortment of ready-made brackets, and you were not satisfied with something about them (just like me).
Here's a photo of what we ended up with to make it clear what we're talking about.

The task was to hang the TV strictly opposite the bed, while the curtain should not be affected in any way. This means that the simple option of attaching the bracket to the wall at a right angle was no longer needed.
After watching ready-made solutions, more or less suitable options We found only from $80, since we needed a bracket with a 545 mm offset and a significant angle of rotation, in general, we couldn’t afford it. The rotation angle was necessary, but tilt adjustment was not needed, and this already simplified the task, because making a TV bracket with tilts with your own hands is something unrealistic.
It was decided to use a long gate loop as the base. This loop can withstand a load of 50 kg, which is extremely reliable for a bracket.

The loop itself was secured to two anchor bolts, and there’s no need for more here, now the loop can only be pulled out with the wall.

Next, a piece of board was cut out, which serves as the connector of the bracket to the TV. The board with the bracket is connected with bolts with a truncated cone, this is done so that the heads of the bolts are in the same plane with the board, and nothing rests against the TV.

Then the wires were laid in a cable channel, which was secured with glue.

We also installed a separate outlet for the TV.

At this point, the installation of the bracket was completed, and all that remained was to fix the TV on it.


Bracket creation costs
The gate hinge is the main and only expense; it cost 140 rubles. It doesn’t even make sense to count a piece of board and bolts, since these are pennies. In general, the cost of the bracket itself did not exceed 200 rubles. The creation of a bracket for the poor has been successfully completed. If you decide to use the ideas from this article, leave a comment on it, good luck!
LCD (LCD), LED (light emitting diode) and plasma TVs in the interior have finally “waved the handle” of cabinet furniture and moved into the realm of decor and finishing. The reason is obvious: a flat-screen TV looks like a picture in a frame and therefore fits seamlessly into almost any room design. At the same time, useful space is freed up, which simplifies and reduces the cost of renovation with furniture.
Modern TVs in the interior
However, at the same time, the happy owners of a high-tech window to the world are faced with a far from idle question: how to hang a TV on the wall? 28-inch (28”, 71 cm) LCD weighs under 15 kg; the same “plasma” approx. 20. With the optimal viewing distance of 3 screen diagonals recommended by doctors, a 35” TV can be placed in an ordinary living room. The back walls of all of them are thin, most often plastic. It's clear to a repeat student that the TV won't hang on a couple of hooks for a long time; a special holder is required. Which, in turn, must be securely fastened to the wall.
There are more than an abundance of offers from master “hangers”, but the prices for the work... In general, it turns out that the price in rubles for mounting a TV on the wall is obtained by multiplying the screen diagonal in centimeters by 100. For “plasma” the premium is approx. 10%, and for fastening to plasterboard, PGB (tongue-and-groove blocks), etc. “problematic” (weak) walls – another 20%. Perhaps the craftsmen develop their own tariffs for some other reasons; say, the cost of working time and the cost of an hour of life for your family. However, the results of statistical processing by regions of the Russian Federation give the above values. Considering that many people have to take out a loan to buy a TV, the question arising from the first - how to attach a TV to the wall with your own hands - becomes no less relevant.
What about the bracket?
From an ergonomic point of view, fixing the TV on the wall motionless is only possible in some cases. Although the full viewing area of modern flat-screen TVs is, as a rule, at least 120 degrees horizontally and 60 degrees vertically, health requirements for long-term viewing impose additional restrictions: up to +/–30 degrees from the horizontal axis perpendicular to the center of the screen; vertical tilt of the screen plane up to +5 (up) and –15 (down) degrees. If long-term viewing is possible while sitting or lying down (studio apartment or small apartment with a living room-bedroom), a vertical tilt is permissible at +/–15 degrees. Those., the system for mounting the TV to the wall must ensure its rotation/tilt within certain limits so that the viewers' eyes are in the specified zones, and best of all - directly opposite the center of the screen.
Note: in what cases and how it is possible to mount the TV on the wall tightly/immovably will be discussed further.
Prices for TV holders don’t seem to be very high: a good one for a diagonal of up to 30” can be purchased for 2000-3000 rubles. , and one that will support it on a solid permanent wall - for less than 1000. But if the TV is a credit one, then this amount can also matter. Hence the third question: is it possible to make a TV mount on the wall with your own hands? There seems to be nothing complicated about store-bought products; For rotary hinges, small garage hinges (say, 10x120) or split door hinges with a ball bearing will do. Well, let's see at work.
Watch the video. It is not educational, it was chosen based on the number of viewer comments.
Video: how to hang a TV on the wall
If we discard purely “goblin (troll)” ones, it is still clear: there are more than enough completely justified questions and comments on the quality of the work and the progress of its execution. Although, it would seem: well, what kind of skills are needed here, to drill holes in the wall, drive dowels into them and install iron on the screws, specially designed for this?
When installing on a purchased bracket, related problems are also possible. For example, its reach when folded is 40 mm, which is aesthetically attractive. But the socket has already been moved upward so that the TV covers it. The protrusion from it of the power plug with the axial entry of the power cord, which is most often supplied with televisions, is from 60 mm. Should I cut the cord and install a side entry plug? The warranty is lost because Almost all TVs have an integral power cable.
Or vice versa, to view the TV in the sleeping area, you need to rotate it 80-90 degrees. But then the usual “breakable” bracket will be needed in such a way that when viewed in the living area, its hinge will stick out from the side and will make the entire interior design laughable. And for hanging on a special bracket for just such cases (see below), a regular TV is not suitable.
On the other hand, in 2 parts of another story it is shown how to make a bracket for a TV yourself.
Video: DIY LCD TV bracket
The finished product turned out to be quite good, but only with the 1st degree of freedom (see below), which is not always acceptable. The work is not easy, and the savings are no more than 3,000 rubles. at best.
Based on these conditions, we can give the following recommendations regarding the purchase or self-production of a TV bracket:
- First of all, according to the requirements of health care, ergonomics and interior design (in that order), you need to find a place on the walls for the TV with satisfactory load-bearing properties of the supporting surface: if the TV weighs 10 kg, each of the 4 points of its attachment to the wall will have not less than 20 kgf; The rule of leverage applies here.
- Then choose a suitable fastening design.
- If you have the opportunity to use welding equipment, access to metal-cutting machines, appropriate working skills and a certain supply of suitable metal scraps (steel pipe from 25x15x1 and sheet from 1.5 mm), then you can make a TV bracket with your own hands. The money saved is enough to mark the successful completion of the job.
- Otherwise, search the Internet for a product that meets your requirements. The choice is endless, but how to choose a TV mount expertly and install it yourself is what all subsequent material in the article is about.
How the TV is attached to the wall
The vast majority of TVs are designed for mounting using the VESA system, which is based on mounting modules (typical distances between the centers of holes) of 75, 100, 200, 300 and 400 mm. An exception is televisions with a screen diagonal of more than 25” (63.5 cm) for studio apartments or other residential premises with combined functionality, i.e. with sleeping and living areas in one room. We'll remember about these later, but for now let's move on to VESA.
Note: with a socket for placing on the “leg” of the stand, TVs are not suspended on brackets, because small supporting area. When manipulating the TV on the bracket, large concentrated loads will arise in the socket and it will quickly collapse. Such an incident, of course, is not guaranteed.
On TV
The TV mounting points for VESA modules are located on its rear panel, most often in groups of 4 or, in rare cases, in pairs, pos. 2 in Fig. “Quadruple” VESA is most often organized in the form of a square, pos. 1 or more or less elongated rectangle, pos. 3 and 4. Sometimes, but very rarely - in the form of a trapezoid, isosceles or oblique.
Standard mounting bolts, pos. 1-3, are often already screwed into the mounting points. If not, when purchasing, look for them in a separate package and do not use others: mounting the TV on non-standard fasteners completely voids the warranty.
Attaching the TV to a pendant or bracket
Sometimes, as a rule, in “cool plasmas”, the standard fasteners are poorly visible (item 3), the bolt heads are designed for special tools (for example, a 5-point wrench), and are even filled with soft plastic. This means that a certified technician must hang the TV on the bracket. Upon completion of the work, he puts his personal stamp on the warranty card and makes a note about the completion of the work; Without this, all warranties are void.
The same situation arises with regard to TVs with a steel back wall, on which there are stampings for fastening with standard, and only standard, non-screw-out screws (red arrows on item 4). Such TVs are most often anti-vandal and “anti-theft”; fastening with self-tapping screws is intended for installation in public premises. For residential installations, as a rule, the usual VESA is provided (orange arrows), but you definitely need to check the user manual to see if a non-proprietary installation is acceptable, otherwise the warranty will be void.
Note: price for TVs by item. 3 and 4 above in branded dealerships, as a rule, includes installation at the point of use within the city. Brackets are also often offered as a choice for some extra charge or bonus. If you have your eye on this, find out all this before shelling out your money.
On the bracket
The diagram of a standard VESA mounting pad (cross, butterfly, crab, mill, cuttlefish - simply) is shown in pos. 5. It can be made independently from durable laminated plastic (getinax, textolite, fiberglass) with a thickness of 4 mm or sheet steel from 1.5 mm. In the latter case, it is highly advisable to stick elastic pads onto the seating surface, for example. from cork or linoleum; It is also better to take a purchased bracket with spacers, because any mechanical damage to the TV body, even minor scratches/dents, gives a formal reason to refuse warranty repairs.
A VESA wall mount of a simplified design for TVs with a screen diagonal of up to 12” (30.5 cm) is shown in pos. 6. This is exactly what it makes sense to do with your own hands; say, for a small TV in the kitchen. To mount the entire suspension, first attach the support bracket to the wall A, then to the TV mounting bracket b. It takes two people to put the TV in place: one holds it, and the other screws in the locking bolts. V. Remove as needed in reverse order. “Telk” with a diagonal (8-10)” can generally be hung together with the mount on a hook. Only, God forbid, not on silumin or plastic: they tend to suddenly break off under load for no apparent reason.
Brackets
Most often, TVs are hung on “breakable” (fracture) brackets with 3 degrees of freedom: sideways rotation, sideways movement, tilt, on the left in Fig. If there is a need to rotate the TV more than 75-80 degrees, you need the full reach of the bracket rod (distance A) to be at least half the overall width of the TV. It is also highly desirable that the far hinge B be detachable without tools; this will make it much easier and easier to install/remove the TV.

Brackets for TVs with different degrees of freedom
Note: inexpensive brackets with 3 degrees of freedom, as a rule, are mounted only on solid walls. Fastening them to PGB and gypsum board (plasterboard, see below) is most often impossible.
For fixed mounting, much cheaper holders with 1st degree of freedom are used, which only allow you to adjust the tilt of the screen, on the right in Fig. They also allow installation on weak walls, so it is advisable, if the purpose and functionality of the room allows it, to find a place in it for a fixed mounting of the TV.
Mounting a TV on such a holder requires two people: with mounting units B pre-screwed to the body, holding it from the sides, it is placed on the support bar G. The “single-free” holder allows you to mount very large TVs with mounting modules over 400 mm and generally non-standard ones. However, if the TV mounting points are not arranged in a rectangle, installation may not be possible because The ability of mounting units to skew is very limited.
Special cases 
Compact, with increased bearing capacity, TV bracket
When frequently manipulating a large TV in multifunctional rooms, in order to securely mount the TV on the wall, a pantograph or parallelogram mount and a beam suspension are required, see fig. right. VESA without beams (shown by red arrows) in this case will no longer be reliable: it quickly weakens, or even the case cracks. In addition, the pantograph bracket folds compactly, and the TV can be pressed tightly against the wall.
The absolute disadvantages of pantograph brackets are, firstly, the prices for them themselves: literally an order of magnitude higher than the turning point ones. Secondly, you also need a special TV, with ridges on the back panel for attaching beams and handles on the sides, by which you drag it back and forth, also seen in Fig. right.
A special TV will also be needed to install it in a niche flush with the wall, without clearance on the sides. The issue here is cooling: you need to ensure air circulation behind the TV. It’s not just “plasmas” that are sensitive to overheating; For LCD/LEDs operating without heat dissipation, screen delamination before the warranty expires is common, and any more or less experienced repairman can accurately determine the cause. From an LCD/LED TV with a delaminated screen, all that remains is to remove the electronics for spare parts and throw away the rest.
Note: Screen delamination first appears in the form of colored moire, which quite quickly turns into dark or light spots.

Scheme of installing a TV in a mounting box
TVs for installation in blind niches are equipped with a special mounting box. In addition to VESA, they have hooks on the side of the case for hanging in a box. The installation diagram of the TV in the mounting box is shown in Fig. In addition to niches, these are hung on very weak walls; As a rule, the box provides at least 8 points of attachment to the load-bearing surface.
To attach conventional brackets to solid walls, fasteners, unless otherwise specified in the specification for the TV, are selected according to the following rules:
- Dowels - at least propylene, and preferably steel;
- For walls made of PHB (foam blocks, cinder blocks), only propylene dowels;
- The diameter of the screws in mm is no less than the first digit of the screen diagonal size in inches, but in any case from 4 mm;
- Depth of a self-tapping screw into a load-bearing wall, in mm, not counting the thickness of the finish - not less than the diagonal length in cm +10 mm for concrete walls, not less than the same diagonal length in cm +30 mm for brick walls and not less than 1.5 diagonals in cm +50 mm for PHB walls.
For example, a 12-inch (31 cm) TV. The diameter of the screws is 4 mm. Depth in a concrete wall from 40 mm, in a brick wall from 60 mm, in PHB from 95 mm. Diagonal 28” (71 cm) – from 7 mm, from 80 mm, from 100 mm and from 155 mm, respectively.
Drywall
The above does not apply to gypsum plasterboard walls, they are too weak. For installation on a main wall with sheathing, the dowels are driven into the load-bearing wall; The holes in the casing are drilled to accommodate the passage of the dowel head. The dowels are pushed into place by tapping a spacer made of steel rod with a hammer; A 6-sided socket wrench of a suitable size (so as not to fall into the dowel) will do.
If the partition is entirely plasterboard on a frame, then, firstly, the thickness of the sheathing should be from 12 mm. Otherwise, we look for another place for the TV or put it on a cabinet. Secondly, the weight of the TV per 1 point of attachment to the wall should not exceed 5 kg, i.e. when fastened to 4 points, it should not exceed 20 kg. Thirdly, the distance between the centers of the mounting holes should be, in mm, at least 20 of the TV’s weight in kg. In this example – from 400 mm.

Fasteners for TV bracket on plasterboard wall
Also, instead of simple dowels, anchor ones are used, with legs that diverge, in mm, by at least 2 the weight of the TV in kg; in our case, no less than 40 mm to the sides. The attachment points should not be too close to the frame and not too far from it; Approximately permissible distances of the ends of the “spread” legs from the frame elements are shown in Fig.
It remains to decide how to find the sheathing elements if their location is unknown. In the case of sheathing made of steel profiles, a simple metal detector will help out. Not an expensive field one, with which treasure hunters scour beaches and popular picnic spots, but a construction one, which you can do with your own hands, without delving into the jungle of electronics.
A way to find wooden frame beams under drywall in amateur conditions is a medical stethoscope. First, by tapping your knuckles on the wall, you find a place where the sound is louder. Then, tapping there, they listen to the wall with a stethoscope. Above the sheathing beams the sound weakens sharply.
Straight to the wall
If it is possible to organize a permanent long-term viewing area in a room with a TV, then in all respects it would be optimal to mount it tightly to the wall, without a bracket. The design of a holder without degrees of freedom can replicate that of a “1-free” bracket; drawing - at pos. 1 pic. Material – thin-walled perforated steel profile: corner 80x60 and U-shaped 40x40. Scraps can always be purchased at hardware stores or from drywall specialists. The smaller shelf of the corner is bent in half and slightly bent upward.

Mounting a TV on the wall without a bracket
When suspended on such a holder, it is possible to set the screen tilt angle once by placing spacers under the upper or lower VESA bolts. For angles of +/–15 degrees and a viewing distance of 3 m, this will allow you to change the height of the suspension within +/–0.8 m, which is sufficient for most interior solutions.
A very simple way to hang a TV without a bracket is a piece of wooden board with a thickness of 30 mm, pos. 2, and furniture hinges for shelves, pos. 3. To avoid “non-warranty” due to scratches on the body, it is better to attach them to a plywood spacer, pos. 4. If you take a supporting bar with a width of 150 mm and attach it in the corner, with a pair of screws on each edge, then for a TV with a diagonal of up to 70-85 cm it is possible to organize a long-term viewing area in the Khrushchev living room 3x4 m, where cockroaches nowhere to roam, pos. 5.
Where to put the wires
A modern TV, taking into account the available signal sources and the possibility of using it as a PC display, can accommodate up to 6-7 cables. In addition, it is fundamentally impossible to place an effective acoustic design in a thin flat case, and full “juice” of sound can be achieved only with the help of external speakers (acoustic systems, speakers), which means another 2-3 cables. Such a “broom” even in the dark will ruin the impression of both the interior with the TV and the program, even if its plot is of the kind that makes some categories of viewers forget everything in the world, on the left in Fig.

How to hide wires from a TV
The way to hide a bunch of TV wires is well known: this is a piece of cable duct with a color and texture that matches the interior. Attaching shelves for a tuner, DVD player, USB and storage containers to it is not a difficult task for an average home craftsman, in the center and on the right.
You can also find advice to pass the wires under the drywall through 2 holes in the sheathing, at the top and bottom. Let’s say it’s still possible to catch their ends at the bottom with a hook. Let's also assume that the connectors on the wires will be mounted after. But how to pass the elements of the sheathing frame? It remains to be assumed that the authors of these recommendations simply do not know that the wall is sheathed.
Garage-shed-dacha
Old “kinescope” (CRT, cathode ray tube) “bubble” televisions are usually sent here for retirement. They can also be hung on the wall. We don’t touch lamp-semiconductor “coffins”; workers, they are valuable technical antiques and there is no point in finishing them off. Let's deal with the later single-board ones with a slot mask in the tube.
The internal supporting structure of the still vigorous CRT veterans can be in the form of a frame made of steel profiles or a three-dimensional frame made of a round bar. You can recognize them by their mounting legs: the first ones have visible heads of fairly powerful bolts with wide washers. For these, you can make a cantilever bracket from professional pipe from 25x15, pos. 1 in Fig. To attach the TV to it, holes are drilled in the consoles for the bolts of the legs; The standard ones need to be replaced with others, with the same threads, but extended by the thickness of the consoles + the depth of the hole in the leg. There is a nuance here: the bolts need to be changed one at a time, and the TV must be attached to the consoles carefully, otherwise its “guts” may move. It won’t break, but it will be difficult to catch the “lost” sockets with bolts without disassembling.

How to hang an old TV on the wall
CRT TVs with a three-dimensional power frame are even easier to hang on the wall: on a cord with loops at the ends, pos. 2 and 3. The hinges are clamped under the standard rear cover mounting bolts. By tightening the cord in the holes of the plywood holder, you can adjust the tilt of the screen. This mount looks curious, but it is quite reliable and practically free.
Note: As a technical curiosity, what is shown in pos. 4. Even a steam locomotive can withstand it, but the design... Unless the owner adamantly and inexorably wants to hang a one and a half meter plasma in the garage.
And more about brackets
So, the final answer to the original question: how to hang a TV on the wall, step by step comes down to the following:
- Choosing a place to mount the TV; first of all by mechanical characteristics bearing surface.
- Based on them, the weight and dimensions of the TV, we determine how to attach it to the wall.
- We choose a bracket or holder that suits all existing conditions, make it or purchase it ready-made.
The first 2 points are entirely in your hands. The main criteria for choosing a bracket are set out in the text of the article. Just in case, in conclusion, we’ll give you another video on how to choose the right bracket for your TV:
Video: how to choose a TV bracket
Desire to watch something interesting in the evening it remains so in our minds. If previously all large families gathered in front of their neighbors' TV, because they were not so common, today everything has changed and there can be one in each room. The TVs themselves also changed their form factor. If earlier it was a huge box that required an impressive stand, now these are thin and light solutions that have migrated to other planes. That is why it is worth knowing how to make a TV mount on the wall with your own hands.
Understanding the brackets
The back panel of modern TVs is plastic, so it is not possible to hang it on screws or hooks, so special fastenings have been developed - brackets. Brackets have several main classifications, which are divided, for example, according to the location of their installation:
- for the wall;
- for the ceiling;
- bracket-stand;
A ceiling mount for a TV is often used in cases where it is located in the transition area between two rooms, but they do not have a clear partition. This, for example, could be the kitchen and dining room. Its advantage is the possibility of adjustment, as well as the minimum occupied space. Such a device requires special care when performing installation work, because you can pay with expensive plasma. Mounting the TV to the wall using a bracket is more common. Such brackets are used not only at home, but also in offices, hotels and performance halls. The stand bracket is a more specific solution. They are not suitable for every interior; they are often used to visually delimit the area of a room.

In addition to location, brackets also differ in some ways design features. There are fixed options. They are a durable, ready-made structure that is installed in its place, and the TV is attached to it. However, it is not possible to change the angle of its inclination or rotation. Such a bracket will be needed if there are no plans to rearrange the room and the TV is always watched from the same distance and location. This, for example, could be a bedroom or living room. These brackets can support more weight than others.
There are situations when you need to change the angle of the TV. This may be due to viewers of different ages or heights. Then a tilt bracket is perfect. Visually, it is similar to a fixed bracket, but it has a separate module that is capable of changing the angle of inclination in the vertical plane. There is also a swivel TV mount. They are often used for desktop monitors in order to select the required position for a specific user. They consist of a base that is attached to the wall and several levers. The most technical is the bracket, which is capable of changing the angle of rotation and tilt. These are suitable, for example, for kitchens where the hostess is constantly moving.

Choosing the best option
To decide which mount in the best possible way is right for you, you need to answer a few questions for yourself:
- where the installation will take place;
- what is the maximum position from the wall that is permissible;
- where is the socket located?
- what type of TV mount does the TV have?
- what is offered specifically for my model;
- what is the cord plug for the TV;
- what is the weight of the TV;
- what will be the load-bearing base;
- Is a rotation angle required?
Depending on which characteristics of the bracket you put a plus sign in front of, you will need to choose a fixed module or one of the movable options. Also, before purchasing a holder, it is worth looking at how many mounting holes there are on the back of the TV. Typically, fastening systems are designed according to VESA standard. They have a stated hole spacing that varies depending on the screen diagonal. The number of holes also varies. There may be 4, 2, 6 or even 8. At the first inspection, they can be difficult to identify, because from the factory they come with screws already screwed in and may be under a sticker or soft material resin-like.
Pay attention! According to the VESA standard, the distance between the bolts on the bracket can be 75, 100, 200, 300 and 400 mm. IN non-standard solutions You will need a bracket with a different fastening system.
Mounting the wall bracket

The TV wall mount has the easiest approach to installation. This bracket is very easy to attach without outside help. Before you prepare the tools to fix the bracket, you need to think carefully about the location of the TV. It is necessary to take into account factors of sanitary and hygienic standards. The head should not be raised too high when viewing, as this impairs blood flow and can subsequently affect vision. This also applies to a large head tilt. It is better to attach a fixed bracket to the wall at the user’s eye level. It is also important to consider the location of light sources and windows in the room. If the TV bracket is opposite the windows, then it will be difficult to see anything there during the day. The lamps should also be kept to the side, otherwise they will have to be constantly monitored. To work you will need:
- bracket;
- hammer drill or drill;
- dowels and screws;
- level;
- screwdriver or wrench;
- roulette;
- marking tool.
In addition to choosing a place for the bracket, you should decide on the quality and material from which the wall is made. Mounting the TV on plasterboard wall has some nuances. If for regular wall Under the bracket, plastic dowels and screws are purchased that can withstand total weight TV, then for drywall the approach is a little more complicated. For the latter there are special brackets with a large number of holes for mounting. You will also need to pick up the so-called “butterflies”. These are special dowels that, when screwed in with a self-tapping screw or bolt, are compressed and secured to the back of the drywall sheet.
Pay attention! If you plan to hang the TV on drywall, then you should take into account that the thickness must be at least 12 mm or you will have to look for another option. It is also important to calculate the weight correctly. It should not be more than 5 kg per hole. You also need to get to frame profile, because the sheet itself may crumble and repairs will have to be made.

If you have already installed something in your apartment and know that the walls are old and crumble when exposed, then for the bracket you will need dowels of a larger diameter than recommended and the screws should be of a type that will be able to compress the walls of the dowel in the hole. If this is not provided for, then at one point you may see your TV on the floor. Now the process is in order:
- Using a tape measure, measure the distance from the floor to the height of the TV mount. For convenience, you can use a level to draw a light reference line.
- The bracket is tried on in place. In this case, you can position it along the line by passing it into the lower holes. The level sets the correct vertical and horizontal position of the bracket.
- Using a pencil or other marking tool, marks are made for future holes.
- Use a hammer drill or a drill to drill holes for the bracket. In this case, you should not move the tool from side to side. This may result in a broken drill bit or increase the diameter of the hole, which is not good.
- Using available means, the remaining crumbs from the stone are cleaned from the hole.
- Dowels are inserted into the holes for the bracket.
- When supporting the bracket, it should be attached to several bolts to keep it in place. After this, a full tightening is performed.
- The bar that will hold the TV is removed from the bracket and screwed onto it.
- After this, the TV is mounted in its place.
If the bracket is rigidly mounted and cannot be rotated, then before hanging the TV, you should raise it to the level of the bracket and connect all the required wires, since this will be impossible to do later.
Pay attention! Mounting the TV to the ceiling and floor is practically no different from this option. It’s just that the work is being done on a different plane. Additional effort may be required when laying wires. But often manufacturers provide the opportunity to hide them in the pipe of the bracket itself. Therefore, before attaching the TV to the bracket, be sure to route all the required wires.
DIY bracket
If you don’t think it’s necessary to buy an expensive holder or the mounting method of your particular option is not suitable for the VESA system, then you can make a wall mount for your TV yourself. For this you will need, for example, an aluminum corner. You can use metal or wooden slats.

WITH reverse side TV is measured between the top and bottom mounting holes. Another 2 cm should be added to this number so that the holes are not flush against the edge of the corner. Four identical elements are cut. Holes are drilled in two of them in accordance with how they are on the TV cover. The other two will be on the wall. In order for them to interact with each other, you will need to drill holes so that they coincide in the corners that will be on the TV with those that will be on the wall.

Two corners are mounted on the TV, and the other two on the wall. The distance between the latter should be such that those mounted on the TV fit between them. To carry out the procedure, you will need two more people who will hold the TV suspended while the third can fasten the corners together.

Conclusion
As you can see, there are different module options for mounting the TV on the wall, ceiling or floor. It is better to purchase exactly the one recommended by the manufacturer. This should be done because some companies may void warranties due to improper installation. If this does not concern you, then you can make it yourself.