Finishing walls with laminate will be a revelation for those who are looking for original solution in decorating your home. Thanks to the unique combination of aesthetic and technical properties, laminate can be successfully used for covering and finishing floors, walls and even ceilings.
Is it worth installing laminate flooring on the wall?
Laminated panels have been tested as a floor covering, where they have proven themselves excellent. Therefore, there is no need to doubt the reliability and practicality of laminate as a finish for wall surfaces. Laminate panels are increasingly replacing more familiar wall coverings from apartments and offices: lining, wall panels and MDF panels. This trend can be explained by the fact that laminate has many more advantages over its competitors.
The advantages of laminate as a finishing material for walls are as follows:
- environmental friendliness of the material. Laminated panels have a wood base, which makes them environmentally friendly;
- durability. If you follow the rules of operation and care, laminate will last for many years and will become boring rather than lose its aesthetic appearance;
- affordable price. If you compare the cost of MDF panels and laminate, then in the second case you will be able to save a significant amount. In addition, laminated panels for walls can be purchased thinner and therefore cheaper;
- a huge range of textures and colors. This is an undeniable advantage that allows you to use it to implement various design solutions;
- ease of installation. You can install laminate flooring on the wall yourself, without the help of specialists;
- practicality. The coating can be washed, cleaned and polished.
Among the disadvantages, it is worth highlighting that laminate cannot be used in all rooms of the house. Due to fluctuations in temperature and humidity levels, the kitchen and bathroom are not the most suitable places for this type of coating. Although there are special moisture-resistant types of panels that can withstand even hot water, but they are more expensive and require more maintenance. The basement, cellar and especially the balcony will destroy even the most durable laminate with their microclimate. In these rooms it is better to use lining or MDF panels.
The site’s site masters have prepared a special calculator for you. You can easily calculate the area of the walls.
Finishing walls with laminate: how to choose the material
In order to finish a wall with laminate, you need to select and purchase the material. When choosing laminated panels for walls, you can save a lot thanks to budget options. Budget means types of material that are in the low-order class (have lower quality characteristics). Since the load on the walls is minimal, a thin and less durable laminate will cope well with the task.
After purchase, the laminate must lie in the room where it will be installed for at least two days. This procedure is necessary to ensure that the material gets used to the microclimate of the room.
But you shouldn’t focus only on cheapness. All influence factors (small children, pets) on the coating under operating conditions should be taken into account. Therefore, when choosing, you need to take into account several parameters:
- Level of mechanical and abrasive load. If the laminate has to withstand frequent cleaning or the sharp claws of a pet, then choosing the thinnest and most delicate coating is not recommended.
- Color and texture. These parameters should be combined with the interior and harmonize with the laminate flooring, if any.
- Installation method. Depending on which mounting method is more convenient (glue or frame), the choice of laminate will depend. In this case, the opposite is also true - the type of laminate will influence how to fix the laminate to the wall.
To finish the walls, tongue and groove laminate can be used.
- The tongue and groove type is equipped with a tongue and groove lock. This laminate can be attached with an adhesive composition without gluing the tongues. The result will be neat and dry joints. Also, strips of material can be mounted without glue, like lining, using staple clamps or small nails.
- Click laminate is an improved model of tongue and groove laminate. Its lock is presented in the form of a pear-shaped comb, which fits into a groove and snaps into place when pressed. Click laminate is characterized as durable material, resistant to warping. In this case, you should not use clamps, since the lock may not close, so when laying it on the wall, it is better to use glue.
Finishing walls with laminate is not a dusty job, in the literal sense of the word, so everything should be quite simple. Laying laminated panels on the wall is possible in two ways: with an adhesive composition and on a wooden sheathing. These methods have differences, but in each process a certain sequence of actions must be followed.
How to fix laminate flooring on the wall - step-by-step instructions
Step 1: Calculation of the required amount of laminate
Since the wall is a flat surface, the calculation is quite simple: the width of the wall is multiplied by the height. Taking into account the cutting and adjustment of panels, approximately another 10% must be added to the resulting figure. To make the most efficient use of the material, you must initially select the most convenient size strips.
Step 2: Preparing the work surface
For glue, just a flat and dry wall is enough. For the laminate that will be attached to the frame, it is necessary to prepare the sheathing. For the sheathing, wooden slats measuring 20–40 mm are suitable, secured with self-tapping screws at a distance of 30–40 cm. The slats are installed using a level clearly perpendicular to the direction of the panels.
Step 3: Selecting a Starting Point
If the entire wall or its upper part is being sheathed, then you should start from the ceiling. In this case, you need to use a level to mark a line with an indent of one board from the ceiling in the appropriate direction (horizontal/vertical/diagonal). If only part of the wall is sheathed from below, then similar actions are carried out from the floor. The panels are laid from left to right from the corner of the wall and deformation gaps must be left (15–20 mm from the corners).
Step 4: Installing the laminate on the wall
With the glue method: the wall and the back of the boards of the first row are treated with glue and fixed to the surface using the plank level. The second row is coated with glue in the same way, but is first inserted into the lock and then pressed against the wall. For additional fixation, the lock is nailed or stapled.
The laminate is attached to the sheathing using special fasteners - clamps, which are used to fix eurolining and MDF. Clamps fix the laminate board at the bottom and top, creating a kind of niche. If the fasteners prevent the panel from going into the groove, then it is necessary to trim the lock at the fastening points with a clamp.
Step 5: Step 5. Installation of skirting boards
It is not recommended to leave the junction of the wall with the floor and ceiling unformed. Therefore, you need to use baseboards and corners. To hide all imperfections, it is better to use overhead accessories, and if everything turned out quite neatly, you can choose skirting boards that are attached to a recessed profile.
Very often in construction, materials that were originally intended for one purpose find application in other types of work. The same thing happened with laminate. This material, as everyone knows, was first used exclusively for finishing floors, but over time, decorating walls with laminate with your own hands gained popularity. In order to carry out this work, you need to have information about some of the nuances accompanying the process, to navigate the types and methods wall mounting. It's about these important aspects we'll talk today.
Types of laminate for wall decoration
There are three types of material that consumers can use for flooring, but not all of them are suitable for walls.
So, of the three types, only two are suitable - tongue and groove. Regardless of which type you choose, in order to achieve a good result, you will need an additional tool, this is especially true when laying a click type, since it cannot be adjusted manually. These tools are not useful for installing laminate flooring on the ceiling, because all work is carried out suspended. We recommend you for these finishing works use the tongue and groove type.
Laminate installation tool
To lay laminate flooring, both on the floor and on the walls, you will need the following set of tools:

Material advantages
- Strength. If we compare it with panels made of polyvinyl chloride, then our material is much stronger and can withstand serious loads, this is especially true when finishing walls.
- Hygroscopicity. Thanks to its special structure and protective polymer coating it absorbs moisture less than, for example, MDF.
- Easy to care for. Unlike regular wallpaper It is easy to clean, there are no scuffs or holes on it, and if it is fastened correctly, it does not come off the walls.

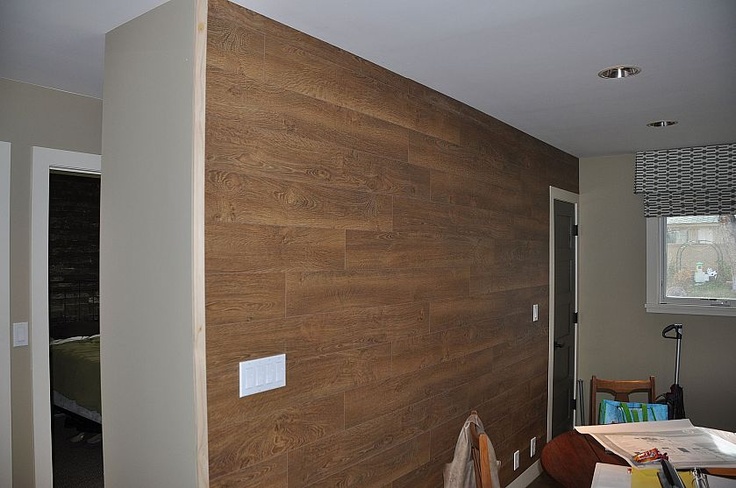
The wall is covered with laminate
Flaws
- Price. Very often, consumers include the price of the material as a disadvantage, which is really high compared to others and differs significantly, but this is compensated by the reliability, durability, and aesthetics of the coating, so this disadvantage is very controversial.
- The weight of the structure. Strength almost always means a lot of weight, so you have to be careful when attaching a material like this. vertical surface these are its characteristics.
Where laminate is not applicable
Possible only if your balcony is glazed and insulated, but the best material there will still be a lining. It does not respond very well to constant temperature changes, high humidity, and exposure to chemical liquids. Because of this, laminate is rarely used in kitchens, bathrooms, and toilets. It is not at all reasonable to lay it in cellars, basements, closets, not so much because of their unstable performance, but because of the high cost of the material.
It is much easier and cheaper to decorate the walls there with regular plaster and paint them. laminate is often used. The material lasts there for quite a long time, despite the fact that it is susceptible to contact with moisture. Its strength, aesthetics and durability can transform a secondary space into a chic and luxurious one. cozy corner. But the optimal place of application will still be the main residential areas. In the bedroom, living room, dining room, nursery, office - this material will “feel” great.
Some subtleties to consider
Laminate wall decor
When laying laminate on any surface, gaps of up to 2 centimeters should be left to prevent deformation of the coating in case of swelling of the material during high humidity. When laying on walls, it is difficult to achieve the desired result using wedges. To make your work easier, experienced builders put the rail down or flat board, which is simply removed after installation of the structure. You can easily hide the remaining gap behind a plinth, which is glued after all work is completed. Fastening is possible only on a surface with increased strength - installation of such structures on glued drywall or plaster is not recommended.
Moisture is the enemy of laminate flooring, so finishing walls with laminate in the kitchen, bathroom, or toilet does not make sense. Rigid fixation is not applicable to this type of finishing, since, expanding when adapting to the room, the material must have room to “shrink.” If you chose click panels, then remember – fastening in locks is not applicable!
Fastening
There are three ways to attach panels to the wall:
- Glue.
- On the sheathing.
- For production systems.
They mainly use the method of fastening to the lathing, which allows not only to decorate the walls in an original way, but also to additionally provide sound and thermal insulation. If your idea is original and fastening to the sheathing deprives you of this design solution, you can resort to fastening with glue; most often they use liquid nails or construction silicone.
It should be remembered that such installation is carried out only on a flat, dry, clean surface without finishing or even plaster. If your financial capabilities are not limited by any amount, then you can safely purchase a branded fastening system for wall work on finishing panels and parquet.
The instructions say that before starting work on installing the material, you need to make sure that the walls are even. This can be done using improvised means, running a long strip along the walls. Where you notice any unevenness, mark it, then eliminate the defect with putty.
It is recommended to start from the left corner, but this is a rule for right-handers; lefties will find it more convenient to start from the right. Before you start work, you should decide how you will lay the material - vertically or horizontally?
If you chose classic, horizontal method, we recommend alternating laying a whole strip with two halves, this way you will achieve greater structural strength. All gaps after installation, as mentioned earlier, will be hidden behind the baseboards.
Vertical placement of stripes using glue opens up endless possibilities for realizing all your creative ideas. You can alternate not only stripes of different colors, but also play with their length. If your imagination doesn’t run wild for some reason, then you can look at many options that you can easily use both independently and with outside help. If your wall that you are going to finish in this way is not large sizes, you can even assemble the structure in the form of a shield on the floor, and then attach the whole thing directly to the wall.
If your wall is so uneven that you can’t simply fill in small areas with errors, you simply need lathing. The pitch of such a frame is not allowed to exceed 60 centimeters. The material for it can be either wooden beams (4*4) or a metal profile.
We tried to outline all the nuances that may put you in a difficult position, but if you have additional questions, either people who have already done this or specialists who will be happy to take on this work can help you. The main thing when starting any work is to remember that nothing is impossible!
Laminate flooring is inexpensive, looks quite beautiful, almost like parquet, and laying this flooring is easy even for beginners. This practicality of laminate prompted designers and craftsmen to think that it would be nice to finish not only floors, but also walls with laminate.
The practice paid off, and today the walls living rooms and offices lined with this finishing material, are quite common and even popular solutions.
Advantages of laminate wall finishing and some limitations
There are several advantages of finishing walls with laminate, which is why this flooring, in general, initially became widely used for finishing walls.

Here are some:
- Great appearance“wood-like”, a variety of textures and colors;
- Relatively low price and durability;
- The coating retains its unchanged appearance for many years, practically does not get dirty, and is easy to clean;
- Good fire resistance and tolerance to elevated temperatures;
- Ease and high speed of installation.

Of course, laminate also has disadvantages that somewhat limit its scope of application. This is primarily its susceptibility to deformation under the influence of temperature and humidity changes.

Therefore, for example, it is better not to think about decorating the walls in the bathroom and kitchen with laminate.
Choosing a laminate for wall decoration
The most main characteristic laminate – abrasion resistance. It is determined by the coating class, the lowest of which is 21, the highest is 34.

The first one lasts a little more than 2 years and is only suitable for rooms with low load on the floor covering.

However, we must not forget that we will use laminate for wall cladding, so there will be practically no load on it.

Thus, even the most inexpensive laminate will look like new on the wall for many years.

This means that when choosing a laminate for wall decoration, you can not pay attention to its class, but concentrate on such parameters as cost, texture, color, etc.

There are many colors of laminate flooring. It's not only classic colors“wood-like” - oak, walnut, pear, cherry, etc., but also modern “metallic”, avant-garde white or black, etc.
Methods for installing laminate on the wall
To cover walls with laminate, you can use the adhesive or frame method. The first, that is, in which the planks are glued to the base, can be used with any type of fastening, be it adhesive or locking.
Laminate with an adhesive type of fastening can be found quite rarely today, but if you chose it for arranging the walls, then it should be glued to the base special glue for laminate.

If the laminate is interlocking, then “liquid nails” can be used for gluing to the base, and for additional fixation, fasteners used when installing MDF panels. It should also be taken into account that high-quality finishing of walls with laminate using the adhesive method without visible seams is possible only on a high-quality and almost perfectly flat base. This can be a carefully plastered wall or sheets of plasterboard, plywood, etc.
Method 1 - attaching the laminate with glue
- We install a stop under the first line of planks on the floor so that they do not slide under their own weight.
- We start laying the laminate from the bottom, the first row is laid level, with the groove up.
- Glue is applied to the base before installation.
- In order to guarantee the reliability of the connection, the grooves of the locking connection at several points must be attached to the base with a clamp - fasteners for, etc. (to do this, the lock on the bar must be cleaned with a knife at the attachment point).
- Before laying the next row, the joints (grooves) must be treated with a special water-repellent gel for laminate flooring.
- Place the next row in checkerboard pattern so that the vertical joints on adjacent rows do not coincide.
- It is better to use wooden slats 44x74 mm or 40x40 mm as the sheathing material;
- In the first rail we drill holes to attach it to the base in increments of approximately 30 cm;
- We apply the slats to the wall, align it strictly vertically and mark the places in the wall where you will need to make holes for dowels to attach the slats (the slats need to be raised from the floor by at least 10 mm);
- We drill holes in the wall and fasten the first vertical batten; we do the same with the rest - we mount them at such a distance that the edges of the plank are held by the slats, while there should be one or two more slats between the boards.
- We fasten the bottom strip of the laminate with the groove upwards using self-tapping screws with a countersunk head, while trying to make this fastening as low as possible so that it can later be covered with a plinth.
- The upper part of the board to the batten in the area of the lock joint is nailed to the wooden batten. To ensure that the complex profile of the lock does not interfere with completely recessing the nail head into the laminate board, you can use a metal rod, core, etc. when driving, or you can use the same clamper, having previously cleaned the lock in this place. Remember that if the head of a screw or nail protrudes even slightly lock connection, then the joints when laying the laminate will have large gaps.
- The next rows of laminate are laid in a checkerboard pattern, observing the installation features of the planks with a locking connection.

Before carrying out this work it is necessary to dismantle door frames, they are subsequently put in place on top of the finishing. You should start laying the laminate from the lower left corner.
Method 2 - laying laminate on the sheathing
This installation method is considered the most reliable and practical. In this case, you should choose a laminate with long and preferably wide slats, then the labor intensity of the work will be even less. In addition, this installation method does not provide pre-leveling walls

Installing the sheathing:
Thus, the laminate strip should be attached to the sheathing at least at three points.

We install the laminate on the sheathing:
Each person upon completion repair work I want to see an original result that will create warmth and comfort in the room. Modern craftsmen suggest finishing walls with laminate - a flooring familiar to everyone. This solution allows you to cover a room with wood, selecting the necessary texture, getting rid of the shortcomings of lining or MDF panels.
Before deciding on an original cladding method, you need to weigh the pros and cons. Finishing walls with laminate has a number of important advantages. Let's look at the main ones:
- Modern fiberboard-based coatings are made from safe materials which undergo testing and certification.
- Laminate cladding allows you to forget about repairs for many years due to the strength and durability of the panels.
- On the wall, the floor covering will be subject to less impact, which is why you can purchase the most inexpensive types (class 21-31).
- Modern market building materials offers a wide selection of laminate flooring with a variety of textures. Thanks to this, you can easily cover the wall with the most suitable slabs in color and texture.
- Installing laminate flooring is not a very complicated process. At the same time, caring for it is even easier. Thanks to the special coating, after completing all the facing work, the walls will simply need to be periodically wiped with a dry cloth to remove dust.
So, if you have an idea to decorate a room with wood, then it is best to use laminate for this purpose. It always looks quite organic, but is not demanding in terms of care. Despite all this, laminate finishing does have a few minor drawbacks.
Firstly, it quickly absorbs water, due to which it can subsequently swell and crack. Because of this, it cannot be used in wet areas. Failure to comply with these simple rules may lead to destruction of the top decorative layer.
Secondly, cladding with fiberboard-based boards is unacceptable in rooms with frequent temperature changes.
Choosing laminate for walls
Any construction and repair work using non-standard solution imply a painstaking selection of materials. Finishing walls with laminate determines some features that must be taken into account when choosing slabs. Let's consider each factor separately.

First you need to choose a suitable locking system. Adhesive laminate means there are no physical latches. Due to this, there is no need to struggle with the correct joining of the plates. Fixation to the wall is carried out using construction adhesive. This option has one small nuance: When joining the boards, excess glue may appear. Excess must be removed immediately with a cloth so that it does not have time to dry and spoil the decorative layer.
Tongue and groove laminate differs in that it has special lock connections. Due to the convex parts at the edges, the slabs cling to each other, without requiring additional gluing of the joints and forming a dry, rigid connection. With this type of fixation, panel strips can be secured in the groove with nails or special brackets and gluers. In this case, installation is carried out on a lathing made of wood or metal. Finishing with tongue-and-groove laminate is ideal for walls, as there is no need to bother with gluing the joints.
If you plan to have additional impact on the wall in the form of a shelf or lamp, then another type of connection is best suited. Click laminate is an improved version of tongue and groove laminate, as it has a more durable lock, which snaps into place at a certain angle.
Another factor worth paying attention to is the strength class, which determines the cost. The slabs must have a texture suitable for the interior, but they will not be subjected to special loads on the walls. There is no need to buy wear-resistant laminate with high abrasion resistance, which is classified as class 33-34. 21-31 will be enough.

So, in order to choose suitable laminated boards for walls, it is necessary to take into account three main factors: planned loads (it is worth paying special attention on the quality of the top decorative layer if pets live in the house), interior style (predominant colors, their saturation), as well as the installation method and class of slabs.
Existing installation methods and necessary tools
Covering both floors and walls with laminate does not imply complex work. Tools you will need:
- ruler, square, pencil, level and tape measure for making marks, taking measurements, monitoring the orientation of a particular slab in space;
- small hammer;
- hacksaw or electric jigsaw;
- a wooden block (often called a boss) and special spacer wings to create gaps between the slabs and vertical surfaces.
When the basic set of tools is at hand, you can proceed to choosing the installation method. There are two fundamentally different methods fixing laminated boards on the wall. The adhesive method is suitable for all types of laminate. It allows you not to have to worry about special fixation, but requires preliminary leveling of the walls with plaster. If this is not done, the panels may lie unevenly, and gaps will be visible in some places.

Based on this, although the glue method is the simplest, it still has large number nuances. However, it may turn out to be more expensive due to the need for breeding plaster composition, leveling walls, using glue.
The second method involves creating a special sheathing. It may seem that this method much more complex and too time consuming. In fact, this is not entirely true. First of all, there is no need to fuss with plaster or drywall. There is also no need to thin the glue. This allows you to make laminate finishing more economical. Secondly, it becomes possible to insulate the walls and increase their sound insulation by using the necessary materials in the gap between the wall and the slabs.
Considering the growing popularity of lathing when installing laminate flooring, modern manufacturers of floor (and in this case, wall) coverings are creating special systems fastenings that speed up and greatly simplify the installation process.
General sequence of actions for installing laminate flooring on a wall
The process of fixing the panels is not particularly labor-intensive, but it requires the person performing it to strictly follow several rules and the following sequence of actions:
- Calculation required quantity slabs for cladding. Calculations are carried out using a fairly simple formula: to the area work surface add 10% interest for cutting and fitting.
- Surface preparation. If the adhesive installation method is used, the wall is plastered, leveled, and cleaned of dirt. In addition, you can use drywall to remove surface unevenness. In the case when it is necessary to create a sheathing, a frame is mounted from metal or wooden slats. You can also purchase a ready-made mounting system.
- Select a starting point and proceed directly to installation. At this stage, either the panels are fixed to the wall using glue, or they are attached to the sheathing using nails or special brackets - gluers.
- The final stage. Installation of plinths in corner places, as well as at the junction of planes.
Thus, wall decoration with laminate - modern way give the room an original appearance. In this case, it is worth talking about the ease of installation of the panels, as well as the fact that they subsequently do not require special care. At the same time, it is possible to obtain any desired texture and color, ideally suited to other interior elements.
Wall finishing with laminate can be done in several ways, both with a horizontal arrangement of panels and with a vertical one. Before we move on to describing the intricacies of technology, let’s get acquainted with the types of laminate suitable for finishing walls.
Which laminate is suitable for walls: adhesive, tongue-and-groove or click?
- For adhesive laminate The edges are smooth, without a lock. The adhesive laminate is laid on a flat surface using liquid nails or construction silicone: glue is applied to the back of the panel in a zigzag pattern, the strip is laid, glue is applied to the end, the next one is laid, etc. The glue drips that appear at the joints are immediately removed with a cloth lightly moistened with table vinegar. An adhesive laminate is not suitable for laying on sheathing due to the small contact area with the underlying surface. Floors are laid with adhesive laminate.
- Tongue and groove laminate panels equipped with a tongue and groove lock. It can be laid with glue without gluing the tongue and groove, so that the joints come out dry and always neat. When laying dry, the strips are secured into the groove of the tongue like lining: with small nails (only to wooden sheathing) or with glue brackets (to wood and metal sheathing). Tongue and groove laminate is suitable for all surfaces of the room: floor, walls, ceiling.
- Click laminate– improvement of sheet piling. The comb in cross-section is pear-shaped; the groove profile matches it. When laying it, the adjacent panel is tilted at about 20 degrees, the ridge of the lock is inserted into the groove, and, turning it towards the base, pressed - the lock snaps into place. Click laminate cladding has increased strength and resistance to warping. In addition to the glue, the click laminate is secured with nails into the grooves of the lock. Clayers cannot be used - the lock will not latch. Click laminate on the walls can be attached with glue to wooden sheathing.

Laminate is also called MDF panels of the same size as laminate panels. This is very good material, but expensive, so it is not discussed in this article. But all the working techniques and subtleties for laminates based on fiberboard and chipboard are also suitable for MDF. And more detailed description works with MDF can be found.
Tool for work
To cover walls with laminate, you will need some tools used for laying floors. There is no point in using them on the ceiling, because... everything is done there by weight. Click laminate strips can be precisely adjusted when laying using just a tool. It will not be possible to move them with your hands - the comb sits very tightly in the groove.
- Boss. Using a hammer, the strips are tapped through the boss as they are laid.
- Rule (emphasis on “and”), or hook. It is sometimes incorrectly called a clamp. The rule is to tighten the last strips, either by hand or by hitting the “flag” with a hammer.
- Spacer wedges maintain the indentation along the perimeter. You need at least two sets of wedges to work. Wedges are mainly used for flooring.
Technological subtleties
Where laminate is not suitable
The kitchen is not suitable for laminate finishing. Fiberboard and chipboard are inexpensive materials; raw materials for them complex processing does not pass. Therefore, the laminate swells and warps due to excess humidity and temperature changes. In the kitchen, fluctuations in temperature and humidity are not only great, but frequent and sharp.
For the same reason, basements, cellars, and closets cannot be finished with laminate. But the hallway is possible. Here the deviations of air parameters from sanitary standards They don’t last long and happen infrequently.
But for a balcony, even a very carefully arranged one, laminate is even less suitable than for a kitchen. On the balcony there are large seasonal fluctuations in temperature and humidity. Therefore, the balcony needs to be sheathed plastic lining, eurolining or MDF.
Gaps
Due to the tendency of laminate to swell under high humidity, it must be laid with a gap (indentation) from the corners of 15-20 mm around the entire perimeter for any installation method. It is difficult to support it when installing it on a wall with spacer wedges, especially from below, so it is better to do this: lay a flat board or batten along the bottom required thickness. If installation is done using glue, we wrap this board or batten with one layer of thin plastic film. And from the sides you can already use wedges - here they are not loaded with the weight of the skin and will not slip off. Once the sheathing is finished, the gaps are closed with glued plinths.
Glue or lathing?
Most often it is recommended to lay laminate flooring on the sheathing. At the same time, the strength of the finish on any wall is guaranteed and additional sound and heat insulation can be made. But the artistic possibilities of finishing when laying on the sheathing are very limited. To obtain cladding original design The laminate is laid with glue (liquid nails, silicone) on a flat, dry wall without plaster.
About the nuances of forming wooden or metal sheathing.
Advice: Many manufacturers floor coverings, knowing about the desires of customers, they are already producing special systems for attaching parquet and laminate to the wall. An example of such a solution is in the video below:
How to check if a wall is level?
To do this, you need an even strip as long as the height of the wall without a plinth. Before checking, plaster, baseboards, door and window frames are removed. The rail is led vertically along the wall; protrusions and depressions are marked with a pencil. The protrusions are scraped off or knocked down with a chisel to a shallow depression. Then all the depressions are filled with starting putty and rubbed down.
How to check the “evenness” of the rack itself? Right on the wall. Place the batten flat against the wall and draw a line along it with a pencil. Then we turn the rail 180 degrees and apply the ends to the ends of the line. If the line along its entire length coincides with the edge of the slats, it is even. If a deflection/kink is noticeable, you need another one. This method of checking a ruler is described in a school geometry textbook.
Where to start?
Most often it is recommended to start laying laminate flooring from the far left corner and proceed clockwise. There is nothing to object to here, but you can add: if you are left-handed, then it will be more convenient to start from the far right corner and go counterclockwise.
Horizontal or vertical?
Laying laminate on the wall is possible in both vertical and horizontal stripes. We’ll talk about the possibilities of vertical installation later, but for now we will describe the methods of horizontal installation.
At first glance, laying in solid strips is simpler and cheaper, but it only seems so. The joints, which are in one line, must be covered with plinths, and the plinths themselves must be attached to the wall with mounting nails (dowel nails). Fastening holes for nails are drilled directly through the joints of the panels. Even if the cladding comes in solid strips along the length of the wall, it still needs to be installed at least every 1.7 m.
Why such complexity and additional costs? The fact is that solid panels will only lock each other in one direction. Without additional reinforcement, such a cladding will tend to fold like an accordion. Mechanical stress on fasteners (glue, nails, gluers) will be concentrated in some places, and in general the cladding will be unreliable.
For good strength, the cladding is laid with a “comb”: a number of strips equal to half the horizontal rows are cut exactly in half. If, say, 10 rows are laid along the height of the wall, we cut 5 strips. We carry out the laying, starting the rows alternately with a whole strip, then with a half. Joints spaced halfway across the length of the strip will evenly distribute the load on the fasteners.

In some cases, laying laminate flooring diagonally looks interesting. To do this, it is better to use a coating of two colors. Naturally, such work will require certain skills and experience.
Variations of vertical laying
The opportunity to show your creativity in wall coverings increases immeasurably if you lay the laminate on the wall vertically, with glue on a flat, dry surface. The tedious and dusty work of cleaning and leveling the walls is offset by the cost of lathing.
For examples, we will use panels of only two types: long (or solid, if the height of the room exceeds 3 m) - the main ones, and pieces the size of the remaining height of the wall - complementary. Let's take the main and complementary panels of contrasting tones, say, dark and light. Let's see what can happen:
- We will lay out a strip of complementary panels 60-80 cm long along the bottom; We will sew the main ones up to the ceiling. On horizontal joint Let's put the plinth. Vertical joints at certain intervals (say, after 3-4 joints) can be additionally secured with pieces of the same plinth, and the same can be run along the ceiling, also lined with laminate. What happened? Romantic, medievalist (medieval-looking) room with imitation ribs and ceiling beams. Instead of torches, linear fluorescent or freon lamps can be installed on the ribs instead of torches.
- We will sew only the bottom with the main panels, and leave a clean bleached strip along the top. For what? Or at least as a screen for LED strips. Who said that lighting design is only possible on the ceiling? There is no such law, and that’s it.
- We will place a strip of dark complementary panels in the middle light wall and decorate it with skirting boards. We will place paintings, photographs, decorative plates, souvenirs, straw appliqués, macrame, a collection of decorative weapons, etc., etc. on it. Aesthetic and original.

As an option, cover the wall at the head of the bed with a laminate that matches the tone of the floor.
- We cut the complementary strips to length in a ratio of 1:3 (cut in thirds). We will lay them out along the top and bottom with a comb, and between them there will be the main ones. The result is a light (or dark) surface between two combs - minimal in labor intensity and economical in material, but quite a decent design solution.
- We will purchase the main and complementary strips in equal quantities and cut them into squares. The idea is clear: the walls are in the form of a chessboard. It is not so trivial if you stick flat symbols of chess pieces made of thick sheet plastic onto some squares. You can depict a collection of chess studies.
- Let's cut both the main and complementary strips in a 1:2 ratio, and lay out a pattern from them, or simply scatter them in artistic chaos. The result is complete freedom of expression.
IN latest version There is a stumbling block: if you lay it as you please, then there will not be enough space for some fragment at the top, or there will be a gap. Therefore, the pattern (or artistic disorder) must be laid out on the floor in advance, just like that, without fastening, and transferred to the wall in pieces.
What if the room is narrow? In this case, you need to simulate the pattern on a computer in any computer design program, at least in the well-known CorelDraw, number the real fragments accordingly and arrange them in numerical order horizontally.
If you only have basic computer skills, then perhaps it will be easier to cut pieces of thick multi-colored paper to scale, lay them out on the table, and then transfer the numbering from there to the “living” pieces. Numbers, of course, need to be applied to their back side.
Conclusion
As you can see, covering walls with laminate is not only possible for almost anyone. Laminate also provides ample opportunities for the manifestation of creative abilities for people who do not have artistic education and skills. Even the cheapest laminate of only two tones allows you to express the individuality of its owner in the design of an apartment.
Video: example of complex laminate cladding of a loggia
Despite the fact that in the video we completely cover the balcony with laminate, we remind you once again that such a solution should be resorted to only if you are deeply confident in the good microclimate of the room, or use more serious laminated panels based on MDF.