Hello, dear blog reader, if you have a building or garage with concrete or polymer floors, then this information will be very useful to you.
Working as a foreman in the production of concrete floors, I often had to repair floors with (topping), the reasons are mainly poor-quality concrete mix.
Types of destruction in a concrete floor are delamination of a hardened layer, cracks, chips or small pits from a piece of wood or clay that has fallen into the concrete.
It is a non-shrinking, fast-hardening mixture with polymer fibers. Minimum Thickness drawing from 2 centimeters maximum to 4 cm., in one layer.
This mixture belongs to the thixotropic type - this is the ability of the solution not to liquefy from mechanical action and thicken to a state of rest.
It has excellent adhesion to steel and concrete, 24 hours after laying it can be walked on and has a compressive strength of 28MPa.
In addition to the peeling of the topping, there were sections of the floors near the dockfelers (the goods acceptance area) on which the customer laid the concrete on his own without grouting, the view was ugly. It was necessary to align with the main floor and make it smooth. 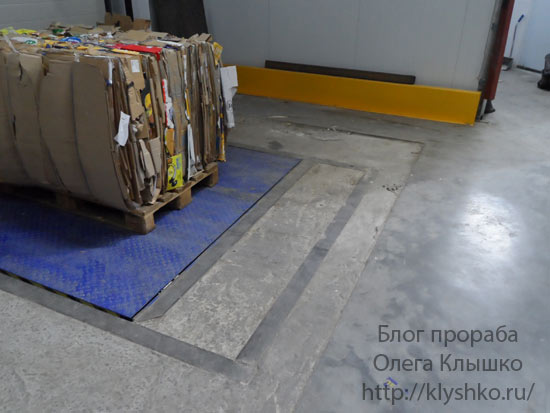
For repairs, tools such as a grinder with a diamond disc for concrete, a hammer drill or an electric chipper, an industrial vacuum cleaner, a mixer for mixing the mixture, containers, a trowel, and trowels for manual grouting of small areas are needed.
After we have decided on the size of the area to be repaired, we beat off even borders with a masking cord or draw with a marker. We cut off the marked area with a grinder with a diamond disc for concrete to a depth of at least 20 mm.
We remove the destroyed layer of the concrete floor with an electric perforator so that the surface is rough with grooves up to 5 millimeters high. Roughness is necessary for the adhesion of the material to the base.
Water consumption per bag of dry mixture MasterEmaco S 488 minimum 4.35 maximum 4.8 liters. Pour water into the mixing container and then gradually, stirring with a mixer, add the dry mixture.
After the entire bag has been poured into the container, it should be stirred for 3-4 minutes until the lumps completely disappear and a homogeneous mixture is obtained.
The finished repair composition is laid and leveled in the prepared area with the help of a trowel. To obtain a smooth surface, it is necessary to rub with a metal float, after about 2 hours and as the mixture hardens. 
Also, with the help of this composition, small dimples in the concrete floor, which appeared due to the ingress of pieces of wood or clay, were repaired. Before laying the repair mixture in the pits, it is necessary to clean them from foreign bodies, remove dust and wet them.
Resin floor repair
For the repair of polymer floors, they mainly use the same materials from which the floors are made.
Major defects in polymer floors this swelling is due to poor adhesion between the base and the coating, cracks.
Blisters or flaking are repaired in the same way as a concrete floor with a hardened top layer.
Surface preparation includes the same operations:
- Determining the size of the repaired area,
- Outline and cut with a diamond blade,
- Grind the base with a grinder and a diamond cup, without a puncher, in this case, the grooves in the concrete will lead to unnecessary operations and material consumption,
- Paste the borders of the site with masking tape so as not to stain the floor nearby,
- Primed with a special composition that comes with polymer coatings,
- And the last operation is to lay the polymer composition.
Repair of cracks in floors
Cracks in concrete floors appear over time, there can be many reasons - expansion joints in concrete floors were cut at the wrong time, subsidence of the base, penofol was not glued along the walls of the building in areas of contact between concrete and walls, etc.
The cracks that appear in the base under the polymer coatings break them over time.
Crack repair consists of several operations:
- Crack patching. With the help of a grinder and a diamond disk, a crack is expanded in its direction.
- Dedusting, with the help of an industrial vacuum cleaner remove dust.
- Primer, as mentioned above, each polymer coating has its own primer.
- And sealing cracks with a polymer composition, to which special quartz sand is added to fill the crack.
- The last operation is not a large grinding of the repaired crack, after the polymer composition has hardened. It happens that the repair polymer composition protrudes slightly above the floor level.
Polymeric floors differ in the increased durability and wear resistance. However, during operation, various defects can occur that spoil appearance coatings, as well as reduce it specifications. At the first sign that the coating is becoming unusable, you should immediately repair the polymer floors. The sooner you start to restore them, the cheaper it will cost the customer.
Types of defects and their analysis
The reasons for the destruction of the polymer layer can be different:
- Poor quality of the base on which the finish coat is laid
- Violation of laying technology
- Long and intensive use
- Damage of an emergency nature, for example, due to mechanical impact
First of all, you should carefully inspect the floors to determine the type of damage.
- Natural abrasion of the surface is observed due to long-term operation. This is especially noticeable if the material for installing the floor covering does not correspond to the load level. Abrasive wear is also observed in the absence of a varnish coating.
- If the technology is violated, when the thickness of the upper polymer layer is much higher than that provided by the manufacturer, clouding of the surface is observed. if poor-quality materials are used, then the floors can also delaminate inside.
- If the surface is not treated with a needle roller during installation, then air bubbles form inside the polymer layer. After hardening, they are clearly visible in the floor structure.
- If the mixture is not properly diluted, it becomes viscous and thick, which leads to tuberosity. Sagging can also form if the filling is carried out at too high temperature air.
- The curing process can be disturbed by high humidity. then the surface becomes sticky and appears dusty.
- Cracks and swellings are formed due to poor-quality base. For example, the repair of a polymer floor covering will be necessary if the concrete screed has not been sanded, dusted and degreased properly.
- The porosity of the coating is due to the insufficient thickness of the polymer layer or the lack of a primer on the screed.
- Mechanical damage can be caused by falling heavy objects on the floor, exposure to aggressive chemicals.
First of all, before carrying out repair work, it is necessary to determine the cause that led to the formation of a particular defect. The analysis uses tools such as a moisture meter, a building thermal imager, and a hardness tester. Thanks to these devices, you can save on repairs, as the exact cause will be identified.
Prices for polymer floors
Concrete dusting, concrete floor grinding
| Coating type | Purpose | Price rub/m 2 |
|---|---|---|
| The cost of grinding a concrete floor with dedusting | Grinding concrete floor, leveling small irregularities | from 80 |
| The cost of milling a concrete floor with dedusting | Milling of concrete, removal of the top layer of concrete, removal of the old coating, leveling the base | from 100 |
| The cost of shot blasting concrete floor with dedusting | Shot blasting of concrete, removal of the top layer of concrete, removal of the old coating, leveling the base | from 100 |
| Impregnation of the concrete floor with a polymer composition (1 layer) | Dusting of concrete floors with concrete floor grinding | 190 |
| Dust removal and hardening of the concrete floor with a polymer composition (2 layers) | Dedusting and hardening of concrete floors under conditions of mechanical loads of medium intensity and exposure to aggressive chemicals | 350 |
Prices for Thin-layer polymer floors
| Coating type | Purpose | Price rub/m 2 |
|---|---|---|
| Thin-layer epoxy floor coating up to 0.6 mm thick (color according to RAL chart) | Coloring and hardening of concrete floors under conditions of medium-intensity mechanical loads and exposure to aggressive chemicals | 390 |
| Thin-layer polyurethane floor coating up to 0.6 mm thick (color according to RAL chart) | Painting and hardening of concrete floors under conditions of medium-intensity mechanical loads and exposure to aggressive chemicals | 380 |
| Thin-layer water-dispersion coating (vapor permeable) floor thickness up to 0.6 mm (color according to RAL table) | Painting and protection of freshly laid concrete floors (up to 28 days), wet concrete floors, floors without waterproofing under conditions of mechanical loads of medium intensity and impact | 380 |
Prices for self-leveling polymer floors
| Coating type | Purpose | Price rub/m 2 |
|---|---|---|
| The device of an epoxy self-leveling floor with a thickness of 1.5-2 mm (color according to the RAL table) | Decorative finishing and protection of concrete floors under conditions of high intensity mechanical (abrasive) loads and exposure to aggressive chemicals | 990 |
| Installation of a polyurethane self-leveling floor with a thickness of 1.5-2 mm (color according to the RAL table) | 980 | |
| Self-leveling floor device based on methyl methacrylate resins 3 mm thick (color according to RAL table) | Protection of concrete floors under conditions of high intensity mechanical loads and exposure to aggressive chemicals. Fast commissioning. Possibility of application at low temperatures | 1410 |
| Vapor-permeable epoxy self-leveling polymer floors 1.5-2 mm thick (color according to RAL table) | Protection of freshly laid (up to 28 days), wet concrete floors, floors without waterproofing under high-intensity mechanical (impact, vibration and abrasion) loads | 1020 |
Highly filled polymer floors
| Coating type | Purpose | Price rub/m 2 |
|---|---|---|
| Highly filled polyurethane floors (for dry substrates) 3.5-4 mm thick (color according to RAL chart) | Decorative finishing and protection of concrete floors under conditions of high intensity mechanical (impact, vibration and abrasion) loads and exposure to aggressive chemicals | 1290 |
| High strength (highly filled) floors based epoxy resins(for dry substrates) 3.5-4 mm thick (color according to RAL table) | Decorative finishing and protection of concrete floors under conditions of high intensity mechanical (impact, vibration and abrasion) loads and exposure to aggressive chemicals | 1320 |
| High-strength polymer floors for wet substrates 3.5-4 mm thick (color according to RAL chart) | Decorative finishing and protection of concrete floors under conditions of high intensity mechanical (impact, vibration and abrasion) loads and exposure to aggressive chemicals | 1340 |
| Highly filled polymer floors with colored quartz sand 5-6 mm thick (color according to RAL chart) | Decorative finishing and protection of concrete floors under conditions of high intensity mechanical (impact, vibration and abrasion) loads and exposure to aggressive chemicals | 1370 |
Repair types
Depending on the depth and degree of damage, there are several types of repair of polymer floors. Technology and cost vary considerably.
- Cosmetic repairs of polymeric floors. If there are small scratches on the surface or the top layer is slightly cloudy, it is enough to polish. The procedure is carried out using a polishing machine, which allows you to restore the original shine and freshness of the floors. Also to cosmetic repairs can be attributed to the application of a protective varnish layer, which allows you to hide minor flaws.
- Partial or complete removal of the polymer layer is required for larger defects that cannot be removed by polishing. Repair of flooring in this case consists of grinding and installing a new top layer. If significant cracks and chips are visible on the surface, if more than 30% is damaged, then it is better to remove the polymer completely and renovate. In this case, it is necessary to re-grind, dedust and degrease the concrete base. Local repair differs in that a small rectangular section of the floor is cut out, and the joints are then carefully sanded and masked.
- The most complex and expensive repair of polymer floors affects the concrete base. If the concrete laying technology was violated, the waterproofing is of poor quality, in concrete screed there are cracks, it needs to be redone. Depending on the degree of damage, two options are possible: dismantling the concrete and pouring the screed again, or sealing cracks with a special polymer composition.
For the repair and restoration of the characteristics of the polymer floor, use the services of specialists. Professional workers will accurately determine the cause of the defect and eliminate it in the best way. The sooner you contact a specialized company with your problems, the cheaper the repair service will cost you. Experts can help you troubleshoot entry level and prevent the appearance of defects during further operation.
Self-leveling floor repair and other polymer floors and coatings (painting, quartz-filled).
Repair methods depend to a large extent on the nature of the defects. We give in detail possible defects, their causes, how to repair a self-leveling floor or other polymer floor.
Defect - Cause - Self-leveling floor repair method
1. Peeling of the polymer floor from the base(self-leveling floor, paint coating, etc.)
1.1. Peeling of the coating together with the primer layer from the surface of the concrete floor.
The reason is an obvious marriage in the performance of work, non-compliance with the instructions - coating technology. Options:
- grinding was not performed - cleaning the surface in order to remove cement laitance, a weakened layer of concrete, etc.;
- the surface was not dedusted before applying the primer;
- priming is carried out on a damp or contaminated (for example, oily) surface.
Clean, degrease the surface; apply self-leveling floor or polymer floor in strict accordance with the technology of the device.
1.2. Delamination of the coating from the primed surface.
Reason - most often occurs due to the following violations of device technology:
- the drying time of the primer layer (exposure between applying the primer and subsequent layers) was more than 2 days.
- dust, dirt, water, etc. have fallen on the primed surface (surface area).
- when applying a coating on a primed surface, there was a "dew point".
Method for repairing self-leveling floor or polymer coating.
Clean, degrease the surface; apply a polymer floor or self-leveling floor in strict accordance with the technology of the device.
1.3. Peeling of the coating together with the top layer of concrete (sand concrete, mortar) screed.
The reason is the insufficient strength of the screed.
When exposed to mechanical loads, the impregnated layer, which has high physical and mechanical properties, is separated from the weaker one. concrete base.
Methods for repairing a polymer coating:
- perform the deepest impregnation to strengthen the top layer of the screed;
- cut down concrete in the problem area, restore with the help of repair compounds,
perform a new coating on the site.
If delamination has occurred over the entire area and the repair of the polymer floor does not lead to a result, it is necessary to perform a new screed with higher strength characteristics.
2. Coating wear.
Occurs on the most loaded areas of the floor - places of passage Vehicle, work areas, etc.
To repair the self-leveling floor, apply new layers of coating on the worn area.
3. Loss of appearance of the floor.
Wear of polymer coatings from long-term operational loads.
To update, you need to apply one or two new layers.
4. Chips, potholes.
They appear from blows with heavy objects, falling weights, etc. As a rule, fragments of coated concrete are chipped.
The surface of the pothole must be cleaned, primed, puttyed, and a new coating applied.
5. Cracks.
Self-leveling floor repair technologies
Technology of repair of polyurethane floors.
Use in conjunction with Technology on the appropriate coating: polyurethane floors
6. Application of new layers on the old coating.
- Rinse the surface thoroughly with water detergent. Dry.
- Sand the surface with sandpaper (or grinder) to remove gloss.
- If the surface is damp (wet), dry.
- Degrease the surface with xylene (you can use petroleum solvent).
- After drying, immediately apply Elakor-PU Grunt-25 (careful painting "cross over").
Consumption 60-80g/m². Drying 4-6h.
If there is no Primer-25, take Elakor-PU Primer and dilute it with petroleum solvent 1:1. - Apply 2-3 layers of Elakor-PU Enamel-60 or self-leveling polyurethane floor according to the Instructions.
7. Repair of areas damaged to concrete.
- Clean - sand the concrete until the pores open.
Thoroughly clean the joints with the old coating. - If the surface is damp (wet), dry. Dedust.
- Degrease the old coating at the joint with xylene (you can use a solvent).
- Perform the appropriate polymer floor according to the Instructions, starting with the priming operation.
If the epoxy floor requires repair, to repair epoxy coatings apply Elakor-ED epoxy materials and technology for the installation of an appropriate epoxy floor and coating.
Violation of the technology of the device (installation), wear and mechanical damage during operation - the main reasons leading to the loss of their properties by the polymer self-leveling floor. Removing old and pouring new flooring is more expensive than the initial installation of this type of floor. But one of their advantages is good maintainability. Most of the damage can be repaired during the repair. True, extremely professional.
The STELS company specializes in installation and service of polymer self-leveling floors. If there is at least one chance to repair the floor, this opportunity should be used. The costs will be incomparably less than when replacing the entire coverage with a similar one.
Damage and options for their elimination
As a rule, the need to repair a polymer self-leveling floor arises for the following reasons:
- Mechanical damage - chips and potholes, which are usually formed from hitting the surface with heavy objects. Since chips and potholes are local, they are eliminated by cleaning, priming, filling the area and applying a coating. A similar approach is applied to repair small surface cracks.
- Wear. It is usually observed in areas subject to the highest loads. Manifestations of wear are quite easily eliminated by applying new layers of coating.
- Peeling / delamination of the coating at the local level, in several places or almost over the entire area. Violation of floor installation technology leads to such problems, the use of quality materials, marriage in the performance of work. The method of repair depends on the nature and extent of the damage. In most cases, cleaning, surface preparation and re-applying the floor in compliance with all technology requirements will be required. In case of local damage, the damaged area is removed, then it is restored using repair compounds and re-coated with a finishing layer.
You can often limit yourself simple repair with surface preparation and application of a new layer on the old coating, but sometimes it is required to remove damage and areas of their presence with the reconstruction of self-leveling floor layers in a specific area. Each situation, each problem is studied and evaluated by STELS specialists individually. It is important to identify not only visual damage, but also hidden ones. This will ensure that the correct method is selected, the quality of the repair, and the reasonable cost of fixing the problem.
If you want to have a beautiful environmentally friendly floor, the first thing that comes to mind is a bulk coating that perfectly complements the design of the room and looks aesthetically pleasing and prestigious. Waterproof and wear resistance only add to its pluses. When using only high-quality materials, self-leveling floor repairs will have to be carried out quite rarely.
Advantages
When carrying out repairs in the apartment, this material has become very popular. Self-leveling floor can be made in any color scheme, with a suitable image and texture. Their service life reaches 20 flawless years. Compared to other types floor coverings This option has a number of significant advantages. Self-leveling floor is resistant to:
- abrasion;
- blows;
- vibrations;
- chemicals;
- temperature fluctuations.
Polymer surface filling
The polymer coating remains intact even when a 10 kg object falls on it. It is a kind of fuse against the destruction of concrete. Another advantage is antistatic, that is, dust practically does not sit on it. In addition, the self-leveling floor is absolutely tight, which does not allow water to penetrate inside. In the event of a fire, such a coating does not ignite. They are applied to the prepared surface, this process takes a little time, and in a day it will already be possible to walk on it.
The range of self-leveling floors is quite extensive. You can choose by type and type, quality, strength, reliability and durability. Bulk floors made of polymers can be:
- methyl methacrylate;
- epoxy;
- polyurethane.
The first type is used extremely rarely because of the high cost. But the second two types are widespread. In appearance, the self-leveling floor can be matte, semi-gloss and semi-glossy.
When is the repair required?
Such work will not be required if no errors were made when laying the polymer floor. When those were nevertheless discovered, the repair process can be divided into several stages.
- Those places that do not fit snugly on the floor must be removed.
- Exposed bases should be leveled by grinding.
- The cracks that were discovered must be embroidered and filled with a special mixture.
- Get rid of dust and dirt that has appeared.
- Apply a new coat.
Basically, damage can occur when the technology of the device was not respected, or the floor was damaged as a result of improper use. Repairs do not have to spend a lot of effort and do not require special tools and equipment. The floor covering is seamless and perfectly even. It is absolutely safe for health, various insects and bacteria simply cannot breed under it.
Frequent problems
Pimples and bumps on the surface. Appear due to dirt that has penetrated the polymer layer during its application. To prevent this from happening, the surface must be carefully rid of any debris. Apply the coating with a notched trowel towards you. From a fresh layer, garbage can be removed with your hands without fear. Most of all, dirt particles will be visible on the floor of the same color.
Bubbles. When two types of bulk coatings are mixed, air enters the composition. The elimination of defects of this type occurs by surface treatment. There will be much fewer bubbles if you repeatedly run such a roller across the floor. Then the coating will become even. When moisture remains at the base, small swellings can also be detected. They just won't be noticeable right away. The condensation will cause the polymer coating film to peel off the substrate. Therefore, it is especially necessary to carefully monitor the complete drying of concrete.
The cover is white. After the floor dries, with horror, you can find whitened areas on the floor. This may be due to the following reasons. In the wrong proportions, the components were mixed, or the composition was poorly mixed. In order to eliminate such troubles, it is necessary to grind a certain area and cover with a new layer.

Floor irregularities
Hollows and bumps. This happens with an initially uneven base. And after applying the self-leveling floor, the surface in defects will become even more noticeable. All recesses on the surface must be leveled with putty.
Required Tools
All repair work require to prepare certain tools required for the process. In this case, you need a container where the solution will be induced. Its volume is calculated based on the size of the damaged space. Two liters of the composition goes to the calculation - one square meter premises. These are relative calculations, since the correctness depends on the quality of the surface.
An electric drill must have a stirring attachment. If you mix by hand, it will take a lot of time and the quality will be much worse! To level the polymer coating, you need a spatula with large teeth. To remove bubbles, you will need a special spiked roller. In order to be able to walk on a freshly poured layer, special shoes are needed. Their soles have high protruding spikes. Such shoes do not destroy the structure of the filled layer. This item is optional, but if necessary, just walking on the floor is strictly prohibited.
Restoration of self-leveling floor
At the beginning of the repair, you need to purchase necessary materials. They must have a high degree of bonding and match the composition of the worn floor. All restoration work can be done independently. Installation of self-leveling floor is carried out according to the following steps:

Floor restoration
- The surface is being prepared for pouring the floor;
- The solution is being prepared;
- The solution is poured;
- The polymer coating is leveled;
- Irregularities, bubbles are removed;
- The floor is drying.
Below will be detailed instructions for laying a new floor covering.
The first thing to do is get rid of the old skirting boards. The cracks formed during this process must be covered with a special solution. If in the renovated premises high humidity, it is necessary to observe waterproofing. Then, using a level, check the height differences. Where the height is lower, it will be necessary to carry out deep alignment. All cracks and chips should also be covered with a special compound. And the last thing in preparing the base will be the primer. It is advisable to use a deep-penetrating ground liquid.
You can start preparing the solution. Depending on the manufacturer, different mixing ratios of the components are given. The main thing is to follow them exactly.
Professionals give following tips for flooring:

And the last step is drying. It is carried out in full accordance with the manufacturer's instructions. The main thing is to avoid drafts and direct sunlight. Be sure to exclude the possible ingress of moisture and other undesirable factors. Basically, after a day it is already allowed to walk on the surface. But, if further pasting is supposed tiles or other materials, you will need to wait at least five days. The floor needs to be strong.
Filling this type of coating requires a lot of professionalism. It is important to carefully observe the conditions allowed for the storage of materials, as well as the technology of their application to the surface. Otherwise, the possibility of defects cannot be avoided. In the worst case, you will have to do everything all over again, and this takes time, nerves and another waste of money.
Safety regulations
Polymer self-leveling floor can last quite a long time. When the allotted time passes, and the appearance of the coating deteriorates, then it is time to apply a new layer. It is necessary to choose a better coating so that it can withstand a serious load. It is also worth observing special security measures. Dry polymer mixture combines with water and gives chemical reaction. It is required to provide protection to eyes and hands, since burns may occur if the mixture comes into contact with the skin.
If the repair is planned with your own hands, then the work should be carried out with gloves and glasses. In case of contact with the eyes, rinse immediately running water. Hands should be washed in soapy water, then lubricated with cream. Polymers have a strong odor. Mixing and pouring the solution must be strictly in a respirator. During work, it is necessary to exclude the presence of children in the room.
With high-quality installation and proper operation in the future, you can forget about the repair of the self-leveling floor for a long time. And in case of defects, you should not be afraid of them. They are very easy to remove, as you can see. It is important to consider your real possibilities. Some mixtures for beginners will be a real challenge. It is also not uncommon for fakes to be sold. Purchase materials only from trusted suppliers. Savings in this matter can easily turn into unjustified and lead to a loss of time. Compliance with all recommendations will make the work pleasant, useful and efforts will not be in vain.