Foam cutting machines allow you to make products of various shapes from polymers. The latest developments can be controlled by a person even through a computer, but when it comes to homemade machines, they are easy to manufacture, but less efficient.
In general, today there are quite a lot of ways to cut polystyrene foam. Before choosing this or that equipment or device, you need to decide how often you plan to carry out cutting work on this material. If you do not have free space, and you will only cut foam plastic from time to time, then it is best to make do homemade device or purchase a manual machine.
Types of machines for foam plastic
By visiting modern stores of relevant equipment, you can find machines for cutting foam plastic of the following types:
- mobile;
- for cross and horizontal cutting;
Different machine models are based on almost identical mechanisms. Expanded polystyrene is cut with a heated cutting surface, during which the drawing is taken as a basis. As a result, the hot knife cuts the material according to the principle butter. Fishing line is often used as a cutting surface. Simple machines for cutting foam plastic they are equipped with a single string. As for high-precision models with numerical control, they can operate several fishing lines, the number of which reaches 6. The cut is clean and does not require processing.
Operating principle

Foam cutting machines offered for sale are available in many modifications, but the principle of their operation remains the same. As mentioned above, the edge passes through the foam in a specific direction. If you plan to cut moldings into elements, then it is important to pay attention to what length the machine will be able to overcome. As an example, we can consider the SRP machine, which uses strings longer than 2 m for cutting. In one pass, the equipment will be able to cut approximately 15 linear meters.
Shaped cutting

Shaped cutting foam plastic can be made using a machine homemade. For this you will need sharp knife, which has a rubber nozzle on the end, a soldering iron, a string and a hacksaw. These methods can be used separately, but each of them has its own pros and cons. When choosing a knife for a machine, you should be guided by the fact that it should be as sharp as possible. It can be used for small workpieces. Before starting work, the workpiece is fixed in a vice or other device. The movement of the knife should be directed away from you, as otherwise there is a risk of it slipping, which can cause unpleasant consequences.
Shaped cutting of polystyrene foam can be done using a soldering iron, which is equipped with a knife-shaped attachment. The work process involves heating the nozzle; the master will only have to move the device with smooth movements along the surface of the foam. You need to be extremely careful, because during the cutting process the material will melt under the influence of high temperatures. A hot drop of mass may get on the skin. In order to avoid unpleasant consequences, you should protect your movements.
If you are thinking about the question of how to cut polystyrene foam, then you can use a shoe knife. With its help, you can overcome thicknesses of up to 40 cm. The blades are pre-sharpened well, while the edge remains blunt. The knife will need to be sharpened every 2 m, so the sharpener should be nearby. The cutting process will be accompanied by a specific sound, but you can eliminate it by wearing headphones.
If you have not yet decided how to cut the foam, you can use a hacksaw. It can overcome thicknesses of up to 80 cm and must have fine teeth. This is very important, because the uniformity and accuracy of cutting will depend on the size of the teeth. Apply special effort you don’t have to, and injuries are kept to a minimum. But this technology is not relevant in all cases. If the thickness of the foam is small, you can use a stationery knife. This tool is quite sharp, but over time it will become dull. It should be heated so that the process goes more smoothly.
Specialized machines and their cost

Quite often, polystyrene foam is used not for the purpose of sound or heat insulation, but for the manufacture of design elements for the interior or advertising. This is possible thanks to the use of special machines that are designed for figure cutting. With the help of such equipment it is possible to process canvases in several projections. If desired, quite complex elements can be made such as miniature models of cars, chess, gears, as well as various figures and decorative ornaments.
Among others, we should highlight the FRP 01 foam plastic cutting machine, which is extremely popular due to its simplicity of design and versatility. Using this equipment, you can make linear elements, insulation boards, letters for signs and shapes. The device is controlled using computer program, which is included in the kit. You can purchase the device for 115,000 rubles.
Another machine model is SRP-K “KONTUR”. It is intended for the manufacture of parts facade finishing and formwork. The control is manual, but the power consumption is relatively low at 150 V. As distinctive feature The device is easy to transport.
For figured cutting, you can use ChSFR-2D-02.12.06, which is a machine for 3D cutting of foam plastic. It is used to create advertising signs, the height of which can be 2 m. Using the device, you can create symbols and logos. The maximum size of the processed sheet is 200x1200x600 mm.
SRP-112 "BASIS"

If you need a CNC machine for cutting foam plastic, then you should pay attention to the SRP-112 “BASIS” model, which has independent movement. The distinctive features are:
- industrial rail guides;
- rigid steel frame;
- variable string length;
- belt drive;
- string break control.
The guides are made in the form of rulers. The length of the string can be changed from 1000 to 3000 mm, the final value will depend on the tasks. This foam cutting machine provides automatic control broken string, which is replaced if necessary, which eliminates the possibility of stopping work. The ends of the string move independently; they have asynchronous movement.
Idling is provided at high speed and reaches 120 mm per second. If necessary, the equipment can be transferred from site to site and installed in any room. The device is suitable for 2D and 3D cutting of material, and its distinctive feature is the ability to cut conical elements.
This foam cutting machine has a steel frame, and the working field is limited to the following parameters: 1400x1400 mm. The kit includes a cutting table, the number of cutting strings is limited to one piece. The power consumption of the unit does not exceed 1000 W. Control software is included in the kit. You can purchase such equipment for 250,000 rubles.
Description of the string machine SRP-3220 “Maxi”

If you are interested in string machines for cutting foam plastic, then you can consider the SRP-3220 “Maxi” model, which is used for shaped cutting using a heated string in 2d and 3d format. This version of the equipment was developed with the aim of increasing productivity compared to its predecessors.
Using this device you can cut molded products, including:
- façade finishing elements;
- insulation for pipes;
- skirting boards;
- packaging.
Due to the use of fairly long strings and the ability to install up to six cutting elements, productivity is increased by 12 times compared to the SRP-200 model. If desired, the machine can be equipped with a rotary table, the diameter of which is 760 mm. It expands to create 3D shapes.
The clamps that complement the equipment allow you to firmly fix the workpiece on the rotary table. According to the program, the rotation is carried out automatically. To create 3D shapes, the decisive factor is the accuracy of rotation. Rotary tables use a gear drive that allows high precision of up to 0.015 °C per step.
The working field is limited to the following dimensions: 1100x1100x2200 mm. Power consumption is 1500 W, a power transformer for power supply is included. You can purchase the device for 176,000 rubles; a rotary table acts as an additional element; its price is 16,500 rubles.
Cost of laser machines

Laser machines for cutting foam plastic are sold at different prices. For example, model
MINIMO 0503 can be purchased for RUB 147,000. The working field has dimensions equal to 500x300 mm. The emitter power is equivalent to 50 W. It is noteworthy that this equipment equipped with a color display, and control will be quite simple, because the language of the interactive menu is Russian.
Another device for cutting foam plastic is Kamach 53, the cost of which is 190,000 rubles. Its operating pressure and emitter power remain at the same level. As for the VENO 640 equipment, its working field is 600x400 mm. The consumer will be able to take advantage of the ability to change the height of the workpiece being processed, which is 150 mm. The work table is adjustable and can be lowered if desired. The price of such equipment is 289,000 rubles.
Why choose a laser machine
Laser equipment for cutting foam plastic is characterized by high accuracy and productivity. With the help of such devices it is possible to perform quite complex technological operations. You can cut the material along the contour, ensure the most accurate cutting of parts and materials, and also carry out high-precision engraving.
The use of laser equipment makes it possible to minimize the cutting width. The level of thermal and mechanical impact is low. These features are the key advantages of the technology. Each machine is a whole high-tech complex that has a numerical control system. The device comes with software. Laser machines are universal, so they can be used to work not only with foam, but also with other materials, including:
- glass;
- plastic;
- wood;
- textile.
Description of the machine ChSFR-12.20.35-P
If you need a 4-axis CNC foam cutting machine, then you can take a look at the above-mentioned model, which has a rotary table and 4 action coordinates. The sliding frames are quite compact; the operator can adjust the length of the strings up to 3500 mm. This machine is equipped with components of high quality and reliability; they are supplied by companies from Italy, Japan and Germany. The design has increased rigidity and strength. Additionally, the system is equipped with a milling beam. The milling function is characterized by low dynamics due to its design.
Description of the manual machine for polystyrene foam "Scat"
A manual machine for cutting foam plastic will not be as technologically advanced as the equipment described above, but you can purchase it for 44,000 rubles. The working field is limited to the following dimensions: 1320x380 mm. The design uses one cutting wire, the length of which is 1320 mm. The power consumption of the device is equivalent to 1500 W.
The machine can operate in one of three modes, including:
- guillotine;
- dissolving into sheets;
- dissolving into webs of variable thickness.
The first mode provides the ability to cut foam plastic to the required dimensions. The cut is carried out by moving the string up or down with the heat turned on. The kit includes adjustable stops. The second mode - dissolving into sheets involves fixing the string at the desired height above the table level, while the sheet is manually moved along the surface. Cutting into sheets of variable thickness involves fixing the string at an angle, while the sheets themselves are moved manually along the table surface.
Making a machine using nichrome wire
Nichrome wire makes it quite easy to cut foam. A sheet of chipboard can serve as the base of the machine structure. The size of the slabs should be selected taking into account the width of the foam slabs that you plan to cut. You can even borrow a door from furniture; its size in the example under consideration will be 40x60 cm. This size of the base will allow you to cut plates whose width will be 50 cm. The base can be made of plywood, as well as a wide board.
The string is fixed on the desktop or workbench. You can stretch the string between two nails if you don't want to bother with the machine. The nichrome wire is secured using springs that fit onto the screws. The latter are screwed into metal racks, which are pressed into the base of the machine. If the base thickness is 18 mm, then the metal stand should have a length of 28 mm. When fully screwed in, the screw will not extend beyond the bottom of the base. If you plan to use thicker foam or foam sheets, the screws will need to be replaced with longer ones.
To press the rack into the base, it is necessary to drill holes 0.5 mm smaller than the outer diameter of the rack. In order for the posts to be driven in with a hammer, the sharp edges should be removed using an emery block. Before screwing the screw into the rack, it is necessary to machine grooves at its head so that the wire does not move arbitrarily during adjustment, but takes the required position.
In order to make a groove in the screw, its thread must be protected from deformation using a plastic tube or thick paper. The nichrome wire should not sag - it is secured through springs. The latter can be borrowed from a computer monitor.
Instead of a conclusion
The most common way to cut foam at home is to use a string. The productivity of this technology is quite high, but it will be necessary to build a special device, which should be located permanently. The accuracy and speed of cutting are equal to production ones.
You can also use a grinder. But the disk must be designed to work with metal and have minimum thickness. The work will be accompanied by noise not only from the foam, but also from the operation of the tool, while debris will fly in all directions.
Polystyrene foam is a wonderful material used in many areas of construction and decoration. It is used to install hydro- and thermal insulation, create decorative ceiling coverings, baguettes and much more. For all its versatility, it is also cheap. The only problem that arises while working with it is cutting.
Cutting foam: do-it-yourself machine
It is extremely difficult to cut polystyrene foam yourself so as to get a clean and even cut. It crumbles and bursts if you use a saw; even a blade or razor does not solve the problem.
Hot metal can be a solution, but how can you use it at home? Design a homemade foam cutting machine!
Method number 1.
To implement this venture you will need:
- table, it is better if each of its sides is no shorter than 2 m;
- metal springs with low current resistance;
- a transformer that converts current from 220 to 24 Volts;
- high resistance string, if you have an old heater, remove it.
You will also need a string height adjuster. Use a couple of beams for it. The cutting string with the holder will move between them.
A transformer is not necessary in every case. It depends on what material the string is made of. If it is chrome plated, a current of 220 Volts is also considered acceptable. But when working with such a discharge, you must strictly follow safety rules, otherwise the matter may end sadly.
If you work with a 24 Volt discharge, then there is no danger to life and health. It is simply not noticeable, and if it is affected, you just need to rinse the affected area with water.
It should also be remembered that when cutting foam plastic with hot metal, toxic fumes are released, so it is imperative to use a protective mask and ventilate the room well, otherwise poisoning will occur. In general, it is best to work outside, but this is possible if you have your own yard.
To make it easier to assemble a foam cutting machine from the above materials, below is a schematic drawing:

Method number 2.
In the absence of a suitable table, a sheet of chipboard, plywood, or board is quite suitable as a base for the device.
Assembly sequence homemade machine:
1. Attach nichrome wire to the springs, put the springs on M4 screws, and screw them, in turn, into special racks.
2. Press the metal stands in advance into the table roof, chipboard, or any other surface chosen as the base. The height of the stand and the thickness of the base depend on the needs of the machine owner. If the thickness of the slab is 1.8 cm, and the height of the stand is 2.8 cm, then when fully screwed in, the screw will not go through the base, but when completely unscrewed, it will be able to cut foam plastic 5 cm thick.

3. If thicker cutting is required in the future, the short screws will need to be removed and the long screws screwed in their place.
4. To press fit, drill a hole in the base. Its diameter should be half a millimeter less than the diameter of the stand. Hammer the posts into the holes, but before doing this, to make this procedure easier, run sandpaper along the sharp edges of the ends.
5. Before screwing the screw into the rack, cut out a groove just under the screw head. To do this, clamp its end with a screwdriver, place a thin file under the head and turn on the rotation. This groove is needed in order to fix the wire in one position, which otherwise may move during adjustment.
6. To prevent the wire from sagging, elongating due to heating, attach it first to the springs, and then to the screws.
7. Once all the fasteners are ready, secure the nichrome wire. To ensure reliable contact between it and the current-carrying wire, use the “twisted and crimped” fastening method. The copper wire must have a cross-section of at least 1.45 sq. mm.

8. Remove the insulation from the ends of the wires by about 2 cm. Wind the copper conductors onto the wire in the places where it is attached to the spring. Hold the end of the wire with pliers and wrap it around the conductor. Thanks to this winding, the contact between the wire and the current-carrying wire will have a large area, and when the machine starts working, the connection points will not become hot.
9. To be able to adjust the cutting thickness of the material, make a branch of the conductive conductors in the form of a loop. To prevent the wires from getting tangled under your hands when using the machine, make holes in the base, pass the interfering piece through them and attach it to the back of the surface using staples.
10. It is best to put the wires together and twist them into a loose bundle. This way they won't get confused.
11. Solder jumper terminals to the ends of the wires to connect them to the power source.

A device designed according to the instructions described above will be quite sufficient for use at home. In addition, it can be used as a machine for shaped cutting of foam plastic.
During cutting, the speed of material movement should be medium. If you move the foam very quickly, then it will crumble in the same way as when cutting with a saw. If, on the contrary, you move it very slowly, the edges of the cut out figure will melt.
If polystyrene foam is required to insulate a house during construction, then it is better to purchase a thicker one. Because of easy to manufacture and low demand, such material is much cheaper than thin material.

If you have had a Mayak stereo tape recorder lying around in the attic since Soviet times, then don’t buy a transformer, but take it from it. It is just suitable, because... supplies 24 Volts.
In the case when work is carried out in conditions of lack of electricity, connect three 9-volt crowns to each other and use them. Thus, the device will be able to function for 30-40 minutes.
But using car batteries for this purpose is strictly prohibited. Despite the low voltage, they have a very high current strength, which can burn the string and it will simply burst. This will happen in a good situation, but in a bad situation it will splash hot metal.
Choosing foam plastic for thermal insulation
There is a special foam designed specifically for insulating facades. The packaging usually has a corresponding marking in the form of the letter “F”. It has a high density compared to conventional material and is resistant to mechanical stress. It springs well, making it difficult to break.

When cutting foam plastic, for thermal insulation, you should not set the string below 50 mm. The point is that more thin material will not be effective enough, and when wet it will generally lose most of its wonderful properties. At high humidity, such thermal insulation will be permeable to cold air, just like regular insulation. brickwork.
As additional material use a slab for thermal insulation mineral wool. In addition to the properties mentioned, it has another important advantage - in the event of a fire it will not burn.
Foam cutting machine, video:
recn.ru
DIY foam cutting machine: how to cut foam
The issue of home insulation is very relevant these days. Cladding house facades with foam plastic is one of the most popular types of insulation. And this is very justified, because... the process of such insulation is simple and clear, and all necessary materials always available for free sale.
But everyone knows that gluing foam plastic on a flat wall is very convenient. With any method of gluing foam plastic to the wall: using dry mix glue, foam or foam glue, it is always very important that the foam sheet fits tightly to the wall and does not create air gaps.
If the wall is smooth, then no questions arise. But, unfortunately, the walls of old houses are not ideally even. Yes and different design features structures sometimes create differences in the plane of the wall.
This drawback can be partially mitigated by laying the foam on a thicker layer of glue. But the maximum permissible thickness of the adhesive layer often cannot cover the magnitude of the differences in the plane of the walls. In addition, too large differences lead to unjustified overuse of glue.
The only way out of the situation remains is to trim the foam according to its thickness. But doing this with a hacksaw is very inconvenient and takes a long time, especially if you need to cut large number polystyrene foam In addition, during cutting, a large amount of debris is generated in the form of foam balls. And the surface is uneven and the accuracy of such cutting is very conditional.
In order to quickly and evenly cut foam plastic required thickness, you can use a foam cutting machine. This device can be made independently, absolutely with your own hands.


Operating principle and design of the foam cutting machine
The operating principle of the machine is based on the fact that foam plastic easily melts under the influence of temperature. Thus, if you run a thin heated wire over it, it is easily cut, forming a perfectly flat, smooth surface.
To manufacture the machine, the following components are needed:
- LATR (laboratory autotransformer) or car battery;
- nichrome thread;
- stands for fastening nichrome thread;
- spring (1-2 pcs.);
- board-tabletop;
- copper wire.
A nichrome thread (spiral) is used as a cutting object. You can either buy it in a store or extract it from old household appliances in which they were used as filaments (hair dryer, for example). The thickness of the spiral can be 0.5-1 mm. The most optimal thickness is 0.7 mm. The length depends on the width of the foam that will be cut.
An important element of the device for cutting foam is LATR. But if it doesn’t exist, then it can be made using an old transformer and a device for charging car batteries.

You can also use a computer power supply, in which wires providing 12 W (yellow and black) are used to connect to the spiral.

To operate such a machine, it is enough to have an output voltage of 6-12 W.
It is necessary to correctly adjust the length and thickness of the filament so that it matches the voltage. If the thread gets too hot, it may burst. Well, if the thread heats up slightly, then cutting will occur slowly.
A car battery can also be used as a power source. It can be used in conditions where there is no electricity on the site.
Machine for cutting foam plastic in the field. Connection to car battery.
For different tasks you can do different designs devices for cutting foam.

Basically, these devices will differ in the length of the spiral. To cut polystyrene foam into bars, you need a short spiral length.
You can install two spirals and cut the sheet into several bars in one pass.
Two spirals cut the sheet into three parts in one pass. The stand has guides for smooth feeding of foam.
But, as a last resort, foam plastic can be cut into bars with a hacksaw. It is much more difficult to cut foam plastic to thickness, and even to a given size. Therefore, let’s look at how to make a machine for cutting foam plastic to width.
Step-by-step instructions for making your own machine and cutting foam plastic
Step 1. Preparing the tabletop. You can take any piece of chipboard of the required size as a tabletop for a machine for cutting foam plastic with your own hands. The surface on which the foam will move must be smooth. Holes for the racks are drilled in the tabletop. It is convenient to use metal pins with threads with a diameter of 10-12 mm as racks. The height of the racks should correspond to the thickness of the foam sheets plus a headroom. The pin is fixed with nuts.

To give the structure stability, bars are attached to the bottom of the tabletop, which will also serve for the safe passage of the electrical wire.

Step 2. Connecting the current supply wires. From below, under the tabletop, the wires are connected to metal stand rods: the wire is wound around the lower end of the pin and pressed with a bolt.
The second end of the wires must be connected to a power source, depending on the selected method. The most best connection there will be a connection through a plug that will connect to the LATER socket. Connection is possible through self-clamping terminals, as well as by twisting and soldering. This depends on the selected power source.
In any case, the connection must be made in accordance with the rules for working with electrical installations and devices, be convenient for work and safe during operation.
Step 3. Fastening the nichrome spiral. A nichrome spiral is fixed between two posts. A spring is attached to one end of the spiral (there may be two of them).

The spring is needed to tension the nichrome thread during operation. The fact is that when heated, the nichrome thread lengthens and sags. A thread in this condition will not produce a quality cut. Therefore, the thread is fixed in an initially tense state, so that the spring is slightly stretched.
To fasten the nichrome thread to the pin, washers with an internal diameter slightly larger than the diameter of the pin are used. A small hole is made in the washer for attaching the spiral itself. A small sharpening is also done on the inner diameter side so that the washer can be fixed on the thread of the pin.

A spring with a spiral attached to it is inserted into one washer and placed on the first pin. The second washer is put on the second pin and drilled hole thread a nichrome spiral. Next, it is tightened so that the spring stretches and fixed.

Step 4: Cutting the foam. To spread a sheet of foam into two sheets of a given size, the spiral is set to the desired height. The required distance is measured with a ruler.
The machine is then connected to a power source. The thread heats up and now you can cut the foam, smoothly moving it forward along the countertop.
The cutting speed depends on the filament temperature, which in turn depends on the applied voltage and the thickness of the filament itself. You should not try to apply more voltage to achieve high speed, because... this can lead to rapid filament burnout. Here, a balance between tension, thickness and length of the thread must be selected experimentally. The thread should not overheat during operation. When heated, it turns red or scarlet. But it should not turn white - this indicates that the thread is overheating and that it is advisable to reduce the voltage, otherwise the thread will not last long in this mode. Of course, smooth adjustment is easy to do if LATER is available. But if it is not there, then a laboratory power supply can be made from a computer power supply; the video below has more information. After you have made this foam cutting machine with your own hands, you need to make sure that the device is safe.
It must be remembered that all activities must comply with safety regulations for working with electrical appliances. The power source must be grounded and all connections must be carefully insulated. All work on assembling the machine must be carried out with de-energized wires. The machine is connected to the electrical network only while working with polystyrene foam. After work it must be turned off immediately. While working with the machine, you should avoid touching metal parts and the nichrome thread itself.
Step 4: Cutting the foam at an angle. Sometimes it becomes necessary to cut the foam so that one side is higher and the other is lower.
To do this, the spiral is set at an angle with the required parameters. In this way, foam sheets of various sections can be obtained.
Useful video
o-builder.ru
Homemade machine for cutting foam plastic Design, calculation, electrical diagram
Heat and sound insulating building materials on the market are presented in a wide range, these are foamed polyethylene, mineral and basalt wool and many others. But the most common for insulation and sound insulation is extruded polystyrene foam and polystyrene foam, due to its high physical and chemical properties, ease of installation, low weight and low cost. Polystyrene foam has a low thermal conductivity coefficient, a high sound absorption coefficient, and is resistant to water, weak acids, and alkalis. Foam is temperature resistant environment, from the minimum possible to 90˚С. Even after decades, foam plastic does not change its physical and chemical properties. Polyfoam also has sufficient mechanical strength.
Polystyrene foam also has very important properties, such as fire resistance (when exposed to fire, foam plastic does not smolder like wood), environmental friendliness (since polystyrene foam is made of styrene, even food products can be stored in containers made from it). Fungi and pockets of bacteria do not appear on the foam. An almost ideal material for insulation and sound insulation during the construction and renovation of houses, apartments, garages, and even packaging for food storage.

In stores building materials polystyrene foam is sold in the form of plates of different thicknesses and sizes. When repairing, foam sheets of different thicknesses are often needed. If you have a foam cutting machine, you can always cut foam sheets of the required thickness from a thick plate. The machine also allows shaped foam packaging from household appliances turn into slabs like the photo above and successfully cut thick sheets of foam for furniture repair.
The video clip clearly demonstrates how easy it is to cut polystyrene foam on a homemade machine.
If you want to make a machine for cutting foam plastic and foam rubber, many are stopped by the difficulty of organizing the supply of supply voltage to heat the nichrome string to the desired temperature. This obstacle can be overcome if you understand the physics of the issue.
Design of foam cutting machine
The base of the device for cutting foam plastic was a sheet of chipboard (chipboard). The size of the slab should be taken based on the width of the foam plates that are planned to be cut. I used a furniture door measuring 40x60 cm. With this size of the base, it will be possible to cut foam plates up to 50 cm wide. The base can be made from a sheet of plywood, a wide board, and the cutting wire can be secured directly to the desktop or workbench.
Pull nichrome string between two nails is the limit of laziness for a home craftsman, so I implemented a simple design that provides reliable fixation and smooth adjustment of the height of the string during cutting above the surface of the base of the machine.
The ends are attached nichrome wire for springs mounted on M4 screws. The screws themselves are screwed into metal posts pressed into the base of the machine. With a base thickness of 18 mm, I selected a metal stand 28 mm long, so that when fully screwed in, the screw would not extend beyond the bottom side of the base, and when fully unscrewed, it would provide a foam cutting thickness of 50 mm. If you need to cut sheets of foam or foam rubber of greater thickness, then it will be enough to replace the screws with longer ones.
To press the stand into the base, first a hole is drilled in it, with a diameter 0.5 mm smaller than the outer diameter of the stand. In order for the posts to be easily hammered into the base, the sharp edges from the ends were removed using an emery column.

Before screwing the screw into the rack, a groove was machined at its head so that the nichrome wire could not move arbitrarily during adjustment, but would occupy the required position.

To make a groove in a screw, you must first protect its threads from deformation by putting on a plastic tube or wrapping it thick paper. Then hold it in the drill chuck, turn on the drill and attach a narrow file. In a minute the groove will be ready.
To prevent nichrome wire from sagging due to elongation when heated, it is secured to the screws through springs.
A spring from a computer monitor, used to tension the grounding conductors on the kinescope, turned out to be suitable. The spring was longer than required, so we had to make two of it, for each side of the wire fastening.
After preparing all the fasteners, you can fasten the nichrome wire. Since the current consumed during operation is significant, about 10 A, for reliable contact of the current-carrying wire with the nichrome wire, I used the fastening method by twisting and crimping. The thickness of the copper wire at a current of 10 A must be taken with a cross-section of at least 1.45 mm2. You can select the wire cross-section for connecting nichrome wire from the table. I had at my disposal a wire with a cross-section of about 1 mm2. Therefore, each of the wires had to be made of two with a cross-section of 1 mm2, connected in parallel.
After removing the insulation from the ends of the wires to a length of about 20 mm, the copper conductors are wound onto a string of nichrome wire at the point where it is attached to the spring. Then, holding the nichrome wire by the loop with pliers, the wrapped copper wire is wrapped with the free end of the nichrome wire in the opposite direction.
This method of connecting the current-carrying copper wire with the nichrome wire will provide a large area of contact and eliminate strong heating at the junction when the foam cutting machine is operating. This was confirmed by practice: after prolonged cutting of foam plastic, the PVC sheath of the current-carrying wire did not melt, and the copper wire in the connection area did not change its color.

To be able to adjust the thickness of cutting foam on the device, the outlet of the current-carrying conductors is made with a loop. To prevent the wires from interfering during operation, they are passed through holes in the base and secured on the back side with brackets. The same brackets are nailed to the corners of the base as legs.

The current-carrying wires are twisted together to avoid tangling. At the ends of the wires for connection to the power source, plug-in terminals are sealed.
Nichrome wire in appearance is not much different from steel wire, but it is made of an alloy of chromium and nickel. The most common wire is X20N80, containing 20% chromium and 80% nickel. However, unlike steel or copper wire, nichrome wire has a higher resistivity and can withstand heating temperatures up to 1200˚C while maintaining high mechanical strength. Nichrome wire is available in diameters from 0.1 mm to 10 mm.
Nichrome wire is widely used as heating elements in household and industrial products, such as electric hair dryers, irons, electric stoves, radiant heaters, soldering irons, water heaters and even electric kettles. And this is not a complete list. The so-called heating elements type heaters are also made of nichrome wire, only the spiral is placed in a metal tube, which is filled with quartz sand to insulate and transfer heat from the spiral to the walls of the tube. The list of devices was not given by accident, it was simply something that was out of order heating element you can take nichrome wire to make a machine, of course, if it has not had time to burn out from long work.
Cutting polystyrene foam on a machine involves melting it along the passage line of heated nichrome wire. The melting point of polystyrene foam is about 270˚C. In order for the foam to melt upon contact with the wire, its temperature must be several times higher, since the heat will be spent not only on melting, but also due to thermal conductivity will be absorbed by the foam itself, reducing the temperature of the wire. The amount of heat absorbed by the foam will directly depend on its density. The denser the foam, the more thermal energy required.
From the above it follows that, depending on the density of the foam, for cutting it it is necessary to select a wire of the appropriate diameter so that the nichrome wire does not melt from the heat generated on it. The higher the density of the foam, the larger the diameter of the nichrome wire. It is worth noting that a machine on which a wire is installed for cutting dense foam plastic will successfully cut loose foam plastic, but it will only need to be advanced faster.
The length of the nichrome wire for the device is selected based on the size of the foam plates intended for cutting, and does not depend on the density of the foam.
As a result of the conducted experiments, it was determined that for effective cutting of foam plastic, the power that must be supplied per unit length of wire should be in the range of 1.5-2.5 W per centimeter of wire length; for this operating mode, nichrome wire with a diameter of 0 is best suited .5-0.8 mm. It allows you to generate enough heat to quickly cut foam of any density, while maintaining its mechanical strength. Therefore, nichrome wire with a diameter of 0.8 mm was used to make a foam cutting machine.
Calculation of power source parameters for heating wire
It should be noted that for heating the nichrome wire of a foam cutting machine, a power source of both alternating current and direct current is suitable.
Taking into account the fact that no more than 2.5 watts of power must be allocated per centimeter of wire length and the wire length is 50 cm, the power of the power supply can be calculated. To do this, you need to multiply the amount of power released by the length of the wire. As a result, it turns out that to heat up the wire of a foam cutting machine, you will need a power source of 125 W.
Now you need to determine the voltage value of the power supply. To do this, you need to know the resistance of the nichrome wire of the foam cutting machine.
The resistance of a wire can be calculated from the specific resistance (resistance of one meter of wire). The resistivity of nichrome wire grade X20N80 is given in the table. For other brands of nichrome, the values differ slightly.
As can be seen from the table, for a wire with a diameter of 0.8 mm, the resistivity is 2.2 ohms, therefore, a nichrome wire 50 cm long, which was chosen for the foam plastic cutting machine, will have a resistance of 1.1 ohms. If you choose a wire with a diameter of 0.5 mm, then the resistance of a piece of wire 50 cm long will be 2.8 Ohms.
Using the transformed formulas of the Ohm and Joule-Lenz laws, we obtain a formula for calculating the value of the supply voltage for a foam plastic cutting machine. The value of the supply voltage will be equal to the root of the product of the amount of power consumed and the wire resistance. As a result of the calculations, it turns out that a power source with a voltage of 11.7 V is required. In this case, the current consumption from the source will be 11.7 A. In order to find the current value, you need to divide the power consumption by the voltage value. Dividing 125 W by 11.7 V we get a current of 11.7 A.
As a result of calculations, it was determined that to heat the nichrome wire of a foam cutting machine, an AC or DC power source is required that produces a voltage of 11.7 V and provides a load current of 12 A.
When decreasing or increasing the length of the wire, the voltage of the power supply will need to be proportionally decreased or increased accordingly. In this case, the current value will not change.
The calculation performed is an estimate, since the transition resistance at the points of connection of the wires and the resistance of the current-carrying conductors are not taken into account. Therefore, the optimal heating mode for the wire ultimately has to be set directly when cutting foam plastic on the device.
Electrical circuit of the power supply of the foam cutting machine
You can apply power voltage to the nichrome thread of a foam cutting machine using several circuits.
Diagram of a machine for cutting foam plastic using LATR
Most simple option The power source of the foam cutting machine is an autotransformer with the ability to smoothly adjust the output voltage. But this circuit has a significant drawback: it does not have galvanic isolation from the power supply network, since the output of the LATR is directly connected to the power supply network. Therefore, when using LATR, it is necessary to connect it in such a way that the common wire is connected to the neutral wire of the supply network.

Electrical diagram for connecting a nichrome spiral of a foam cutting machine to LATR.
What is LATR and how does it work?
The industry produces laboratory autotransformers, which are commonly called LATR (adjustable laboratory autotransformer). They are connected directly to a 220 V household power supply and, depending on the type of LATR, are designed for different load currents.

LATR is toroidal transformer with one primary winding, along the turns of which, when the handle located on top is rotated, a graphite wheel moves, allowing you to remove voltage from any part of the winding. In this way, the voltage at the LATR output can be changed from 0 to 240 V.
The wires to the LATR are connected using a terminal block, on which its electrical diagram is drawn and the inscriptions “Network” and “Load” are written. A cord with a plug is connected to the “Network” terminals to connect to a household network. The “Load” terminals are used to connect a product that needs to be powered with a voltage different from the household power supply.

Attention! One of the power wires, the bottom terminals in the photo, is connected directly to one of the load wires. Thus, if a phase gets on the lower terminal, then touching this circuit will be dangerous for a person.
Therefore, in the case of using LATR to heat the nichrome wire of a foam plastic cutting machine without an isolating transformer, it is necessary to check the absence of a phase on the common wire with a phase indicator. If there is a phase on it, remove the LATR supply plug from the socket and, turning it 180 degrees, insert it again. Recheck the bottom wire for phase presence.
Usually there is a label on the LATR body that provides data on its load capacity. On the LATR shown in the photo, the label is installed directly on the adjustment knob.

From the label it follows that this is a LATR of the LOSN type, the output voltage can be adjusted in the range from 5 to 240 volts, the maximum load current is 2 A.
If the design current does not exceed 8 A, then it is quite possible to power the nichrome wire through an LATR type RNO 250-2.

This LATR allows you to connect a load with a current consumption of up to 8 A, but given the short duration of operation of the device for cutting foam, it will completely withstand a load current of 10 A.
Before using LATR as a power source, it is necessary to check its functionality. To do this, you need to connect a power cord to the “Network” terminals of the LATR, and a multimeter or pointer tester turned on in the AC voltage measurement mode to the “Load” terminals, to a limit of at least 250 V. Set the LATR voltage adjustment knob to the minimum voltage position. Insert the plug into the socket.

Slowly turn the LATR knob clockwise to make sure that the output voltage increases. Return the LATR handle to the zero position. Remove the plug from the network and connect the wires coming from the nichrome thread to the “Load” terminals. Insert the power cord plug into the socket and use the phase indicator to check the absence of phase on the nichrome wire. Having dealt with the phase, you can slowly turn the LATR handle to apply voltage to the nichrome wire. It should be taken into account that the wire heats up gradually, over several seconds.
Attention! It is strictly forbidden to touch the wire with your hand to check the degree of its heating when the supply voltage is applied to it! The temperature of the wire is very high and you can get burned!
When the wire heats up to a slightly noticeable glow, you can begin cutting the foam on the machine.
Diagram of a machine for cutting foam plastic using an LATR step-down transformer
If the amount of current consumed by the nichrome wire of the foam cutting machine is greater than the LATR can provide, then you will have to additionally turn on a step-down transformer after it according to the electrical diagram below.

As you can see, unlike the previous diagram, the network winding of the power transformer is connected to the output of the LATR, and the nichrome spiral is connected to the secondary output winding of the transformer. In this circuit, thanks to the isolating step-down transformer, the nichrome spiral is not galvanically connected to electrical network and therefore safe to use. In addition, it became possible to more smoothly adjust the output voltage and, therefore, more accurately set the temperature for cutting foam plastic on the machine.
The power of the transformer and the voltage on its secondary winding are taken based on calculations performed using the above method. For example, for the proposed design of a machine for cutting foam plastic, with a nichrome wire diameter of 0.8 mm and a length of 50 cm, the power source was an LATR with an output current of 2 A, followed by a step-down transformer with a power of 150 W and a voltage on the secondary winding of 12 V.
To power the nichrome spiral of a foam cutting machine, you can use a transformer with taps in the secondary winding. This is the simplest, most reliable and safe option, especially if the foam cutting machine will be used regularly. After all, when cutting foam plastic on a device, there is no need to regulate the heating temperature of the nichrome wire. The temperature is selected once when setting up the machine. Therefore, having selected the desired voltage, the wires from the terminals of the nichrome wire are soldered to the terminals of the secondary winding of the transformer forever.

Despite the simplicity and reliability of this circuit, there are no standard ready-made transformers with taps, and even for the required voltage. You will have to find a suitable transformer for voltage and current on the secondary winding and unwind the extra turns. You can disassemble the transformer and, having unwinded part of the secondary winding, wind it again, but with taps. But this work requires knowledge and experience.
Diagram of a machine for cutting foam plastic using a step-down transformer and current-limiting capacitors
You can establish a stable output current from the secondary winding of the transformer using ordinary capacitors connected to the primary winding of the transformer.

The capacitor must be designed for a voltage of at least 300 V and have a capacity, depending on the type of transformer and the current consumption of the nichrome spiral, of the order of 50 μF. Based on this principle of stabilizing the current on the secondary winding, I have developed a charger circuit for car batteries. The transformer must be of appropriate power and have a 10% voltage reserve.
Diagram of a machine for cutting foam plastic using a step-down transformer and a thyristor power regulator
One more, several unusual scheme temperature controller for heating nichrome wire using a thyristor. It is similar to adjustment using LATR with a transformer, but small-sized. The classic thyristor regulator circuit is not suitable for this circuit, as it distorts the shape of the sinusoidal current.

Therefore, a special thyristor regulator circuit is required that produces a sinusoidal signal at the output and is designed to work with an inductive load.
It is possible to turn on the thyristor regulator after the secondary winding of the transformer. In this case, when choosing a regulator circuit, it should be taken into account that it must be designed for the current that is necessary to heat the nichrome wire.
Diagram of a machine for cutting foam plastic using any electrical appliances
If none of the above electrical diagrams heating nichrome wire to accommodate cutting foam cannot be implemented, then I propose a non-standard scheme for heating it.
When connecting any electrical appliance, it consumes current from the mains. The amount of current directly depends on the power of the electrical appliance. The greater the power, the more current will flow through the wires. The resistance of a piece of nichrome wire from a foam cutting machine is slightly greater than the resistance of copper wires and, therefore, connecting the machine to a break in one of the wires of an electrical appliance will not affect its operation, and the nichrome wire will heat up. This is what you can use.

When using the connection of a machine for cutting foam plastic according to this scheme, you must ensure that the nichrome wire is not connected directly to the phase wire of the electrical network. Physically, the connection is best done using an adapter, like the one described for measuring current consumption.
Continuous electrical appliances, such as a heater or vacuum cleaner, are suitable for operation in the circuit. You can estimate how much current electrical appliances consume using the table on the website page “Choosing the cable cross-section for electrical wiring.”
If the electrical parameters of the nichrome wire are not known, then you should first try to connect a low-power electrical device, for example a 200 W light bulb (a current of about 1 A will flow), then a 1 kW (4.5 A) heater, and so increase the power of the connected devices until the nichrome wire The wire of the foam cutting machine will not heat up to the required temperature. Electrical appliances can also be connected in parallel.

The disadvantages of the latest connection scheme for a nichrome spiral of a foam cutting machine include the need to determine the phase for correct connection and low efficiency (coefficient of efficiency), kilowatts of electricity will be wasted uselessly.
ydoma.info
Do-it-yourself foam cutting machines (drawings, video)
Foam cutting machine is important element equipping many enterprises and home workshops. With their help, the production of various blanks used in construction, repair, decoration, interior design, etc. is carried out.
Photo of a foam cutting machine
If you study the range of factory models of machines for cutting foam plastic or simply PSA, then there are several types:
- Mobile. Such PSA are more reminiscent of an ordinary knife designed for working with polystyrene foam with your own hands. With a mobile machine you can make various simple workpieces. Quite often found in everyday life when processing polystyrene foam, expanded polystyrene;
- Machines for transverse and horizontal processing. PSA data is cut in a certain direction, that is, achieving complex figures is problematic. But the machine provides highly efficient production, cutting large materials;
- CNC machines. PSA equipped with a CNC module are modern models of machines for processing expanded polystyrene and polystyrene foam. With its help, you can make machines and 3D models of a wide variety of parameters, complexity and configuration. The current furniture, repair and construction production cannot do without the use of CNC PSA.
Diagram of a foam cutting machine
If you want to buy a PSA or make it yourself, first you need to understand the operating features of the device.
- The operation of most types of machines for working with foam is based on a single principle;
- The cutting part of the machine heats up and affects the material being processed;
- The cutting element moves according to the drawings;
- The process is similar to passing a hot knife through butter, that is, the process is carried out easily, with minimal damage to the foam or polystyrene foam;
- Most simple model The machine has one cutting string. This installation is easy to do with your own hands, having at your disposal the appropriate drawing;
- To work with complex 3D shapes and perform high-precision cuts, a PSA with a CNC module is used. The machine itself can have up to 6 cutting strings;
- The advantage of the machine is that additional edge processing is not required due to a clean cut. This simplifies production and minimizes the cost of finishing parts.
Device Features
- If you want to make a cutting device for foam plastic with your own hands, this can be done using two methods - vertical and horizontal cutting of a sheet of foam plastic;
- To make a vertical cut, the cutting line is installed perpendicular to the work table;
- For a horizontal cut, you need to make an appropriate design, the opposite of the first example;
- To get an even, neat cut, you will need a competent drawing and template for subsequent processing;
- The drawing is widely available on the Internet, which allows anyone to make a machine at their own discretion, based on personal needs or materials available for assembling the PSA;
- It is recommended to use nichrome thread as a cutting element. Almost every drawing provides for its use;
- To process complex parts and obtain 3D models, the current production of machine tools has reached high level. Special models of CNC units designed specifically for figure cutting are widely used. The workpiece is processed in several projections at once. Thanks to such equipment, it is possible to establish the production of models of cars, people, airplanes, animals and much more. Moreover, in reality, the resulting 3D products accurately repeat all the curves, lines, and configurations of the copied product.
Making a machine with your own hands
The production of special machines for cutting foam plastic has been put into active production. At the same time, the cost of equipment seems high for many potential buyers. In addition, having the opportunity to assemble a machine for cutting foam plastic without unnecessary help, with their own hands, many simply abandon the idea of purchase. The estimated price of a factory machine is from 40 thousand rubles. But there are models costing 100 thousand rubles and more.
Yes, for that kind of money you can get an excellent foam cutting machine equipped with a CNC module. A CNC machine is far superior to homemade simple devices. At the same time, not everyone has a real need for CNC and automated cutting of foam plastic. Therefore, we will give an example of how you can make an excellent unit for processing expanded polystyrene or polystyrene with your own hands. It will not be a bad idea to consolidate your skills with video lessons.
- Drawing. It is not necessary to use a drawing specifically for a given machine model. It is not needed here, since the design is quite simple. But for clarity, you can draw a drawing yourself, based on the selected parameters. Another option is to choose a drawing for a more serious installation. It all depends on what you want to get out of your foam cutting machine.
- Select or build a table on which to perform polystyrene foam cutting operations. The surface should be covered with thermal insulation or electrical material. Polyamide film has proven itself excellent in this component.
- Attach the insulator to the center of the long side of the work surface. One on each edge. Ceramic or glass elements can be used as insulators. Between these structural components you will then stretch a thread that will act as a cutting tool.
- Choose a line. If you have an old hotplate, an unwanted soldering iron or iron, you will find nichrome thread inside them. It has sufficient power.
- Remove the spiral from the tool, carefully straighten it to form an even thread.
- It is not recommended to use nichrome threads with a thickness of more than 0.5 millimeters for a homemade machine.
- Be sure to connect the thread to the network through a rheostat or step-down transformer. This will protect your main working element of the machine from combustion.
- A nichrome fishing line is connected to a reel on insulating material. An electrical cable is connected to the fishing line, through which power will be supplied to the machine. Try to ensure that the contact between the electrical cable and the thread is as high quality as possible.
- Under the table, pull the thread to another insulator and pass through it. The end of the thread will hang from the insulator, so a weight should be provided here. The weight of the load determines the tension of the heated thread when processing foam. Here you will have to “play around” a little to determine the optimal parameters of the weight. Movable sliding fixation is the most advantageous when creating such a machine with your own hands. This is due to the fact that this way you will get a better and cleaner cut line, and you will be able to adjust the position of the thread as needed.
- Near the second insulation coil, a second electrical cable is mounted to the thread, which goes to the rheostat and is connected to the slider terminal.
The machine may only be started after the slider has been set to the maximum resistance level. If this is not done, literally immediately after turning it on, your thread will burn out, and you will have to look for a new one.
The power of the unit depends on the current parameters and the thickness of the thread used. The only drawback of a homemade machine for working with foam plastic is that when heated, the material emits bad smell and harmful substances. Therefore, it is strongly recommended to use the machine only where available efficient system ventilation.
Foam plastic- This inexpensive material, from which craftsmen make a variety of products. It is very popular not only because of its low cost, but also because of its ease of processing. Not everyone knows that foam plastic does not have to be cut with a regular knife. In this case, it will crumble very much and it will be simply impossible to make an even cut.
But this material melts very well, and at a relatively low temperature. That is why the most convenient way to work with polystyrene foam is to cut it using special cutters that rely on high temperature. But cutting foam plastic with your own hands is also possible in other ways, which we will definitely consider.
Foam sheets
Polystyrene foam is a white material that consists almost entirely of air. It is used for packaging equipment, food, as thermal insulation and soundproofing material, as a basis for the manufacture of household items, logos and many other things. One of the main advantages of polystyrene foam is its cheapness. Many people buy it in order to make some product from this material and sell it profitably. But even to the common man Styrofoam will be very useful, because you can make a lot of things for your home from it. The main thing is to be able to work with the material correctly, as well as choose it for specific purposes.
What material to choose for cutting
Before we start working with the material, we need to find out what kind of foam there is, what type of foam is best used for cutting at home.
Polystyrene unpressed
This is the most common and familiar polystyrene foam, which is familiar to us from technology packaging. The material consists of many small white balls that are tightly connected to each other, but can become separated from mechanical stress. It is very widespread and is most often used in the manufacture of products at home.
Polystyrene pressed
This is a similar type of foam, which is simply additionally pressed. Because of this, it has a much denser structure, it is more difficult to crumble, but such material also costs much more than its non-pressed counterpart. Because of high price Polystyrene pressed foam is not widely used, but for some products it can definitely be used, since its structure is quite smooth.
 Polystyrene extruded foam
Polyvinyl chloride foam
The rarest and most unused type of this material, which has one interesting property - the ability to extinguish on its own when ignited. It does not emit hazardous substances, but if it does catch fire, the smoke from it is very dangerous and can pose a health hazard.
Prices for foam plastic
Foam plastic
How to cut foam without special equipment
The first common question is what to do if you need to cut foam, but building a special cutter is too difficult, expensive and useless. There is a way out, even several.
 Methods for cutting foam plastic
Wood hacksaw
The large teeth of the hacksaw allow it to grab onto the foam granules and cut it quite effectively. To implement this method, you do not need to modify anything yourself; you just need to purchase or take a ready-made hacksaw for wood. In the same way, cutting can be done using a jigsaw; in this case, it will be important to choose the right file for it.
 Wood saw
But this method is not widely used, since when using it, the foam will crumble in any case, and it will not be possible to achieve a perfectly even cut. Also, if you use the tool carelessly, the plate may crack and all the work will go down the drain. Therefore, the following methods are almost always used to cut such capricious material.
Cutting material using a hot tool
To cut a sheet of foam plastic, you can use the most ordinary knife, if you first prepare it for this procedure:
- You need to make sure that the length of the knife is greater than the thickness of the sheet that will need to be cut.
- Next, you need to mark the lines on the sheet along which it will need to be cut.
- The next step is to heat the knife using a gas stove or special gas burner. Carefully draw a hot knife along the intended line; the foam will begin to melt and cut clearly along the line.
It is important to consider that it is not possible to achieve a perfectly even cut using this method, and it is also only suitable for cutting small pieces of material. The fact is that even slightly shaking hands will not allow you to achieve a straight line, and a constantly cooling knife will not allow you to make a neat and long cut.
But if your goal is to cut off a small piece, then a hot knife will allow you to do this very quickly and without wasting extra money and time. Please note that after cutting, the knife should never be used in the kitchen or at home, as the foam contains toxic substances.
 Knife
Knife
A simple soldering iron cutter
If you need to make quite a lot of foam blanks, but don’t want to make an overly complex cutter, then you can use its simple analogue, which works on the basis of a regular soldering iron.
It is important to choose a soldering iron that is not too powerful, since its temperature is excessive for normal sheet cutting. If the power is too high, the foam will smoke a lot, smoke, and be difficult to cut.
The next step will be to select and install a nozzle on the tip of the soldering iron, since the standard tip is in no way intended for these purposes. We need to find or make our own long and flat tip, which will look like a small knife blade, but less sharp. Copper wire folded several times is good for making such an item. Another option is to simply take out the tip of the soldering iron and shape it into the desired shape.
The soldering iron is inserted into a socket, heats up and cuts the foam using a similar principle to a hot knife. The main advantage of this method is that there is no need to constantly heat the knife; cutting can proceed continuously.
 Soldering iron cutter
Special cutter for cutting foam plastic
If you want to make foam products on a regular basis, and so that they turn out really smooth and well, then you will have to make a special cutting machine that will allow you to do all this.
Prices for a special cutter for foam plastic
Foam cutter
On the Internet you can find many options for this design, which differ in size, appearance, but they have the same essence. We will analyze one of the most popular and simple designs, which has proven itself well.
Table 1. Main methods of cutting foam:
Step-by-step instructions for making a cutter
First we need to decide on the tools and materials that we will need to create the cutter. The list of required materials includes:
- A sheet of chipboard or other dense base, approximately 600 by 400 millimeters. The size can be changed, it will depend on the size of the sheets you are going to work with.
- A flat wooden strip, about a meter long.
- Leg material: 4 corks from plastic bottles, a piece of lath or other material.
- Nichrome wire, diameter approx. 0.4 millimeters. You need about half a meter, but it is better to buy with a reserve.
- Tension spring. It is for tension, not compression. Such a spring cannot be found everywhere.
- 10-15 screws.
- Wires, crocodiles for fastening them.
- Computer power supplies and cable for it.
Now let's move on to the tools that we will need to manufacture and assemble the structure. These include:
- Drill or screwdriver;
- Jigsaw or hacksaw for wood;
- Screwdriver;
- Pliers;
- Drill for screw diameter.
Prices for popular drill models
Video - How to make a foam cutting machine with your own hands
Where to get nichrome wire
 Rolls of nichrome wire
Nichrome wire- an integral part of the cutter, but not everyone knows what it is, and most importantly, where to get it. Nichrome wire differs from ordinary wire in its strength and very high melting point. That is why it is most convenient to use to create a foam cutter.
This wire is used in irons, boilers and some other heating devices. In addition, it can be bought in electronics stores and markets.
Prices for nichrome wire
Nichrome wire
Power supply, its connection and configuration
Our cutter will operate from a regular computer power supply, which almost everyone has, but if you don’t have one, you can buy it at any computer store; it’s inexpensive.
The power cord must be plugged into a power outlet and the device turned on. But the power supply will not turn on due to the nature of its operation. In order for it to turn on you need:
- Find the largest connector that is designed for the motherboard.
- Prepare a small piece ordinary wire or find a hairpin.
- Find the green wire there, there will be only one.
- Now, using a hairpin, you need to connect the green wire with one of the black wires, and it doesn’t matter which one.
After these simple manipulations, the power supply will work.
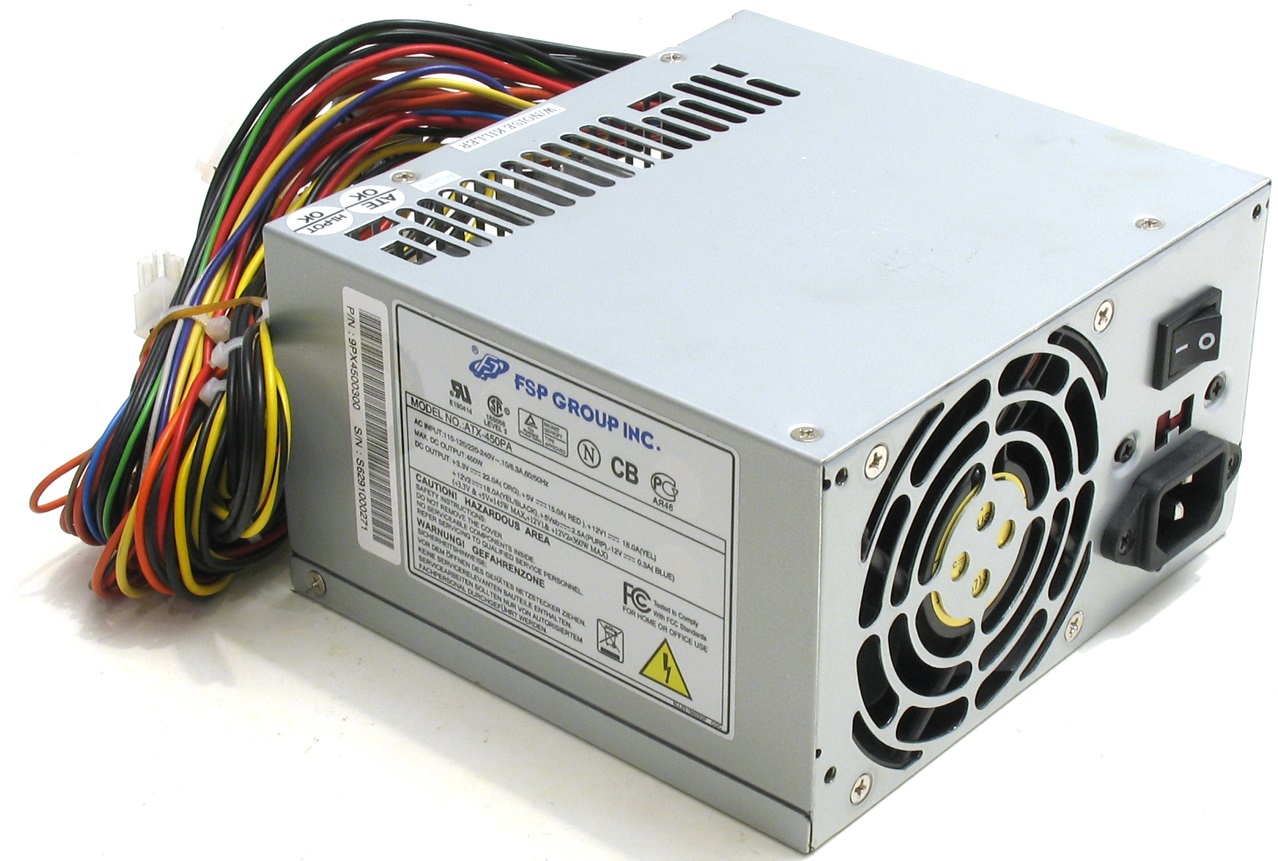 Computer power supply
All that remains is to somehow obtain the voltage we need using a power supply. To do this, you need to find a Molex connector, which is a connector with four holes, to which wires of different colors go.
In the holes with the yellow and black wires, you need to connect the wiring wires, which will power the entire cutter. With this all manipulations with the power supply are completed, you can move on to building the cutter itself.
Selecting wire length
Before you start making the foam cutting machine itself, you need to calculate the length of nichrome wire, which will be sufficient for normal cutting of the material. To do this you need:
- Take a long strip and screw it on both sides.
- It is necessary to attach a tension spring to one of the screws, which we will also use in the future.
- Pull the nichrome wire to the maximum possible length. One end of it will be connected through a spring.
- Now you need to connect one wire from the power supply to the very end of the wire that does not have a spring.
- There is no need to secure the second wire tightly; we will move it. Depending on the position of the wire, the temperature of the wire will increase. The closer the two ends are, the hotter it is. Thus, you need to find a position at which the temperature of the wire will be sufficient to cut the foam. Please note that if the wires are placed too close, the foam will burn, which will negatively affect the final quality of the product.
Now the entire structure needs to be disassembled and the manufacture of the main part of the cutter can begin.
 Selecting wire length
Base
The first thing you need to do is take a board for the base and screw 4 legs prepared in advance to it. The easiest way to do this is to take 4 caps from plastic bottles and secure them to the back of the board using regular screws. It is important that the screws do not come out reverse side boards. This can happen if the fastener is too long.
 Chipboard for cutter base
Wire holder
The wire fastener in our design consists of two twisted pieces of lath that are tightly attached to the base. It is important to assemble everything so that an angle of 90 degrees is formed and nothing wobbles.
The first step is to fasten the two slats together. The length of the first should be equal to the length of the wire that is suitable for cutting. The length of the second staff will express the distance from the edge of the cutter to the wire. It must be selected based on the size of the workpiece you are going to process.
Now the resulting angle of slats needs to be screwed to the base using corners. It is important to do this in such a way that the structure does not wobble.
Now you need to drill in the base through hole where the fishing line will go. To do this, you need to screw a screw to the center of the rail and tie a thread to it. When the thread goes down, you need to put a point in the place with which it comes into contact. This is where you need to drill.
On the back side of the base, next to the hole, you need to screw a small screw. It should be as close to the hole as possible.
 Wire installation
Wire fastening
Now you need to start attaching the wire. The first step is to secure the spring to the screw located on the rail. A nichrome wire is wound to the end of the spring, and the spring needs to be stretched by about half.
The other end of the wire must be tightly wound around the screw, which was screwed onto the back side of the base. The wire should be well tensioned, and the spring should not be in its original position. Nichrome wire can be quite uneven due to the fact that it very readily takes the shape that it is given. To make it as even as possible, you need to stretch it and move a piece of wood along it until it visually becomes smooth. It is unlikely that you will be able to make the wire perfect, but minor irregularities will not greatly interfere with cutting.
The last step will be setting up the cutter. The fact is that the screwed rail does not create a right angle with the base of the cutter. To fix this, you need to take a square and apply it to the rail. Now, using a screwdriver or screwdriver, you need to turn the screw a little until an even angle is formed.
This completes the process of creating a homemade foam cutter. All that remains is to connect the power.
 Wire tension through a spring
Power connection
In order for the cutter to start working, it must be connected to power from the block that we made in the previous steps. For ease of fastening, you can buy special crocodile clips that will help secure the wire in a couple of movements. If there are no crocodiles, then the wire can simply be tied in the right places.
Video: Do-it-yourself foam cutting machine
The first end of the wire needs to be connected to the back of the base, to the screw that we screwed there. The second end must be placed on the nichrome wire itself, under the spring. If you lower the wire a little, the temperature will increase and the cutter will be more powerful.
If you need a full-fledged power regulator, here are brief instructions on how to make one:
- You need to take a piece of nichrome wire that is left and wind it around a regular ballpoint pen so that you get something similar to a spring.
- You need to bend the hooks at the ends of the spring.
- Now, in a random place on the cutter frame, you need to screw in two screws at a distance approximately equal to the length of the resulting spring. The wire must be secured to these screws.
- Next, you need to connect the end of the spring to the beginning of the nichrome wire of the cutter itself.
- The first wire from the power supply must be connected to the same screw that is located under the base, and the second wire must be secured to one of the turns of wire. Depending on the chosen turn, the resistance in the circuit will change, and therefore the power of our device.
 Power regulator
Foam cutting process
In order to cut foam plastic, you need:
- Turn on the power supply.
- Make high-quality markings on the foam sheet so that you can see where the cut line should be.
- Take a metal ruler and apply it to the cut line. Without a ruler it will be very difficult to cut.
- Cutting complex geometric shapes It is also possible on such a machine, but for this you definitely need to practice on simple products.
Guide board
To make it easier to cut simple products and shapes, you can screw any flat board to the base of the cutter and use it as a guide. To do this you need:
- Find a flat board and place it on the base of the foam cutter.
- Drill a through hole at one end of the board. At the other end you need to make a slot in which the screw should move freely.
- Now all that remains is to set the desired size and screw both screws to the cutter itself. Thus, the board will serve as a guide against which the workpiece must be pressed. With its help you can cut products with a perfectly smooth edge.
 Material cutting process
Dangers of cutting at home
Remember that when burning, and therefore when cutting with our machine, it can release highly toxic substances. These substances can harm a person, so be sure to follow safety precautions so as not to harm yourself.
Safety precautions when cutting yourself
- Be sure to work in a well-ventilated area, preferably a large one.
- You cannot breathe vapors or smoke that come from the foam; it is advisable to work in a mask or respirator.
- Do not place your hands close to the hot wire.
A foam cutter is a very useful household device that is not difficult to make with your own hands. With it you can do many interesting things that will definitely be useful to you and your loved ones.
Have you tried cutting foam with a regular knife? It doesn’t work because the material crumbles. I'll tell you how to make a foam cutter with your own hands, and also offer three simple instructions step-by-step assembly cutters for foam and plastic.
What you need to know about cutting foam

Expanded polystyrene is a cellular material, the structure of which consists of many dense compressed bubbles. Bubbles are difficult to mechanically deform, as they can be pressed through even with a sharp knife.

The only way to accurately cut such material is to use a cutting tool heated to a temperature above +100 °C. A lower heating temperature will cause the material under the cutter to sag and tear.
The heating temperature of the cutting tool above +200 °C will cause the edges of the cut to catch fire and burn.
By the way, a properly assembled thermal knife can cut not only foam plastic, but also extruded polystyrene foam, polyethylene and other polymer materials.
Assembling a simple cutter from a regular soldering iron

There are situations when foam plastic needs to be cut right now and there is no time to make a complex machine. It is precisely for such cases that I propose a simple way to convert a regular soldering iron into a cutter for polystyrene foam.
The instructions are very simple, and therefore the tool will be ready in 10 minutes, and maybe earlier.
| Illustration | Description of actions |
 |
We prepare materials and tools. We will need:
|
 |
We take out the standard tip. Near the tip on the body of the soldering iron there is a clamping screw. The screw must be unscrewed counterclockwise. As a result, the sting will weaken and it can be pulled out. |
 |
Bend the wire. Bend a piece of wire up to 10 cm long in half. We squeeze the bend with pliers so that the loop on the bend is as small as possible. |
 |
Cutting the wire. We measure the bent wire along the length of the standard tip and cut it with a small margin. |
 |
Installing a new tip. Bent and trimmed the right size insert the wire into the soldering iron. As a result, the fold should point outward. We tighten the fixing screw and secure the wire in the soldering iron. |
 |
How to cut? We turn on the soldering iron and wait until the wire heats up. After this you can use homemade cutter as intended.
|
Assembling a hand cutter on nichrome thread

Now that you know how to make a simple thermal knife with your own hands from a regular soldering iron, I offer instructions for assembling a hand-held cutter with a cutting part made of nichrome wire.
This cutter is as simple as a thermal knife, but it can be used for neat, shaped cutting of foam.
| Illustration | Description of actions |
 |
We prepare everything you need. We will need:
|
 |
Attach wooden sticks to the battery pack. Apply hot glue to the edge of the sticks. We apply the sticks to the battery pack, to those walls where the metal terminals are located. |
 |
Drill holes in the strips for the cable. At a distance of 5 mm from the battery pack, we drill a hole in the wooden sticks. Considering small size sticks, the holes should be no more than 2 mm. |
 |
We bring out the wire. We pass one of the two wires from the battery pack through the first and second holes to the opposite wooden plank. |
 |
Attaching the button. We cut off a free piece of wire at a distance of 1 cm from the battery pack. We solder the button to the piece of wire, and on the other side we solder the cut piece of wire. We attach the button to the bar with hot glue and use the same hot glue to isolate the soldering areas. |
 |
Drill holes for attaching metal strips. In the upper edge of the wooden sticks, we drill one hole with a diameter of 3 mm at the same distance from the edge. |
 |
We fasten metal strips and wires. We insert bolts into the holes in the wooden sticks to secure the metal strips. We screw the bare ends of the wires from the battery pack onto the bolts and tighten the connection. |
 |
Attaching the filament. We stretch nichrome wire into the holes along the edge of the metal strips. We fix the filament between the metal strips using a screw with a nut and washer. We cut off the excess nichrome along the edge with pliers. |
 |
A device for cutting foam plastic in operation. We install two AA batteries, press the button and cut the foam.
|
Assembling a stationary vertical cutting machine
The previous nichrome cutter was held in the hand when working. The model you will learn about now is stationary. That is, the device is stationary, and the foam will be fed manually to the filament.
| Illustration | Description of actions |
 |
Preparing materials. We will need:
|
 |
Assembling the bed. We cut out a square with dimensions of 70x70 cm from multilayer plywood. We screw a triangular piece of board in the middle of the edge of the plywood sheet. We fasten a piece of wooden blocks along two opposite edges of the plywood sheet. We fasten the pieces of timber with a 10 cm indentation from the edge. |
 |
We make fastening under the lanyard. On the bottom side of the frame, between the beams at a distance of 5-7 cm from the edge, screw in a self-tapping screw 2/3 of the way. The head of the self-tapping screw can be used to hook a lanyard. |
 |
Assembling the mast stand. Using two self-tapping screws, we attach a 50×50 mm block of length 60 cm to a corner pre-fixed on the frame. |
 |
Installing a crossbar on the mast. At the top of the installed rack, from a 50x50 mm block, we attach a horizontal crossbar 50 cm long. We strengthen the installed crossbar, as shown in the photo, with a diagonal spacer along the inner corner. |
 |
We determine the point of passage of the wire on the frame. A nichrome filament will run from the top crossbar to the frame. To determine the point of its passage through the frame, we apply a square with an angle to the frame and the opposite part to the crossbar. |
 |
Drilling the bed. We mark the corresponding point on the bed. Using the mark made, drill a through hole with a 6 mm drill. |
 |
Preparing the metal plate for the hole. We cut a rectangular plate with a side of 50 mm from millimeter steel. Mark the center of the plate and drill a through hole with a diameter of 2 mm in the center. |
 |
Installing a metal plate. We attach the plate to the frame so that the holes match. We trace the plate along the outline with a pencil. Using a chisel, we knock out the wood to the thickness of the plate. We put a plate into the recess made and drive it in until it is flush with the surface of the plywood. |
 |
Making a crossbar for nichrome wire. Bend a nail 100 mm long in a vice into a “P” shape. We cut off the head and tip with a bolt cutter. |
 |
Installing the crossbar. On the bottom side of the frame, above the hole into which the wire will pass, we apply a bent nail and mark the legs. According to the markings, we drill holes of a suitable diameter with a depth of 5 mm. Pour a little hot glue into the holes and insert a bent nail. |
 |
We attach the end of the nichrome wire to the crossbar on the mast. To do this, screw in a screw from the edge of the crossbar, at the point located above the hole in the frame. We wrap nichrome wire around the screw. Tighten the screw so as to press the wire. |
 |
We connect the top crossbar and lanyard with nichrome wire. We pass the free end of the wire through a hole in the metal plate in the frame. We place the wire on the nail crossbar and tie it to the loose lanyard. We scroll the lanyard until the cutting nichrome wire is stretched. |
 |
Connecting the power. In our case, we use a battery charger with parameters of 12 V and 4 A. You can use a more powerful step-down transformer and use the secondary winding in it. We connect one cable through the terminals to the bolt on the crossbar, and the second cable to the lanyard at the bottom of the frame. |
 |
Polystyrene foam (extruded polystyrene foam) is used as thermal insulation for external and interior decoration, used for packaging goods or manufacturing prefabricated structures. The material is produced in the form of sheets, which are cut on site and adjusted to the dimensions of the surfaces. To quickly cut foam plastic, you will need a special device that allows you to make a straight or shaped cut.
Manual processing of foam plastic is possible at home and in small workshops using a simple device assembled from scrap materials. Extruded polystyrene foam has a fairly dense structure, so You can cut slabs metal tool , heated to a certain temperature. A wire feeding wire is suitable as a cutting surface. electric current, the supply of which is associated with the main difficulty of assembly.
 A self-made machine allows you to make tiles or bars from ordinary polystyrene foam for packaging. suitable thickness with their further use in certain designs. This device can also be used to cut foam rubber or similar materials that are needed for manufacturing or repair. upholstered furniture. The compact dimensions of the device for cutting foam plastic with your own hands using nichrome allow you to install the machine in a small workshop or even on a balcony.
To cut polystyrene foam at home, you will need a structure that can be assembled from simple materials available at any hardware store. You must first determine the parameters of each element, taking into account the size of the foam boards that will have to be processed . In most cases, the following details are sufficient:
- The base is made of dense plywood, chipboard or solid wood. You can order new parts or use elements old furniture(doors, walls, shelves). To work with foam plastic, a base of 400 x 600 mm is sufficient.
- String or wire in the form of a thermal knife for foam plastic.
- Metal posts, screws, springs or regular nails to secure the wire. The installation height of the cutter depends on the expected thickness of the finished slabs.
- Fastenings for parts on the base. A few self-tapping screws are enough to secure the structural elements.
To assemble the thermal cutter, you will need up to one hour of working time. Each of the structural elements can be quickly replaced during repairs or expanding the capabilities of the device.
Algorithm of actions
To make a device for cutting foam plastic or similar materials, you need the most common tools (hammer, screwdriver, pliers). You can work anywhere with sufficient space (balcony, room, hallway, garage, etc.). No helpers or third party specialists not required.
Assembly is carried out in the following order:

Legs can be attached to the base, which will increase stability when cutting foam with a string.
How to choose cutting wire
A suitable cutter can be made from nichrome wire (X20N80), which is used in the design of most household appliances as a heating element. By mechanical characteristics nichrome is comparable to ordinary steel, but has a high resistivity and a heating limit up to temperatures of +1200 ºC. Wire with a diameter of up to 10 mm is available for the manufacture of cutting devices.

Precise and smooth carving of foam plastic is possible by heating the cutting line to a temperature that is two to three times higher than the melting threshold (+270 ºC). It should be borne in mind that such a process involves energy consumption for the absorption of heat by the material itself in proportion to its density. Therefore, for effective and safe cutting you need to select a wire of suitable thickness to prevent the metal from melting at maximum heating.
Calculation and preparation of the electrical part
 For safe work The device must be correctly mounted with current-carrying elements that are connected to the power source through plug-in terminals. To cut the material, you can use alternating or direct current. The power of the source is calculated based on the fact that to effectively cut 10 mm wire you will need up to 2.5 W (for 500 mm - 125 V).
The current voltage is proportional to the resistance and is calculated using formulas or tables. But on average, with a wire diameter of 0.8 mm, a length of 500 mm and a resistance of 2.2 Ohms, you will need a current source of 12 V with a load current of 12 A. Changing the length up or down will require a similar increase or decrease in voltage at the same force current
Electricity sources and connection diagram
Safe cutting is ensured by connecting to a regular 220 V household network via a car transformer. To adjust the voltage, a handle is provided in the single primary winding, with which the graphite wheel is moved and the voltage is removed from the corresponding area. This parameter can be changed within the range from 0 to 240 V. Connection to the current source is made through the terminal box.
When connecting a homemade foam cutting machine to the electrical network, you need to make sure that the phase does not fall on the common wire. All necessary parameters and connection diagram can be found on the transformer body. Before connecting to the network, you need to check the functionality of the device using a multimeter.
A simpler option for supplying current to the wire is to use conventional step-down transformers with taps from the secondary windings. In that case no need to adjust the voltage, since this value is always constant and sufficient to heat the wire to the desired temperature. You can select the desired value during the initial setup of the transformer by providing a certain number of winding turns in the circuit.
You can also heat the wire for cutting foam using household appliances. The following nuances are taken into account:

It must be taken into account that cutting tool When energized, it will immediately be hot, so it should not be touched to check the temperature.
To make a thermal knife for polystyrene foam or foam rubber, it does not require a significant investment of time and effort. A wire of almost any diameter is suitable for this, but with unknown parameters (diameter, resistance), you need to increase the power gradually, first connecting low-power current sources. Great value has reliable contact insulation and phase position control, which cannot be connected to the wire.