A winch is an indispensable device both in the household and in the garage. Lift a roll of roofing felt onto the roof, throw a couple of bags of cement into the second floor window of a private house under construction, pull the engine out of the hood, and drag the broken car itself into the garage... This is an incomplete list of tasks that can easily be done alone with its help.
Drum-type devices for lifting or moving heavy objects differ in the way they transmit torque. From our school physics course we know how the shoulder works. Losing in speed or distance, we gain in strength. The phrase of Archimedes: “Give me a fulcrum, and I will turn the Earth upside down” precisely describes the principle of operation of the winch.
IMPORTANT! When working with such a device, the support points are the body and the place where the winch is attached. Both elements must be reliable.
Hand winch, with the help of an attached shoulder - increases human strength so much that one operator can move cars or lift weights of several hundred kilograms. With the same (from a mechanical point of view) principle of operation, these devices have various ways execution.

Manual drum winch - varieties
A hand winch with a drum is a classic of the genre. In addition to the common element - the pulley on which the cable is wound, the devices have different types of drive.

A large, main gear is firmly attached to the drum. The entire load falls on it, and on the fastening. Therefore, the reliability of the elements must be at the proper level. In mesh with the main one, there is a small driving gear.
The ratio of the number of teeth is the value of the gear ratio. In other words, gain. The drive gear is integral with the drive shaft. Since we are talking about hand tools– a handle for rotation is put on the shaft.
The length of the lever also affects the degree of reinforcement. The larger the handle arm, the less effort you need to apply.
With the help of such devices, you can single-handedly lift several centners of cargo or move a car weighing 2-3 tons. At the same time, the rotation speed of the drum is quite high.

The design consists of two or more pairs of gears, each of which has a gain of tens of times. With sequential engagement, these coefficients add up, multiplying the force.
The other side of the coin is a proportional reduction in speed. Having such a winch, you can slowly vertically lift loads of more than a ton, but if you have to work with two bags of cement, the lifting time will stretch for tens of minutes.
At home, everyone cando it yourselfa winch made from bicycle parts, as well as other equipment. Pwith a powerful ratchet mechanism this tool will help not only when repairing your car, but will also be useful in small industries.
Necessary tools
In progress You will need a set of parts that can be easily removed from an unnecessary bicycle, and additional materials:
- the chain is in working order;
- star;
- rear wheel axle with bushing;
- a pair of sheet steel strips 50x400x3 mm;
- block with carabiner;
- open hook;
- cable.
During production you need to stock up on tools:
- grinder or stationary cut-off machine;
- drill or high-speed screwdriver;
- welding equipment;
- metalworking yews;
- hammer 0.5 kg.
It is more convenient to carry out disassembly/assembly operations on a workbench.
Manufacturing instructions
Step-by-step manufacturing algorithm:
- We convert one of the flanges of the bushing with holes into a ratchet. To do this, we sequentially open all the holes with a grinder, forming teeth of the required profile.

- We bend two metal strips in four places using a vice and a hammer so that an internal hexagon is formed, which will serve as the body.

- We drill holes for tightening the frame with M8 bolts and for installing the bicycle shaft axis. We assemble the hub in the same way as on a bicycle.

- We make a six-pointed sprocket for the chain and a shaft with a U-shaped housing for it.

- We mount the handle with the ratchet at such a distance that the mechanism is rigidly blocked and weld the back sheets of the body.

- We fix the power loop on the upper part of the body.

- We screw the cable onto the shaft using a screwdriver.

- We securely attach a hook to the end of the cable.
We hang it on a beam and test the structure, starting with small loads. The equipment is capable of lifting loads of 50 kg or more without problems. This process is presented in detail in a video from a professional master.
Hi all!
I have long wanted to buy a winch. None of the store options costing up to 3,000 rubles. did not inspire confidence, and for a long time I thought about ways self-made winches.

Somehow I found information on the Internet that you can use a brake ratchet from a truck as a basis. The advantages of such a winch are that there is no need for a stopper, it works in both directions.
In addition to the standard set of tools, you will need electric welding.
Winch Application
Such a winch will help not only on the road, or rather off-road, but also in the garage. With its help, you can independently pull a faulty car into the garage, onto a mini overpass (2 boards and 2 stumps), it will also help you lift or lower the weight into the basement, and remove the engine from the car.Materials for production
- Ratchet az9100440005 - 587 rub.
- Pulley 21013701051 2x116 r. =232 rub.
- Rope 10 m x 30 r. = 300 rub.
Disassembling the Chinese ratchet

First, I cut off the rivets and removed the covers. I also unscrewed the plug and pulled out a spring and a ball - this was a worm stopper, it will no longer be needed.

Making a winch
It was decided to make two drums for uniform winding of the cable. To make the drum cheeks, collapsible VAZ generator pulleys were purchased.Although you can make such washers yourself, I liked this option better. No bearings were needed.

A 10 m long cable was also purchased.

I couldn’t find a shaft with the corresponding splines, and I didn’t really look for it, so I just decided to make a shaft from a tube and weld it into the gear.

The shaft was inserted into the gear with a gap; to select it, I decided to make a spacer from a thin-walled tube.

I cut out a centering insert from a thin-walled tube.

This is what the installed shaft looks like.

I welded the shaft to the gear and cooled the entire structure during testing. The rivet holes were threaded for screws.

Now it was necessary to widen the holes in the inner cheeks of the drums, for this you need a turner. Or a good driller)

Cheeks prepared for installation.

To reduce the size of the structure, the screw heads were cut down almost to the root, which resulted in a saving of 11 mm and a significant reduction in the amount of dirt getting between the cheeks and the ratchet body.
And the dirt that gets there anyway will come back out when the mechanism is injected. Using fragments of a cutting wheel 1 mm thick, I leveled the gap between the cheeks and the body and scalded it.

It turned out something like this.


I painted it a little for appearance.

First winding of the cable. For now, by hand, it is unlikely that it will be wound as neatly at work.

I decided to adjust the length of the cable by simply pulling the excess to the side. The ends of the cable were soldered and slightly bent.

At first I wanted to find some kind of block for the cable, but I decided to just make an equalizer with a hook, because... the cable is wound almost evenly.
For the cable guides, I decided to use the inner races from single row ball bearings.

Having sawed through the outer clips, I removed the inner ones, and for some reason sawed them too.

I decided to weld the guides to the strip.


WITH reverse side I welded the hook, having previously selected a position in which the hook location would be in line with the guides.


Painted it for appearance.


I decided to do a little test.
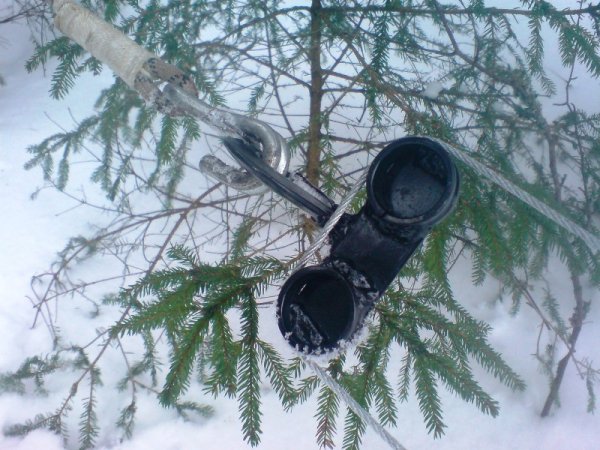

I didn’t dig in on purpose, but such a winch pulls a stalled car. If you need more force, you can make a loop at one end of the cable and throw it over the drum. Instead of an equalizer, use a block. In this way, one side of the cable will be wound, the other will slide along the drum. In this case, the block will provide double traction.


There are many ideas for different crafts based on a bicycle and its individual parts. Some of them relate to household work, in particular, tillage in garden plots. The device in the form of a winch, powered by a bicycle drive, is simple and allows one person to perform plowing, hilling, and loosening operations without greatly tiring him.
To make a bicycle winch, you need a road bicycle of a conventional design with a closed frame. You will need: a broken motor from a moped, for example, type D-6; large bicycle sprocket; hub from a moped wheel together with an axle; metal corners, tubes, sheet.
The bike is not modified; Only the chain lengthens.
A small modification of the moped engine is being carried out. Cut out the upper wall of the cover and crankcase above the drive sprocket. This is done between the bosses, leaving them and the existing thread. Reduce by lathe the thickness of the sprocket ring gear is up to 2.6 mm - this is necessary to be able to place a bicycle chain on it.
The crankshaft is decompressed, the connecting rod is removed, and everything is compressed again. Graphite lubricant is placed in existing bearings. They make a lid from a sheet of metal and cover the place where the cylinder is attached. The crankshaft will play the role of a flywheel in the craft.
The converted motor is attached to the bicycle frame in its upper part. Place it with an asterisk down. The chain is lengthened so that it can cover three sprockets - two that are on a bicycle and one in a converted moped engine.
On the left side of the bicycle handlebar, install a handle and run a cable from it to the motor. It is used to control the clutch.
The converted bike is suitable for normal riding. To start driving you need to disengage the clutch. When the road goes downhill, it is turned on - the flywheel begins to rotate and store energy, which will help in the future to overcome climbs.
From a converted bicycle you can make a winch that will be used for household work. In place of its rear wheel, an attachment is installed, consisting of a frame carrying a winch drum equipped with a sprocket and a cable. It is also equipped with lugs and a cable management loop.
The drum is made from the hub of a moped wheel, to which round metal flanges are attached to the sides. Equipped with a large bicycle sprocket.
There are two lugs. They are made using 12-centimeter-long pieces of corners. The outer edges of the shelves are sharpened, which ensures their easy entry into the ground. The corners are welded to the edges of a half-meter piece of corner, which serves as a support on the surface of the earth.
For the cable loop, soft wire is used. It is attached to the frame so that the tensioned cable lies in the middle of the drum surface.
The attachment is attached to the bicycle in two places: with a pin in the place where the rear wheel is installed; clamps covering two frame tubes in the space between the first mount and the carriage with pedals.
First assembled using welding, bottom part consoles. Then an axle is attached to it, on which the winch drum is installed. The upper part is placed on top and secured to the bicycle frame. In this case, the chain is first installed on all three sprockets.
The winch is a mechanism that is widely used in many areas of life. The principle of its operation is to transmit traction force from the drive drum using a flexible element (chain, cable, rope).
Depending on the source of applied force, winches are divided into mechanical and electrical. You can make both of them yourself with a little effort and patience.
Homemade winch from a ratchet
Quite often there is a need to lift a heavy load and fix it in this position.
This could be, for example, a massive basement lid or large parts of a car.
A homemade ratchet winch will help you cope with such a difficult task. .
Most often, to make homemade winches from a ratchet, a worm gear from ZIL— it is the most compact and can withstand weight up to half a ton.
Ratchets from KamAZ and MAZ able to withstand weight up to two tons or more.
This is the most suitable option winches for home use. A solid load capacity will allow you to cope with relatively large loads if necessary. Lifting or dragging them. Let's take a step-by-step look at the entire process of creating a winch from KAMAZ ratchets.
To make a lifting device of this type you will need:

Two rear ratchets of a Kamaz car: left and right

Hooks for towing, 2 pcs.

Cable with a diameter of 4-5 mm.

Fist for releasing brake pads on a Kamaz vehicle

Hook bolt

Disassemble the brake ratchets, removing everything except the gear, as shown in the photo.

Next, cut off the pawl from the expanding fist and use the corner grinder, popularly called a grinder, cut slots identical to those located on the other side. Ideal option such a shaft will be manufactured in a mechanical workshop at milling machine. Cutting slots with your own hands will require careful attention to detail and compliance with the rules and regulations for safe handling of power tools.

Take covers from an unnecessary used ratchet and make two washers for the future winch.

Weld the structure as shown in the photo and drill a hole along the diameter of the cable to fix it.

Install the ratchets on the splines, install the bolt and hang the tow hook on it. The structure can be strengthened by putting a bushing on the bolt. I did this using a bushing from an internal combustion engine mount.

We install a second towing hook on the free end of the cable.

We make and install a handle for easy operation of the winch.

Let's test the resulting mechanism. The winch is ready for use.
At frequent use In a homemade winch made from a ratchet, the worm mechanism can quickly fail; in this case, it is better to replace the gears with stronger and more wear-resistant ones.
Homemade electric winch
A homemade electric winch will come in handy in the most difficult situations.
It will help pull your car out of a deep quagmire, saving money.
Its work is based on the principle of using the power of all kinds of devices, such as:
— various engines;
— generators from tractors;
— starters converted for engines.
Making an electric winch with your own hands is not difficult. You can use it to conduct household, for example, to use in the plowing process personal plot, construction work, as well as in any other operations related to the movement of goods. Let's consider step by step instructions creation of this mechanism.
First you need to determine the necessary components:

Electric motor. For a home winch, it is not advisable to use a heavy-duty motor designed for a three-phase network. A small motor with a power of 2.2 kV and a voltage of 220 V is quite sufficient. We offer an electric motor more powerful than in the video. Practice has shown that a device with a power of 1.1 kW cannot cope with plowing. And the 2.2 engine was tested at the dacha.

Electromagnetic starter PM2 16A, remote control, capacitor, wire PVA 3X1.5

Gearbox 1:40.

Pulleys (2 pcs) and a belt for arranging the transmission from the electric motor to the gearbox.

Bearing 180306 in housing (2 pcs).

Drum shaft.

Splined part from the outer grenade (2 pcs).


Rolled metal of various thicknesses and sections for the manufacture of frames and drums.

Hardware for mounting the engine, gearbox and drum.
To carry out work on the manufacture of the mechanism, you will need: locksmith tool, grinder, drill and welding machine.

Kinetic diagram of a winch with an electric motor
Before you start making a frame for the unit, you need to sketch a sketch of the future metal structure indicating the dimensions. To do this, you need to take a sheet of paper and draw a frame, then remove everything with a measuring tool. installation dimensions and plan the placement of the electric motor, gearbox and drum on the sketch. The video posted above will make drawing up a drawing easier. Based on the sketch, it will be easier for you to prepare the necessary rolled metal and hardware for the future unit.

From the pipe rectangular section We weld a common frame on which we mount the electric motor and gearbox with installed pulleys and a screwed base made of profile pipe. To ensure that the belt does not sag, we place the engine platform on canopies, then spot welding We weld the canopies to the frame of the unit, as shown in the photo.

We install the gearbox on the corners. We put on the drive belt and check its tension. We weld the base of the gearbox.

Let's move on to making the drum. We weld metal washers to the pipe with a diameter of 159 on both sides, as shown in the photo.


Next we proceed to welding and assembling the shaft. We weld the splined part of the grenade into the end of the shaft as shown in the photo and insert the shaft inside the drum. We stuff bearings and housings onto the shaft and spot weld the shaft to the drum. We weld the second splined part of the grenade to the gearbox shaft.

We align the drum using available means to maintain the alignment of the gearbox shaft and the drum. Next, using a corner, we secure the drum bearing housings with spot welding.
We connect the electrical equipment of the winch and do a test run.
If the testing was successful, turn off the power supply, remove the electric motor and gearbox and weld the joints. Then we put the winch mechanisms in place. We fix the cable on the drum. On the other side of the cable we install a tow hook. A homemade electric winch is ready.
This mechanism has a fairly large load capacity, but requires time to assemble and lack of humidity.

For safe work with heavy loads, it is advisable to equip the electric winch with a small and simple remote control.
Homemade winch for farming
All kinds of winches are an irreplaceable thing for motorists. But a homemade winch for the farm can also be successfully used.
Here most often similar devices used to move goods around horizontal surface, for example heavy logs.
Farmers often use winches, installing it above the attic opening, thus moving loads between in different parts premises.
And some manage to use a homemade winch to plow the land.
To do this, just secure it to the edge of the site, hook the plow to the end of the cable and turn on the winch.
The mechanism pulls the plow, and the person can only give it direction. Using a winch, you can not only plow the ground, but also carry out all cycles of tillage.
We offer a winch for home work, or more precisely for hilling potatoes based on an angle grinder. Almost nothing is needed to make it. We present it as a modification of our winch with an electric motor.
When the engine turned out to be low-power, and I still had a new one, the idea arose to remake the drive. We decided to use an angle grinder. What came out of this is up to you to judge. We will tell you how the modification took place.

Let's start with altering the frame; the engine platform must be adapted to the angle grinder. The canopies and the original appearance of the site remain unchanged. The only thing you need to do is raise it on the frame with the corners to give tension to the belt.

The grinder has threaded holes for attaching handles. It is in them that we insert the bolts to secure the angle grinder to the platform, additionally weld the corner to the platform, as shown in the photo, and fasten electric drive another bolt.


Then we weld the corners to the frame and raise the platform. We put a pulley on the grinder, put on a belt and carry out a dry test. Next, we carry out full testing on a potato field.

Homemade mechanical winch
IN emergency situations on the roads, a homemade mechanical winch will become your indispensable assistant.
It will not take up much space in the trunk of any car and will allow you to solve the problem without involving strangers.
To operate this type of winch, you only need your physical strength. A homemade mechanical winch works on the principle of a lever.
By applying force to the lever, you wind the cable around the axle, and the longer the lever and the greater the physical force applied, the more weight can be moved
The winch helps you cope with numerous complex tasks, therefore, its presence is desirable for every practical person.
But this does not mean that you need to spend a lot of money to purchase it. The design of the winch is quite simple and allows you to build it from available materials.
You will need:
- a section from a pipe;
- strong cable;
- a strong stick.
A piece of pipe will serve as the basis for such a winch; we attach a cable to it, and make a handle from a stick.

If there are no suitable sticks nearby, take a second piece of pipe and make a handle from it. That's all - a do-it-yourself winch!
When force is applied to the handle, the tube mounted on the axle begins to rotate and wind the cable around itself. The axle must be securely fastened, for example, driven well into the ground.
And this must be done at an angle so that all the elements of the homemade winch do not jump off the axis during operation.
Homemade winches for cars
Today, bad roads, numerous holes and potholes are everywhere, which makes it difficult for motorists to travel normally.
You can easily get stuck somewhere and hope for help from strangers.
However, it may be delayed, so it is better to have a backup option that does not depend on external factors and assistants. In such situations, a winch can save you.
Not every car is equipped with it, because high-quality winches are quite expensive, and those that are cheaper are short-lived and do not always have enough power to rescue a seriously stuck car.
That's why the best option homemade winches for a car are considered.
Such winches can be either simple and made by hand in a maximum of 30 minutes, or more advanced, but also homemade.
Selected for you: