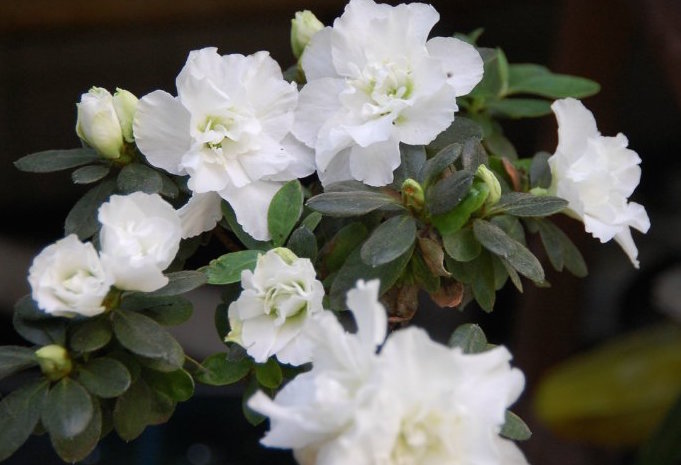
The beautiful azalea is the star of flower collections and is known for its capricious disposition.
She requires a careful attitude, a lot of attention and care. Provide her necessary conditions quite difficult, but possible.
The main thing is to strictly follow all the rules for caring for and replanting azaleas at home.
Transplanting and propagating azaleas at home requires special attention. In order for the plant to continue to develop well and delight the grower with its beauty, it is important to take into account many nuances.
Care and reproduction
In this article we will try to answer questions that interest many gardeners:
- how azalea flowers reproduce and how to care for them;
- how to breed and how to plant azaleas at home?
How to propagate at home?
You can propagate azaleas from spring to August in several ways: cuttings, seeds and dividing the bush. This is painstaking work that requires a fair amount of patience from the grower.
How does azalea propagate at home?
Cuttings
The most reliable method is considered to be propagation of azaleas by cuttings, which gives up to 90% success.
How to propagate indoor azalea at home from cuttings? This procedure is carried out as follows:
- After a healthy plant has flowered, cuttings about 10 cm long are cut from it - for this, the tops of six-month-old shoots are taken. The cuttings are cut obliquely directly below the bud.
- The three or four lower leaves are carefully removed, leaving petioles of about 0.5 cm, and the remaining leaves are cut in half.
- For better rooting, cut azalea cuttings are immersed in a solution of Zircon, Kornevin or Heteroauxin and left in it for 5-6 hours.
- Next, a layer of drainage up to 3 cm thick is placed on the bottom of the bowl or box and sprinkled with a layer of sand 2 cm thick. Then the container is filled with a nutrient mixture with an acidic reaction.
It is best to use ready-made soil for azaleas or a mixture of equal parts of coniferous soil (rotted pine needles) and peat.
- The cuttings are planted in the substrate, deepening them to 3 cm and maintaining a distance of 4 cm between them. After this, the soil is thoroughly shed.
- The container with the cuttings is covered with film, thus creating a “mini-greenhouse”, and placed in a light, shaded place. Next, the cuttings are regularly sprayed and ventilated daily in the morning, opening the film for 35-40 minutes.
The soil should always be slightly moist. Also experienced gardeners Bottom heating is recommended.
- At a temperature of 25 to 30 ° C and a humidity of 80%, the cuttings usually take root in a month or a month and a half, after which they can be transplanted into permanent pots. 7-8 days before transplanting, the rooted cuttings begin to “harden off”. First, the “greenhouse” is opened for a couple of hours, then for a longer time. After a week, the “greenhouse” is completely opened.
- Next, the cuttings are transplanted into separate containers and covered with film again for 11-12 days. After two to three months, the tops of the young bushes are pinched for the growth of new shoots and better tillering. If the plant has produced its first buds, it is recommended to remove them.
- After the azalea overwinters, it is pinched again in early March. In this case, you can trim up to 6 young shoots. Next, the plant is transferred to a new container with a diameter of about 11 cm with holes for water drainage and a good layer of drainage.
In the future, the young azalea is cared for like an adult. In a couple of years, it will reveal itself in all its glory and will delight the gardener with abundant flowering.
Many plants are propagated by cuttings at home, such as Impatiens, Crassula, Croton and many others.
Seeds
Azalea propagation indoor seeds is an even more complex and time-consuming process.
The seeds of the plant germinate with difficulty and do not retain varietal characteristics. In addition, they remain viable only for 3 months.
But it's worth a try, because it's very exciting process, as a result of which you can grow azaleas with completely unexpected flower colors.
The algorithm for planting seeds is as follows:
- In early March, small plant seeds are mixed with sand and sown on a moistened substrate surface. The container is covered with glass and placed on sunny place— azalea seeds are photosensitive and germinate only under the rays of the sun.
- Next, regularly ventilate the “greenhouse” and water the substrate from a fine sprayer with soft and well-settled water. It can be softened with oxalic acid by diluting 4 g of the substance in 10 liters of water.
When watering, do not over-moisten the soil so that the seedlings do not rot.
- If the seeds are fresh, the first shoots can be expected in 14-15 days or a little earlier. After 3 weeks, all seeds will germinate. Their germination rate is up to 70%.
- When the cotyledons are almost completely expanded, the seedlings, together with a clod of earth, dive into another container, maintaining a distance of about 3 cm between the sprouts. The seedlings are buried to the very leaves. The composition of the soil is the same as for cuttings.
- In August, the grown small bushes are transplanted into separate pots no more than 7 cm in diameter and cared for in the same way as cuttings.
Azaleas grown from seeds begin to bloom after 5 years.
At home, you can grow not only azaleas from seeds, but also many others. beautiful flowers, such as Geranium and Beloperone.
Dividing the bush
Another way to propagate azaleas is by dividing the bush.
To do this, use only a healthy branched plant at least 3-4 years old and with a well-developed and intact root system. After flowering, the azalea bush is removed from the pot and carefully divided into several parts, trying not to damage the thin roots. Next, the divisions are planted in separate shallow containers, the soil is well poured into them, and the plants are placed in a shaded place for a week.

Transfer
How and when to replant an azalea at home?
Azaleas are replanted in the spring, after flowering.
Otherwise, the plant may lose buds, flowers and leaves. It will be difficult to save him.
How to replant an azalea? When transplanting an azalea, it is important to know that it has a very sensitive root system, which has its own microflora. Mushrooms live on its roots, providing the azalea with adequate nutrition. Therefore, it is very important not to disturb this symbiosis during transplantation.
The correct substrate is very important for the healthy development of the plant. It is desirable that it be acidic, with a pH of 4.5 to 5.5, light and nutritious.
You can take ready mixture called “Azalea” or prepare the soil yourself by taking 1 part peat and 2 parts rotted pine needles. Or you can mix peat, humus, sand, turf and leaf soil and add 5 parts of coniferous soil to them. Another option:
- part of sand
- part of dried and crushed sphagnum moss
- 2 parts of rotted pine needles.
For azaleas with a shallow root system, the new container should be selected wide enough and not very deep, but 5 cm higher than the previous one.
A layer of drainage at least 3 cm thick in the form of large expanded clay or broken shards is placed at the bottom of the pot. A layer of pine bark is placed on the drainage (it helps increase the acidity of the soil), and then the container is filled with prepared soil. It is useful to add Trichodermin to the substrate to prevent fungal infections and rot.

Before transplanting azaleas, cut off dry twigs and faded buds and clear the stems of dried leaves. Next, the bush along with a lump of earth is taken out of the pot and placed with its roots in a basin with filtered or boiled water and “Kornevin” or “Zircon” dissolved in it.
The procedure is repeated, changing the water twice. The roots of the azalea are very tightly entwined with a lump of earth, so it is impossible to completely remove it, and it is not necessary. However, such bathing helps to wash away most of the salts that have accumulated in the soil over the year.

Before immersing the plant in water, it is recommended to make cuts in the earthen coma using a knife - these should be grooves about 0.5 cm wide on the sides, bottom and top. This will help the roots become saturated with moisture, making it easier to settle in and germinate in the new soil. Otherwise they won't be able to get enough nutrients and dry out, which can lead to the death of the plant.
After part of the soil (usually no more than a third) is washed away from the roots, you can begin replanting, or rather, transferring the flower to new pot. It is taken out of the basin and, when the water has drained, placed in the center of the container, and then the roots are evenly sprinkled with earth, lightly compacted. It is very important not to bury the root collar of the plant.
If the azalea has grown too much, it is divided into bushes by cutting the root ball into several parts according to the number of divisions. Each bush with a lump of earth is placed in a separate pot.
What to do after transplanting an azalea?
After transplantation, the azalea is watered generously with the water in which it was soaked and placed in a warm and bright place with shade from the sun's rays. Watering is repeated after four days. The plant is kept in partial shade for about 12 days. It is useful to spray a flower that has not yet matured after transplantation with Zircon or Epin.
You should also protect the weakened plant from drafts. You should not immediately fertilize the transplanted flower; you must give it the opportunity to adapt and get stronger.

Replanting after purchase
It is not advisable to immediately subject a newly purchased azalea to the transplant procedure.
Let the plant remain in quarantine for several days - separately from other flowers.
During this time, it will adapt to unfamiliar conditions and will be able to move painlessly to a new pot.
Often azalea is sold in a store in in bloom and, according to the rules, it is impossible to transplant it at this very moment.
However, if it is flooded and sick or its capacity is clearly too small, you can make an exception and change the soil and pot for the plant. But this must be done very carefully, using the transshipment method, only slightly cleaning the root ball.
`````````````````````````````````````````````````````````````````````
Azalea is a rather special flower for home gardening. Even from the moment you chose it in a flower shop, it will urgently require close and almost constant attention to itself, as well as especially careful care.

But there is no reason to worry. Thoughtful care for azaleas at home will not allow this to happen. beautiful plant die. On the contrary, it will actively grow and delight its owner with beautiful and lush flowering. The main thing is to know what to do and not make fatal mistakes.
One of the features of azaleas is the rather unusual microflora around the roots. If its integrity is violated, the flower may die. You could say it's tender root system- This weak point azaleas. Therefore, in this regard, you should be very careful with the plant. Especially when moving from one pot to another.
But there is no doubt that this article will tell you in detail how to care for azaleas at home after purchase.
How are azaleas kept in stores?

In large and small shops that sell flowers, any plants are always brought from so-called nurseries. Most flower growers - both amateurs and professionals - know that this flower itself is quite capricious in terms of care. Manufacturers artificially prepare azaleas for flowering and subsequent sale.
In these nurseries, flowers are treated with special synthetic agents that put the plant into a kind of sleep. The flower looks quite presentable for sale, and can bloom for several months, thanks to the fact that it received special fertilizers at the nursery. Often the soil is even overfed with them.
However, the azalea root system, which we have already mentioned, does not develop in any way, because, in fact, it sleeps. Therefore, the plant, in the end, often gets sick - the roots of the flower die from the fungus. This is considered one of the main reasons why new owners do not even have time to properly begin caring for azaleas at home after purchase.

Most popular variety For indoor floriculture, the variety of evergreen Indian azalea is considered. The buds boast a variety of shapes and colors.
There are some details that can affect the cost of a flower:
- Its variety is a garden or indoor azalea;
- The size of the plant itself and the roots - accordingly, the larger, the more expensive;
- How many buds does a flower have?
Most online stores have consultants who will not only help you choose suitable flower or decide on the variety, but they will also be able to tell you everything you are interested in about caring for azaleas at home.
How to prevent a flower from dying

When you have made a long-awaited purchase and brought an azalea to her new home, do not rush to take it out of the store packaging. It is better to leave the plant alone for about half an hour so that the flower gets used to the microclimate of the apartment.
It is important to decide on the permanent location of the plant. Here are some recommendations:
- A space with good lighting, but without direct sunlight;
- Coolness – approximately +16-18;
- Humidified air.
It is very important to examine the soil of the azalea - to do this, you need to remove it from the flowerpot. In stores, they often fill the flower with water to make it look fresher.
What to do if the soil is too wet:
- Remove the flower from its pot and wrap the roots and soil with paper that absorbs moisture well;
- Repeat this action until the soil is sufficiently dry, but this must be done extremely carefully due to the fragility of the roots.
If the plant is too dry:
- It needs to be placed in a container of water directly in the pot for about sixty minutes. The water should reach the edges of the pot;
- Then you need to take out the flower and allow the excess moisture to leave - to do this, place the pot in a saucer or a special tray lined with expanded clay so that the soil and liquid no longer combine;
- You should not replant the flower immediately, especially if the flowering period has begun.
Adaptation to a new room
You can be sure that the azalea has fully adapted only when, after moving from the flower shop to the home windowsill, the plant fades and sprouts further shoots. During such a rather exciting period, you should care for the flower with all care. And carefully observe how he behaves.
Azalea does not like heat very much, so it is better to move the pot away from heating systems. In addition, they are very poorly affected by low humidity levels. The more coolness it gets during habituation, the greater the chance that the flower will remain alive.
There is also no need to rush with fertilizers. While in the nursery, the azalea is placed in already overfed soil so that the flower can live quietly until it reaches the store counter.
If you follow all these rules, all you have to do is wait.
A special spray called “Epin” can help with habituation. This substance is a special biostimulant for indoor plants.

Its action helps the plant to reveal its own protective functions, increases the level of immunity and resistance to stress. The instructions for use can be read on the packaging, and spray about once every ten days.
What care should I provide to the purchased plant?

First of all, the azalea needs to get used to the new environment where it found itself after the store. Caring for azaleas at home after purchase is actually quite troublesome. Due to its very capricious nature, a flowering and fragrant plant just yesterday may lose its buds and leaves in just two or three days.
If the leaves begin to fall and the plant rapidly loses its luxurious look, this can be called a harbinger of the death of a flower. That is why, before buying an azalea, you need to be prepared for something like this and remember exactly how to act in such a case.
In order for the newly acquired azalea to delight your eyes with its beauty and lush blooms for a long time, it is extremely important to strictly follow the basic rules of care.
Please note that after purchasing the azalea, it is advised to transship it. But you shouldn’t replant it right away.
Transshipment is quite easy to do:
- You need to carefully remove the plant from the store pot along with a lump of earth;
- Move it along with the soil to a new spacious flowerpot;
- Close empty space special mixture;
- Try not to over-wet the soil.
How to save a newly acquired flower? Under what conditions will azalea be able to more easily adapt to a new environment?
The roots also require special inspection. Symbiont mushrooms live on its roots, which provide the azalea with nutrition. In soil with a high alkali level, these symbionts die. And, as is easy to understand, the plant too. This is why flower roots should not be washed.
The substrate mixture should be acidic and allow water and air. It is better to buy soil already prepared for this flower. It is recommended to replant young flowers every year. And when the plant has matured, then once every two to three years. The top layers of soil are replaced, trying not to affect the fragile roots.
Temperature

The most favorable temperature for the growth and development of azalea flowers will be from +10 to +15. It's okay if the temperature is a little higher. The main thing is that it does not exceed +20. But during the summer heat it is quite difficult to provide the plant with such a regime. At the same time, during the summer season, azaleas go into hibernation.
To support vitality plants, outdoor shade is also perfect. If there is such a possibility, great solution will bury the flower in the ground right along with the pot. But first, it will be useful to pull nylon tights or stockings over the potty. This is necessary to prevent pests from attacking the plant. Experienced flower growers they say that pests really like the earthen mixture for this color.
As the fall season approaches, buds begin to form. It will be useful to lower the temperature level for the flower to +6 degrees. And when the flowers appear and begin to bloom, you can raise the degrees to +15. Remember - the cooler the azaleas are, the longer the flowering will last.
Azalea does not tolerate hot weather. But under no circumstances should you water it. cold water! This risks causing fungus to develop. In summer, the pot can be lined with ice cubes. This will not only protect the plant from the heat, but will also add humidity to the air.
Humidity level
This is one of the most important factors. Dry air can simply kill a flower.

Here's what you can do to keep humidity at the proper level:
- Choose a deep tray for the pot;
- Cover the tray with pebbles and moss;
- Make sure there is moisture in the pan;
- Spray the leaves during flowering;
When spraying with a spray bottle, try to keep the droplets small.
Lighting
Azalea really just loves bright light. At the same time, it should not be exposed to direct sunlight - this can cause it to wither. Excellent for azaleas the room will do, located in the northern or western part of the apartment.
You can place the flower in the southern room, but then it is better not to place it on the windowsill. Good way out will buy a special stand and place it near the window.
How to water correctly

As with any plant, water is a very important detail that saves them from withering.
For home flowers, the following are of great importance:
- Water quality;
- Temperature level;
- Frequency and abundance of watering.
Never water your azalea with cold or even ice water! An unexpected change in temperature conditions can become a real stress for the flower.
To the point that this can serve as some kind of signal for the plant that autumn has already arrived. And then the azalea will shed both flowers and leaves. Ideal for azaleas would be water at the same temperature as the flower itself.
Only soft water is needed. It would be better to boil the water first, then let it cool. It is also important to water only with the top layers of water in the container, trying to prevent sediment from getting into the soil.
If you water the soil with regular water, the soil will change from acidic to alkaline because it contains a lot of mineral salts. After boiling, they become the aforementioned sediment. To acidify the soil a little more, you can add three drops of juice to a liter of water.
If you bury your azalea in the street soil during the summer, rain will only benefit it.
This plant will not be able to tolerate drought. If you notice that the leaves or flowers have begun to droop, this is the first signal that the flower needs to be watered immediately. Nothing like this should happen. It is better to maintain the moisture content of the soil mixture at normal levels. Excess liquid can also harm fragile roots, and they can begin to rot.
This plant loves water, so it’s a good idea to water it abundantly. Typically it should be watered every other day. But if the air in the room where you placed it is dry (this happens especially often in winter period), then it will be better to water every day.
You need to water the plant from above, and it is better to drain excess water from the pan. As you probably already understood, you need to monitor the soil moisture so that the leaves do not start to fall.
"First aid" for azalea

What should never be allowed:
- Droughts;
- Heat;
- Excess moisture;
- Direct exposure to sunlight.
- Sudden change in temperature;
What to do if the plant begins to wither:
- Inspect the soil in the flowerpot;
- Moisten if necessary;
- Monitor air humidity;
- The location may not be the most suitable - move the plant to a cooler place, away from sunlight.

If the azalea begins to shed its leaves, this is most likely the first signal that the plant is beginning to die. What to do:
Azalea is a very demanding and capricious plant. It requires not only care in accordance with all the rules, but also a lot of attention. It often happens that even after all the rescue operations, the azalea cannot be brought back to life. Therefore, it is better to monitor the flower every day than to bring it to such a state and then frantically try to save it.
If you properly and carefully care for your flower, it will delight you with its luxurious flowering for many years.
An inexperienced gardener will probably find that azaleas take a lot of time and bring a lot of trouble. But in practice, all these rules gradually become a habit that will only bring pleasant emotions.
The beautiful azalea is the star of flower collections and is known for her capricious disposition.
She requires a careful attitude, a lot of attention and care. It is quite difficult to provide her with the necessary conditions, but it is possible.
The main thing is to strictly follow all the rules for caring for and replanting azaleas at home.
Transplanting and propagating azaleas at home requires special attention. In order for the plant to continue to develop well and delight the grower with its beauty, it is important to take into account many nuances.

Care and reproduction
In this article we will try to answer questions that interest many gardeners:
- how azalea flowers reproduce and how to care for them;
- how to breed and how to plant azaleas at home?
How to propagate at home?
You can propagate azaleas from spring to August in several ways: cuttings, seeds and dividing the bush. This is painstaking work that requires a fair amount of patience from the grower.
How does azalea propagate at home?
Cuttings
The most reliable method is considered to be propagation of azaleas by cuttings, which gives up to 90% success.
How to propagate indoor azalea at home from cuttings? This procedure is carried out as follows:
- After a healthy plant has flowered, cuttings about 10 cm long are cut from it - for this, the tops of six-month-old shoots are taken. The cuttings are cut obliquely directly below the bud.
- The three or four lower leaves are carefully removed, leaving petioles of about 0.5 cm, and the remaining leaves are cut in half.
- For better rooting, cut azalea cuttings are immersed in a solution of Zircon, Kornevin or Heteroauxin and left in it for 5-6 hours.
- Next, a layer of drainage up to 3 cm thick is placed on the bottom of the bowl or box and sprinkled with a layer of sand 2 cm thick. Then the container is filled with a nutrient mixture with an acidic reaction.
It is best to use ready-made soil for azaleas or a mixture of equal parts of coniferous soil (rotted pine needles) and peat.
- The cuttings are planted in the substrate, deepening them to 3 cm and maintaining a distance of 4 cm between them. After this, the soil is thoroughly shed.
- The container with the cuttings is covered with film, thus creating a “mini-greenhouse”, and placed in a light, shaded place. Next, the cuttings are regularly sprayed and ventilated daily in the morning, opening the film for 35-40 minutes.
The soil should always be slightly moist. Experienced gardeners also recommend bottom heating.
- At a temperature of 25 to 30 ° C and a humidity of 80%, the cuttings usually take root in a month or a month and a half, after which they can be transplanted into permanent pots. 7-8 days before transplanting, the rooted cuttings begin to “harden off”. First, the “greenhouse” is opened for a couple of hours, then for a longer time. After a week, the “greenhouse” is completely opened.
- Next, the cuttings are transplanted into separate containers and covered with film again for 11-12 days. After two to three months, the tops of the young bushes are pinched for the growth of new shoots and better tillering. If the plant has produced its first buds, it is recommended to remove them.
- After the azalea overwinters, it is pinched again in early March. In this case, you can trim up to 6 young shoots. Next, the plant is transferred to a new container with a diameter of about 11 cm with holes for water drainage and a good layer of drainage.
In the future, the young azalea is cared for like an adult. In a couple of years, it will reveal itself in all its glory and will delight the gardener with abundant flowering.
Many plants are propagated by cuttings at home, such as Impatiens, Crassula, Croton and many others.
Seeds
Propagation of indoor azaleas by seeds is an even more complex and time-consuming process.
The seeds of the plant germinate with difficulty and do not retain varietal characteristics. In addition, they remain viable only for 3 months.
But it’s worth a try, because this is a very exciting process, as a result of which you can grow azaleas with completely unexpected flower colors.
The algorithm for planting seeds is as follows:
- In early March, small plant seeds are mixed with sand and sown on a moistened substrate surface. The container is covered with glass and placed in a sunny place - azalea seeds are photosensitive and germinate only under the rays of the sun.
- Next, regularly ventilate the “greenhouse” and water the substrate from a fine sprayer with soft and well-settled water. It can be softened with oxalic acid by diluting 4 g of the substance in 10 liters of water.
When watering, do not over-moisten the soil so that the seedlings do not rot.
- If the seeds are fresh, the first shoots can be expected in 14-15 days or a little earlier. After 3 weeks, all seeds will germinate. Their germination rate is up to 70%.
- When the cotyledons are almost completely expanded, the seedlings, together with a clod of earth, dive into another container, maintaining a distance of about 3 cm between the sprouts. The seedlings are buried to the very leaves. The composition of the soil is the same as for cuttings.
- In August, the grown small bushes are transplanted into separate pots no more than 7 cm in diameter and cared for in the same way as cuttings.
Azaleas grown from seeds begin to bloom after 5 years.
At home, you can grow not only azaleas from seeds, but also many other beautiful flowers, such as Geranium and Beloperone.
Dividing the bush
Another way to propagate azaleas is by dividing the bush.
To do this, use only a healthy branched plant at least 3-4 years old and with a well-developed and intact root system. After flowering, the azalea bush is removed from the pot and carefully divided into several parts, trying not to damage the thin roots. Next, the divisions are planted in separate shallow containers, the soil is well poured into them, and the plants are placed in a shaded place for a week.

Transfer
How and when to replant an azalea at home?
Azaleas are replanted in the spring, after flowering.
Otherwise, the plant may lose buds, flowers and leaves. It will be difficult to save him.
How to replant an azalea? When transplanting an azalea, it is important to know that it has a very sensitive root system, which has its own microflora. Mushrooms live on its roots, providing the azalea with adequate nutrition. Therefore, it is very important not to disturb this symbiosis during transplantation.
The correct substrate is very important for the healthy development of the plant. It is desirable that it be acidic, with a pH of 4.5 to 5.5, light and nutritious.
You can take a ready-made mixture called “Azalea” or prepare the soil yourself by taking 1 part peat and 2 parts rotted pine needles. Or you can mix peat, humus, sand, turf and leaf soil in equal parts and add 5 parts of coniferous soil to them. Another option:
- part of sand
- part of dried and crushed sphagnum moss
- 2 parts of rotted pine needles.
For azaleas with a shallow root system, the new container should be selected wide enough and not very deep, but 5 cm higher than the previous one.
A layer of drainage at least 3 cm thick in the form of large expanded clay or broken shards is placed at the bottom of the pot. A layer of pine bark is placed on the drainage (it helps increase the acidity of the soil), and then the container is filled with prepared soil. It is useful to add Trichodermin to the substrate to prevent fungal infections and rot. 
Before transplanting azaleas, cut off dry twigs and faded buds and clear the stems of dried leaves. Next, the bush, along with a lump of earth, is taken out of the pot and placed with its roots in a basin with filtered or boiled water and “Kornevin” or “Zircon” dissolved in it.
The procedure is repeated, changing the water twice. The roots of the azalea are very tightly entwined with a lump of earth, so it is impossible to completely remove it, and it is not necessary. However, such bathing helps to wash away most of the salts that have accumulated in the soil over the year. 
Before immersing the plant in water, it is recommended to make cuts in the earthen coma using a knife - these should be grooves about 0.5 cm wide on the sides, bottom and top. This will help the roots become saturated with moisture, making it easier to settle in and germinate in the new soil. Otherwise, they will not be able to receive enough nutrients and will dry out, which can lead to the death of the plant.
After part of the soil (usually no more than a third) is washed away from the roots, you can begin replanting, or rather, transferring the flower into a new pot. It is taken out of the basin and, when the water has drained, placed in the center of the container, and then the roots are evenly sprinkled with earth, lightly compacted. It is very important not to bury the root collar of the plant.
If the azalea has grown too much, it is divided into bushes by cutting the root ball into several parts according to the number of divisions. Each bush with a lump of earth is placed in a separate pot.
What to do after transplanting an azalea?
After transplantation, the azalea is watered generously with the water in which it was soaked and placed in a warm and bright place with shade from the sun's rays. Watering is repeated after four days. The plant is kept in partial shade for about 12 days. It is useful to spray a flower that has not yet matured after transplantation with Zircon or Epin.
You should also protect the weakened plant from drafts. You should not immediately fertilize the transplanted flower; you must give it the opportunity to adapt and get stronger.

Replanting after purchase
It is not advisable to immediately subject a newly purchased azalea to the transplant procedure.
Let the plant remain in quarantine for several days - separately from other flowers.
During this time, it will adapt to unfamiliar conditions and will be able to move painlessly to a new pot.
Often, azaleas are sold in the store in bloom and, according to the rules, they cannot be replanted at this very moment.
However, if it is flooded and sick or its capacity is clearly too small, you can make an exception and change the soil and pot for the plant. But this must be done very carefully, using the transshipment method, only slightly cleaning the root ball.
Beautiful, but capricious. In order for the plant to be healthy and bloom profusely, its owner will have to be patient, have a lot of theoretical and practical skills, and also create comfortable conditions for the living window sill decoration.
The azalea flower requires attention from the first days of its stay in the house. Often, a bush brought from the store, covered with a lush head of flowers, literally after a few days or weeks begins to wither, sheds flowers and foliage, and then dies. Some azaleas cannot recover after flowering and also dry out.
When faced with a similar situation, a novice gardener blames himself or is convinced that the azalea is a disposable flower and cannot be kept at home. This opinion is wrong! With proper preparation and diligence, beautiful azaleas actively bloom, grow and even reproduce.
Azalea after purchase: risks and necessary measures
To ensure a long and happy indoor life for the flower, the azalea is carefully examined immediately after purchase.
Nurseries producing domestic plants care little about the development of the root system and the further growth of azaleas. Artificially brought to the flowering stage and planted in shipping pots with a small amount of peat mixture, the shrubs are additionally treated with retardants, synthetic substances that put the crop into a kind of sleep. Long-acting fertilizers are added to the soil mixture, a supply of which maintains the freshness and flowering of the plant for 2-3 months. The roots, often damaged during transplantation, do not develop at this time. The plant is at risk of pest and fungal infections.
It is not surprising that when moving from the store to the windowsill, the new pet weakens after a while and may die. The initial inspection of an azalea after purchase is aimed at identifying existing and developing problems and deciding on further actions:
- The peculiarity of azaleas is that a specific microflora is formed around the root system of the plant, the disruption or removal of which threatens problems in growing the crop.
- Equally dangerous is excessive soil moisture, which leads to rotting of the small roots and root collar of the azalea.
If, after purchasing the azalea, problems are discovered with the root system, the condition of the soil is suspicious, there are traces of mold or salinity, it is better to transfer the plant to another container, removing damaged tissue and poor-quality soil.
An azalea covered with flowers or buds should not be replanted. Transferring to another substrate will be a severe or irreparable stress for a culture that spends all its energy on many flowers.
If we are talking about saving a shrub, before replanting it is better to carefully remove most of the blossoming corollas and colored buds.
It is dangerous to replant an azalea in winter time When the plant is at rest, life processes, including restoration, are inhibited. It is better to try to wait until the growing season resumes and transfer the revived shrub to fresh soil.
Transplanting azalea
 Regular replanting of azaleas is carried out when mass flowering ends. Such a measure will not only not harm the culture, but will also help renew it, give it strength and lay the foundations for subsequent growth.
At the same time, the procedure carried out in relation to indoor rhododendrons has its own characteristics. First of all, you should pay very close attention to the root system of the shrub.
When the azalea is carefully removed from the pot, the gardener most often discovers a dense earthen lump that looks like a black-brown sponge. It is completely penetrated by many large and small roots, and on the remaining fragments of soil traces of salts and dead tissue can be seen. Therefore, azalea transplantation is always preceded by treatment, including:
- removing the remains of the old substrate;
- renewing root pruning;
- treatment of the root system and zircon.
All tools, be it a knife, pruning shears or scissors, which are used to trim the coma, are pre-treated with an alcohol-containing liquid or calcined over a burner.
Due to the excessive density of the root system inside the pot, the azalea is deprived of some nutrients, and access to moisture and oxygen is impaired. To correct the situation, the root ball of the azalea is cut off by approximately a centimeter from below, at the root collar and along the side surface. At the same time, remove any remaining soil.
In this form, the azalea flower is placed in a container with clean warm water, to which, according to the instructions, a root growth stimulator and zircon, which has an immunomodulatory and fungicidal effect, are added. While the grower is preparing a nutritious soil mixture, the roots of the azalea will be saturated with moisture and the stimulating drugs will show their effect.
 Unlike many houseplants, azaleas prefer to grow in acidic soil. Therefore, the mixture is specially prepared for them. To do this take:
- specialized soil for azaleas;
- chopped steamed bark;
- sand;
- dried sphagnum moss;
- charcoal;
- perlite and vermiculite.
 The resulting mixture should be loose and airy. A pot for replanting azaleas does not need a deep one, the main thing is that there is enough space for a thick layer of drainage made of fine expanded clay and comfortable placement of the root system:
- A small layer of substrate is poured onto the expanded clay.
- An azalea flower is placed in the center of the container, around which fresh soil is gradually poured so that the root collar of the bush is not affected.
- The substrate is compacted and after transplantation, the azalea is lightly watered with the solution in which its root system was soaked.
The best place for the shrub after the procedure is well lit, but not under direct sun rays a window where the plant is not exposed to drafts and there are no heating devices nearby.
 In the next 3–4 days after transplanting the azaleas, the soil is not moistened, and then watering is gradually resumed using filtered or settled water. room temperature. In 1–2 months, the plant must undergo acclimatization and compensate for the loss of the root system.
Since the condition of the azalea flower is still unstable, it is better not to feed it, but sometimes add zircon to the irrigation water.
Reproduction of azalea shrubs by layering
 To propagate azaleas at home, you can use layering rooted in the spring. To do this:
- shoots in the lower tiers of the bush are bent to the ground;
- sharp knife a transverse cut is made on the wood, into which a match or toothpick is inserted so that the cut does not connect;
- the cut site is secured with a wire pin to the loose substrate;
- the apical part of the shoot is raised so that it takes a vertical position and secured with a peg.
The cuttings at the place where they are attached to the ground are sprinkled with substrate and watered. Several months pass before the formation of the root system and separation of the young azalea flower from the mother plant. This usually happens by autumn, and by the following spring the seedling will be ready to be transplanted into a separate pot.
Reproduction of azaleas by dividing the bush
In this way, you can propagate an azalea that has many young shoots and a well-developed and healthy root system. The procedure is carried out in spring time when a culture activates not only growth, but also protective forces.
Propagating azaleas by dividing the bush is risky by damaging the small, but extremely important roots for the plant. Therefore, the procedure should be carried out very carefully using a sharp, disinfected knife.
The separated parts of the azalea after transplanting into their own pots do not less than a year restore strength and demand special attention and care.
Reproduction of azalea flowers by cuttings
 The apical parts of last year's shoots, 7–9 cm long and with several fully formed leaves, are taken as cuttings. The cut is made diagonally with a sharp knife or blade. The lower three leaves are removed, leaving a small part of the cutting. All other leaf plates are shortened by half.
To make azalea propagation at home easier, before planting in the ground, the cuttings are immersed a couple of centimeters in a solution of a root growth stimulator. This treatment lasts 4–6 hours.
Rooting planting material carried out in a loose substrate with an acidic reaction. The cuttings are buried no more than 2 cm at a distance of 3–4 cm from each other. Future plants will have to spend 1.5–2 months in a greenhouse and dim light. The entire period of cuttings is necessary:
- keep at a temperature not lower than 25 °C;
- water moderately;
- spray with warm, settled water;
- ventilate to prevent the formation of condensation and mold.
 To form a uniform crown, the planting container is rotated from time to time. Azalea flower cuttings are removed from the greenhouse when their own shoots begin to form. The young azaleas are then transplanted into their own small pots and pinched, which will lay the foundation for the future crown of the plant.
After rooting and before becoming an adult flowering plant takes place from 2 to 3 years. Since azalea noticeably weakens after flowering, it is better to remove the first buds from young specimens.
 Getting flowering azaleas from seeds is extremely difficult and troublesome, but possible. To do this, small seeds are mixed with dry sand and sown on the surface of the substrate. Best time for the procedure - spring.
The future plants spend three weeks under the film at a temperature of 18–22 °C and constant humidity within 90–100%. They are regularly sprayed and ventilated, preventing drying out or mold. When real leaves form on the seedlings, it’s time for the azaleas to take off. And seedlings that have reached a size of 10–12 cm are transplanted into their own pots.
Replanting azalea correctly - video
After purchasing, which pot is better to choose, water immediately or later - all these questions arise immediately as soon as you become the owner of this luxurious flower.
Let's take a close look at the plant - the azalea is planted in a small transport pot. Usually it is made of plastic, without a tray and does not have the slightest gap to the top edge, that is, regular watering from above becomes impossible. Therefore, it is necessary to replant the azalea.
How to replant an azalea in a pot
Which pot should I transplant the plant into - plastic or ceramic?
From an aesthetic point of view, ceramics are more attractive, but for practical reasons, it is better to choose plastic.
In plastic pots, moisture is distributed more evenly, it is more convenient to make good drainage holes; in extreme heat, the pot does not heat up so quickly and does not cool so much in winter. In addition, it is more convenient to water azaleas by submerging the pot, using the so-called bottom watering. This involves keeping the pot submerged in water for about 20 minutes. Plastic will not be damaged by this procedure, but the glaze may begin to peel off from beautiful ceramics.
You can replant an azalea immediately after purchase or do it after flowering. Whichever is more convenient for you.
In what soil should I transplant my azalea?
It should be transplanted into acidic or slightly acidic soil - light, loose, nutritious. Coniferous-leaf soil will be ideal for planting. As a last resort, you can use ready-made peat soils suitable for azaleas, gardenias, camellias, and begonias. If you see that the quality is not very good - the soil for planting is dense, monolithic, then you need to add some kind of loosening element to it - vermiculite or perlite.
How to replant an azalea by transshipment
You need to transplant the plant into a container larger size. For example, from a shipping pot with a diameter of 12 cm, you will need to transplant it into a container with a diameter of no more than 18 cm, which is about 1.5 liters in volume.
We take the azalea out of the pot, we see that 3 or 4 cuttings are planted together, the roots are very well developed.

Divide? No way!!! You need to replant without dividing the lump into parts!
If we make three out of one, we will lose everything, because... when dividing, there will inevitably be injuries to the roots, and it reacts extremely painfully to this - it may begin to shed leaves and flowers.
An azalea needs to be replanted by transshipment. At the same time, the roots are not disturbed, because we practically move it from one pot to another. We make drainage holes, usually there are 2 or 4 of them.
You can use a pointed stick to slightly separate the roots, as in these photos.


We put a small layer of drainage at the bottom, about 1 cm, pour earth on it and try on an azalea.
Align it in the center and place it so that 1-1.5 cm of soil can be poured on top, and at the same time about a centimeter remains to the top edge of the new pot free space for convenient watering.
 Now we fill the free space with earth and carefully compact it.
Replanting the plant turned out to be easy and simple!
Water well, abundantly, so that the water reaches the pan. After 20 minutes, remove excess water! If you neglect this, then the water, remaining in the pan for a long time, will block the access of air to the roots. Deprived of oxygen, they will gradually begin to rot, and the plant may die from this.
In order for the azalea to better take root in a new place after transplantation, after transplantation it can be spilled with Kornevin’s solution or sprayed and watered with Zircon.