Decorative ceramic plates on the wall are now gaining new popularity. This kind of decor is becoming more and more common among designers and in fashionable interiors!
How to beautifully place and hang souvenir plates on the wall:
- 5 ready-made layouts and rules for beautiful hanging!
- 6 ways to make a mount for ceramic plates DIY or how to use wall holders and hooks
You won’t need much effort to attach such a souvenir to the walls, but a spectacular and original result is guaranteed!
But no matter which of these decorating methods you choose, everyone will then have to complete the following process - attach the plates to the wall. Here, too, there are several methods for securing and attaching plates to the wall:

How to hang a plate on the wall without nails
The simplest fastening method that does not require nails, which does not even require you to know how to drill walls, is to buy it at a stationery store. special double-sided Velcro.
- if the plate is small, just stick one piece of Velcro on it and attach it to the wall,
- If bigger size- a few on a plate.
Remember that in this method you need to take into account the weight of the plate if you want it to remain intact.
The second method does not require nails:
- We glue any base to the plate - it can be a block of wood or a piece of six tin can. There is only one condition: it must be solid, hold its shape and not become limp from the glue.
- We are waiting for our base to dry on the plate.
- And then we attach the base with the plate with glue directly to the wall.
The base in this case improves the adhesion of the smooth plate to the wall. In addition, many plates are not completely flat, which makes gluing them difficult. That's why they use the base.
What glue is better to use? Liquid nails or cold welding glue work well.

DIY wall plate holder
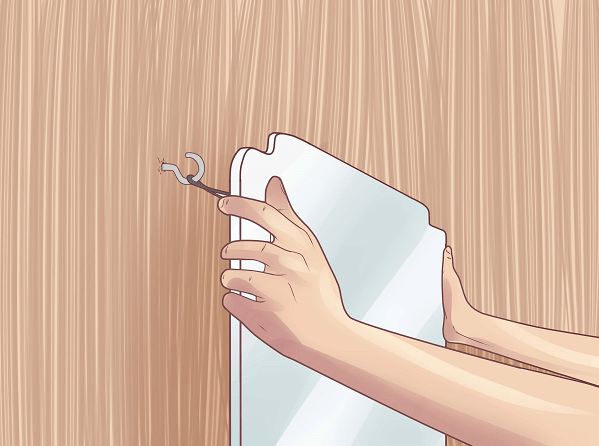
By using cold welding Glue a ribbon to the back of the plate and use it to hang the plate on a nail. If you don't like how the mount on the back of the plate looks, you can decorate it. Here, of course, you will have to make holes in the wall. But beauty requires sacrifice.

If you don’t have any special cold welding at home, you can use regular superglue.
Glue the ribbon to the plate, and stick a circle (square, or whatever you prefer) of paper on top to secure the ribbon and make the structure more reliable.

Fastening the plate using electrical tape or adhesive tape
If you have a light ceramic plate and have electrical tape or adhesive tape on hand, you can use that too. When you attach the tape, keep in mind that its end must be quite long in order to glue it generously along the entire length, in order to avoid the tape slipping out from under the tape.

Fastening with paper clip, wire and hairpin
You can also make a circle-mount from a regular olive lid, for example. Or take a wire or a hairpin
- You can use a gun with silicone rods. The main thing is to warm it up well and quickly attach the wire or pin to the plate.
- In all these methods, for the best result you need to started degreasing the back surface of the plate, you can even scratch it a little so that the adhesive materials do not come off and hold the fasteners securely.


Ready-made hooks for ceramic plates on the wall
You can also use special stand mounts that are attached to the wall, and a plate or several are placed in them, depending on the size of the stand.
There are 2 types of such holders:
- metal on a spring basis,
- self-adhesive circles with loops.

In stores for handmade products or specialized painting workshops, they sell special self-adhesive circles with loops that can be attached to a plate. Or fastenings of the same type, but requiring the application of superglue to attach to the surface of the plate.

How to choose a purchased wall mount? Only by the weight of the plate: if the plate is massive, then the best option- on a spring, if the plate is small, then take a self-adhesive one.
The process of installing plates to the wall
Before attaching the plates to the wall, we highly recommend making a paper mockup first. This is especially true if you use nails for fastening. Yes, even without nail fastening - if the plates are not glued correctly, it will also leave an unsightly blemish on the wall.
- Place the plates on the paper, trace them and cut them out. This will give you the exact diameter of the plate
- We lay out the layouts on the wall.
- We secure them assembly adhesive tape for painting— it leaves no marks on paint or wallpaper.
- We outline with chalk or a pencil, which can be easily removed from the wall.


How to beautifully display a decorative plate
You can place and hang plates on the wall in different ways, and you need to take into account the interior of the room you want to decorate. We offer several ideas to help you make your choice:

Schemes for placing souvenir plates
There are already ready-made diagrams for hanging plates on the wall - look and repeat. Also if you have a large object in the center for example beautiful mirror or a painting, you can decorate it beautifully with the help of plates.


Rules for attaching ceramic plates
Chaotic order
If you like “creative chaos” and don’t like strict lines, then the easiest way is to hang plates different sizes in a chaotic order.
- They can be one color scheme or with drawings(nature, for example).
- The plates do not have to be round, you can also use oval or square.

Magnets
When we travel, we usually bring magnets for the refrigerator as memories of the cities and countries we visited. But this won’t surprise anyone. Recently, I began to notice that in souvenir shops you can buy not only magnets and cups, but also plates with images of the sights of the city you are visiting. So you can start bringing them in and hanging them on the wall. This way, you can immerse yourself in pleasant memories without the temptation to eat something from the refrigerator.

"Plate puzzles"
There are special decorative plates, each individual plate shows a part of the design. Thus, by hanging all the plates on the wall, you get one complete picture - "plate puzzles"

Geometry
Those who like orderliness and symmetry can hang plates in lines or geometric shapes . Smooth lines of plates of the same size, or a gradual transition from the smallest plate to the largest. You can make a circle, oval or square from plates around a mirror or picture.

Can form shapes from plates: flower, sun, waves or something more abstract.

Ideas for placing plates in the kitchen and living room
Where would such plates look appropriate? First of all, this is an excellent decor for the kitchen or dining area. Also pay attention to how they look harmonious in the living room, for example above the sofa or near large mirror. If allowed square meters, then you can also decorate the hallway or the wall in the bathroom with plates.


Pictures are the most simple and in an accessible way decorate your home, giving it comfort and individuality. How to hang a picture without nails on wallpaper if you don’t know how to use a tool or don’t want to do it? You can hang pictures in different ways.
How to hang a picture without nails or drilling into the wall on wallpaper
There are a number of options for hanging one or more pictures without drilling into the wall. First, let's look at the methods by which you can attach to images equipped with a special mount.
Today in stores you can find special kits that allow you to attach decorations to the wall without using nails.
Velcro and hooks of the “Command” system
Command kits include Velcro and hooks. The former are used for images with light weight, while hooks are used to hang larger and heavier paintings. The main thing is that the surface of the wall is smooth.
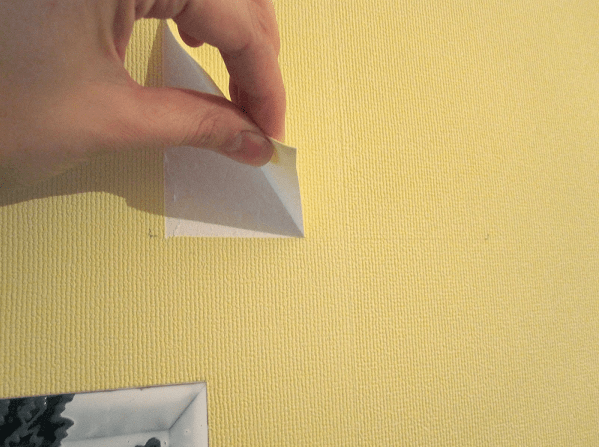
If the design is light, you will need Velcro. One part of it is fixed on the wall, the other - on the back side of the decoration. Using this method, you will not spoil the wallpaper and will be able to rehang the image as often as you want.
For large paintings, use hooks. Degrease the wall to create maximum adhesive force and attach a Velcro hook to the surface. Use multiple fasteners if necessary.
With "Command" you can hang a picture on the wall without nails on any wallpaper, from the thinnest to the most durable.
Hook system "Kreps"
Such mounts can be used to hang sheets weighing up to 1.5 kg, equipped with a special rope or cable. The hooks of the Kreps system can be attached to any surface, with the exception of vinyl wallpaper.
For a small image, one hook is enough, but larger and heavier paintings will require several fasteners. Remove the protective strip from the back of the hook and press it firmly against the wall, holding it for 30–40 seconds. After this you can hang the image.
This way you will securely mount the picture on the wall without damaging the surface.

How to hang a picture without drilling using improvised means
You don’t have to purchase special fasteners, but hang the picture on the wall using improvised means, without ever drilling into the wall or hammering a single nail.
How to hang a picture without nails on wallpaper? Let's consider the available and simple ways.
Paper clips or coat hooks
To hang an image on a paper clip or regular clothes hook, you will need a pencil, glue or liquid nails and a sharp utility knife.
Mark the location of the fastening with a pencil and carefully cut the wallpaper horizontally. Apply glue or liquid nails to the wall under the wallpaper and install a crocheted paperclip. After the glue “seizes” the fastener, cover the cut with wallpaper, carefully spreading it on the surface.
You can hang pictures on such a hook a day after installation.

Wine cork
Don't want to ruin your wall by driving nails into it? You can drive them into a wine cork! Take wine cork, and with the help sharp knife cut a 1.5 cm wide “circle” from it. Using liquid nails or Moment glue, attach a piece of cork to the future location of the painting.
When the glue has dried, drive a nail into the cork (without reaching the wall!) and hang the image. This type of mount can support very large and massive jewelry.
Spider hook
Such a mount can be found in almost every hardware store. This is a hook equipped on the back with four small pins made of durable alloy. The hook must be applied to the surface of the wall and hit it several times with a hammer. When the pins are completely embedded in the wall, you can hang the picture.
How to make a “gallery” from photographs or paintings
Nowadays, “collages” of several images located in a certain order close to each other are very popular. What's the best way to hang several pictures? You can use one of these methods.
Suspended structure
To make such a structure, you will need a wooden plank (the rail of an old cornice) and strong nylon threads. If you are using a curtain rail, attach nylon threads of the required length to the internal hooks. In the case when the basis of the structure is a plank, the threads can be secured by simply “tying” one end around the device.
After this, the base of the structure is installed on the wall, and hooks, paper clips or other devices are attached to the ends of the threads, on which the paintings will be hung.

Wide tape
In sewing accessories stores you can purchase satin ribbons of various widths and colors. We fold the material in half and attach it to the wall using a small nail. You can mount a hook into the wall and hang the tape on it, having first sewn it to it back side loop.
A small hook is attached to the frame of the picture, by which it is hung on a ribbon. It should be noted that this method is suitable for small and light images; it will not be possible to hold a heavy decoration on the wall with tape.
Picture board
This method will give your room a unique look. Choose a board whose color contrasts favorably with the main tones in the interior and attach it to the wall. Boards that are not close to the wall, but at some distance from it, look original.
The base of the structure can be placed in this way using special brackets located in the upper and lower parts. You can hang images on the board in any way convenient for you, it all depends on your preferences. The wall will remain undamaged.
What to hang a picture on if there is no fastener on it
Before you start choosing a way to hang a picture without drilling, pay attention to the presence of fastening on its back side. If it is missing, then none of the methods listed above will suit you.
What to do in this case? How to hang a picture without drilling or using nails? You can use one of the methods for installing jewelry that does not have fastenings.
Buttons, needles or pins
These tools are suitable for attaching small images, such as posters or photographs, three-dimensional picture they won't hold. Mark with a pencil the place where you decided to place the decoration, and, having pierced the design with a needle or a button, “pin” it to the wall.
As a result, a thin, almost imperceptible mark will remain on the surface of the wallpaper, and you can move the pictures as often as you wish.
Double sided tape
With help double sided tape You can capture a small image on any surface.
Choose a location for the painting and mark it with a pencil. After this, stick a strip of tape on the top border of the painting, remove the paper and press the canvas tightly against the wall. If necessary, you can secure the bottom and sides of the decoration.
A picture fixed in this way should not be outweighed. It is almost impossible to remove it from the wall without damaging the surface.
Polymer glue or liquid nails
These substances are convenient because they do not leave stains or greasy marks on the surface. Mark the location of the painting on the wall, apply adhesive to the back side of the canvas (you can only fix it on top, but if the decoration is voluminous, it is better to grab it and bottom part, or apply glue pointwise around the perimeter at a distance of 5 cm from each other).
Then attach the painting to the wall surface and press for 30–40 seconds to ensure strong adhesion of the canvas to the surface.
When choosing a place for a painting, give preference to well-lit areas of the room that are not “loaded” with bulky furniture.
Not really
From time to time we need to complement the interior of our room with decorations. For walls, these can be posters or pictures on paper, diplomas, certificates, garlands on New Year or even some notes.
Garland on paper wallpaperHow to attach them to the wallpaper so as not to spoil the wallpaper, because in some cases their texture is very delicate. For example, wallpaper with acrylic foam, where the top layer of glitter is clearly kept on parole. Of course, there are several successful ways.
 The tape on the edges of the poster has a nice shine.
 Adhesive materials
Krepp is an abbreviation for masking tape, also called paper tape. Paper tape has a very sticky inner surface that does not transfer the adhesive to other materials.
When the used crepe is torn off from the wallpaper, it does not leave any marks even on ultra-sensitive surfaces. Masking tape is widely used in hardware stores for packaging.
It is strictly not recommended to use classic tape for gluing decorations to wallpaper, as it spoils decorative coating, and it looks downright bad.
 Photos are glued to transparent tape with a pattern.
 If you have double-sided tape available, it can be used for extra strong heavy wallpaper with increased wear resistance. , hot-stamped vinyl wallpapers are not afraid of contact with similar types of adhesive materials.
But paper wallpaper will be damaged by double-sided tape, even a weak foam version of it.
On sale there are adhesive masses similar to plasticine. They leave no marks and can be used for fastening various items to Wall. For example, blue-tech from the Kelid brand.
 Blue-tech resembles plasticine, but does not leave greasy marks
 Piercing agents
If you are ready to slightly damage the wallpaper, but ensure that this damage is not visible, it is recommended to use safety needles or pins. These thin, sharp skewers will allow you to pierce decorations, wallpaper and secure them to the wall.
The damage from the pins will be so minor that it will not be visible.
 These needles are perfect for attaching decorations to wallpaper
 But if you try to attach, for example, posters with buttons, you will encounter certain difficulties. Since, unlike a needle, the button does not enter obliquely, but strictly perpendicularly, it openly spoils the wallpaper and does not stick into a solid wall.
It's worth being careful about the number of sharp pins you use to avoid leaving them in the wall or floor. You should not throw such objects around the apartment that can injure you.
Types of wallpaper
It is clear that not every type of wallpaper will be able to retain foreign objects on its texture. If we go through the types of wallpaper ready for decoration, we get the following picture.
- Almost all paper wallpapers have a very delicate and quickly deteriorating texture. The exception here is duplex, but when using ordinary adhesive tape, it is easy to tear off the decorative layer from it.
- Vinyl wallpaper is much stronger and is ready for foreign objects. Here we will exclude those that have a texture similar to acrylic foam on paper. Destroying foamed and loose vinyl is easy.
- Textile wallpaper has a wear-resistant surface and is not afraid of contact with glue. If there is pile, it is tightly attached to the base and does not tear out.
- Paintable non-woven wallpaper and glass wallpaper will not be able to hold pins, but masking tape can easily be attached to them.
 Large poster in the children's room
 Judicious use of fastening materials will allow you to keep your wallpaper in good condition. If you have children, attach decorations to the wallpaper taking into account their characteristics.
There are situations when you really need to hang a picture on the wall without nails or drilling: for example, the apartment is rented, you don’t want to spoil the wall with holes, bother the neighbors, or your husband is simply not at home. It is then that very simple and effective ways that will help you hang a picture, panel, poster or photograph on the wall without using a drill. Choose which one you like best!
1. How to hang a picture on the wall without drilling the wall: a paper clip or a coat hook
If you have wallpaper on your wall, make a small horizontal cut in it, fill it with superglue and place a paper clip, bent into a hook or a regular coat hook, and then cover the cut with wallpaper. Step by step instructions you can read by “implanting” a paper clip into the wallpaper .
2. Button
This method is similar to the previous one. Here, too, the base itself is “hidden under the wallpaper” and glued, and the protruding part acts as a nail on which you can hang a not very heavy picture. In the video below you can learn how to effectively hide the base of a button behind wallpaper.
3. Spider hook
In a hardware store you can purchase a special device called a “spider hook”: o but has four pointed ends, which are easily attached to the wall with a hammer and leave practically no marks on it.This hook holds securelyon any wall, you can hang a picture or frame weighing up to 2 kg on it.
4. Needle
Another way to place light paintings is to stick a sewing needle into the wall. For example, you can carefully drive it into the wallpaper at an angle tailor's pin with head. Another option: break off sewing needle eye with pliers and sharp end just drive it into the wall. This way, the hole in the wall is small and invisible, unlike nails or screws. At the same time, withama needle, steel and durable, holds the frame securely.

5. Double-sided tape
This method is suitable for walls with thin paper wallpaper or plasterboard partitions. Just apply regular double-sided tape to the edges of the frame and attach it to the wall. True, the disadvantage of this method is that the tape can leave marks on the wall; to prevent this from happening, it is recommended to keep the tape under glob 90 degrees in relation to the wall when removing the painting.

6. Command Velcro
The special technology of Command Velcro allows you to glue them to almost any surface and easily hang pictures weighing up to 2 kg on them. The advantage of this brand of Velcro is that it can be easily removed without damaging the walls. They sold as a set of several strips: one strip is glued to the frame, the other to the wall. The more stripes, the heavier the painting can be.

7. Liquid nails
Liquid nails are a special glue that securely connects surfaces. Simply apply liquid nails to the back of the frame in small dots (if the painting is heavy, you can coat the entire frame). Then press the painting flat against the wall surface and hold for a few seconds.

8. Polymer glue
Polymer glue is convenient because it does not leave greasy marks behind. The principle is the same as with liquid nails: we glue the heavy picture around the entire perimeter, and the light one only around the edges. For better adhesion to the surface, the frame needs to be pressed firmly and even left for a day, propped up with something.
9. Wine cork
The wine cork is cut into circles approximately 1 cm thick and glued to the wall with quick-drying glue (Moment glue or BF-2). After the glue dries, a nail is stuck into this cork. small size, on which the picture is hung.
The completion of the renovation, after the dust has settled in the apartment or room, does not mean the end of the construction pains; there is still a lot to be corrected or even redone, but the first step is to adjust the lighting and operation of the lamps, adjust the operation of the window sashes and hang a mirror in the room. Only then does the room acquire a habitable appearance.
Is it easy or difficult to attach a mirror to a wall with wallpaper?
In fact, the solution to the problem of how to attach a mirror to a wall with wallpaper is not as obvious as it might seem at first glance. Often there is not much experience in this matter; usually objects, including mirrors, can be attached using a dowel driven into the wall of the room. But after the renovation, spring cleaning rooms from dust and remnants of wallpaper rolls, punch fresh holes in clean and smooth walls to attach a mirror - somehow you can’t raise your hand. Moreover, the location of the mirror may change, you will have to attach it in a new place, and in the old place after fastening there will be holes from the dowels, which are not so easy to remove or disguise by repair.
Imagination and technical savvy tell us that you can attach a mirror to the wall in one of the following ways:
- Using double-sided construction tape;
- Any polyurethane adhesive composition;
- Using hidden plugs.
For your information! If the mirror has decorative elements and weighs more than two kilos, you should not try to attach it to the wallpaper on the wall using glue or any similar means.
Even if the wallpaper is “tightly” attached to the wall, the surface layer of the wallpaper will come off like a film and the mirror will break.
Need for invention is tricky, attach the mirror “tightly”
All of the above methods are real and can be implemented for any wallpaper. Among the above methods, the first two are used for light, small mirrors, the last two, in fact, are universal, but much more complicated, and require increased accuracy and precision.
Advice ! It is better to attach the mirror in places away from drafts, which will save you from the need to regularly wipe dust from the glass surface.
It is quite easy to check and determine how protected a place on the wall is from dust. It is worth removing dust with a damp cloth from the planned place on the wall. After a couple of days, run your hand over it - if dust appears, it means the place is not suitable.
If the integrity of the wallpaper is not of great value, then the mirror can be attached to the wall using a fairly simple procedure - two dowels and a pair of brackets.

How to attach a mirror with glue
When the need arises to glue something during a renovation, people most often think of the widely advertised “Liquid Nails” adhesive. But in practice, the advertised composition was not always able to quickly and efficiently attach even small objects to a smooth surface. Therefore, it is unlikely to be suitable for a relatively heavy object, such as a mirror. Any lime compositions popular in repairs are also unsuitable for such attempts.
More a good option There will be a decision to attach thin and heavy mirror glass using Moment adhesive compositions or mounting polyurethane foam. Last option more preferable due to the highest adhesion, even on dusty surfaces.
If you decide to attach the mirror to the wallpaper using glue, you need to make and glue an intermediate screen to the back of the mirror. It can be made to fit the entire size of the mirror, in the form of a wide rectangular frame that fits tightly to the painted surface of the mirror. The composition with which it is coated backside mirrors, it sticks very poorly directly to the thin base of the wallpaper, so they use an intermediate layer in the form of a screen.
The best material for the screen would be a light and durable wood-fiber board, 3-5 mm thick. The frame should be glued using rubber or any other glue that provides an elastic seam. The fiberboard from which the screen frame is made consists of pressed paper. This will help to attach well to the surface of the wallpaper and compensate for the difference in thermal expansion of the materials.
Before attaching the mirror, you must perform a number of procedures:
- Determine and mark the selected place on the wallpaper for precise positioning of the mirror, more precisely, its top;
- Remove and thoroughly clean the surface from dust and wallpaper glue residues;
- According to the completed markings, apply glue to the surface of the wall, apply glue to the mirror screen in a similar way, wait for the applied layer to dry slightly;
- After 10-15 minutes, repeat the procedure, remove excess glue and carefully attach the mirror to the wallpaper;
- After a couple of hours, you can remove the fasteners and clean the glass surface from dust and fingerprints.

If you use for fastening polyurethane foam, you need to do it a little differently. At a point located 40-50cm from the top of the mirror, according to the markings made, we hammer in a needle-thin 30mm nail. Using a thin but strong thread attached to the top of the mirror screen, hang it. Apply a few drops of polyurethane foam from a foam container to the top of the screen. Slowly turn the object over and apply foam to the wallpaper according to the markings. We press and leave it hanging. If foam appears through the top of the frame, do not remove it. It is easier to cut it after drying by running a blade construction knife along the top of the mirror. Before gluing, it is necessary to remove dust from the surfaces to be glued, and first of all from the wallpaper.

How to Attach Using Mechanical Attachment
The heavier the mirror, the stronger the mount should be. An object with a diagonal of more than 40 cm can also be attached using glue, but there is no guarantee of a secure attachment. For heavy mirrors, you can use the old fashioned way - attach them using two small plugs and a pair of screws.
If the mirror on the back does not have a base made of pressed cardboard or plastic, you will have to use the recipe from the previous paragraph and glue a homemade screen or strip. The larger the mirror, the stronger and thicker the transition frame should be. For glass surfaces with a diagonal of more than 50 cm, additional reinforcement from a thin wooden batten will be required, with which the frame can be attached to the wall. The rail is attached with glue at a distance of ¼ of the entire height of the glass from the top. After this, at a distance of 5-6 cm from the ends of the slats, you should attach one self-tapping screw, but do not wrap them completely into the body of the tree, leave a couple of millimeters.
Between the screws that are screwed in, it is necessary to fasten a strong nylon thread, possibly from the category of shoe threads. The length is approximately 10-12 cm greater than the width of the glass. The top of the tensioned thread should not peek out from behind the top of the mirror. Before fixing the plugs with self-tapping screws in the body of the wall, it is necessary to correctly mark the wallpaper. To do this, use two pencils to pull the thread from both sides towards the top so that the distance between the tension points is approximately ¾ of the width of the glass surface. After this, use a ruler to measure the distance from the top of the frame to the tensioned thread.
Next, we find the optimal location of the mirror on the wall and use a simple pencil to mark the position of the top of the frame on the wall. Using the marked points, we plot the measured distance, after which we determine the points for the plugs in the wall.
Next we use a little trick. We need to drill so as not to damage the wallpaper. To do this, at each of the selected points, use a sharp blade to make a cut in the form of a cross measuring 2x2 cm and carefully bend the edges of the wallpaper. At the bottom, before drilling holes, you need to attach a small cardboard shelf using plasticine or any other material. The shelf will help collect dust and sand from drilling and prevent debris from falling into the gap between the folded edge of the wallpaper and the wall.
At each of the two points we drill holes for plugs with a diameter of 10 mm. The greater the load weight, the larger the diameter and depth of the plug. After blowing off the dust, the plasticine and shelf can be removed, then the protruding parts of the plug are trimmed to be level with the wall. You can move on to the next operation - attach the mirror surface. The screws are not screwed into the plugs completely, leaving 1-2 mm.

Then you can attach the object to the thread without fear that the fastening will not support the weight of the object. In addition, this method of fastening makes it relatively easy to level the mirror glass. In this way, paintings and large decorative panels are usually attached to wallpaper.
If after repair there is a need to attach the item in another place, traces of corks can be easily removed. To do this, unscrew the screws and remove the plugs. We cover the remaining holes with putty, after drying we bend the edges of the cross-shaped cut of the wallpaper and carefully glue it in place. If you do it carefully, even close up you can’t always see the place on the wallpaper where you once decided to attach a mirror or a picture.