/ How to build a raft
When the idea itself settled in my head and the first wave of euphoria subsided, it became clear that there was a lot of work to be done before the raft safely set sail on its first voyage. There were no professional raft designers or even carpenters among us. We had never really been involved in the construction of rafts or boats before. But amateurs with a broad outlook can do a lot. The main thing is to have a desire. In addition, as you know, Noah’s Ark was also built by amateurs, and the Titanic was the work of professionals. And we got down to business.
About that how to make a raft we could talk for hours. There were a million ideas that, of course, contradicted each other. We had to choose the only solution that suited us best.
The all-wooden raft was immediately abandoned. A log raft is common on northern rivers. But in the south there is not enough dry, suitable forest to properly make a large wooden raft. Considering the experience of other homemade raft builders, we thought about the following options:
- Foam raft. You can make two “skis” out of boards and fill them with dense foam. One of the best designs for a motor raft as it handles well.
- A raft of chambers. Large automobile inner tubes are placed under the frame of the raft; the stronger, the better. If the camera bursts, it is easy to seal it in the field rafting conditions.
- Bottle raft. This is perhaps the most popular raft design, and the cheapest of all. First you need to collect many hundreds and thousands of empty plastic bottles. The bottles are then stuffed into plastic bags (rotproof). Next, the bags with bottles are secured under the raft.
- A raft made of barrels (or other plastic sealed containers). Plastic cubes, canisters and so on. More difficult to attach, but it can be achieved high rise raft over water. You can also make a raft from metal barrels.
- Rare and exotic types of rafts. For example, a raft made of plastic unsealed boxes filled with polystyrene foam and polyurethane foam.
There are also special “pontoons” on sale, that is, composite plastic containers for pontoon structures. These cube pontoons are easy to assemble plastic raft, but such pontoons are unreasonably expensive.
We thought and argued and decided make a raft on barrels. Empty plastic “Euro-barrels” of 227 liters were selected. They are sealed, with two holes with screw-on plugs. Moderately rigid to keep its shape under load, and moderately flexible so as not to make holes when the raft hits a stone or snag.
The lower deck was raised above the water by half a meter so that the waves would not overwhelm us, but would peacefully break against the barrels below the deck of the raft, without creating discomfort. In general, when designing and drawing drawings of the raft, the words “comfort” and “reliability” were heard often. After all, we wanted to live on the raft, not survive, and there was a small child among us.
The incredible had to happen for the raft to “throw” or go to the bottom. The reserve of stability was such that even if everyone crowded together on one edge, collecting all their belongings nearby and adding a ton of something else to them, the raft would not be able to capsize spontaneously. Even with strong wind and waves. The buoyancy reserve also suggested a calm continuation of the rafting along the Don under a terrible set of circumstances. The barrels could become leaky and fill with water, become loose and jump out from under the raft, or the barrels could simply flatten. Of course, several pieces at a time and, as luck would have it, one side at a time. Of course, it’s easy to flaunt now, but the facts are as follows: there was no overkill, they didn’t go down.
How to make a small raft
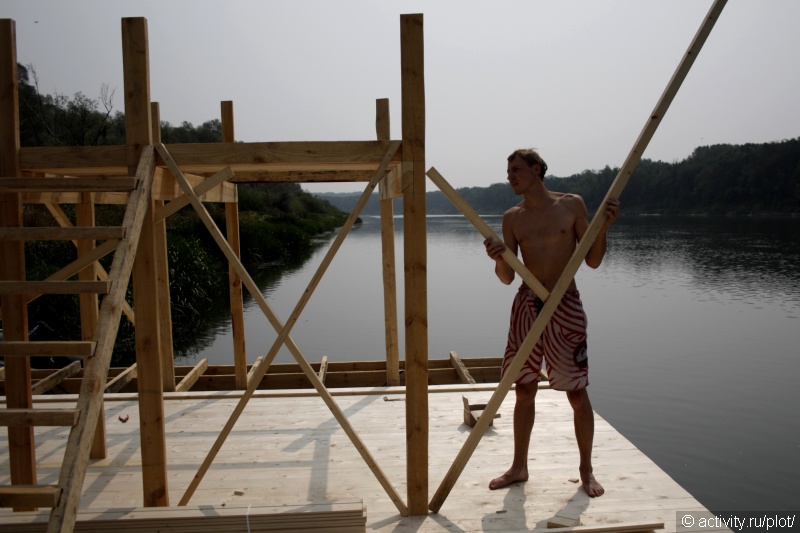
We had just decided on the design and materials when the first beta version was suddenly released. About six barrels, single-deck floating jetty. The only difference between such a pier and a raft is that the raft is made for rafting on rivers, and the pier must remain in place. By the way, this didn’t stop us from swimming on it a little...
Main characteristics of the pier:
- working title: " Youth",
- own weight of the structure: 480 kg,
- maximum load capacity: 1,543 kg,
- deck area: 8 m².
The prototype of the future “big” raft was made on occasion: one of the participants wished to sponsor the construction of a pontoon raft-pier on the river near his country plot.
They built it vigorously, with the help of a certified architect and her husband, a generalist. They started at noon, and by the evening of the same day they were nailing down the last board of the deck. And they got pleasure from the fact that the calculations turned out to be correct: the pontoon behaved as planned. And the next day we took the oars from the boat and tried to float on a raft along the river. There is almost no current in this place, we just crossed the river on a raft and returned back, jumping a little into the water along the way - we liked everything! If you built a raft with your own hands, you can have some fun, because everything turned out as planned!
This circumstance completely freed our hands, and we continued to create. But for now only mentally.
How to make a big raft
For a large raft, 22 barrels were already required. The barrels were attached to the raft in two rows, 11 pieces in each. To get something like a catamaran with two skis, which is good both in terms of handling and weight distribution. By the way, as experience has shown, such a structure is easy to refloat, and for the middle reaches of the Don this is important.
Each barrel was in its own compartment, delimited by two beams and two crossbars. The weight of the raft pressed on the barrels from above, and the water pushed up from below. In addition, the barrels were pulled with slings to the frame bars.
The basis of the structure of a raft made of barrels is a frame made of beams and boards on which the lower deck is laid. The upper deck (a la Sun Deck) also rests on the frame with its posts.
The structure is largely supported by its own weight. The individual elements are connected to each other through grooves.
Or “grooves”, as we now affectionately call them. The fact is that during the construction of the raft, when a whole hundred grooves had already been sawed, cut, hollowed out, and they still did not end, the stock of abusive words addressed to the grooves dried up. And from that moment we began to love them dearly.
In the drawings the raft looks like this:

One barrel has been removed - this makes the details of the raft look clearer in the drawing.
Nails are also widely used in making a raft, and we also practiced a lot in hammering them. Nails are generally indispensable in many endeavors. They played the role of hooks in the kitchen of the raft during the trip, and were nailed to the deck of the tent with the same nails.
It’s good that we managed to build the raft without using screws or self-tapping screws. It takes a very long time to tighten hundreds of screws with your own hands, and taking a screwdriver or drill with you is an extra hassle with electricity. Plus, nails are simply cheaper.
How to control a raft when rafting
For a long time we could not decide how the raft would be propelled and how it would be controlled. Options where any mover would constantly make noise nearby were not suitable. The classic version with ridges somehow didn’t work (although we used another traditional option for controlling the raft - poles). As a result, we agreed that we would simply float downstream on a raft how it floats. And if necessary, pull the raft motor boat. At the same time, we were not sure that a light boat would be able to tow a multi-ton raft, the size of which would be comparable to a two- or three-room apartment.
It's a pity, but many beautiful and almost unrealistic propulsion options were left overboard. One such option is a giant fishtail. In miniature it looks like this:
But what are we all about theory! Finally the day came when we left for the place building a raft, that is, a slipway. Practice has begun. Construction materials arrived, their piles grew and grew. We began to “recycle” them, and the piles began, albeit slowly, to decrease.

There was a lot of work. The first days we lived on the shore. They marked, sawed timber and boards, made grooves, sealed the plugs of the barrels. It was not planned to launch the raft at once, as with a pontoon. The structure was too massive, several tons - You can’t lift the raft with your own hands. Parts of the future raft were carried by hand into the water, where the installation of the huge structure continued. It was even easier to work in water: remember how hot this summer was?

On the third day of making the raft, the flooring of the lower deck finally began to appear. And ours active life began to gradually move from the shore to the raft. I already wanted to spend the night on it, drink tea, fish and just sit, dangling my legs in the water.
The incident stuck in my head. We built the raft not in a remote place, but not far from the village. Of course, the locals were very interested in what kind of raft we were making here. We even had regular spectators who tracked the progress of the work almost every day and made constructive suggestions to the raft project. There were also local boys constantly hanging around, who didn’t ask questions, but were simply happy and, probably, envied us in some way. One day, when we had already covered part of the deck, one of the boys suddenly asked: “Can I jump from your raft?”
It was probably at that moment that it became clear to me that the idea with the raft was not in vain. Not one, but several boys jumped into the water from the raft, actively exploiting our creation. What a thrill it was just to see their sparkling eyes!
After another couple of days of work, a second deck and a staircase leading to it grew above the water.
It became clear that raft trip- not far off. The next day they finished laying the lower deck, built part of the partitions and prepared to set sail the next day. The tents began to crawl from the shore to the raft in the evening.
The next morning, having laid the second deck, we began to load. All things, tents, as well as tools and remaining building materials were moved onto the raft. It took a long time to collect the accumulated construction waste, intending to use it for firewood for the samovar and barbecue. The shore was empty, we pushed off, and the Don slowly carried us south...
Rafting days
Now our main occupation has become, as someone accurately noted, “drinking the beauty of the Don.” Sailing sedately on a raft along the river. Enjoy the tranquility of the river, gaze at the slowly changing landscapes of the Don, smile in response to the horns of larger boats and ships passing by. Rafting down the Don is not uncommon; we also came across homemade rafts quietly floating along the river. Sometimes it is very important not to rush anywhere. Swim, fish, sunbathe, talk about the most important things and nothing else...
But the work didn't end there. It’s just that further arrangement of the raft took place “on the fly”. It's like renovating an apartment - it's impossible to finish. Now the pace has become completely different. We were no longer in a hurry, but worked for our own pleasure, in our free time. So, during rafting, several more partitions appeared on the raft to visually separate the space and as protection from the wind. The kitchen (that is, the galley) was equipped, and an almost-not-wobbly table was built for the wardroom. A hammock is hung, protected from the sun and “with a view.” A semi-automatic ladder was created to climb onto the raft from the water after swimming. On the second deck, rails were stretched and a flag was hoisted...
Enough with the arrangement, it’s time to look at the results of your labor!

The story about construction could end here (we will admire the photo of the raft in other chapters). But some will be interested in the dry numbers of the project. So, the characteristics of the raft with the working title " Four and a half tons".
- Gross design weight: 4,500 kg, including
- dead weight of the raft: 3,711 kg, .
Side height (distance from the top of the deck to the surface of the water) at the design payload: 0.39 m.
Landing at design payload: 0.46 m.
Maximum raft carrying capacity (maximum payload): 5,382 kg. At the same time gross weight of the raft would become terrifying: more than 9 tons!
- Raft dimensions
Dmitry Chuverin.
To answer the question how to make a raft from logs you will need to prepare dry pine or spruce wood. If you knock on it with an axe, a ringing sound will come from it. Dry elements with old wood. So the tree will quickly become damp, and the raft itself will sink. To calculate the specific gravity, you need to remove a small piece - about 10 cm - from the end of the tree with a saw. Then place it flat in water. If this piece deepens by 5-6 cm, then this wood is optimal for constructing a raft.
In order to find out how to make a raft We use logs whose maximum diameter is 25-30 cm, and the smallest diameter is 10 cm.
To ensure that the future raft of logs has excellent durability, thin timbers are concentrated in middle zone, and thick ones - on the side sides. If the logs for the raft are crooked, then they are placed with the crooked places down.
Allowable voids between logs are 2-4 centimeters. Otherwise, the craft will turn out to be weakly stable and inert to floating and make a raft correctly it won't work.
The logs are laid on a slipway, then they are rolled out to the sides and their tops are marked.
At a minimum distance of 80 centimeters from the end, grooves are created on the central log (sawed and cut out). The mandatory position of the lower grooves is to be at the same level. Their depth should reach the middle of the log - the most important criterion. Otherwise, when driving a wedge, you risk chipping the sawn wood. A special end is used for the sample. It is hewn from damp birch. With its middle section it lies in an already designated log.
It is easily inserted into the groove on it from above. So make a raft with your own hands it will be much easier. Its lower wide section fills the top of the groove. A wedge is driven between its inclined side and the groove wall. Wedge criteria: wooden and dry. Ronjins must fit in one plane. In order to clearly understand how to make a raft you can see video below:
Using the samples, you can make similar grooves on the remaining logs. They are attached in turn with wedges to the central log. Before laying the outer logs, slightly different grooves are created in them, intended for the logs. Three special stands are also cut out with a maximum thickness of 10-12 cm and a height of 60-70 cm.
The main rope is then pulled over them. Instead of rope, you can rely on the option of twisted wire or rope ties. Make a raft it's much easier this way.
On calm rivers it is better to use a “P” design of a similar type. First, two posts are cut vertically into the working logs. Then a pillow is put on them. It needs to be wedged out and a rowing area cut out in it. To prevent chipping of these racks, it is better to focus them 50 cm from the stern and bow.
On wild and difficult-to-pass rivers, it is recommended to use options that have metal frames. Modules and couplings are used to create them. The length of the modules is allowed to vary. Type of couplings – shaped. In order to make a raft it will take a lot of effort. You'll have to do a lot of drilling. There is a need for lathe and welding skills.
But make a raft from logs will be easy to assemble and disassemble. To pack its frame you need a couple of kayak covers. You will need a separate container to pack the oars.
Interestingly, such a frame can be converted into two small rafts, even a catamaran. You can attach car cameras and work areas to it. The latter are placed 30 cm below the frame. This lowers the center of gravity.
An interesting option is if make a raft, on the structure of which floats are arranged transversely. Creating it is quite simple. It has excellent stability. All kinds of flooring and mesh can be used on it. You can also attach some inflatable components to it. This type of raft is used for navigation on various rivers.
Its frame is created using a cable with a parameter of 6 mm and modules with a length of 200 cm. The connecting elements of these modules are hinges. Here we get a deflection of 20 degrees. The weight of the frame reaches 80 kg. On large shafts, cable breaks are likely.
When you start summer holiday on a lake or river, if you are planning leisure on the local shore or modest boat trips, you can build a shallow-draft raft for 5-6 people. Their backpacks are also taken into account. Such a raft made of logs will also have excellent stability on steep waves.

The main components for making a raft with floats:
Rubber tires (or barrels). Number: 6-10, diameter – 100-150 cm;
elements of aluminum parts and tubes;
wood, number - 7 pieces, length 3 - 500 cm, 4 - 170 cm, diameter of all - at least 6 cm;
steel sheets 1 cm wide.
So, how to make a raft this design? Place the designated poles of shorter length (170 cm, 4 pieces) parallel to each other. The distance between the first and second, third and fourth poles is 150 cm, between the second and third - 200 cm.
Three longer poles (500 cm) are placed perpendicularly on them. The distance between them is 50-60 cm. These poles are attached to other poles with nails.
Next, you should create the main deck with bridges. Here such bridges are three shields made of tree trunks arranged in a selection.
The deck is based on two 170 cm poles, on which the cuttings of the boards are placed. Their thickness is 2 cm. They are also connected to the poles with nails. “Captain’s” bridges are made using the same principle.
The supporting elements for the awning here are willow twigs. And the raft itself is assembled from logs only after these elements are installed. Make a raft this way it's not that difficult.
The inner tubes used must be inflated. They are tied to the base with ropes. Next comes the installation of the main deck. The sides are made from hewn poles (4 pieces). The awning is made of polyethylene.
The supporting parts of the steering oars are concentrated diagonally on the bridges. Here the process moves according to the following scheme: a support is placed on the left side of the bridge at the back, and a support is placed on the right side of the bridge in front.
After which the three indicated pipes (duralumin) come into play. The supports are bent from them. Steel strips are needed for fastening.
The combs are made from other poles, whose length is 250 cm. The blades are made from plywood or aluminum sheets. You need to decide on their parameters yourself.
In preparation for the new construction season, we decided to make an unusual rafting trip down the Nara River on a raft assembled from sheets of extruded polystyrene foam. The route ran from Naro-Fominsk to Chekhov district of the Moscow region, partially passing through the territory of the Kaluga region. We assembled a raft from 8 sheets of polystyrene foam and 6 boards, which easily supported 5 people and large number equipment, including an exclusive grill made of aerated concrete, assembled on polyurethane foam. In just 6 hours we walked along the river about 30 kilometers.
The design of the raft is very simple. Our task is to make a raft using a minimum of materials. We used sheets of high-density extruded polystyrene foam (used in the construction of Swedish slab foundations) with dimensions of 2400x600x100 mm. Total required 1 cubic meter(2 packs of 4 sheets each). To securely fasten the sheets together, I used boards with a cross-section of 100x50 mm (thinner 100x40 mm could have been used, but this size was not available on the nearest market). In total, 4 boards 5 meters long and 2 boards 3 meters long (diagonals) were required. For rigid fixation, studs with self-locking nuts and large washers were used. There are 9 fixation points in total. Diagonal boards are needed to prevent the structure from skewing.
I assembled all the components on site. Initially we thought of assembling the raft directly on the shore, but then we decided to transport it assembled on a trailer, especially since the river is only a couple of kilometers away.
During the assembly process, I slightly modified the design from the remaining materials (the boards are sold 6 meters long, but I only needed 5). I made a triangular bow to make it easier to ram debris. We were faced with a very non-trivial task, how to transport a five-meter (and in fact six-meter) raft on a two-meter trailer. I had to lengthen the trailer tongue using a rope and another board.
We arrived and unloaded on the banks of the Nara River near the village of Melnikovo. We lower the raft into the water, check buoyancy and reload things. The heaviest part of the raft's design is the boards, but 4 people can easily carry the raft (its weight is approximately 100 kilograms). If we assume that we already had polystyrene foam, then the budget for building the raft was a ridiculous 2 thousand rubles (1000 rubles for boards and about 1000 rubles for studs/nuts/rope).
Let's set sail!
The design of the raft turned out to be very durable, despite the skepticism of commentators on Instagram, where I published the first drawing of the raft. In fact, it is basically impossible to sink or break such a raft.
Rowing is rowing, and lunch is on schedule. For the swim, I made a special grill from thin aerated concrete blocks with a thickness of 50 mm and a density of D500. The blocks were glued together using regular polyurethane foam for windows and doors. The budget for the construction of a barbecue is 144 rubles for 4 aerated concrete blocks and some polyurethane foam. Let's rock it!
The water level in Nara is now slightly higher than usual, by about 50 centimeters. Although in general Nara is very shallow and its average depth did not exceed one and a half meters.
We started at noon, which means it’s already time for lunch.
Nowadays you won’t surprise anyone with a barbecue made of aerated concrete. Aerated concrete glued onto polyurethane foam is also a trivial story; houses have been built this way for a long time. But a floating barbecue made of aerated concrete glued to polyurethane foam is something new.
For the first 10 kilometers of the journey, the current speed was about 4-5 kilometers per hour.
Beauty! We took a cordless saw with us to deal with debris on the way and it really came in handy several times (see the video for details). Although, as practice has shown, the cordless saw is not sealed and is not intended to work in water.
Rainbow Waterfall is a famous landmark on the border of Kaluga and Moscow regions.
In the Kaluga region, the most serious obstacle of the entire route awaited us - a concrete dam. While passing through it, the raft caught on the nuts located on the underside of the rear studs. The raft was covered by a wave, which did not allow the raft to be lifted and freed. In the end, we managed to push the raft off the obstacle, but in the process of fighting the elements we lost a bag of food (it was untied from the raft at that moment) and one oar. A little further downstream we found an oar in the branches near the shore and took it away. This moment is detailed in the video.
Towards evening the sun came out briefly.
And then the fog fell over the river.
Picnic area on the shore.
The width of the river increased and the speed of the current dropped sharply to a ridiculous 2 kilometers per hour. I had to lean on the oars a little to get to the intermediate stopping point before dark.
In total, on the first day we walked almost 30 kilometers by water in 6 hours. Unfortunately, the video is no longer available for viewing.
Making a raft for river rafting with your own hands is quite simple, the main thing is to understand the basic principles. This floating craft has a fairly simple design; without special knowledge and skills, you can easily build a fishing raft with your own hands from wood and scrap materials.
Large raft with tent
Materials and components
To build a good log raft with your own hands, you need to make the following key structural components:
- Frame.
- Components for holding the structure on the water (pontoons).
- Control systems.
- Flooring and roofing.
- Safety details.
- Compartments for various things.
The frame is the basis of the structure on which all other components are fixed. It is necessary to achieve the highest possible strength of the frame in order to prevent destruction under sufficiently high loads to which the structure will necessarily be subjected during use. It is important to try to minimize its weight. This is important for the convenience of launching the structure into the water. At the same time, the frame must be rigid and resistant to deformation. Otherwise, the integrity of the structure may be damaged right on the water, which is fraught with the most negative consequences.
Typically, rafts are constructed in an inflatable or wooden configuration. In the case of wood, a log frame is used as a frame base. In an inflatable structure, the base is constructed with lathing.
It is extremely important to comply correct proportions raft dimensions. The ratio of width to length should be 1:3. In case of a significant deviation from this norm, the stability and controllability of the boat will be impaired.
Pontoons are designed to hold the structure on the water. They can be made from a variety of available materials. Here you should build on what is at your disposal.
The most popular pontoon options:
- cameras;
- plastic bottles;
- barrels;
- tree;
- polystyrene foam
It is very easy to make a raft from chambers with your own hands; this is one of the most affordable and easy to implement options.
It must be equipped with properly equipped controls.
Most often used:
- The rows are shaped like large oars. As a rule, they are operated by two people; working alone is quite difficult. Sometimes very large rows are built, which can be controlled by 4 people at once. In terms of efficiency, this solution is very good. The structure not only turns easily, but can also move freely against the current. Such control is relevant for large rafts descending onto large, deep rivers with fairly fast currents.
- Poles – optimal solution for small rivers. Using a pole, you need to push off from the bottom, thereby ensuring the movement of the structure. By efficiency this method significantly inferior to the previous one.
- The movable keel is mounted on the aft part of the structure and is a steering mechanism.
It is not necessary to make a flooring, but it is advisable; this will make the use of the watercraft much more comfortable. The roof can be made in any form, based on the available materials.
The design must include safety elements. They must be responsible for the stability of people during movement and, which is extremely important, in any collisions. For this purpose, special footrests are equipped. Hands are usually protected by control elements. It is necessary to provide special posts on the sides to allow you to hold on in the event of collisions or strong currents. And if possible, it is worth taking inflatable vests on the raft.
To conveniently store things and protect them from getting wet, raised platforms are equipped for folding everything you need. You can set up a kind of “greenhouse”, a structure that can be quickly covered with film if necessary. The crew can also hide in it during rain. To store documents, you should use special hermetically sealed bags.
You can set up a special place for a fire to heat food. If you are planning a long rafting, it is worth equipping comfortable places for sleep and relaxation.
How to build a raft with your own hands - video, drawings and photos
See what the finished raft, made by yourself, looks like in the photo:

Wooden raft
This is one of the simplest and easiest structures to construct. This raft is made entirely of wood.
And the video below demonstrates the process of launching a raft made from plastic kegs, made by yourself:
But, in this case, not only wood is used, but also large plastic containers that ensure its free retention on the water. Therefore, if you want to make a raft from 200 liter barrels with your own hands, the drawings and videos will definitely come in handy.
First, let's talk about simple wooden rafts. First of all, you need to be puzzled by the selection suitable wood. It is important to use only dry materials. Usually a thickness of 10 cm is sufficient; such a raft is easy to build and launch. It is very easy to check whether the tree is suitable. Just put the log in the water, if it sinks at most halfway, this is the right material.
The wood does not need any special treatment. Just remove unnecessary branches and try to achieve as smooth a surface as possible. If the logs differ slightly in thickness, thinner ones are placed in the middle of the structure. As you approach the edges, the logs should thicken. Thanks to this, the structure will be very durable.
Stack the logs side by side and place them on top cross beams. Nails or strong ropes can be used as connecting elements. You can use wire and other available materials that will strengthen the structure. But, if you use a rope, you must first moisten it. This is necessary so that when wet in water the nodes do not relax, otherwise the structure may even collapse. It is better to make connections using U-shaped brackets.
After connecting the logs, the raft can already be used. But to make operation more comfortable, you can make a flooring. Plywood, boards, sheets of tin and other available materials are suitable for this.
You can use not only wood, but also combine it with various available materials that provide better buoyancy. You can use, for example, pieces of foam plastic and similar lightweight materials that do not get wet and do not sink in water.
For example, this solution is demonstrated in the following video:
How to make a raft from inner tubes with your own hands (video)
Very often as pontoons on homemade rafts car cameras are used. They are easy enough to find. This solution is very effective. Compared to wooden version, such a raft has many advantages. Its weight is significantly lower, making it easy to carry on the shore or in shallow water. On the water it is more stable and easier to control.
The photo below shows a raft with a sail, made by yourself. Its peculiarity lies precisely in the presence of a sail, due to which movement on water is ensured. Here the sail is of the most primitive type, but it completely fulfills the task. Since the raft is built on chambers, it is lightweight and glides well through the water, so even a small wind is enough for movement. Naturally, you should not rely only on a sail; you must also take oars or, at least, a pole on the raft.

Raft on tubes
So, we make a light raft with our own hands using inner tubes.
Main features of the construction process:
- The cameras need to be placed in 2 even rows and then connected. A rope is perfect for this, nylon rope is best, but any other rope will do. The advantage of nylon is that it does not stretch when exposed to moisture.
- Wood beams are placed on top of the chambers. To connect them to the cameras, also use ropes.
- The beams serve as a platform for installing the decking. It is advisable to use boards. If they are not available, use any available materials suitable for solving this problem. It is advisable to process the material in advance so that all parts are identical and even. Thanks to this, there will be no gaps on the deck. Make sure that the beams protrude somewhat beyond the chambers and flooring. This is necessary so that the beams absorb possible collisions with obstacles.
- Approximately in the middle, provide the simplest design in the form of a box covered with film. Things that should not get wet will be stored here. Even all kinds of wooden scraps are suitable for this.
- Set up oar racks on both sides.
Take 1-2 spare tubes on the raft, as there is a risk of them being damaged by all sorts of obstacles. Even if the chamber bursts, the raft, naturally, will not sink, but controllability will noticeably deteriorate.

Ready raft on tubes
How to make a raft from plastic bottles with your own hands (video, photo)
One of the most popular options is to use simple plastic bottles. You can use both small and 20-liter ones. Bottles are quite easy to find, so there shouldn’t be any difficulties with materials. The frame of the raft can be made of wood, to which a large number of bottles can be tied. Make sure each bottle is screwed tightly.
It's easiest with big bottles. With little ones it’s a little more difficult, but still doable. But we need a lot more of these bottles. For example, a small raft requires about 100 bottles.

Bottle raft
The easiest way is to place the bottles horizontally. You can connect them using tape, and to increase strength, additionally tie them with ropes. Use special moisture-resistant adhesive tape. Point the bottle necks in one direction. Moreover, in rows the bottles should be connected as follows: necks to necks, bottoms to bottoms, so the design will be as compact and stable as possible on the water.
One of good options– pack bottles in bags. Depending on the size of the raft, prepare required quantity bottles Such pontoons turn out to be very voluminous, which will ensure good stability and high carrying capacity of the raft. The bags must be tied tightly so that the bottles remain in the right place when floating on the water. The bags can be tied to the frame with ropes and tape. We invite you to watch the video “How I built a raft with my own hands,” which demonstrates the construction of a large raft from bottles in bags. The design turned out to be very large, stable and load-lifting.
The video also demonstrates the rafting of several people with a lot of things on such a raft:
Bottles can also be placed in a vertical position. Divide the bottles into blocks of 4, joined together. Then connect these blocks in rows. Any structure, including a wooden frame, can be used as the basis for a raft.

Bottles are arranged vertically
One of the most successful and easy to implement solutions is to make a raft from 200 liter barrels with your own hands. You can also use barrels of other sizes. The difficulty lies in the availability of the material; it is not always possible to obtain the required number of such barrels. If you have unnecessary ones, it is best to make a raft out of them. Depending on the size of the structure, determine the required number of barrels. For a small raft, 6-8 pieces are enough. It is important to securely tighten the barrels, preferably using sealant, this will prevent leaks. You can use beams or boards as a frame. It is advisable to make the flooring from boards. Inside the frame you also need to provide several separate beams to which the barrels will be attached. Use ropes to secure the barrels.

Raft on barrels
Raft care
If you plan to use the raft more than once, it must be maintained to extend its service life. The structure must be thoroughly dried after each fusion. To do this, simply take it ashore and leave it in a dry place. With rafts on bottles, barrels or tubes, everything is simple because they are lightweight. In the case of a heavy wooden raft, it is better to equip special guides on the shore to facilitate landing.
It is advisable to move the raft indoors for the winter. If this is not possible, it is necessary to arrange suitable storage conditions right on the shore. At a minimum, it must be carefully covered with a tarpaulin. It is advisable to impregnate the structure with a special agent that repels moisture; this will significantly increase durability.
There are different types of rafts for river rafting, I will tell you about my experience. Some things could have been done better, but overall we succeeded good option, which during two weeks of water travel proved to be an excellent means of transportation.
Let me make a reservation right away that we are talking about rafting on a calm, flat river, without. Its average width was 150 meters, and the current speed was 3 km/hour. Navigation - private boats only. In a word, ideal conditions for a relaxing rafting without unnecessary problems.
And if you want to better understand the essence of the matter, read my story below.
Advantages of a raft on tubes
So, we thought about it and decided that the raft would be on inner tubes. Firstly, it glides through the water much easier than a log boat.
Secondly, everything needed to make it is easier to find in the city (I can’t imagine where we could get several dozen logs for free and store them before the start of the trip).
Thirdly, the log raft is almost entirely in the water, and at some point you may be drowned, especially if a wave rises. And here you are at a height of 20 cm above the water. It's much more comfortable.
Fourthly, a raft with tubes is much lighter, and you can drag it by hand over a small shoal that you may encounter along the way. By the way, we had to do this once. A log raft would have to end its route in such a place.
Load capacity calculation
Before we started making the raft, we created its model with the calculation of its carrying capacity. You can see this in the first picture. My partner did this, so it is difficult for me to add anything to what is shown in the picture. Then we simply had no idea how to make a raft and whether it would support 6 people, so we had to bother with this kind of design.

Although at the last moment three people fell away and for us, the three remaining, it was very spacious there.
Stages of building a raft
So, to make the raft, we took 8 tubes from trucks(6 from KAMAZ and 2 from MAZ, this was not on purpose, it just happened that way), they were laid out in two rows and tied with nylon rope at all points of contact (Fig. 2). No other rope is suitable, because... she will have to stay in the water for a long time. It shouldn't stretch out because of this.

Then load-bearing beams were placed on top and they were also tied tightly to each chamber (Fig. 3). It would be good if they were square, it would just be more convenient. But we didn’t have those, we used rectangular ones.

Boards were nailed onto the beams on top, resulting in an excellent deck (Fig. 4). We prepared the boards in advance, took them from waste from the nearest sawmill (although they are very good for waste), and processed the uneven edges on circular saw so that there are no gaps in the deck.

Please note that the two internal beams protrude half a meter on each side (Fig. 5). This is necessary to make “bumpers” with which the raft will rest against possible obstacles. Otherwise, he would push against the cameras and this could damage them.

In addition, the front bumper was also one of the support points for the mast cables, and at the rear there was a support for the steering wheel.
The final view of the raft immediately after construction is shown in Fig. 6.

The sail was our whim, we just wanted to try it. But for the entire two weeks of the journey the wind blew against us, and on the third day the sail along with the mast had to be removed, because... they slowed down a lot.
The mast is secured with three guy wires made of steel cable, and the sail itself is pre-sewn from sugar bags. It’s a perversion, of course, but we didn’t have any other opportunities to make such a painting at that time.
The raft must have a “greenhouse” - a box that is quickly closed with a film wound on picket fences. If it doesn’t happen, then in the first rain in the middle of the river you will wet all your things and your clothes.
Subsequently, we made special supports along the edges of the deck, which made it possible to open the film in the form gable roof, under which it is comfortable to sit (Fig. 7).

You still can't do without a place for a fire. It needs to be well thought out so that you can cook food without going ashore, warm up, and not burn the raft. We used a temporary stove for this purpose (Fig. 8), which we simply left on the shore after the end of the trip.

After setting sail, we realized that rowing with oars without support for our backs was extremely tiring. Therefore, on the second day, “benches” with comfortable inclined backs appeared on the left and right edges of the deck (Fig. 9).

A few tricks
The steering oar, already mentioned, was rarely used. But it is very convenient when you need to make the raft move straight forward, or when you need to quickly turn it to the desired side.
You can see the spare tube on the steering oar stand. It is also required, because if you puncture any of the chambers, the raft will begin to tilt to one side and it will become inconvenient to control. True, the fate of our spare tire was inglorious: on the last day of the journey the sun came out (it had been cloudy before), it overheated and burst.
Another important thing when sailing on a raft is the ladder. If you are forced to moor to a swampy or simply dirty shore, then it will greatly help you get off your vessel onto a clean piece of land. We had a thick four-meter board for these purposes.
That's probably all. On this raft we covered 210 km in two weeks in bad weather. Didn't disappoint.
I think there are few people who choose such a unique one, but if you suddenly decide to build a raft and go “down the great river” on it, I hope my experience will help you in some way.