No matter how spacious the house is, for sure every owner always wants to increase it by a couple of square meters. An ideal opportunity to achieve what you want is to equip the attic. But it is very important that these additional meters please not only with functionality, but also with a cozy design. And here you can not do without high-quality interior decoration. But is it possible to cope with such a task on your own? And if so, what facing material to choose and how to work with it? To get answers to these questions, we suggest that you familiarize yourself with several popular attic design options at once: plasterboard, clapboard, OSB sheets and plywood. We also recommend that you evaluate the photos of already finished interior projects and watch a video that will help you successfully complete the cladding with your own hands.
Preparatory procedures
Before directly making out the attic, it is necessary to carry out a number of preparatory work. If these procedures are neglected, the room cannot avoid large heat losses and constant high humidity, which will make it uninhabitable.
Preparation of walls and ceiling is carried out in several stages:
- arrangement of waterproofing - lay a waterproofing film on the entire surface of the ceiling, starting from its lower edge. The film is overlapped and fastened with adhesive tape. In order for the waterproofing to fit snugly against the roof, counter-rails with a stroke of 50 cm must be nailed on top of the film to the rafters. Then the wall surface is covered in the same way.
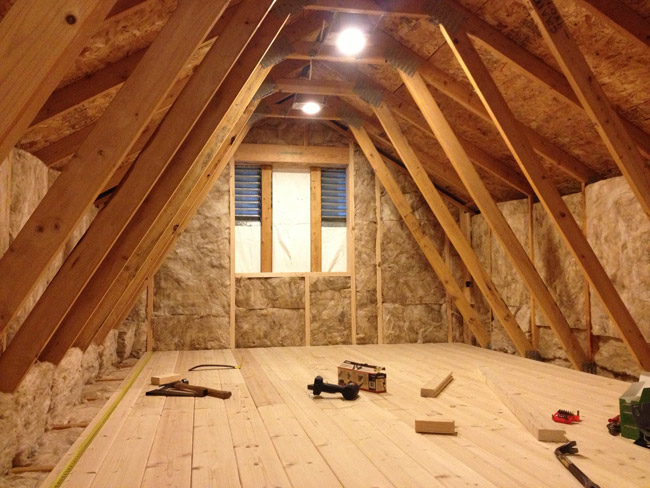
- installation of insulation - a layer of mineral wool of 10 cm is laid on the walls and ceiling. There should be a small gap between the film and the insulation, which will guarantee air circulation.
- fixing the vapor barrier - the surface of the walls and roof of the attic is sewn up with a vapor barrier membrane, which is fastened with building brackets.
The next step is floor preparation. First, it is necessary to lay a waterproofing film over its entire area, and on top of it - glass wool or mineral wool with a layer of at least 10 cm. Then the insulation must be covered with heat-insulating material.
The final stage is the cleaning of working surfaces. After that, you can proceed to the interior decoration of the attic.
Features of working with drywall
Drywall is a versatile and affordable material that is suitable for finishing walls, ceilings, and floors. Under it, you can perfectly hide surface irregularities and engineering communications. But remember: in the attic you need to use only moisture-resistant material.

Attic sheathing scheme
Finishing begins with the installation of a leveling metal frame. The standard pitch of its rails is from 45 to 65 cm. Next, the necessary engineering communications are laid - they are placed in special corrugated pipes. Then drywall sheets are fixed directly on the frame. They need to be screwed with self-tapping screws with an average pitch of 25 cm. Each self-tapping screw must enter the sheets to a depth of at least 1 cm.
Gaps between drywall boards must be sealed with plaster tape. From above, the entire lined surface is covered with putty, after which it dries, grinding is necessarily performed.
If you want to finish the attic with several layers of drywall, the plates must be mounted with a slight offset relative to each other. You can connect the sheets themselves to each other with both glue and self-tapping screws.
Advice. The roof of the attic can be deformed under the influence of strong winds and precipitation, so drywall on the ceiling should not be fixed end-to-end, but with a gap of 0.5 cm.
If you plan to finish with drywall not only the walls and, but also the floors of the attic, you must first equip the rough flooring from wooden boards on the beams - this will give the structure the required strength.
The final stage is the transformation of drywall slabs. They can either be painted, or covered, or wallpapered.
Sheathing with plywood
If you need to cheaply and quickly clad the inner surface of the attic, pay attention to plywood - it is quite durable, absolutely affordable and provides great opportunities for finishing decorative finishes.
Plywood sheets can be attached directly to the truss system. Here it is worth noting one significant plus of the material - it is very durable in bending. Thanks to this, you can use thin sheets, thereby reducing the load on the finish on the rafters.
Important! Thin plywood sheets are suitable only for cladding walls and ceilings, but for the floor it is better to choose either plank boards or the same plywood, but at least 12 mm thick. If you bought plates thinner than 10 mm, then it is better to veneer the floor in two layers with offset sheets.
Plywood boards are fixed to each other butt-to-butt and fixed on the working surface with self-tapping screws. In order to hide the resulting gaps between the sheets, it is recommended to use moldings that match the shade.
The sheathed surface must be covered with putty and polished. To increase the service life of the finish, it must be covered with several layers of high-quality furniture varnish.

Most often, plywood is used as a base for subsequent wallpapering or textiles, but it is also good as a finish. Only in this case, in order to emphasize the decorative properties of the sheets, it is desirable to cover them with paint or wax.
Finishing the attic with clapboard
For the interior lining of the attic, you can use both wooden and plastic lining - they are mounted according to the same scheme, so the difference is only in appearance and price. So, natural wood trim is quite expensive, but it also looks very soundly. In turn, plastic lining is a budget option for sheathing with good performance, but with a rather modest appearance.
Important! As in the case of drywall, if you want to finish the floor with clapboard, you must first equip it with durable wooden flooring, otherwise the lining may quickly deform.
The laying of the lining is carried out as follows:

OSB cladding
OSB - sheets of wood origin, which, unlike many similar materials, are characterized by increased moisture resistance, therefore they are ideal for interior decoration of the attic.
In work, it is better to use oriented strand boards with a width of at least 1.5 cm. Sheets can be fixed not on a special frame, but directly on the rafters, since the material is relatively light. But at the same time, the surface of the rafters must be perfectly flat.
Finishing the OSB attic includes the following procedures:
- from the corner on the rafters, the first slab is laid longitudinally. It is aligned in height and width, and then fixed with self-tapping screws.
- the second plate is also installed longitudinally with a slight offset relative to the first sheet and fastened with self-tapping screws. All subsequent plates are mounted in a similar way.
- tile joints and recesses from self-tapping screws are closed with putty.

OSB is rarely used as a finish. Most often they serve as the basis for subsequent decorative cladding. And completely different materials can be used as a finish coating:
- wallpaper or fabric - glued to the composition of PVA and latex putty in a ratio of 1: 4.
- acrylic or oil paint - applied only to a latex primer so that yellow spots do not appear on the finish;
- water-based paint - applied immediately to both the outer and inner sides of the slab so that the OSB does not bend to one side under the influence of water.
As you can see, the stylish transformation of the attic is within the power of absolutely everyone. The main thing is to choose the right facing material and strictly follow the technology of its installation. So do not be afraid to do the interior decoration with your own hands - this is the only way you can get a space that will meet exactly your quality and aesthetic needs.
Attic interior: video
Do-it-yourself attic decoration: photo


![]()

